
On this page
Start here
Quick answer
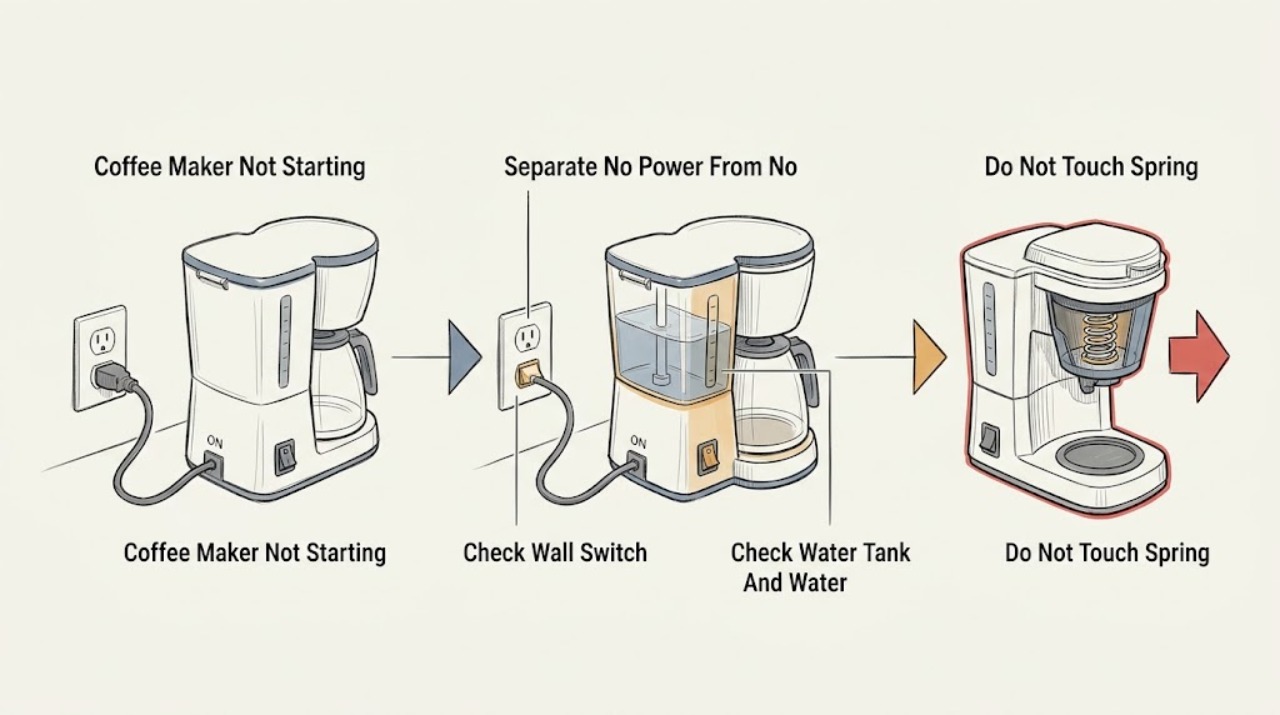
First separate a completely dead De’Longhi coffee maker from one that has lights or a display but will not start a drink. If there is no display, light, sound, or response, check the plug, outlet, and any model-provided main switch from a dry position; stop for a hot or damaged cord, burning smell, smoke, sparks, water near electrics, or a repeated breaker trip. If the machine has power but refuses to brew, read the exact model's message and check that the water tank is filled and seated, the bean container or filter/portafilter is correctly loaded, the grounds container and drip tray are fitted, and the infuser or brew unit and its door are correctly installed where the model has them. A water-circuit-empty prompt may require the documented fill-water or hot-water routine; a descale prompt should be handled only with the exact model procedure and De’Longhi-approved descaler. Make only documented control or cleaning changes, keep hands away from hot water and steam, and do not open the case. If the machine still will not start after these visible checks, the cause may be a pump, grinder, heater, interlock, sensor, power board, or other internal control fault; the symptom does not identify a replacement part, so arrange qualified service.
Before you begin
Safety first
- The user may inspect the external supply from a dry position, use documented controls, refill and reseat removable tanks, inspect applicable coffee inputs and doors, and follow the exact model's shutdown, cleaning, fill, rinse, and descale instructions with burn precautions. Internal power, control, interlock, pump, grinder, heater, sensor, wiring, pressurized water/steam, live testing, and case removal are for qualified personnel.
Work through in order
Diagnostic checks
Use only checks that match the exact appliance or system and its official guide.
-
Check 1
From a dry position, note whether any display, indicator light, interior light, pump sound, grinder sound, or heating message appears when the documented power control is used. Look only for smoke, sparks, a burning or electrical odor, a hot or damaged cord/plug/outlet, water near electrical parts, melted plastic, or a tripped breaker. Do not keep pressing the control to reproduce a hazard.
Expected result: There is no response at all; the machine has lights or a display but no drink cycle; it shows a heating/rinsing or maintenance message; or a hazard sign is present.
Next step: For no response, continue with the external power checks in the next action. For a powered machine, continue with the model message and removable-component checks. Stop and isolate the appliance only if it is safe to do so when a hazard is present.
Stop if: Do not operate a machine with smoke, sparks, burning odor, a hot/damaged cord or outlet, water near electrics, melted plastic, or repeated breaker trips.
Why this matters
Why: No response shifts the first check to the supply, plug, and model-provided main switch. Lights or a display show that the machine is powered, so an input, interlock, water circuit, operating state, or internal start fault is more likely than a completely dead outlet. A hazard sign changes the path to stop-use handling.
-
Check 2
With the machine unplugged and the counter dry, confirm the plug is fully seated in the intended grounded outlet and inspect only the outside of the cord, plug, and receptacle. Check whether the breaker or fuse is open and, on models that have one, verify the rear main switch is in the documented ON or I position. Do not use a power strip, adapter, extension cord, improvised fuse, or higher-rated breaker.
Expected result: The plug was loose, the outlet or breaker is off, the rear switch was off, the outlet/cord is damaged or warm, or the external supply and switch appear normal but the machine remains dead.
Next step: Correct only the safe external connection or documented rear-switch position once. If the outlet is damaged, the breaker trips again, or the machine remains dead with a known-good supply, leave it unplugged and arrange qualified electrical/appliance service.
Stop if: Do not reset a breaker repeatedly, remove a plug ground, change fuse/breaker ratings, open the machine, or perform live electrical tests.
Why this matters
Why: A loose connection, open supply, or rear switch can explain a fully dead machine; De’Longhi’s official FAQ specifically notes a rear switch on applicable bean-to-cup models. A damaged or warm supply is an electrical stop condition. A normal external supply with no response makes an internal power, switch, fuse, or control fault more likely.
-
Check 3
For a powered machine, remove and refill the water tank only as the exact model manual permits, keep it below the documented MAX line, and press it fully into place. Check the tank, lid, visible float or sensor area, and filter position if fitted; read any “fill tank,” “water circuit empty,” or water-light message. If the model explicitly offers a fill-water or hot-water routine, place the documented cup/container safely and follow that routine once.
Expected result: The tank was empty or not seated, a water indicator remains on, the display requests water-circuit filling, water flows normally after the documented routine, or the tank and prompt look normal but brewing still will not start.
Next step: Correct the tank position or documented water-circuit prompt and wait for the machine to return to its ready state. If the warning persists, water does not flow, or the machine makes an abnormal pump sound, stop user-level testing and arrange service.
Stop if: Do not force a tank, pierce valves, add liquids other than those named by the exact manual, reach into the water path, or touch hot water/steam without the documented container and clearance.
Why this matters
Why: De’Longhi identifies insufficient or incorrectly fitted tanks as causes of water warnings, and its help center directs users to fill and correctly insert the tank for a water-circuit-empty message. Normal water flow after the routine makes an empty circuit less likely; a persistent warning with a seated tank may involve a sensor, valve, air lock, pump, or control fault.
-
Check 4
Use the exact model manual to check the coffee input and removable brew path: beans in the hopper for a bean-to-cup model, the correct amount of pre-ground coffee or a clear filter/portafilter for a manual model, and a seated grounds container and drip tray where fitted. Turn the machine off through its documented shutdown and unplug it before opening an infuser door or removing a brew unit; reinstall the infuser until its locks engage and close the door fully. Do not reach into a grinder or drive mechanism.
Expected result: The hopper is empty, the filter/portafilter or grounds container is misloaded, a tray is missing, the infuser is absent/not latched, the service door is open, or all applicable removable items are correctly fitted.
Next step: Correct only the applicable removable item, clean accessible coffee residue as the manual permits, close the door, and select the documented beverage again. If the infuser will not move or latch, the grinder jams, or the machine still refuses to start, arrange service rather than forcing it.
Stop if: Never extract an infuser while the machine is on, force a brew unit or door, insert tools into a grinder, or open internal panels.
Why this matters
Why: The machine may inhibit a beverage when it cannot detect required water, coffee, tray, grounds, infuser, or door conditions. De’Longhi manuals specifically identify an infuser that was not replaced and a tank or grounds-container condition as blocking normal operation on applicable models. Correctly fitted parts with a continuing no-start point toward an interlock, sensor, drive, pump, grinder, heater, or control fault.
-
Check 5
Read the exact display, indicator pattern, and control mode before pressing anything else. Check for OFF/standby or energy-saving state, a selected but incomplete heating/rinse cycle, a “please wait” or general-alarm message, a water-circuit prompt, or a descale prompt. Follow only the model's documented confirmation, rinse, cleaning, or descaling sequence; when descaling or hot water is involved, position the required container and protect hands and surfaces from splashes.
Expected result: The machine is still heating/rinsing, a maintenance or descale prompt is active, a general alarm remains, a control is in standby/energy-saving, or the display reaches ready but the beverage command still does nothing.
Next step: Allow a documented automatic cycle to finish, exit only a documented standby state, or complete the exact model's maintenance procedure once. If the prompt returns, the alarm persists, or the ready machine still will not brew, record the message and arrange service.
Stop if: Do not cancel a required safety sequence by bypassing controls, use vinegar or an unspecified descaler, handle hot descaling liquid, or continue if smoke, burning odor, leaking, or electrical instability appears.
Why this matters
Why: A machine can appear not to start while its automatic preheat/rinse or maintenance sequence is incomplete. De’Longhi says a descale indicator means descaling is required and its manuals identify “please wait,” general alarm, energy saving, and water-circuit states. A ready display with no beverage response makes a control, interlock, pump, grinder, heater, or internal circuit fault more likely.
-
Check 6
After the external supply, tank, coffee input, removable brew components, door, mode, and maintenance checks, record the exact model, display/light state, prompt or error pattern, water and bean/filter status, whether the infuser or portafilter is fitted, and any pump, grinder, click, heat, leak, odor, or breaker behavior. Do not open the case or perform live tests.
Expected result: The machine starts after a safe correction, remains powered but will not begin a drink, repeatedly stops at the same stage, stays completely dead with a normal supply, or shows an abnormal sound, leak, odor, heat, or electrical event.
Next step: Use the machine only if it completes a normal cycle without abnormal signs. Otherwise protect against hot water and electrical hazards, leave it unplugged when safe, and arrange qualified De’Longhi/appliance service with the model and recorded symptoms.
Stop if: Do not bypass interlocks, open panels, probe live wiring, disassemble a grinder/pump/heater, clear internal blockages with tools, or work on hot, pressurized, or energized components.
Why this matters
Why: Recovery after a documented correction supports a supply, tank, input, interlock, or operating-state condition. Persistent no-start can involve a pump, grinder, heater, sensor, door interlock, power/control board, wiring, or blocked internal circuit; the observation does not prove one replacement part. A hazard or repeated electrical event requires stop-use handling.
Use your observations
Decision map
Find the observation that best matches what you see, then follow the next safe action.
-
PATH 01Safety boundary
What you see
There is no display, light, sound, or response, and the outlet, plug, and any rear main switch have not yet been verified.
Do this next
From a dry position, correct only the external plug or documented switch once. If the supply is damaged, trips, or is normal but the machine stays dead, leave it unplugged and arrange qualified service.
Why this path and its safety boundary
Why it matters: A supply connection, open breaker/fuse, or model-provided rear switch is more likely than a brew-path fault. De’Longhi explicitly tells users of applicable bean-to-cup machines to check the rear switch.
Safety stop: Do not repeatedly reset a breaker, use an improvised supply, open the case, or test live voltage.
-
PATH 02Next step
What you see
The display or indicators work, but a tank warning or water-circuit-empty prompt remains, or no water is delivered during the model's documented fill routine.
Do this next
Reseat the tank and follow the exact fill-water/hot-water prompt once. If the prompt persists or water does not flow, stop and arrange service; do not pierce or bypass the water path.
Why this path and its safety boundary
Why it matters: An empty or incorrectly seated tank, water sensor/float, air in the circuit, valve, pump, or control condition is more likely than a bean quantity problem. De’Longhi's help center directs the user to fill to the documented level and insert the tank correctly.
-
PATH 03Safety boundary
What you see
The machine powers up, but the hopper/filter, grounds container, drip tray, infuser/brew unit, portafilter, or service door is missing, incorrectly fitted, or not detected.
Do this next
With the machine safely shut down and unplugged where the manual requires, correct the applicable removable item and close the door. If it will not latch, move, or be detected, arrange service rather than forcing it.
Why this path and its safety boundary
Why it matters: A required removable item or door interlock can prevent the beverage sequence from starting. On applicable fully automatic models, De’Longhi identifies an infuser that was not replaced and tank/grounds-container states in its messages and troubleshooting.
Safety stop: Do not extract an infuser while on, reach into the grinder, defeat an interlock, or insert tools into the brew drive.
-
PATH 04Safety boundary
What you see
The machine has power and fitted components, but it shows heating, rinsing, “please wait,” energy-saving, general-alarm, or descale/water-circuit instructions instead of a ready state.
Do this next
Wait for the documented automatic cycle or follow the exact displayed maintenance sequence once. If the machine never reaches ready or the alarm returns, preserve the prompt and arrange qualified service.
Why this path and its safety boundary
Why it matters: The machine may be completing a normal startup or maintenance sequence, or it may be blocked by an incomplete descale, water fill, or detected internal contamination. A prompt is model-specific and should not be replaced with a guessed button sequence.
Safety stop: Do not bypass the sequence, use an unsuitable descaler, or touch hot rinse/descale water.
-
PATH 05Safety boundary
What you see
The outlet and controls are normal, the tank and applicable coffee/brew components are fitted, the display reaches ready, but no beverage cycle starts or the machine repeatedly stops; or an electrical, hot-water, leak, odor, or abnormal-noise hazard appears.
Do this next
Stop use for hazards and leave the machine unplugged when safe. For a persistent non-hazardous no-start, arrange qualified De’Longhi/appliance service and provide the model, prompt, lights, sequence stage, and visible checks already completed.
Why this path and its safety boundary
Why it matters: An internal pump, grinder, heater, sensor, interlock, control board, wiring, or internal blockage is more likely, but the pattern cannot identify a part. Any hazard overrides further troubleshooting.
Safety stop: Do not open panels, perform live tests, bypass an interlock, disassemble the pump/grinder/heater, or work on hot or pressurized internals.
Helpful context
Understand the symptom
Start by identifying what “not starting” means
A De’Longhi machine with no lights or display has a different first check from a machine that powers up but refuses a beverage. For a fully automatic model, the rear main switch, display messages, water tank, grounds container, infuser door, and automatic start-up cycle all matter. For a portafilter or drip model, the relevant controls and filter/carafe arrangement differ. Use the exact model manual for symbols and prompts rather than forcing a control or assuming every De’Longhi coffee maker has a bean hopper or removable infuser.
Water, coffee, and fitted components can block a powered start
A tank that is empty, not fully seated, or not detected can produce a water warning or leave the water circuit empty. Depending on the model, a full bean container, a correctly installed filter or portafilter, an emptied grounds container, a seated drip tray, a closed service door, and a correctly latched infuser are prerequisites for the next drink. If a water tank or alarm light remains on, correct only the documented removable-item check and use the model’s displayed fill or rinse routine.
Modes, preheat, and descaling are model-controlled
A powered machine may still be in a start-up, heating, rinsing, energy-saving, cleaning, or descaling state. De’Longhi manuals describe automatic preheat and rinse cycles, water-circuit filling, and maintenance prompts; some models require a displayed confirmation before hot water is delivered. Wait for a normal ready state and follow the exact screen or manual. Do not use vinegar, skip a required rinse, or improvise a descaling sequence. Keep a cup or container in the documented position and avoid hot splashes.
Internal drive and heating faults need professional diagnosis
If power is stable and the tank, coffee input, grounds container, brew unit, door, mode, and maintenance prompts are correct but the machine still will not begin, an internal pump, grinder, heater, interlock, sensor, control board, wiring, or blocked internal circuit may be involved. A hum, click, silent motor, or repeated alarm is useful information for service but does not select a part. Do not bypass a door switch, reach into a grinder or brew drive, open the case, test live voltage, or work around hot water, steam, or the heater.
Safety boundary
Stop conditions
- Stop immediately for smoke, sparks, burning or electrical odor, a hot or damaged cord/plug/outlet, melted plastic, water near electrical parts, a leak onto electrics, or repeated breaker trips.
- Stop if the machine is visibly damaged, unstable, leaking under pressure, or produces abnormal heat or steam outside the documented cycle.
- Do not open the case, remove electrical covers, perform live voltage tests, bypass a door or brew-unit interlock, or reach into the grinder, pump, heater, or drive mechanism.
- Turn the machine off and unplug it before cleaning accessible internal parts or removing an infuser where the exact manual requires; never immerse the appliance.
- Protect hands and surfaces from hot rinse, steam, and descaling liquid; do not handle hot components until the exact manual's cool-down guidance is met.
- Arrange qualified service when external supply and documented removable-item, control, water, and maintenance checks do not restore a normal ready state.
When checks do not resolve it
Need a professional?
Arrange qualified De’Longhi/appliance service when the machine remains completely dead with a verified safe supply, when it powers up but will not reach ready or begin a beverage after the exact model's tank, coffee input, removable brew-unit, door, control, water-circuit, and maintenance checks, or when a prompt/alarm repeatedly returns. Stop immediately for smoke, burning odor, sparks, hot or damaged electrical parts, water near electrics, abnormal steam/heat, a leak, or repeated breaker trips. Do not open panels, test live wiring, bypass interlocks, or work on the pump, grinder, heater, controls, or pressurized/hot internal circuit.
Safety scope: The user may inspect the external supply from a dry position, use documented controls, refill and reseat removable tanks, inspect applicable coffee inputs and doors, and follow the exact model's shutdown, cleaning, fill, rinse, and descale instructions with burn precautions. Internal power, control, interlock, pump, grinder, heater, sensor, wiring, pressurized water/steam, live testing, and case removal are for qualified personnel.
Common questions
FAQ
Why is my De’Longhi coffee maker completely dead?
From a dry position, check the plug, intended grounded outlet, breaker or fuse, and the rear main switch if the exact model has one. De’Longhi specifically calls out the rear switch on applicable bean-to-cup machines. If the supply is damaged, hot, repeatedly trips, or is normal but the machine remains dead, leave it unplugged and arrange qualified service.
Why does my De’Longhi turn on but not start coffee?
Read the exact display or indicator first. Check the water tank and its seating, the bean hopper or filter/portafilter as applicable, the grounds container and drip tray, and the infuser or brew-unit door on models that have them. A water-circuit, heating, rinse, “please wait,” general-alarm, or descale state may need its documented routine before a drink can start. A ready machine that still will not begin needs service diagnosis.
Can an incorrectly fitted water tank stop a De’Longhi coffee maker from starting?
Yes. De’Longhi guidance identifies an empty or incorrectly fitted tank and water-sensor conditions as causes of water warnings; its help center says to fill the tank to the documented level and insert it correctly for an empty-water-circuit message. If the warning remains with a seated tank, do not bypass the sensor or valve; arrange service.
Can the infuser, brew unit, door, or grounds container prevent starting?
On applicable fully automatic models, yes. De’Longhi manuals identify a missing or incorrectly replaced infuser, and container or door conditions, in their messages and troubleshooting. Shut the machine down as directed, unplug before removing an infuser where the manual requires, refit only accessible removable parts, and never force a latch or reach into the drive.
Could a descale or cleaning prompt make my De’Longhi not start?
A maintenance state can prevent a normal beverage cycle or leave the machine waiting for a documented step. De’Longhi says a descale indicator means descaling is required and warns that the exact procedure and suitable solution matter. Follow the exact model's displayed sequence, keep clear of hot water and descaling liquid, and arrange service if the prompt or alarm returns.
When should I stop troubleshooting a De’Longhi coffee maker that will not start?
Stop immediately for smoke, sparks, burning odor, a hot or damaged cord or outlet, water near electrics, abnormal steam or heat, a leak, or repeated breaker trips. For a non-hazardous persistent no-start after the exact model's external power, tank, coffee input, brew-unit, door, control, water-circuit, and maintenance checks, arrange qualified service. Do not open the case, test live wiring, bypass interlocks, or work on the pump, grinder, heater, or controls.
Read the exact guide
Official sources
- ECAM35035W Instruction ManualDe’Longhi · Model-family guidance for grounded power, rear switch, water-tank setup, automatic preheat/rinse, water circuit, infuser/door, grounds and coffee paths, cleaning, descaling, burn warnings, and troubleshooting; other De’Longhi designs differ.
- Descale Light is always flashing or not turning offDe’Longhi US · General maintenance guidance; exact descaling controls, duration, liquid, and rinse sequence are model-specific.
- Message: WATER CIRCUIT EMPTY PRESS OK TO STARTDe’Longhi Coffee Machines Help Center · Model-specific message guidance showing that insufficient water and incorrect tank insertion can block a start; other models may use different wording or prompts.
- My bean to cup machine will not switch on. What can I try?De’Longhi US · Applicable to De’Longhi bean-to-cup models with a rear switch where provided; other coffee-maker designs may use different controls.
- Dedica Maestro Plus: water tank light explanationDe’Longhi US · Model-specific example for tank seating, water sensing, filter/portafilter loading, water-circuit air, cleaning, and descaling; do not transfer its light pattern to another model.
Community feedback
Share a repair observation
Share a plain-text repair observation. Accepted observations are published automatically; this page may take a moment to update.