
On this page
Start here
Quick answer
For an Electrolux dehumidifier that seems unable to complete a cycle, first define the symptom: Continuous mode is intentionally different from a humidity-controlled stop, and a full bucket can stop the unit normally. Check the exact model's mode, target humidity, timer, and display, then close windows and doors so new humid air is not continually entering. Make sure the room and ambient temperature are within the model's operating range, the filter and intake/discharge are clear, the bucket is seated, and a continuous drain hose is not kinked or installed incorrectly. A cold coil may enter automatic defrost and pause moisture removal for a while; do not scrape ice or open the cabinet. If the unit runs continuously but room humidity does not fall, repeatedly stops or restarts, shows a sensor indication, leaks, overheats, or continues after the accessible checks, stop before opening it: the humidity sensor, control, fan, compressor, heat exchanger, and sealed cooling circuit require qualified Electrolux service.
Before you begin
Safety first
- The user may identify the mode and target, improve room conditions, clean and dry the user-accessible filter, check external airflow, empty and reseat the bucket, inspect visible drain routing, and allow documented automatic defrost. Cabinet disassembly, sensor/control work, fan or compressor work, electrical testing, refrigerant/sealed-system work, and bypassing protective devices are for qualified service personnel.
Work through in order
Diagnostic checks
Use only checks that match the exact appliance or system and its official guide.
-
Check 1
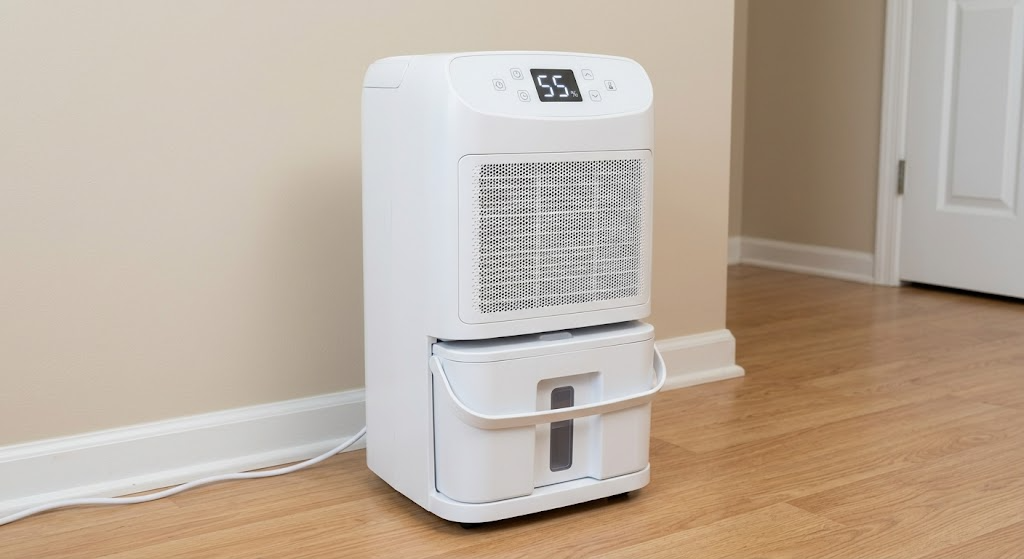
Read the exact model's display and controls without opening the unit. Record whether it is in Continuous mode or humidity-control mode, the selected target, timer status, displayed room humidity, bucket indicator, and whether the symptom is nonstop operation, an early stop, or repeated restarts.
Expected result: Continuous mode is selected, the target is not set as intended, a timer or bucket indication is active, the displayed humidity is still above target, or the unit is in humidity-control mode but never stops after the room has stabilized.
Next step: Use the exact manual to select the intended mode and target, clear only an obvious timer setting, and note the humidity trend with doors and windows closed. Do not change service parameters or repeatedly power-cycle the unit.
Stop if: Stop if the display shows a sensor or electrical fault, if the unit runs with a burning odor, or if controls require opening the housing.
Why this matters
Why: Continuous mode, a timer, a full bucket, or humidity above the target can explain the apparent cycle behavior. A correct humidity-control setting with a stable below-target reading but continued operation points toward a control or sensor issue, not just a mode choice.
-
Check 2
Inspect the room from outside the appliance: close windows and exterior doors while drying an enclosed space, look for showers, wet laundry, seepage, or other ongoing moisture, and compare the room temperature with the exact model's operating range. Keep the appliance level and away from heat-producing sources.
Expected result: Outside air or a moisture source continues entering, the room is unusually cold or hot for the model, the unit is in a poorly circulated enclosed area, or the room conditions are suitable and stable.
Next step: Reduce the accessible moisture source and improve room circulation without blocking the unit. If the appliance must be moved, keep it upright and use the exact manual; arrange help for a heavy or awkward installation.
Stop if: Do not use the dehumidifier outdoors, in standing water, near a combustible source, or where the cord or outlet can get wet.
Why this matters
Why: An ongoing moisture load or unsuitable ambient temperature can prevent the room from reaching the target and make normal operation look endless. Stable suitable conditions make filter, bucket, airflow, sensor, or cooling-system causes more likely.
-
Check 3
Turn the dehumidifier off and disconnect power from a dry, safely reachable point. Remove and clean only the user-accessible air filter and wipe or vacuum the documented intake and discharge grille without inserting objects into the fan or coil. Reinstall the completely dry filter before operating.
Expected result: The filter is visibly dusty or wet, the intake/discharge is covered or restricted, the filter indicator is active, or the air path is clean and unobstructed.
Next step: Clean and dry the filter as the exact manual directs, restore it, and observe the humidity trend without opening the housing. If the filter is damaged or the fan remains weak or absent, arrange model-specific service.
Stop if: Do not run without the filter, reach into the grille, remove fan guards, wash electrical parts, or clean the coil with sharp tools or chemicals not specified by the manual.
Why this matters
Why: A dirty filter or blocked grille reduces airflow and can lengthen a cycle or promote frost. If airflow is clear and the unit still cannot lower humidity, the next checks are bucket/drain, defrost, sensor, and cooling-system boundaries.
-
Check 4
With the unit off, check that the water bucket is empty, the float and bucket are seated as the exact manual shows, and the bucket-full indicator is not active. If using continuous drainage, inspect only the visible hose for a kink, upward loop, loose connection, or outlet blockage without disconnecting it over water.
Expected result: The bucket is full or mis-seated, the float indicator remains active, the drain hose is kinked or poorly routed, water is leaking, or the collection and drain path are clear.
Next step: Empty and reseat the bucket or correct only an obvious accessible hose routing issue using the model manual. Do not move the unit with a full bucket. Arrange service for a leak, persistent float indication, hidden drain blockage, or a drain connection that requires disassembly.
Stop if: Do not spill water onto the outlet, pull a hose from a full bucket, bypass the float, or operate with a leaking tank or wet electrical area.
Why this matters
Why: A full or incorrectly fitted bucket can cause a normal stop or prevent restart; a blocked or misrouted drain can defeat continuous operation. A clear path shifts attention away from water collection and toward humidity control, airflow, defrost, or internal cooling.
-
Check 5
After the unit has been safely stopped and allowed to cool, look only through the user-accessible grille for visible frost or ice and note whether the model indicates a defrost state. Do not remove panels or scrape the coil; compare the room condition and the observed state with the exact manual's low-temperature and defrost guidance.
Expected result: Visible frost is present, the room is cold for the model, automatic defrost is indicated, the unit has completed defrost and resumes airflow, or no frost/defrost condition is visible.
Next step: Allow the documented automatic defrost routine to finish and restore suitable room and airflow conditions. If frost persists or the unit cannot resume dehumidification, keep it off and arrange qualified service.
Stop if: Do not chip ice, use a heater or sharp object on the coil, bypass a defrost sensor, or open the cooling compartment.
Why this matters
Why: Cold operation or restricted airflow can lead to a defrost interval that temporarily pauses moisture removal. Frost that quickly returns, never clears, or appears with weak airflow is not resolved by forcing the cycle and may indicate a fan, sensor, control, or sealed cooling problem.
-
Check 6
After the mode, room, filter, bucket/drain, and defrost checks, record whether the fan and compressor run, whether water is actually collected, whether the displayed humidity changes plausibly, and any sensor code, leak, odor, overheating, or repeated stop/start pattern. Keep the cabinet closed and do not perform a live electrical or sealed-system test.
Expected result: The machine runs continuously with no water collection or humidity improvement, the displayed humidity is implausible or a sensor indication returns, the fan/compressor is silent or abnormal, or the unit resumes normal cycling and moisture collection.
Next step: Monitor only normal operation. For persistent or hazardous symptoms, keep the appliance off and arrange qualified Electrolux service with the model, mode, humidity readings, bucket/drain setup, and observations.
Stop if: Do not open the cabinet, touch moving or electrical parts while energized, bypass sensors or floats, or work on the compressor or sealed cooling circuit.
Why this matters
Why: Persistent no-dehumidification behavior after accessible causes are corrected can involve the humidity sensor, control, fan, compressor, heat exchanger, or sealed cooling system. External observations cannot select a replacement part. Normal cycling and water collection indicate that the cycle is functioning rather than incomplete.
Use your observations
Decision map
Find the observation that best matches what you see, then follow the next safe action.
-
PATH 01Safety boundary
What you see
Continuous mode is selected, the room remains humid because outside air or a moisture source enters, or the target has not yet been reached, and the unit is collecting water without a fault indication.
Do this next
Use the exact model manual to select humidity control when appropriate, close the room, reduce the moisture source, and allow the room to stabilize without repeated setting changes.
Why this path and its safety boundary
Why it matters: The long run is consistent with the selected operating mode or an ongoing moisture load, not proof that the cycle controller has failed.
Safety stop: Stop if the unit overheats, leaks, smells electrical, or cannot be safely operated in the room.
-
PATH 02Safety boundary
What you see
The bucket-full indicator is active, the bucket is not seated, or a continuous drain hose is kinked, blocked, loose, or routed contrary to the exact manual.
Do this next
Empty and correctly reseat the bucket or correct only an obvious accessible hose route. Arrange service for leaks, persistent float signals, and hidden or pressurized drain faults.
Why this path and its safety boundary
Why it matters: The appliance may be stopping normally to prevent overflow or may be unable to dispose of collected water; this is a water-management state rather than a confirmed cooling failure.
Safety stop: Do not move a full unit, bypass the float, or disconnect a wet drain connection over an outlet.
-
PATH 03Safety boundary
What you see
The filter or grille is dirty/blocked, airflow is weak, or frost appears in a cold room and clears during the documented defrost behavior.
Do this next
Clean and dry the user-accessible filter, clear the exterior air path, maintain suitable room conditions, and allow automatic defrost to finish. Escalate if frost returns quickly or airflow remains abnormal.
Why this path and its safety boundary
Why it matters: Restricted airflow or normal low-temperature defrost can lengthen or pause a cycle. Improvement after cleaning and recovery makes an internal failure less likely.
Safety stop: Do not scrape ice, heat the coil, remove panels, or insert objects into the fan or grille.
-
PATH 04Safety boundary
What you see
The unit is in humidity-control mode with a stable below-target reading but never stops, displays a sensor indication, or repeatedly starts and stops after room, airflow, and water checks are correct.
Do this next
Record the model, display, target, room reading, and timing, then arrange qualified Electrolux service. Do not recalibrate, bypass, or replace the sensor based on the display alone.
Why this path and its safety boundary
Why it matters: A humidity sensor, control, timer, or model-specific protection state is more likely than a simple setting or bucket condition.
Safety stop: Do not open the control area, disconnect a sensor, or perform a live test.
-
PATH 05Safety boundary
What you see
The mode and target are correct, the room is suitable, the filter and airflow are clear, water handling is correct, defrost is complete, but humidity does not fall or the fan/compressor behavior is abnormal.
Do this next
Stop using the appliance for overheating, leak, electrical odor, repeated protection trips, or damaged wiring; otherwise avoid repeated cycling and arrange qualified Electrolux service with the recorded evidence.
Why this path and its safety boundary
Why it matters: An internal fan, compressor, heat exchanger, control, or sealed cooling fault is possible; the symptom does not identify a safe part or user repair.
Safety stop: Do not open the cooling compartment, touch energized components, recharge or open the sealed circuit, or bypass protective controls.
Helpful context
Understand the symptom
Define what ‘not completing’ means
A dehumidifier can appear to run forever because it is in Continuous mode, because the room keeps receiving moisture, or because the selected humidity target has not been reached. It can also stop normally when the bucket is full, during a timer event, or while an automatic defrost routine protects a cold coil. Record the mode, target and displayed room humidity, bucket status, and whether the fan or compressor is actually running before changing settings.
Room moisture and airflow determine recovery
Electrolux's guidance requires a room with adequate circulation and unobstructed intake and discharge. Close outside openings when drying an enclosed room, keep the unit away from heat and water hazards, and do not cover the grille. A dirty filter or blocked airflow can make a unit run longer without demonstrating a sensor or compressor failure.
Bucket, drain, and defrost are different states
A full bucket should stop a supported unit until it is emptied and correctly reseated. Continuous drainage has its own hose and slope requirements, so a kink or poor connection can change bucket behavior. In a cold room, frost and automatic defrost can temporarily interrupt dehumidification. Let the documented routine finish; do not chip ice, bypass a float, or dismantle the cooling section.
Safety boundary
Stop conditions
- Stop immediately for smoke, burning odor, arcing, a hot or damaged cord or plug, repeated electrical trips, water reaching an electrical area, or a refrigerant/oil-like leak; disconnect power only from a dry, safely reachable point and arrange qualified service.
- Do not open the cabinet, remove the fan or coil, bypass a bucket float or sensor, perform a live electrical test, or work on the compressor, heat exchanger, or sealed cooling system.
- Do not chip frost, use a heater or sharp tool on the coil, operate without the filter, or block the intake, discharge, or grille.
- Do not move a full or built-in unit, disconnect a continuous drain hose over water, or use an extension cord or wet outlet.
- Stop storing valuables or relying on the unit for moisture control if it runs continuously without collecting water or lowering humidity, or if the room or appliance is becoming wet.
Only after diagnosis
Potential parts
- air filter
Consider this category only when the exact manual identifies a replaceable filter and the installed filter is damaged or cannot be restored by the documented cleaning procedure.
Filter dimensions and access vary by model and market; confirm the exact model or PNC before ordering. - water bucket, float, or bucket seal
Consider this category only when a correctly seated empty bucket still produces a bucket indication or leaks and qualified diagnosis confirms a damaged bucket or float assembly.
Bucket and float designs are model-specific; do not bypass the float or order from a symptom alone. - continuous drain hose or connector
Consider this category only when qualified installation or service confirms a damaged or incompatible hose/connector after routing and outlet checks.
Drain outlets, hose sizes, and gravity requirements vary by model; confirm the manual and exact fitment. - humidity sensor or control assembly
Consider this category only when a persistent below-target run, implausible reading, or sensor indication is diagnosed by qualified service as a control or sensor fault.
Sensor and control assemblies are model- and voltage-specific; do not recalibrate or replace them from cycle behavior alone. - fan, compressor, or sealed cooling assembly
Consider this service category only after mode, room, filter, airflow, bucket/drain, and defrost causes are ruled out and qualified diagnosis identifies the cooling fault.
Electrolux models use different cooling arrangements; internal electrical and sealed-system work requires qualified service and model documentation.
When checks do not resolve it
Need a professional?
Arrange qualified Electrolux service when the unit remains in humidity-control mode below its target but will not stop, cannot lower room humidity after the room, filter, airflow, bucket/drain, and defrost checks, shows a sensor indication, repeatedly restarts, or has abnormal fan/compressor behavior. Call sooner for a leak, overheating, electrical odor, damaged cord, repeated protection trip, or persistent frost. Use the exact model manual before applying any mode, humidity, bucket, drain, filter, or low-temperature instruction.
Safety scope: The user may identify the mode and target, improve room conditions, clean and dry the user-accessible filter, check external airflow, empty and reseat the bucket, inspect visible drain routing, and allow documented automatic defrost. Cabinet disassembly, sensor/control work, fan or compressor work, electrical testing, refrigerant/sealed-system work, and bypassing protective devices are for qualified service personnel.
Common questions
FAQ
Why does my Electrolux dehumidifier run continuously?
Check whether Continuous mode is selected, whether the room still receives humid outside air, and whether the target humidity has been reached. Also check the filter, airflow, bucket/drain, and room temperature. If humidity does not fall after those checks, service is needed.
Does a full water bucket mean the cycle failed?
Not necessarily. Electrolux manuals describe automatic shut-off when the bucket is full. Empty and correctly reseat it, or verify the visible continuous-drain routing if that feature is supported. A bucket indicator that remains active when the bucket is empty needs service.
Can Continuous mode prevent an Electrolux dehumidifier from stopping?
Yes. In the EDH10TRBW1-series manual, Continuous mode is separate from selecting a room-humidity target. Use the exact model manual to switch to humidity control when appropriate; controls and behavior differ by model.
Can a dirty filter or blocked grille make the cycle take too long?
Yes. Restricted intake or discharge airflow can reduce moisture removal and promote frost. Power the unit off, clean and dry the accessible filter, and clear the exterior grille as the manual allows. Do not reach into the fan or coil.
When should I call for Electrolux dehumidifier service?
Call when the unit will not lower humidity after safe setting, room, filter, airflow, bucket/drain, and defrost checks; when a sensor indication returns; or when the fan or compressor is abnormal. Stop sooner for a leak, burning odor, overheating, damaged cord, or repeated electrical trip.
Read the exact guide
Official sources
- Dehumidifier User Manual — EDH10TRBW12Electrolux Taiwan · Direct model-specific evidence for Continuous mode, humidity target, timer, bucket-full restart, filter cleaning, sensor indication, and operating instructions; verify the reader's exact model and market.
- Use & Care ManualElectrolux Home Products · Official model-specific/legacy guidance for enclosed-room operation, clearance, level placement, unobstructed airflow, bucket shut-off, filter cleaning, low-temperature behavior, and the no-user-serviceable-parts boundary; exact current model manual controls.
- Dezumidificator EXD20DN4WElectrolux Romania · Model-specific product evidence for humidity selection, ambient operating range, automatic shut-off when the reservoir fills, and automatic defrost; not universal behavior for every Electrolux model.
- DehumidifiersElectrolux Owner Center · Official support entry point showing that dehumidifier troubleshooting and service are model-driven; use it to locate the applicable model information rather than infer a universal cycle procedure.
Community feedback
Share a repair observation
Share a plain-text repair observation. Accepted observations are published automatically; this page may take a moment to update.