
On this page
Start here
Quick answer
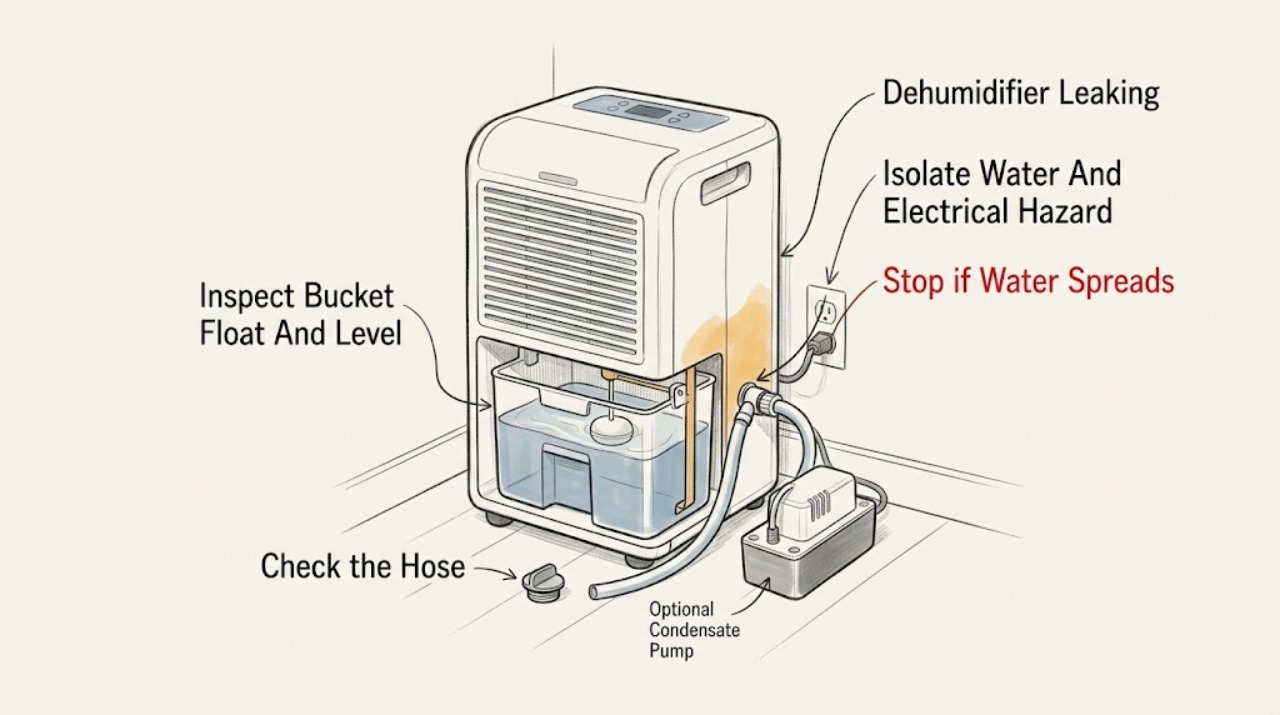
Stop the Electrolux dehumidifier if water is near the plug, outlet, cord, or the unit's electrical base; do not touch wet electrical parts. If the area is dry and safe to inspect, first identify whether water is coming from the bucket, the continuous-drain connection, the pump hose, or the base. Electrolux manuals show that a full or mis-seated bucket can stop the unit, that a float must remain correctly fitted, and that continuous drainage requires a secure, downward, kink-free hose; some models also have a separate pump route with model-specific height and distance limits. Put the unit on a level, stable floor, empty and reseat the bucket, and inspect only accessible caps, connectors, hose, filter, and bucket for cracks, blockage, or a loose seal. Do not remove internal panels, reach into the cabinet, or assume every Electrolux model has a pump or the same hose size. If the leak continues after the exact model's external drainage setup is corrected, water appears from the base or internal area, the float/sensor does not behave normally, there is frost/ice or refrigerant suspicion, or the leak is near electrics, switch off and arrange qualified appliance service; internal pans, pumps, sensors, wiring, and the sealed refrigeration system are not user repairs.
Before you begin
Safety first
- The user may switch off safely, keep water away from electricity, empty and reseat the bucket, verify level placement, and inspect or reseat only the accessible model-documented hose/cap/connector. Internal catch pans, pumps, sensors, controls, wiring, airflow/icing causes, refrigerant, and energized testing are for qualified personnel.
Work through in order
Diagnostic checks
Use only checks that match the exact appliance or system and its official guide.
-
Check 1
From a dry position, stop the dehumidifier and inspect whether water has reached the plug, cord, outlet, control panel, or underside/base. If the electrical area is wet, do not touch the plug or wet parts; isolate power only from a safe dry location or have a qualified person do it. Keep clear of standing water and hot or moving parts.
Expected result: Water is near electrical parts, the cord/plug is damaged or hot, there is smoke or an electrical odor, or the leak is confined to a dry floor away from electrics.
Next step: For any electrical or uncontrolled-water hazard, leave the unit off and arrange qualified electrical/appliance service. If the area is dry and stable, continue only with the external checks below.
Stop if: Do not touch wet electrical components, drag a plugged-in unit through water, or restart a unit after water entered the base.
Why this matters
Why: Water near electricity or any electrical symptom makes further operation unsafe. A dry external leak permits limited visual checks, but it does not prove the cabinet or insulation is dry internally.
-
Check 2
With the unit off and safe to handle, identify bucket-mode collection. Remove the bucket without reaching into the cabinet, empty it, inspect the accessible bucket for cracks or distortion, verify the float is present and not visibly stuck, and slide the bucket back gently and fully. Confirm the dehumidifier is upright on a level, stable floor that can support a full tank.
Expected result: The bucket was full, tilted, cracked, or not fully seated; the float is missing/stuck; the floor is sloped or unstable; or these external conditions appear correct.
Next step: Replace a damaged bucket only with an exact-model-compatible part confirmed by Electrolux; otherwise keep the unit off and call service. If the bucket and floor are sound, continue to the applicable drain-route check.
Stop if: Do not remove or defeat the float, reach behind the bucket into hidden parts, tilt the appliance with water inside, or force a cracked bucket into place.
Why this matters
Why: A full tank normally stops collection, and an incorrectly positioned bucket or float can misdirect water or keep the unit from operating correctly. A correct bucket and level placement make a rear drain or internal leak more likely, but do not identify the cause.
-
Check 3
If the exact model supports gravity continuous drainage, inspect the accessible rear or side drain cap/plug, connector, hose seal, and hose route. Confirm the connector is fully seated, the hose is directed downward toward the drain, and there are no kinks, rises, loose ends, or blockages. If switching back to bucket mode, reinstall the drain plug/cap as the manual directs.
Expected result: The cap/plug is missing or loose, the hose seal/connector leaks, the hose rises or kinks, the hose end is blocked or unsecured, or the gravity route is intact.
Next step: With power isolated and surfaces dry, reseat the accessible connector and route the hose exactly as the model manual shows; replace a worn accessible gasket only when the manual identifies it and the exact part is confirmed. Make one attended check for leakage, then stop if it recurs.
Stop if: Do not drill the cabinet, enlarge the outlet, force a hose onto a wrong connector, route water toward electricity, or leave an unsecured hose running unattended.
Why this matters
Why: Electrolux manuals associate a small hose-connector leak with the seal/gasket or tightening, and warn that improper hose routing can stop drainage and fill the bucket. A sound downward route shifts suspicion toward an internal path or another model-specific cause.
-
Check 4
Only if the exact manual explicitly lists a pump function, inspect the accessible pump-hose connection and discharge end. Confirm the hose is fully seated and directed to a suitable drain or container within the model's stated lift and distance limits; do not assume a pump is present from a generic Electrolux label. If the pump path is not listed for the model, do not create one.
Expected result: The model has no pump instruction, the hose connection is loose or kinked, the discharge route exceeds the manual's limits, or the documented pump route is intact but water still leaks.
Next step: Correct only the accessible model-documented hose connection and route, then perform one attended check. If the pump does not move water, leaks from the cabinet, or the model documentation is unclear, leave the unit off and arrange qualified service.
Stop if: Do not open the cabinet to reach a pump, bypass a float or sensor, run a pump with wet electrical parts, or substitute an unverified hose/adapter or lift height.
Why this matters
Why: Some Electrolux dehumidifiers document a pump as an optional or separate water-removal function, while others document only bucket/gravity drainage. A loose, restricted, or over-lifted pump hose can cause overflow or leakage; an intact route with continued leakage points toward pump, sensor, internal pan, or control diagnosis.
-
Check 5
After the applicable bucket, level, gravity-drain, or documented pump checks, record where the first drops appear, whether the bucket fills, whether the compressor/fan runs, any frost or ice, the model and serial label, and whether water reached the base. Do not remove panels or keep operating to reproduce an internal leak.
Expected result: The leak stops after a documented external correction; it returns from the same connector; water emerges from underneath or inside the cabinet; a float/sensor fault is indicated; or frost, icing, abnormal noise, odor, or cooling changes accompany the leak.
Next step: Keep the unit unplugged when safe and arrange Electrolux-authorized or qualified appliance service. Provide the model, photos, leak location, drainage mode, hose route, water level, and any frost or electrical symptoms.
Stop if: Do not open the cabinet, pierce tubing, handle refrigerant, bypass sensors, test energized circuits, or continue running after an internal or electrical leak.
Why this matters
Why: A recurring connector leak may need an exact gasket/connection assessment, while a base or internal leak can involve a catch pan, drain path, pump, sensor, fan/airflow condition, or refrigeration/defrost system. These observations cannot identify a safe user-replaceable part.
Use your observations
Decision map
Find the observation that best matches what you see, then follow the next safe action.
-
PATH 01Safety boundary
What you see
Water appears around the front or bucket, the bucket is full/tilted/cracked, or the bucket-full indicator remains on after emptying.
Do this next
Empty and gently reseat the bucket on a level floor; inspect only accessible surfaces and the visible float. If it leaks again or the float is missing/stuck, call service or obtain an exact-model bucket through Electrolux.
Why this path and its safety boundary
Why it matters: Bucket position, damage, or float behavior is more likely than a rear continuous-drain connection.
Safety stop: Do not remove the float, force the bucket, or operate with a cracked container or water in the base.
-
PATH 02Safety boundary
What you see
Water appears at the rear/side drain outlet, connector, or hose while continuous drainage is selected.
Do this next
Power off safely, reseat the documented connector, restore a downward kink-free route, and secure the discharge end. If leakage persists, stop and arrange service.
Why this path and its safety boundary
Why it matters: A loose cap/connector, worn seal, kinked or upward hose, blocked end, or incorrect routing is more likely; exact model design still controls the remedy.
Safety stop: Do not force a wrong hose, improvise an adapter, route water near electricity, or leave a leaking hose unattended.
-
PATH 03Safety boundary
What you see
The exact model has a pump function, but water does not rise to the drain, the pump hose leaks, or water returns to the bucket/base.
Do this next
Check only the accessible model-documented hose seating and discharge route once. If the pump still fails or leakage comes from the cabinet, keep the unit off and call qualified service.
Why this path and its safety boundary
Why it matters: A pump connection, hose route, obstruction, lift/distance limit, pump, float, or control issue is possible; the manual must establish whether the feature exists and its limits.
Safety stop: Do not open the cabinet, bypass a pump/float sensor, or run a pump with wet electrical parts.
-
PATH 04Safety boundary
What you see
Water emerges from under the cabinet, inside the bucket cavity, or from a location not explained by the accessible bucket/cap/hose checks; frost or unusual cooling accompanies it.
Do this next
Stop operation, keep water away from electricity, and arrange qualified appliance service. Photograph the first visible wet area without removing panels.
Why this path and its safety boundary
Why it matters: An internal catch-pan/drain path, sensor, airflow/icing condition, or refrigeration/defrost issue is more likely than a simple hose seal.
Safety stop: Do not tilt the unit to drain hidden water, open covers, scrape ice, pierce tubing, or handle refrigerant.
-
PATH 05Safety boundary
What you see
Water reaches the plug, outlet, cord, controls, or base, or there is a hot plug, smoke, electrical odor, damaged cord, or shock concern.
Do this next
Do not touch wet electrical parts. Isolate the circuit only from a safe dry position or obtain qualified help, then arrange electrical/appliance inspection.
Why this path and its safety boundary
Why it matters: The immediate electrical hazard overrides leak troubleshooting and the appliance should not be energized.
Safety stop: Do not unplug through standing water, restart to test, or use the unit until the electrical and water hazards are assessed.
Helpful context
Understand the symptom
Make the first decision from the leak location
Water at the front or around the bucket points to bucket position, a crack, the float, or normal full-bucket collection. Water at the rear points more toward the drain cap, connector, hose, or pump arrangement. Water spreading from underneath the cabinet is not automatically a hose problem: a blocked internal path, catch-pan issue, sensor condition, heavy frost/defrost water, or another internal fault is possible. Dry the surrounding floor only if doing so does not bring you into contact with wet electrical parts, and take a photo of the leak path before moving the unit.
Bucket mode and continuous drainage are different setups
In bucket mode, Electrolux manuals describe automatic shutoff at the preset water level and require the empty bucket to be returned fully to its position. In gravity continuous-drain mode, the drain plug/cap, connector, hose seal, slope, and lack of kinks all matter. A pump-equipped model has a different connection and lift path; it is not safe to infer that a gravity hose can be routed upward or that every model has a built-in pump. Follow the exact model manual and keep the hose end secured over an appropriate drain or container.
Keep water away from the electrical base
The Electrolux EDH10TRBW1 manual says to disconnect power before cleaning and warns not to splash water directly onto the unit because electric shock, insulation failure, or rusting can result. Do not tilt a water-filled appliance, probe the cabinet, or continue running it while water reaches the cord, plug, outlet, controls, or base. A leak that persists after accessible bucket and drain checks needs service rather than a guessed pump, sensor, pan, or refrigeration part.
Safety boundary
Stop conditions
- Stop immediately if water reaches the plug, outlet, cord, controls, or base, or if there is a shock, smoke, electrical odor, heat, or damaged cord; do not touch wet electrical parts.
- Do not open the cabinet, reach behind the bucket into hidden components, test energized circuits, or bypass the float, pump, sensor, thermal, or control safety functions.
- Do not route a hose upward or near electrical equipment, improvise a connector, drill or enlarge the drain outlet, or leave a leaking drain setup unattended.
- Do not scrape internal ice, pierce refrigerant tubing, handle refrigerant, or diagnose the internal pan, pump, sensor, wiring, or sealed system without qualified service.
- Do not continue running after a recurring leak or internal/base leak; protect the floor and arrange service instead of guessing at a part.
When checks do not resolve it
Need a professional?
Contact Electrolux support or a qualified appliance technician when the leak returns after the exact model's bucket, level, cap, hose, and documented pump-route checks; water comes from the base or internal cavity; a float, pump, or sensor behaves abnormally; frost/ice or cooling changes accompany the leak; the model's drainage architecture is unclear; or water reaches electrical parts. Provide the model/serial, leak location, drainage mode, hose route, bucket state, photos, and electrical observations.
Safety scope: The user may switch off safely, keep water away from electricity, empty and reseat the bucket, verify level placement, and inspect or reseat only the accessible model-documented hose/cap/connector. Internal catch pans, pumps, sensors, controls, wiring, airflow/icing causes, refrigerant, and energized testing are for qualified personnel.
Common questions
FAQ
Why is my Electrolux dehumidifier leaking from the bucket area?
A full, tilted, cracked, or incompletely seated bucket, or a float that is not correctly positioned, is a plausible external cause. Empty and gently reseat the bucket on a level floor, but do not remove the float or reach into the cabinet. If it leaks again, arrange exact-model service.
Why does the continuous-drain hose on my Electrolux dehumidifier leak?
Check only the model-documented cap/connector, seal, hose seating, downward direction, kinks, and discharge end. Electrolux manuals warn that a loose seal or improper hose routing can leak or make water return to the bucket. If the connection still leaks after one careful reseat, stop using it and call service.
Do all Electrolux dehumidifiers have a condensate pump?
No universal pump feature should be assumed. One official Electrolux guide documents a pump function, while other models document bucket and gravity drainage. Check the exact model manual; do not create a pump route or exceed a model's stated hose lift/distance limits.
What if water is leaking from underneath the dehumidifier?
Stop operation and keep water away from the plug and outlet. A base leak may involve an internal catch pan, drain path, pump, sensor, airflow/icing condition, or refrigeration system, so do not open the cabinet or scrape ice. Arrange qualified appliance service and provide the first visible leak location.
Is it safe to keep running an Electrolux dehumidifier that is leaking?
Not when water reaches electrical parts, the base, cord, plug, or outlet, or when the leak recurs after the documented external checks. Disconnect only from a safe dry position, do not touch wet electrical parts, and arrange qualified service.
Read the exact guide
Official sources
- EDH10TRBW1 Dehumidifier User ManualElectrolux Taiwan · EDH10TRBW1 model; used for clearly labeled examples of level placement, bucket, gravity-drain hose, cleaning, water-splash and service boundaries.
- Where can I find my model and serial number?Electrolux · General Electrolux model-identification guidance.
- 95 Pints Dehumidifier Owner's GuideElectrolux Home Products · The guide's detailed dimensions and procedures apply to the covered 30/50-70/95-pint model families; use the exact model manual for any other Electrolux dehumidifier.
Community feedback
Share a repair observation
Share a plain-text repair observation. Accepted observations are published automatically; this page may take a moment to update.