
On this page
Start here
Quick answer
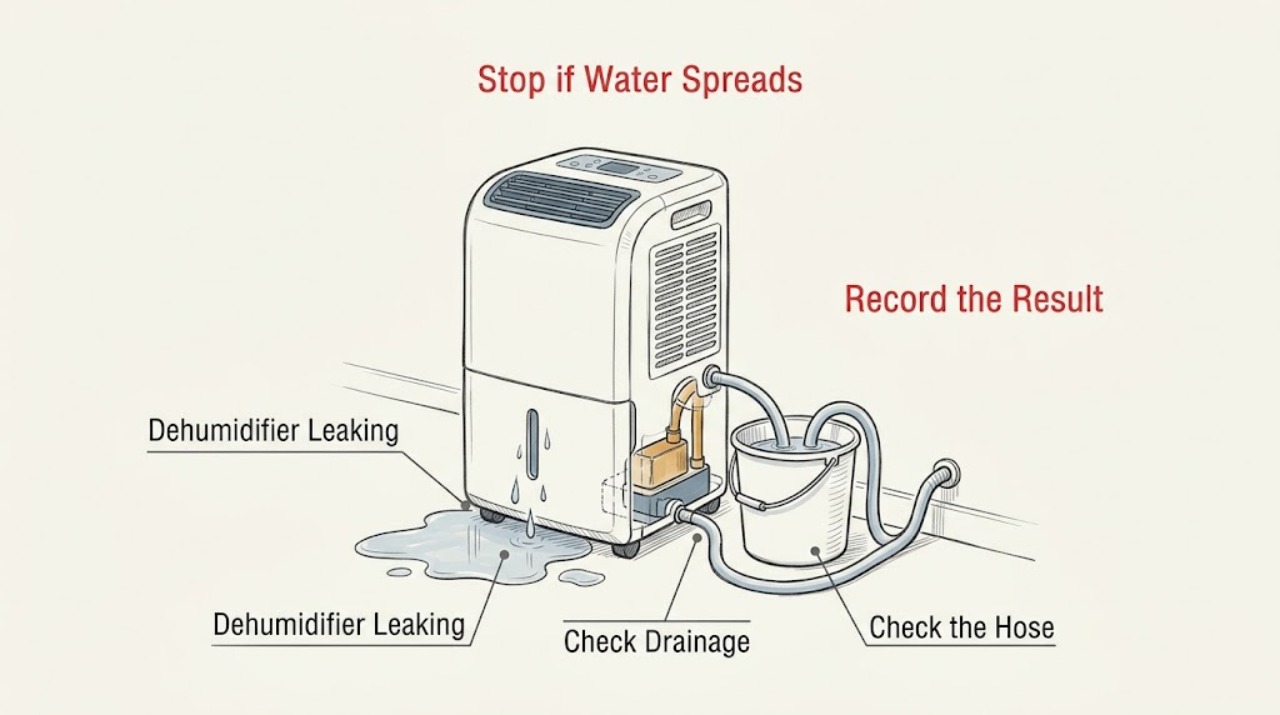
If a GE dehumidifier is putting water on the floor, first move water away from electrical connections and stop the appliance if the leak is near the cord or outlet. Then identify whether you intend to use the bucket, a gravity drain hose, or an internal pump: GE says a hose connection can leak when loose, and a hose should not be attached when the bucket is the chosen collection method. Confirm the bucket is seated and the float can move, route a gravity hose downward above the drain waterline, and check pump-specific requirements such as a full bucket, an enabled pump, and the model's hose limit. If water still leaks after external drainage checks, or the unit has a damaged cabinet, cord, pump, or internal water path, keep it unplugged and arrange service from a qualified local dehumidifier servicer.
Work through in order
Diagnostic checks
Use only checks that match the exact appliance or system and its official guide.
-
Check 1
Stop the dehumidifier and inspect the floor, cord, plug, outlet, and cabinet from outside. If water is close to electrical parts, disconnect power only when safe and keep the appliance out of use until the area is dry. Find the model label before choosing a drainage procedure.
Expected result: Record whether water is under the front bucket, at the rear hose connection, along the hose, around a pump outlet, or coming from the cabinet itself. Note whether the cord or plug is wet, hot, damaged, or discolored.
Next step: Dry and isolate the area without operating the unit if electrical parts were exposed. If the source is the cabinet or the appliance is damaged, stop and arrange qualified service; otherwise continue only with an unplugged external drain inspection.
Why this matters
Why: The leak location separates collection-bucket seating from hose routing or a possible internal leak. Water at electrical parts or a damaged cord is a safety issue, not a drainage adjustment.
-
Check 2
For bucket collection, disconnect any drain hose, empty the bucket, inspect it for cracks or distortion, and slide it fully into the unit. Confirm the model's float or bucket-full mechanism is not trapped and that the bucket hangs on its supports correctly.
Expected result: Check whether the bucket was partly inserted, the float cannot move freely, the unit stopped with a full-bucket indication, or water appears only when the bucket is nearly full.
Next step: Use the bucket alone with the hose disconnected, seat it exactly as the manual shows, and run only a supervised test after the floor and appliance are dry. If the bucket or float is damaged or the leak continues, stop and arrange service.
Why this matters
Why: A mis-seated bucket or float can prevent normal shutoff or allow water to escape around the collection path. A hose left attached while bucket collection is intended can redirect water unexpectedly.
-
Check 3
For gravity drainage, unplug the appliance, confirm the hose has the model-approved washer and a secure connection, and route it in a short, straight, continuously downward path to a floor drain. Keep the hose outlet above the drain waterline and do not use an old, split, or kinked hose.
Expected result: Look for drips at the threaded connection, a hose end pushed into standing water, excess hose length, an upward loop, or a drain that is blocked or too full to accept water.
Next step: Correct only the accessible connection, washer, hose length, and downward routing described by GE. Clean the drain and hose with a suitable small brush only while unplugged; do not remove internal panels or force fittings.
Why this matters
Why: A loose connection can leak into the bucket and onto the floor, while a submerged or poorly routed hose cannot drain by gravity and can back up. These findings point to the drain setup rather than the dehumidifier's internal water collection.
-
Check 4
If the GE model has an internal pump, verify the pump option is enabled, the bucket is securely in place and full enough to trigger pumping, and the supplied or model-approved hose is routed to a suitable drain within the manual's limit. Do not open the pump or test it with exposed wiring.
Expected result: Record whether the pump indicator responds, whether the bucket reaches the trigger level, whether water reaches the hose end, and whether the hose is longer than the model allows or rises beyond the permitted lift.
Next step: Restore only the documented pump setting, bucket seating, and hose routing. If the pump remains silent, leaks at its outlet, or the unit requires internal access, keep it unplugged and arrange a local dehumidifier servicer.
Why this matters
Why: A pump that is disabled, missing the bucket, below its trigger level, or connected to an overlong hose may not remove water and can produce an apparent floor leak. A normal setup with no pumping points toward service.
-
Check 5
After one external drainage correction, run a short supervised collection test with the appliance assembled and on a dry, level surface. Observe whether water enters the selected bucket or drain without appearing at another connection. Stop immediately for water near electrical parts, smoke, burning odor, or a damaged cord.
Expected result: Record whether the leak is gone, returns only when the bucket fills, appears at the hose fitting, occurs while the pump activates, or comes from inside the cabinet. Also note frost or unusual operating behavior.
Next step: Keep the unit unplugged and arrange service if the leak recurs or its source is internal. Retain the model number, drainage method, water location, and test result for the servicer; do not continue cycling a leaking appliance.
Why this matters
Why: A leak that disappears after correct bucket or hose setup supports a drainage-configuration cause. A recurring cabinet leak, pump failure, or abnormal frost and water pattern exceeds safe external diagnosis.
Use your observations
Decision map
Find the observation that best matches what you see, then follow the next safe action.
-
PATH 01Next step
What you see
Water is under the front bucket and the unit is intended to collect into the bucket.
Do this next
Unplug, empty and seat the bucket correctly, disconnect the hose for bucket use, and escalate a damaged bucket or persistent leak.
Why this path and its safety boundary
Why it matters: Bucket seating, float, overflow, or conflicting drain setup is more likely than a failed pump.
-
PATH 02Next step
What you see
Water appears at the rear hose connection or along a gravity drain route.
Do this next
Correct only the accessible connection and downward route while unplugged. If the fitting or cabinet leaks, arrange service.
Why this path and its safety boundary
Why it matters: A hose connection or gravity-routing problem is more likely than an internal collection leak.
-
PATH 03Next step
What you see
A pump-equipped model leaves water on the floor even though the hose is connected.
Do this next
Restore only the documented pump setup. If pumping still fails, keep the unit unplugged and use a qualified local dehumidifier servicer.
Why this path and its safety boundary
Why it matters: Pump activation or model-specific hose conditions are more likely than a bucket-only issue.
-
PATH 04Next step
What you see
The leak persists after the selected external drainage method is correctly configured.
Do this next
Stop using the dehumidifier, isolate any water from electrical parts, and arrange qualified service. Do not open the housing or perform live tests.
Why this path and its safety boundary
Why it matters: An internal water path, pump, coil, control, or operating-condition fault is more likely and cannot be safely isolated by generic instructions.
Helpful context
Understand the symptom
Stop the leak before troubleshooting the drain path
Water on the floor is not one single failure. A GE dehumidifier can collect water in a removable bucket, drain by gravity through a hose, or use an internal pump on models that have one. Before touching the bucket, hose, or controls, keep water away from the plug and outlet and disconnect power if that can be done safely.
Use one intended collection method
GE says not to use the drain hose when the bucket is being used for collection; with a hose attached, water is directed through the hose instead of the bucket. A pump model still requires the bucket to be securely in place. The exact model manual controls whether a hose, pump, or drain plug is present and how it is connected.
Keep internal pump and refrigeration work out of scope
User checks can cover the bucket, float, visible hose connection, drain routing, and model-approved cleaning while unplugged. Do not open the housing, probe a pump, bypass the bucket switch, or work on the compressor or refrigerant circuit. A leak that persists after the external drain checks needs a local service provider that works on dehumidifiers; GE notes that its standard Bodewell service does not service them.
When checks do not resolve it
Need a professional?
Keep the GE dehumidifier unplugged and arrange service if water comes from the cabinet or pump, a bucket or drain fitting is damaged, the leak persists after correct external setup, or water reached the cord, plug, or outlet. GE notes that Bodewell does not service dehumidifiers, so use a qualified local servicer that accepts this appliance type. Do not open the housing, bypass the bucket switch, probe the pump, or operate a visibly damaged or repeatedly leaking unit.
Common questions
FAQ
Why is my GE dehumidifier leaking water onto the floor?
First identify whether water is coming from the bucket, the rear hose connection, the hose route, the pump outlet, or the cabinet. GE lists a loose hose connection and attaching a hose while intending to use the bucket as common checks. Confirm bucket seating and the single intended drainage method before arranging service.
Can I use the bucket and drain hose at the same time on a GE dehumidifier?
GE says not to use the drain hose when the bucket is the collection method. Choose the bucket alone, gravity hose drainage, or the pump method supported by the exact model. The bucket still needs to be securely in place for the appliance or pump to operate.
Why is my GE dehumidifier pump not draining?
On models with an internal pump, check that the pump is enabled, the bucket is seated and full enough to trigger pumping, and the hose stays within the model's allowed length and route. If those external conditions are correct and water still reaches the floor, stop using the unit and arrange service; do not open the pump.
Read the exact guide
Official sources
- GE Dehumidifier Owner GuideGE Appliances · Older GE dehumidifier bucket, float, hose, and floor-leak troubleshooting context
- Dehumidifier - Draining OptionsGE Appliances · GE dehumidifier bucket, gravity-hose, and pump drainage methods
- Dehumidifier - Internal Pump Not WorkingGE Appliances · GE dehumidifier internal-pump external conditions and service boundary
- Dehumidifier - Leaking, Water on FloorGE Appliances · GE dehumidifier floor-leak diagnosis and bucket-versus-hose guidance
- Support for GE Dehumidifiers and Air PurifiersGE Appliances · GE dehumidifier product-line support and service scope
- Dehumidifier - Drain Hose IssuesGE Appliances · GE dehumidifier gravity hose connection, routing, cleaning, and drain troubleshooting
Community feedback
Share a repair observation
Share a plain-text repair observation. Accepted observations are published automatically; this page may take a moment to update.