
On this page
Start here
Quick answer
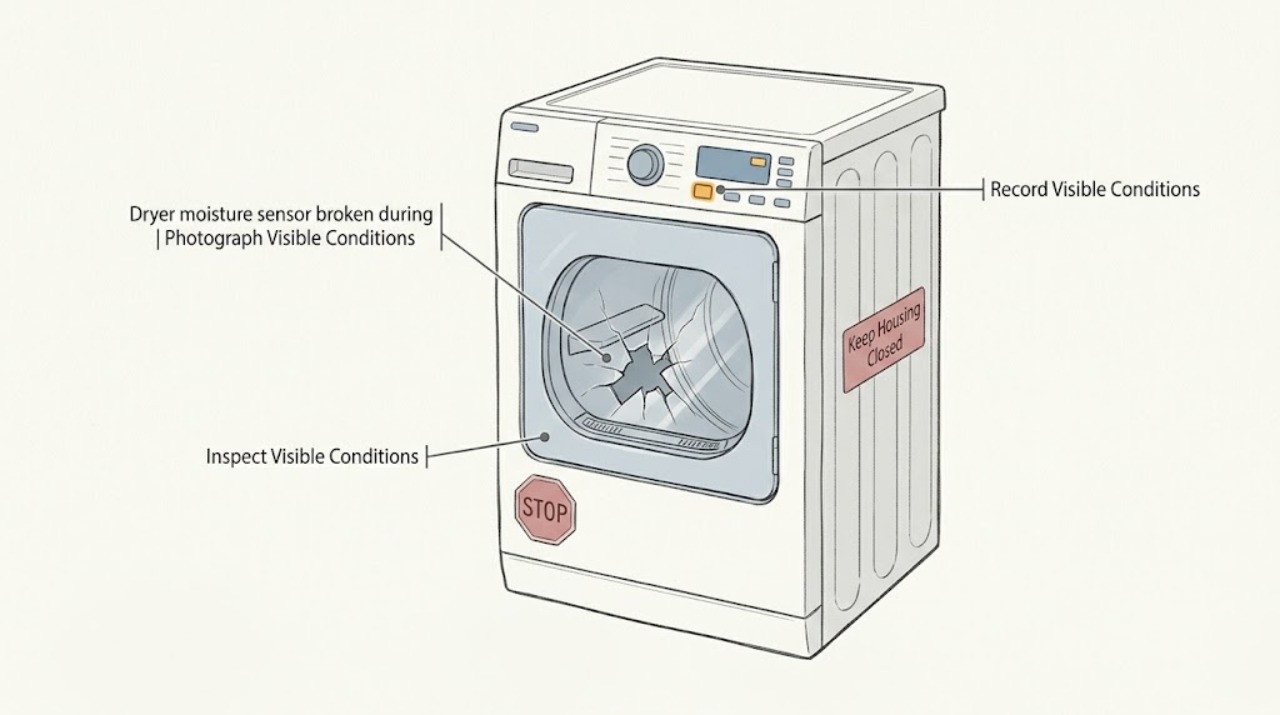
Do not tape over, bend back, bypass, or keep running an Electrolux EIGD50LIW0 with a broken, loose, or sharp moisture-sensor assembly. Electrolux says the visible sensor bars are used by automatic drying and that residue can affect their reading; its dryer code guide says a humidity-sensor failure may let manual cycles continue while the fault still needs service if it persists. With the dryer cool and safely disconnected, confirm that the damaged item is actually the sensor bars, check for a sharp edge or snagging wire, and compare the exact behavior of an automatic cycle with a timed/manual cycle only after the visible area is safe. A timed cycle that appears to finish is not proof that a physically damaged sensor can be ignored. Stop use for exposed wiring, clothing snags, scorching, smoke, burning odor, abnormal heat, or any damage that can contact the drum, and arrange qualified service with the full model number.
Work through in order
Diagnostic checks
Use only checks that match the exact appliance or system and its official guide.
-
Check 1
Read the rating label and record EIGD50LIW0 exactly, including every suffix and the market of sale. Electrolux says a dryer model number can be found along the top of the door opening; photograph the label and the displayed cycle or code before changing settings.
Expected result: The label confirms EIGD50LIW0, the model is incomplete, or the damaged item is not clearly the two visible moisture-sensor bars at the drum opening.
Next step: Use the confirmed identity for the owner documentation or service request. If the label or damaged component cannot be identified, stop at observation and do not order a part from a photograph or another Electrolux model.
Stop if: Do not remove panels, pull the dryer out to reach hidden wiring, or use a service sequence from a different model.
Why this matters
Why: The exact model anchors the case and prevents a similar-looking strip, grille, or sensor from being treated as the same assembly. A missing or conflicting identity means model-specific replacement and service information is unresolved.
-
Check 2
With the dryer off, cool, and disconnected from its accessible power supply without moving the appliance, look from the drum opening and lint-screen area at the visible sensor bars, their mounting area, the front edge, and nearby fabric path. Use a light only to observe; do not straighten metal, push a loose wire back, tape the opening, or reach into a gap.
Expected result: The bars are intact but coated, or a bar/mount is bent, detached, sharp, has exposed or loose wiring, or has left snag marks on clothing.
Next step: If the bars are intact and only visibly coated, clean only the accessible sensor surface as Electrolux describes, with the dryer cool and disconnected. For any break, sharp edge, loose wire, snag, or uncertain identity, leave the dryer unused and arrange qualified service.
Stop if: Do not use adhesive, bend or file the metal, remove the sensor, pull fabric forcefully, open the cabinet, or handle internal wiring.
Why this matters
Why: Electrolux identifies residue as a cause of inaccurate sensing, while the exact-model community case shows that bent metal and a broken connection can catch clothing. Physical deformation or exposed wiring is not an ordinary cleaning issue and cannot be cleared by a timed cycle.
-
Check 3
If the visible bars are intact, cool, and free of a sharp or loose condition, record the cycle type and the result of one normal, supervised run allowed by the owner guide: automatic/sensor dry versus timed/manual dry. Note whether the drum rotates, the load stops early, the load overdries, the cycle completes, or E4 appears. Do not run a cycle when the sensor is physically broken or clothing can catch.
Expected result: Automatic drying stops early or behaves inconsistently, timed/manual drying completes differently, E4 appears, or both cycle types behave normally.
Next step: Record the exact cycle and display behavior for service. If E4 persists, or automatic behavior is abnormal after an intact-surface cleaning, schedule qualified service rather than selecting a sensor, control, or harness from the symptom.
Stop if: Stop the observation for snagging, scraping, abnormal heat, burning odor, smoke, sparking, or a cycle that cannot be stopped normally.
Why this matters
Why: The different cycle results are a sensor-path clue, not a component verdict. Electrolux says manual cycles may operate when a humidity-sensor failure is shown, while automatic cycles depend on moisture sensing; normal timed drying does not make a sharp or detached assembly safe.
-
Check 4
Check the lint screen and the accessible exhaust outlet from outside the appliance, and note load size, fabric type, drying time, and whether clothes are damp or overheated. Clean only the normal user-accessible lint area; do not dismantle the vent or operate a gas dryer without its required outdoor exhaust connection.
Expected result: The lint path is restricted, the load is unusually dense or small, drying is extended, the exhaust flow is abnormal, or the airflow and load appear normal while the sensor symptom remains.
Next step: Correct only a plainly accessible lint or load condition and reassess only if the sensor assembly is physically safe. Persistent sensor-cycle failure, overheating, or restricted exhaust needs qualified appliance or vent service.
Stop if: Do not continue operation with abnormal heat, blocked exhaust, smoke, burning odor, or a suspected gas or electrical hazard.
Why this matters
Why: Electrolux says lint, ventilation, load size, and residue on sensor bars can all affect drying time. These observations can explain poor drying without proving that a damaged sensor is harmless or that a particular heater or control has failed.
-
Check 5
Prepare a service record with the complete EIGD50LIW0 label, market, a photo of the visible sensor area, the cycle names used, the exact display or E4 timing, load condition, drying result, lint/exhaust observations, and any clothing snag or rubbing mark. Keep the dryer off if the assembly is damaged or the result is unexplained.
Expected result: The sensor is visibly broken or sharp, the symptom returns after an intact-surface cleaning, automatic and timed cycles differ, E4 persists, or a hazard is present.
Next step: Give the record to Electrolux or qualified appliance service and ask them to confirm the exact assembly and any related damage before replacement. Do not restore use merely because a timed cycle once completed.
Stop if: Leave the dryer disconnected for exposed wiring, sharp or snagging damage, smoke, burning odor, scorching, abnormal heat, sparking, or inability to stop normally.
Why this matters
Why: A model-specific technician can distinguish a sensor mounting problem from a wiring, control, drum-opening, or airflow issue. The observation history is more useful than a guessed part number or a claim that timed drying proves the dryer is safe.
-
Check 6
If the sensor bars are intact and the owner guide permits normal operation, make at most one short supervised observation after the accessible lint and residue checks, staying nearby and using a normal load. Record whether automatic sensing changes and whether the drum opening remains free of contact; do not repeat the run to force a conclusion.
Expected result: The cycle behaves normally with no contact, the sensor result remains inconsistent, or the dryer develops snagging, scraping, excess heat, odor, smoke, or other abnormal behavior.
Next step: Use the recorded result only to help the technician; stop using the dryer for recurrent sensor failure or any safety sign. Do not bypass the sensor or continue high-heat experiments.
Stop if: Stop immediately for clothing catching, exposed wiring, smoke, burning odor, sparking, scorching, abnormal heat, or a rapidly worsening noise.
Why this matters
Why: A normal run can show that no immediate symptom was reproduced, but it cannot certify a sensor that is cracked, loose, or electrically damaged. A returning cycle difference or any physical hazard moves the case to service.
Use your observations
Decision map
Find the observation that best matches what you see, then follow the next safe action.
-
PATH 01Next step
What you see
The visible bars are intact and only have removable residue, with no sharp edge, loose mounting, exposed wire, or clothing snag.
Do this next
With the dryer cool and disconnected, clean only the accessible sensor surface as directed, then record automatic-versus-timed behavior. Escalate if the result remains abnormal.
Why this path and its safety boundary
Why it matters: Electrolux's guidance supports an accessible surface-cleaning path for residue that can inhibit moisture sensing; this is materially different from repairing or ignoring a broken assembly.
-
PATH 02Next step
What you see
The EIGD50LIW0 sensor area is bent, detached, sharp, has a loose or exposed wire, or has already snagged clothing.
Do this next
Leave the dryer off and arrange qualified Electrolux service. Do not tape, straighten, remove, bypass, or choose a replacement assembly without exact model confirmation.
Why this path and its safety boundary
Why it matters: This is a physical contact and electrical safety branch, not a harmless sensor-reading error. The exact-model report describes the bent area as capable of catching clothing, and an intact timed cycle cannot clear that hazard.
-
PATH 03Next step
What you see
A timed/manual cycle completes but an automatic cycle stops early, overdries, behaves inconsistently, or shows E4 Humidity Sensor Failed.
Do this next
Record the exact cycle and display, stop repeated experiments, and arrange service if the fault persists. Do not use timed drying to bypass physical damage or a sharp assembly.
Why this path and its safety boundary
Why it matters: Electrolux separates manual operation from humidity-sensor-dependent behavior when E4 is present. The result supports a sensor-path service decision but does not identify a sensor, harness, or control as the failed part.
-
PATH 04Next step
What you see
Both automatic and timed drying are abnormal, drying is extended, airflow is poor, or the load is unusually hot or damp.
Do this next
Check only the normal lint, accessible exhaust, and load conditions. If the symptom persists, or heat is abnormal, stop use and obtain qualified appliance or vent service rather than guessing a heater or control.
Why this path and its safety boundary
Why it matters: The sensor clue is not sufficient to separate residue, lint/ventilation, load conditions, thermal protection, or another dryer fault. Electrolux's drying guidance treats airflow and load factors as separate checks.
-
PATH 05Next step
What you see
There is smoke, a burning odor, scorching, sparking, exposed wiring, abnormal heat, clothing caught at the drum opening, or the dryer cannot stop normally.
Do this next
Stop using the dryer, isolate power only from a safe accessible control, keep clear, and obtain qualified appliance or electrical service. Use local emergency guidance for smoke or fire; do not restart it as a test.
Why this path and its safety boundary
Why it matters: This is an immediate fire, electrical, or mechanical safety boundary. It is not resolved by changing from automatic to timed drying or by cleaning the bars.
Helpful context
Understand the symptom
The first decision is physical safety, not whether the dryer can still produce heat. The exact EIGD50LIW0 report describes a broken wire and bent metal that could catch clothing, while Electrolux's opened guidance treats the sensor bars as part of automatic moisture sensing. A clean, intact pair of bars may be wiped as directed; a bent, detached, sharp, or snagging assembly is a stop-use condition. The appearance of the item alone does not establish a replacement part or prove that the sensor is the only fault.
Separate cycle behavior from the safety decision. Electrolux's error guide distinguishes automatic sensing from manual operation when a humidity sensor fails, so a timed/manual cycle may behave differently without clearing the physical damage. Record the cycle name, whether the load stops early or overdries, and any E4 display, but do not use another model's service sequence, open the cabinet, perform electrical tests, or defeat the sensor.
When checks do not resolve it
Need a professional?
Arrange qualified Electrolux appliance service for a broken, detached, sharp, snagging, or electrically damaged moisture-sensor assembly; persistent E4; automatic-cycle failure after an intact-surface cleaning; a cycle that stops or overheats; or any uncertainty about the exact model or assembly. Stop immediately for smoke, burning odor, scorching, sparking, exposed wiring, abnormal heat, clothing caught at the drum opening, or a dryer that cannot stop normally. Do not open the cabinet, perform electrical tests, bypass the sensor, or select a part from appearance alone.
Common questions
FAQ
Can I keep using the Electrolux dryer if timed drying still works?
Not if the sensor assembly is broken, bent, loose, sharp, snagging clothing, or has exposed wiring. Electrolux says manual cycles may operate when a humidity-sensor fault is shown, but that describes cycle behavior, not permission to bypass physical damage. Have the exact EIGD50LIW0 assembly and surrounding drum opening checked before resuming use.
Could residue on the moisture sensor cause the drying problem?
Yes, Electrolux says residue on the sensor bars can inhibit sensing and describes wiping accessible bars with rubbing alcohol. That applies to an intact, accessible surface; it does not repair a broken mount, wire, sharp edge, or detached bar. Disconnect power and let the dryer cool before any user cleaning.
Does an E4 code prove that the sensor itself must be replaced?
No. Electrolux's code guide identifies E4 as Humidity Sensor Failed and directs service if it continues, but the code alone does not prove a particular sensor, wire, or control part is the cause. Record the exact model, cycle, display, and physical condition for a technician.
Can I tape the sensor or remove it so clothes stop catching?
No. Tape, bending, removal, or bypassing can leave a sharp edge, expose wiring, change the automatic-dry safety behavior, or allow contact with clothing. Leave the EIGD50LIW0 off and have qualified service identify the correct repair from the full model and visible damage.
Read the exact guide
Official sources
- Laundry Dryer Error Code GuideElectrolux · General Electrolux dryer code guidance for the assigned EIGD50LIW0 scope: E4 Humidity Sensor Failed, manual-cycle behavior, and service escalation; it does not authorize bypass or part selection.
- Where can I find my model and serial number?Electrolux · Electrolux model-label location guidance for the assigned EIGD50LIW0 dryer identity; it does not establish sensor construction or part fit.
- Dryer - Not Drying and Extended Drying TimeElectrolux · General Electrolux dryer guidance for the assigned EIGD50LIW0 scope: lint, load, ventilation, and visible moisture-sensor bars; exact physical damage still requires model-specific service confirmation.
- Do I really need to replace this Electrolux dryer moisture sensor?Anecdotal observations for the exact EIGD50LIW0 case only; not a universal diagnosis or safety clearance.
Community feedback
Share a repair observation
Share a plain-text repair observation. Accepted observations are published automatically; this page may take a moment to update.