
On this page
Start here
Quick answer
An Electrolux freezer cannot make ice if the model has no fitted ice maker, the ice maker is switched off, the bin or signal arm is not in its normal position, water is not reaching the appliance, or the freezer is not maintaining normal cooling. Confirm the exact model's manual, use the normal ice-maker control, check for a visible water-supply problem or leak, and verify ordinary cooling, airflow, and door-seal conditions. A new installation may need a model-specific startup period before the bin fills. Stop for a leak, exposed wiring, burning odor, repeated electrical trips, severe frost, no cooling, or any need to remove panels or test live parts; arrange qualified Electrolux service instead.
Before you begin
Safety first
- This article covers model-manual lookup, ordinary-access visual checks, normal user controls, visible airflow and seal checks, and non-invasive observation only. A qualified technician must handle internal panels, electrical measurement, water-valve work, refrigerant or sealed-system work, ice-maker component testing, and wiring.
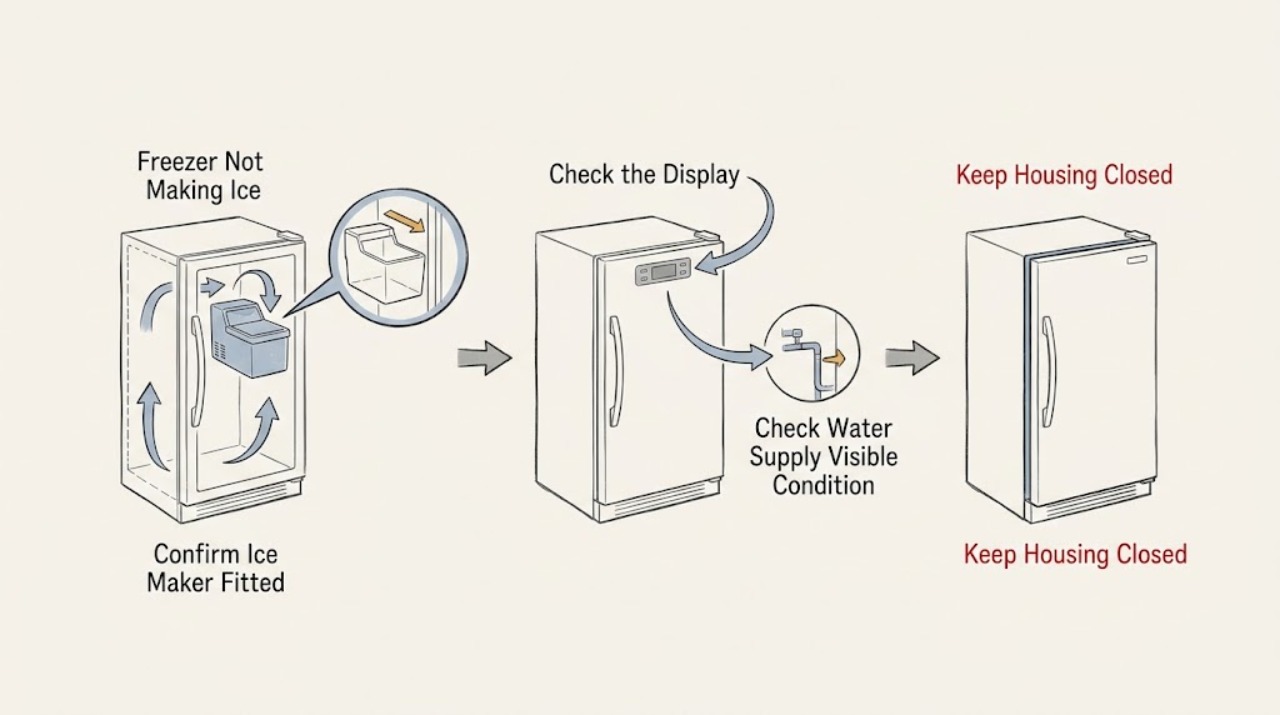
Work through in order
Diagnostic checks
Use only checks that match the exact appliance or system and its official guide.
-
Check 1
Use the exact Electrolux model manual and ordinary-access inspection to confirm that this freezer configuration has a fitted ice maker; identify the ice bin and its normal control or signal arm without removing panels.
Expected result: Record a fitted ice maker with a bin and control, an ice-maker location with no bin, or no ice-maker hardware at all.
Next step: If an ice maker is absent, stop troubleshooting this symptom and use only an accessory or configuration explicitly supported by the model documentation. If it is present, continue to the control and bin check.
Stop if: Do not drill, add a water line, or alter the freezer to create an ice-maker installation.
Why this matters
Why: Electrolux states that not all top-freezer refrigerators include an ice maker. If the appliance has no fitted ice maker, a no-ice symptom is not evidence of a failed internal part.
-
Check 2
With hands clear of the ice-making mechanism, check the normal ice-maker control or signal arm and confirm that the bin is seated as shown in the model manual; do not force the arm or reach into moving parts.
Expected result: Record an enabled control and correctly seated bin, a raised or disabled signal arm, a full bin, a bin that is out of position, or a control that will not move normally.
Next step: Restore only the normal position shown in the manual and reseat the bin without force. If the bin is full, allow normal use to reduce it; if the control is broken, jammed, or the symptom remains, stop and arrange service.
Stop if: Do not bypass the signal arm, hold it down, rotate a mechanism by hand, or chip ice from the assembly with a tool.
Why this matters
Why: Electrolux describes the normal signal-arm or control position as the way to switch the ice maker on and off, and a full bin can stop production. A control or bin that cannot be positioned normally may need service.
-
Check 3
Inspect only the visible water-supply tubing, shutoff area, and floor around the freezer for a kink, disconnected-looking connection, or water leak; compare the valve and tubing arrangement with the model manual.
Expected result: Record a dry, intact visible supply, a kink or apparent disconnection, no water supply to an installed ice maker, or any dripping or pooled water.
Next step: If the area is dry and the supply appears intact, continue with cooling and airflow checks. If there is a leak or an unsafe-looking connection, stop the ice maker if the manual provides a normal control for doing so, keep clear of wet electrical areas, and arrange qualified service.
Stop if: Do not loosen fittings, cut tubing, remove a water valve, or probe for water flow. Treat water near electrical components as an urgent service boundary.
Why this matters
Why: An ice maker cannot fill without its required water path. A leak or damaged connection is a stop condition, and a missing supply is a plumbing or installation issue rather than a reason to open the freezer.
-
Check 4
Check the freezer's ordinary user indicators: interior light or display, control response, normal cooling sound, and whether food is remaining frozen; use only the temperature and power controls described by the exact manual.
Expected result: Record normal indicators and cooling, no response or no light, an error or warning, unusual warming, repeated electrical trips, or a compressor or fan sound that is absent or abnormal.
Next step: If the freezer is not cooling, is warming food, repeatedly trips protection, or shows a persistent warning, stop using it for diagnosis and arrange appliance service. If cooling appears normal, continue with the airflow and door check.
Stop if: Do not remove electrical covers, measure voltage, bypass protection, or repeatedly reset a freezer that is warm, arcing, or tripping.
Why this matters
Why: Electrolux recommends checking power, outlet, controls, and restart behavior when a freezer is not working, but an ice maker will not recover while the freezer has a broader cooling or power fault.
-
Check 5
From ordinary access, confirm that packages are not blocking internal air vents, the freezer door closes fully, and the visible gasket contacts the frame; inspect for heavy frost that blocks circulation without scraping it.
Expected result: Record clear vents, a fully closing door, and an even seal, or blocked vents, a door that rebounds, a loose seal, or frost covering an airflow path.
Next step: Move only packages that visibly obstruct airflow and close the door normally. If the seal fails a gentle paper-resistance check or frost returns, follow the model's approved defrost guidance or arrange service; do not dismantle the door or evaporator area.
Stop if: Do not use knives, heaters, sharp tools, or chemicals to remove frost, and do not remove the inner liner or gasket to chase an ice-maker fault.
Why this matters
Why: Electrolux explains that blocked air circulation, poor door closure, and warm humid air can contribute to freezer frost and cooling problems. A simple external obstruction can affect ice production, while recurring frost or a failed seal needs service assessment.
-
Check 6
If the model manual permits ordinary removal of the ice bin, remove it only by the described handhold and look for a visible ice bridge or packed cubes in the bin; keep fingers out of the ice-maker mechanism and never force a stuck bin.
Expected result: Record a clear bin, a solid clump or bridge in the bin, a bin that cannot be removed normally, or broken or cracked ice-maker components.
Next step: Follow only the manual's safe bin-handling guidance for a visible, loose obstruction. If the bin is stuck, the ice maker is cracked, or production remains absent with normal cooling and supply, arrange qualified diagnosis.
Stop if: Do not chip ice with a sharp object, pour hot water into the ice maker, force the auger, or remove internal panels.
Why this matters
Why: A clump in the removable bin can prevent dispensing or make the bin appear empty, but it does not prove that the ice-maker motor, valve, or control is healthy. A stuck or damaged assembly is outside safe user repair.
-
Check 7
After a safe correction such as enabling the normal control, seating the bin, or clearing an external obstruction, leave the freezer operating normally and observe one model-appropriate production period rather than repeatedly cycling the control.
Expected result: Record ice production returning, no production despite normal cooling and supply, a leak, a new warning, or a worsening cooling problem.
Next step: For restored production, monitor without changing the internal mechanism. For no production after the documented startup period, or for any leak, warning, or cooling deterioration, stop and contact qualified Electrolux service.
Stop if: Do not repeatedly reset, bypass, or disassemble the ice maker to force a cycle.
Why this matters
Why: Electrolux notes that a newly installed ice maker may not fill immediately. If the model-specific startup period has passed and no ice returns, the remaining fault requires diagnosis rather than more invasive testing.
Use your observations
Decision map
Find the observation that best matches what you see, then follow the next safe action.
-
PATH 01Safety boundary
What you see
The exact model documentation and ordinary-access inspection show that the freezer has no fitted ice maker.
Do this next
Use only an accessory or installation option explicitly supported by the model documentation; do not modify the appliance yourself.
Why this path and its safety boundary
Why it matters: Electrolux says some top-freezer configurations do not include an ice maker, so there is no ice-making fault to repair in that configuration.
Safety stop: Stop if the proposed solution requires drilling, internal wiring, or adding an unapproved water connection.
-
PATH 02Safety boundary
What you see
The ice maker is present, but its normal control is off, the signal arm is in the stop position, or the bin is full or incorrectly seated.
Do this next
Use the model manual to restore the normal enabled position and seat the bin without force, then allow the documented startup period.
Why this path and its safety boundary
Why it matters: The ice maker can be intentionally stopped by its control or full-bin signal, and a misseated bin can prevent normal operation.
Safety stop: Do not bypass the signal arm, rotate the mechanism, or force a stuck bin.
-
PATH 03Safety boundary
What you see
The visible supply is absent, kinked, apparently disconnected, or leaking.
Do this next
Use the normal control to stop ice making if the manual permits, keep clear of wet electrical areas, and arrange qualified appliance or plumbing service.
Why this path and its safety boundary
Why it matters: The ice maker lacks a safe, reliable fill path, or water has created a potential property and electrical hazard.
Safety stop: Do not loosen fittings, cut tubing, remove the inlet valve, or continue operation during an active leak.
-
PATH 04Safety boundary
What you see
The freezer is warm, lacks normal power or control response, displays a persistent warning, or repeatedly trips electrical protection.
Do this next
Protect food according to applicable food-safety guidance, stop using the appliance for diagnosis, and arrange qualified service.
Why this path and its safety boundary
Why it matters: Ice production is secondary to a freezer cooling or electrical fault; repeated ice-maker resets cannot correct it.
Safety stop: Do not open electrical areas, test live circuits, bypass protection, or keep operating a freezer with smoke, arcing, or burning odor.
-
PATH 05Safety boundary
What you see
Vents are obstructed, the door does not close or seal, or frost is blocking airflow.
Do this next
Correct only a visible package obstruction and close the door normally. Use the exact manual's defrost procedure or request service when frost or seal failure persists.
Why this path and its safety boundary
Why it matters: Electrolux links blocked circulation, poor door closure, and humid air with freezer frost and impaired cooling, all of which can reduce ice production.
Safety stop: Do not scrape, heat, or dismantle the freezer interior to remove frost.
-
PATH 06Safety boundary
What you see
The ice maker is fitted and enabled, the bin is normal, the visible supply is intact, the freezer cools normally, and no ice appears after the model's documented startup period.
Do this next
Stop user troubleshooting and request qualified Electrolux diagnosis with the model, control position, cooling result, supply observations, and symptom timeline.
Why this path and its safety boundary
Why it matters: A fill valve, ice-maker control or sensor, mold, or internal wiring fault remains possible, but the symptom does not identify which part has failed.
Safety stop: Do not remove panels, apply external power, force a harvest cycle, or replace a part based only on no-ice symptoms.
-
PATH 07Safety boundary
What you see
Water is reaching electrical areas, wiring is exposed or damaged, there is smoke or a burning odor, the freezer repeatedly trips protection, or the appliance has severe physical damage.
Do this next
Stop using the appliance, keep people away from the hazard, and contact appropriate qualified emergency or appliance service. If there is fire or immediate danger, leave and contact local emergency services.
Why this path and its safety boundary
Why it matters: These signs indicate a potential electrical, fire, water, or food-safety hazard beyond ordinary troubleshooting.
Safety stop: Do not restart the appliance, touch damaged wiring, pour water into the unit, or investigate behind covers.
Helpful context
Understand the symptom
First separate an ice-maker problem from a freezer problem
The phrase "not making ice" can describe an absent ice maker, a disabled ice maker, a missing water supply, a full or misseated bin, or a freezer that is not cooling. Electrolux notes that some top-freezer models do not include an ice maker, so the model manual and the visible appliance configuration come first. If the freezer itself is warming, treat cooling and food-safety concerns as the priority rather than repeatedly resetting the ice maker.
Use external observations to narrow the branch
An ice maker needs a stable freezer, an enabled control, a correctly positioned bin or signal arm, and a working water path. Check only what is visible through ordinary access: the display or interior light, the freezer's cooling behavior, clear vents, the closed door, the seal, and any water around the appliance. Do not remove an internal cover, force a frozen mechanism, bypass the signal arm, or perform electrical or plumbing tests.
When a visible check does not restore production
If the ice maker is enabled, the bin is correctly installed, the water supply appears intact, and the freezer cools normally but no ice is produced after the model's normal startup period, the fault may be in the fill valve, ice-maker control or sensor, mold, or related wiring. These parts cannot be identified from the symptom alone. Give the technician the model information, the date of the last batch, the control position, cooling observations, and any leak, frost, or warning details.
Safety boundary
Stop conditions
- Stop immediately for an active water leak, water near electrical components, exposed or damaged wiring, smoke, burning odor, repeated electrical trips, severe physical damage, or a freezer that is warming food.
- Do not remove panels, liners, the ice-maker housing, or electrical covers; do not test live wiring, bypass the signal arm, or apply external power.
- Do not loosen water fittings, cut tubing, pour hot water into the ice maker, scrape frost with a sharp tool, force a stuck bin, or chip ice with metal tools.
- Do not repeatedly reset or force ice-maker cycles when the freezer is not cooling, a warning persists, the control is jammed, or no ice returns after the model-specific startup period.
- Do not select a replacement valve, control, sensor, or ice-maker assembly from the symptom alone; fitment and diagnosis belong to the exact model and qualified technician.
Only after diagnosis
Potential parts
- ice-maker assembly
Consider this category only if qualified diagnosis confirms that the fitted ice maker itself fails to harvest or fill after cooling, control, bin, and water-supply conditions are verified.
Confirm the exact Electrolux model and technician diagnosis before selecting a part; do not force or replace the assembly based on no ice alone. - water inlet or fill valve
Consider this category only when service diagnosis identifies a restricted or failed fill valve after the visible supply is intact and no leak is present.
Confirm model-specific fit and water-system requirements with the technician; valve access and plumbing disconnection are not user troubleshooting. - ice-maker control or sensor assembly
Consider this category only if qualified testing links the no-ice symptom to the control or sensor after normal cooling, bin position, and water delivery are confirmed.
Confirm the exact model and professional diagnosis; do not bypass the signal arm or substitute a control by appearance.
When checks do not resolve it
Need a professional?
Arrange qualified Electrolux service when no ice remains after the ice maker is confirmed, enabled, supplied with water, and given the model's normal startup period; when the freezer is not cooling; or when a control, bin, door seal, frost condition, leak, warning, or electrical symptom cannot be corrected through ordinary safe access.
Safety scope: This article covers model-manual lookup, ordinary-access visual checks, normal user controls, visible airflow and seal checks, and non-invasive observation only. A qualified technician must handle internal panels, electrical measurement, water-valve work, refrigerant or sealed-system work, ice-maker component testing, and wiring.
Common questions
FAQ
How do I know whether my Electrolux freezer has an ice maker?
Check the exact model manual and ordinary-access configuration for an ice bin and normal ice-maker control or signal arm. Electrolux notes that some top-freezer configurations do not include an ice maker, so an absent assembly is not an ice-maker failure.
Why is my Electrolux freezer not making ice after installation?
Initial production may be delayed. Confirm that the fitted ice maker is enabled, the bin is seated, the water supply is intact, and the freezer is cooling normally, then allow the startup period documented for the exact model. Contact service if production does not begin after that period.
Can a full or misplaced ice bin stop an Electrolux freezer from making ice?
Yes. A full bin can signal the ice maker to stop, and a bin that is not seated as the manual shows can prevent normal operation. Restore only the normal position without forcing the mechanism or reaching inside it.
What if the Electrolux freezer is also warm or has heavy frost?
Treat the broader cooling, airflow, door, or frost condition as the priority. Check only visible obstructions and normal door sealing; arrange service for warming food, persistent warnings, recurring frost, a failed seal, or any need to remove panels.
Should I replace the Electrolux ice-maker valve or control myself?
No. No-ice symptoms do not identify a valve, control, sensor, or ice-maker failure. Internal electrical, water-valve, wiring, and ice-maker testing should be performed by a qualified technician using the exact model information.
Read the exact guide
Official sources
- Ice forms on the bottom of my freezerElectrolux · Electrolux support guidance for integrated and freestanding freezers; it supports airflow, door, and frost decisions but does not identify a particular ice-maker component.
- Refrigerators - How do I use my ice maker in my Top-Freezer refrigerator?Electrolux · Electrolux support guidance for top-freezer refrigerator configurations with an installed ice maker; the exact model manual controls applicability.
- My fridge freezer is not workingElectrolux · Electrolux support guidance applying to freezers, chest freezers, and fridge freezers; the exact model manual controls the normal controls and settings.
Community feedback
Share a repair observation
Share a plain-text repair observation. Accepted observations are published automatically; this page may take a moment to update.