
On this page
Start here
Quick answer
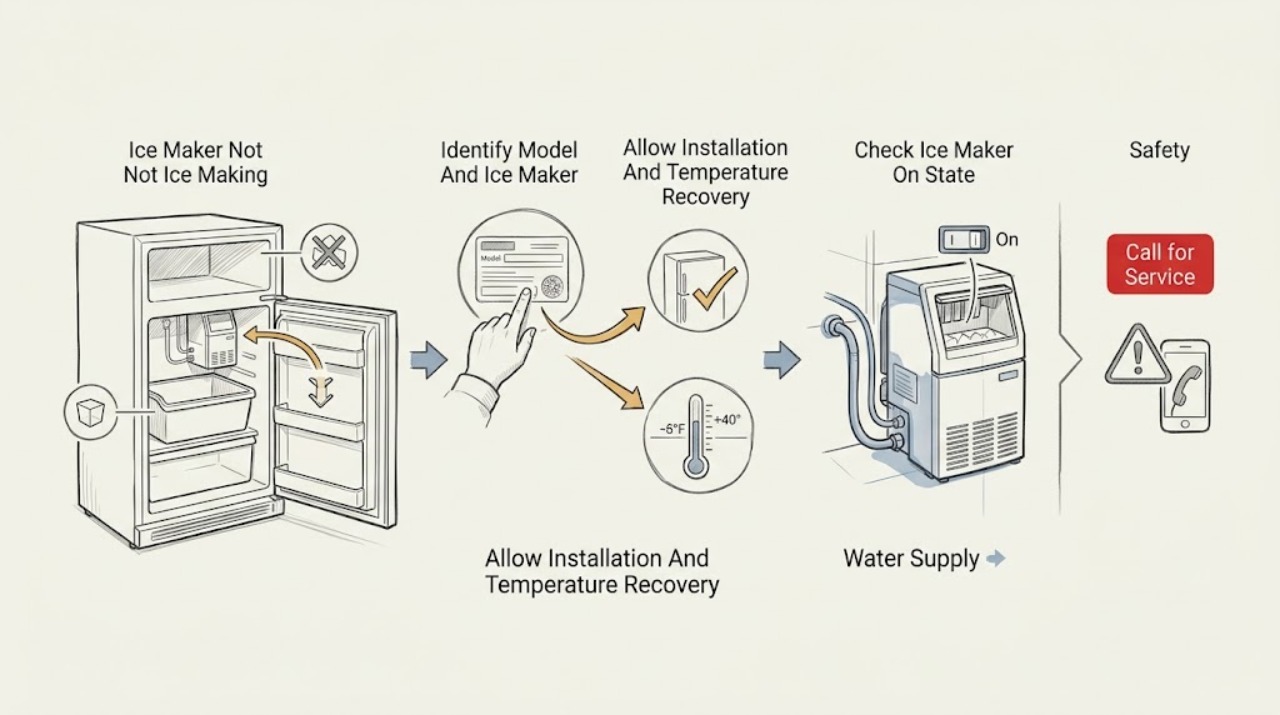
First confirm that the Electrolux refrigerator actually has an installed ice maker, that the ice-maker control is ON, the water valve and plumbing are connected, the ice bin is seated, and the freezer has had time to cool. A newly installed unit may produce little or no ice during its first 24 hours because air is still in the water lines; Electrolux says a top-freezer ice maker can take about 1 to 2 days to fill its bin. If the refrigerator has a lock or high-temperature indication, resolve that model-specific state first. Check for an empty or jammed bin, an incorrectly positioned wire signal arm where fitted, and a filter or water path problem only as described in the exact owner's manual. A fill valve, ice-maker motor, thermostat or sensor, wiring, or control fault is not an owner repair: stop if there is a leak, electrical odor, damaged wiring, or repeated alarm and arrange qualified service.
Before you begin
Safety first
- The owner may identify the model, use documented controls, confirm a visible water valve and line, seat the bin, and clear only an accessible jam or filter condition authorized by the manual. Qualified service must handle the fill valve, ice-maker motor, thermostat/sensor, wiring, control, internal water path, and live diagnosis.
Work through in order
Diagnostic checks
Use only checks that match the exact appliance or system and its official guide.
-
Check 1
Record the refrigerator's complete model and identify whether the ice maker is in a freezer compartment, door, or separately installed top-freezer assembly. Note whether the ice bin is empty, partially filled, or full and whether the complaint is no ice production or only no dispensing.
Expected result: The model confirms an installed ice maker, the model is unknown, the bin contains ice but the dispenser is blocked, or the bin is empty with no visible harvest/fill activity.
Next step: Use the matching Electrolux owner's manual before changing controls or removing a bin. If the model does not have an installed ice maker, do not treat the refrigerator as an ice-maker failure; if the model cannot be identified, contact Electrolux support with the rating-label information.
Stop if: Do not remove covers or reach into the ice-maker assembly to identify its configuration.
Why this matters
Why: The exact architecture determines the location of the ON control, signal arm, filter, water path, and bin mechanism. Ice in the bin shifts the problem toward dispensing; an empty bin keeps production, temperature, water, and ice-maker controls in scope.
-
Check 2
If the refrigerator was newly installed, recently powered off, or had a long door-open or high-temperature event, allow the model's documented cooling period before judging production. Keep doors closed as much as practical and record whether any ice appears after the first 24 hours.
Expected result: The unit has been installed or recovering for less than 24 hours, a top-freezer bin has not yet had 1 to 2 days to fill, a high-temperature/power alarm remains, or the freezer is stable but still produces no ice.
Next step: Wait the model-specific period and discard initial ice or purge water only as the owner's manual directs. If a high-temperature alarm persists or the refrigerator is not cooling, stop treating this as an ice-maker-only issue and arrange service.
Why this matters
Why: Initial plumbing air and temperature stabilization can account for empty cycles and slow first production. A stable refrigerator with no production after the documented wait moves the diagnosis toward ON state, water, bin, filter, or the ice-maker assembly.
-
Check 3
Check the ice-maker ON indicator or control. On a top-freezer model with a wire signal arm, confirm the bin is pushed fully back and the arm is lowered to the documented down/ON position; on electronic models, use only the model's display control. Confirm the bin is not full.
Expected result: The ice maker is OFF, the signal arm is raised, the bin is not seated, the bin is full, or the control and bin are correctly positioned but no ice is produced.
Next step: Turn the ice maker ON or lower the signal arm only as the matching manual shows, then allow a normal cycle. If the control will not stay ON, the arm is damaged, or a correctly positioned bin does not permit production, arrange service.
Stop if: Do not hold the arm down, defeat a bin sensor, or force the bin into place.
Why this matters
Why: An OFF control, raised arm, unseated bin, or full-bin signal can intentionally stop production. A correctly seated, non-full bin with the ice maker ON makes water, freezer temperature, or the ice-maker mechanism more likely.
-
Check 4
From a dry, safe position, confirm the refrigerator's water valve is open and the visible supply line is connected without an obvious kink. If the exact model has a user-accessible water filter, check its seating, age, cracks, and the manual's replacement/priming instruction without forcing the housing.
Expected result: The water supply is off or kinked, the line or filter leaks, the filter is not seated or is cracked, water dispensing is absent/slow, or the visible supply and model-approved filter state are correct.
Next step: Restore only an obvious external valve or correctly seat/prime a model-approved filter according to the owner's manual. If there is a leak, damaged filter housing, no water with a correct supply, or an internal valve issue, stop and request service.
Stop if: Do not disconnect pressurized tubing, remove an internal water valve, or test a fill solenoid with power applied.
Why this matters
Why: An ice maker cannot fill without water. A supply, filter, or trapped-air condition can produce an empty tray without proving that the ice-maker motor or valve has failed; a correct external water path shifts attention to temperature or internal components.
-
Check 5
Read the refrigerator display for a lock, high-temperature, power-failure, or ice-jam indication. If ice is present in the bin but will not dispense, inspect only the accessible chute and bin area as the exact manual permits; do not confuse a dispenser jam with no ice production.
Expected result: The display is locked, a high-temperature or power alarm is active, DI SP is shown, the chute/bin is visibly jammed, or there is no lock/alarm/jam and the bin remains empty.
Next step: Clear the lock, allow temperature recovery, or clear only an accessible ice jam using the model's instructions. If an alarm returns, the freezer cannot hold temperature, or the bin is empty after those conditions clear, arrange service.
Stop if: Do not chip ice with sharp tools, reach into a powered auger, or open the control or ice-maker housing.
Why this matters
Why: Electrolux says a locked display prevents water or ice dispensing, high-temperature alarms can persist until temperature normalizes, and DI SP indicates an ice jam in the chute. None of these indications alone identifies a failed ice-maker module.
-
Check 6
After the model-specific ON, water, bin, and cooling checks, observe one normal production window without repeatedly cycling power. Record whether the ice maker calls for water, harvests, freezes but does not eject, or stays completely silent, along with any code or leak.
Expected result: Ice production resumes, the tray freezes but does not harvest, the maker never fills or harvests, a code/alarm returns, or water/electrical symptoms appear.
Next step: Keep the appliance in its normal safe state and arrange qualified Electrolux service for a persistent no-ice condition, returning alarm, leak, or internal symptom. Provide the model, time since installation/power recovery, controls, water/filter observations, and the cycle pattern.
Stop if: Do not remove panels, force a harvest cycle, jump terminals, perform live voltage tests, or replace internal ice-maker parts without model-qualified service.
Why this matters
Why: A return to production supports a control, water, air-in-line, bin, or temperature condition. A freeze-without-harvest or silent maker pattern points toward the internal motor, thermostat/sensor, fill valve, wiring, or control, which cannot be safely separated by an owner.
Use your observations
Decision map
Find the observation that best matches what you see, then follow the next safe action.
-
PATH 01Next step
What you see
The refrigerator is newly installed, recently powered off, or still recovering from a high-temperature event, and fewer than the model's documented first-production hours have passed.
Do this next
Allow the documented cooling period, keep the ice maker ON with a connected water supply, and reassess after 24 hours or the model's stated period. Escalate a persistent high-temperature alarm or no cooling separately.
Why this path and its safety boundary
Why it matters: Air in new plumbing and temperature stabilization are more likely than a failed ice-maker assembly. Electrolux documents empty first cycles and delayed bin filling for applicable models.
-
PATH 02Next step
What you see
The ice maker is OFF, a wire signal arm is raised, the bin is not seated/full, the water valve is closed, or visible plumbing/filter conditions are wrong.
Do this next
Correct only the model-documented ON, bin, valve, or filter/priming condition, then allow a normal cycle. If the control will not stay on, water leaks, or no fill follows a correct supply, arrange service.
Why this path and its safety boundary
Why it matters: A deliberate stop state or missing water path is more likely than an internal motor or control failure. A full bin can stop production normally, while an unconnected water supply can cause valve noise on applicable models.
-
PATH 03Next step
What you see
A lock, high-temperature, power-failure, or DI SP indication is present, or the bin contains ice but the door dispenser cannot deliver it.
Do this next
Clear only the documented lock or accessible jam and allow temperature recovery. If the alarm returns, the freezer remains warm, or ice production is absent after the dispenser issue is cleared, contact qualified service.
Why this path and its safety boundary
Why it matters: The observed symptom is a refrigerator state or dispensing path issue rather than proof that the ice maker failed to make ice. Electrolux identifies lock, temperature, and chute-jam conditions separately.
-
PATH 04Next step
What you see
The ice maker is ON, the bin is correctly seated and not full, water and temperature conditions are normal, and no ice is made after the model's production window; or the tray freezes but never harvests/fills.
Do this next
Leave the assembly closed and arrange qualified Electrolux service. Supply the model, production timing, temperature/alarm history, water/filter state, and whether the maker was silent, frozen, or failed to eject.
Why this path and its safety boundary
Why it matters: An internal fill valve, motor, thermostat/sensor, wiring, or control fault is more likely. External checks cannot distinguish those components and forcing a harvest or live test creates a safety risk.
Helpful context
Understand the symptom
Start with the refrigerator configuration
Electrolux applies its ice-maker guidance across French-door, side-by-side, and top-freezer refrigerators, but the controls and ice-maker location differ. Not every top-freezer refrigerator includes an ice maker, and some are installed separately. Record the complete refrigerator model before borrowing a button sequence or a wire-arm instruction from another design. A full bin can also stop production normally, so an empty dispenser is not the same symptom as an ice maker that never freezes or fills.
Allow for first-use and temperature recovery
New plumbing contains air, which Electrolux says can cause two or three empty ice cycles. After installation, the refrigerator needs several hours to cool and may produce ice within 24 hours; a top-freezer bin may take roughly 1 to 2 days to fill if no ice is used. A recent power interruption or a high-temperature indication likewise calls for temperature stabilization, not repeated forced cycling. Use the matching owner's manual for the freezer setting and wait period.
Separate ice making from dispensing
If the ice bin contains new ice but the door does not dispense it, the issue may be a locked display, an open door, a jammed chute, or an auger/bin alignment problem rather than a failed ice-making cycle. Conversely, an empty bin with no harvest or fill sound points upstream to the ON state, water, temperature, or the ice-maker assembly. Do not force an auger, rotate a bin mechanism without the model instructions, or reach into a moving assembly.
Keep internal diagnosis out of owner checks
The accessible checks end at the model's controls, water valve and visible plumbing, bin seating, signal arm where fitted, and a clean, unobstructed external area. An ice-maker fill valve, motor, thermostat, sensor, harness, control board, or frozen internal water path requires model-specific diagnosis. If water leaks, a wiring or electrical smell appears, an alarm repeatedly returns, or the refrigerator cannot maintain safe temperature, leave it off as appropriate and arrange qualified service.
Safety boundary
Stop conditions
- Do not reach into a moving ice-maker or auger assembly, force a bin or signal arm, or defeat a bin/door safety sensor.
- Do not chip ice with sharp tools, remove cabinet panels, jump terminals, or force a harvest cycle as an owner test.
- Do not disconnect internal water tubing, replace a fill valve or ice-maker module, or perform live electrical tests.
- Do not continue operating with a water leak near electrical parts, burning odor, damaged wiring, repeated breaker trips, or persistent high-temperature alarm.
- Do not transfer a control, filter, signal-arm, reset, or error-code procedure from another Electrolux refrigerator model.
When checks do not resolve it
Need a professional?
Contact qualified Electrolux service when no ice is produced after the model's installation or temperature-stabilization window despite the ice maker being ON, the bin seated, water connected, and no lock/jam condition; when the maker freezes but does not harvest, remains silent, leaks, or a code/alarm returns. Stop immediately for water near electrical parts, burning odor, damaged wiring, repeated breaker trips, or a refrigerator that cannot maintain safe temperature.
Safety scope: The owner may identify the model, use documented controls, confirm a visible water valve and line, seat the bin, and clear only an accessible jam or filter condition authorized by the manual. Qualified service must handle the fill valve, ice-maker motor, thermostat/sensor, wiring, control, internal water path, and live diagnosis.
Common questions
FAQ
How long should an Electrolux refrigerator take to make ice after installation?
Electrolux says new plumbing air can cause two or three empty cycles, and the ice maker may produce ice within 24 hours after the refrigerator has cooled. A top-freezer bin may take about 1 to 2 days to fill when ice is not being used.
How do I know whether my Electrolux ice maker is turned on?
Use the exact refrigerator manual. On applicable top-freezer models, the wire signal arm is down for ON and the bin must be pushed fully back; electronic models use a display indicator instead. Do not hold the arm down or defeat a sensor.
Can a full ice bin make an Electrolux ice maker stop producing?
Yes. Electrolux says applicable ice makers turn off automatically when the ice container/bin is full. Confirm the bin is correctly seated and allow a normal cycle after ice is used.
What if my Electrolux refrigerator has ice but will not dispense it?
That is a dispensing symptom rather than proof of no ice production. Check the display lock, door closure, and accessible chute/bin for a jam using the model manual. DI SP indicates an ice-chute jam on the cited Electrolux alarm guide; an empty bin requires production checks instead.
When should I call for Electrolux ice-maker service?
Call when the maker is ON, the bin is seated and not full, water is connected, and the refrigerator has stabilized but no ice is produced; also call for a frozen-but-not-harvesting tray, recurring alarm, leak, internal noise, or silent assembly. Do not remove panels or perform live tests.
Read the exact guide
Official sources
- Refrigerators - How do I use my ice maker in my Top-Freezer refrigerator?Electrolux Owner Support · Opened official Electrolux support article; its wire-arm and timing instructions are limited to top-freezer units with an installed ice maker.
- My refrigerator was just installed and the ice maker is not working, how do I fix it?Electrolux Owner Support · Opened official Electrolux support article; it applies to French-door, side-by-side, and top-freezer refrigerators and addresses the initial no-ice condition after installation.
- What do the alarms or error messages mean on my Four-Door refrigerator?Electrolux Owner Support · Opened official Electrolux support article; its alarm meanings are model-dependent and should be checked against the matching owner's manual.
Community feedback
Share a repair observation
Share a plain-text repair observation. Accepted observations are published automatically; this page may take a moment to update.