
On this page
Start here
Quick answer
First separate a completely dead oven from an oven whose display works but will not start heating. Check the visible wall switch, plug or isolator, and household breaker or fuse once, without opening the cabinet. If the display is lit, check for a locked control panel, an unset clock, automatic or delayed cooking, Demo mode, and a selected cooking function and temperature; close the door and allow the documented preheat sequence. On a gas model, stop if you smell gas and do not attempt ignition or internal gas work. If power is present but the oven remains dead, a fault code returns, the breaker trips, wiring is damaged, or a reset does not restore operation, leave it off and arrange a Fisher & Paykel trained technician or qualified electrician.
Before you begin
Safety first
- Do not open the cabinet, test live terminals, bypass door or thermal protection, alter domestic wiring, or work on gas components. Fisher & Paykel directs non-user servicing to a trained and supported technician.
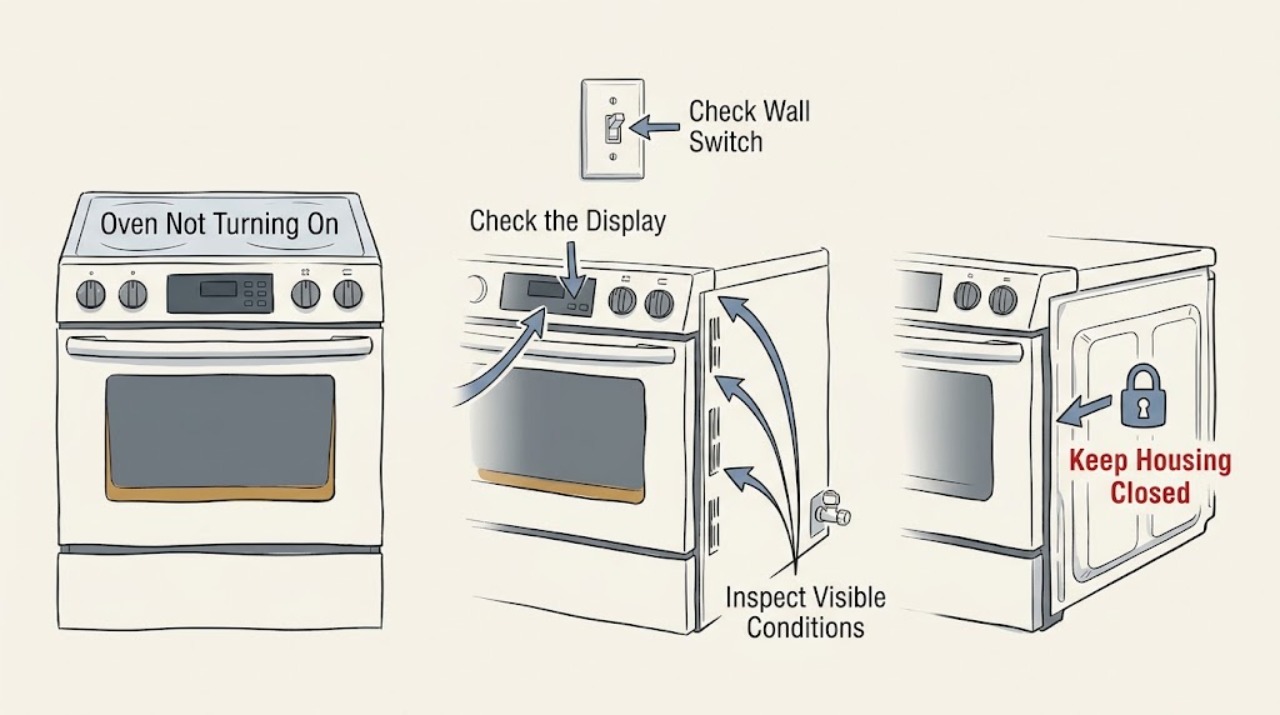
Work through in order
Diagnostic checks
Use only checks that match the exact appliance or system and its official guide.
-
Check 1
Stand at the oven without removing trim or covers and check the visible operating signs: display, control halos or indicators, interior light, fan, and any code. Confirm whether the complaint is ‘nothing responds’ or ‘the display responds but the cavity does not heat.’
Expected result: No display, light, or indicator suggests a supply, isolator, fuse, or control-power problem. A lit display with responsive controls means power reaches at least part of the appliance, so continue with the clock, mode, lock, door, and temperature checks. A light alone does not prove that the heating circuit is safe or energized.
Next step: Write down the model and all visible indicators. If the oven is completely dead, go to the external supply check; if the display is usable, continue to the control-state check.
Why this matters
Why: Fisher & Paykel troubleshooting treats no power and no display as a different path from an oven that does not heat while the screen or controls are on. Separating these symptoms prevents an unnecessary heating-element diagnosis on an oven that is not receiving supply.
-
Check 2
For a blank or dead oven, check only the accessible supply controls: make sure the wall switch or isolator is on, verify a plug is seated if the model uses a plug, and inspect the household breaker or fuse indication. Reset a tripped breaker once only if there is no sign of damage, moisture, smoke, or a gas event.
Expected result: If the breaker or fuse immediately trips again, or the wall control is hot, scorched, wet, or loose, the fault is not a user reset. If supply is restored and the display returns, the original symptom was consistent with an interruption, but a repeat outage still needs diagnosis. If the supply appears present and the oven remains blank, the appliance-side control or wiring needs service.
Next step: Leave the oven off and arrange a qualified electrician or Fisher & Paykel service when the breaker will not hold, the supply cannot be verified safely, or the display stays blank after a confirmed supply.
Why this matters
Why: Fisher & Paykel manuals direct owners to check the circuit breaker, fuse box, wall power, and local outage for a no-power or no-heating symptom. A reset does not prove that the oven's internal circuit is sound, and hard-wired ovens must not be opened by an ordinary user.
-
Check 3
If the display is lit, inspect the control state before testing heat: look for a lock symbol or unresponsive controls, an unset or flashing clock, Demo mode, automatic or delayed cooking, a Cancel state, or an event code. Use the exact model guide to unlock, set the clock, cancel automatic cooking, or disable Demo mode; do not guess a hidden key sequence.
Expected result: A locked panel may ignore normal touches. Some Fisher & Paykel guides state that the oven will not function until the clock is set; other models identify Demo mode when the display works but the oven does not heat. If a mode or code disappears after the documented setting change, the oven can be tested normally. If the same state returns, it is not a reason to remove the control panel.
Next step: After one documented correction, select a normal cooking function and temperature. If controls remain unresponsive or a fault code returns, record the code and arrange service.
Why this matters
Why: A responsive display does not always mean that a cooking cycle is authorized. Clock, lock, automatic-cooking, and Demo settings vary by model, so the model number and manual determine the safe control action.
-
Check 4
With the door closed and the cavity empty of loose or combustible material, select a standard bake or equivalent cooking function and a temperature supported by the model, then start it according to the control guide. Watch for a preheat indicator, temperature change, light, or fan; do not repeatedly open the door to check.
Expected result: If the control accepts the function and the oven begins its documented preheat, the original issue was likely a mode, clock, door, or selection state. If the display counts or responds but no heat develops, check the door-closed and temperature-selection branch once. If the display remains on but the controls do not start any function, treat it as a control or service issue.
Next step: Allow the normal preheat indication to complete once. If there is still no heat with a closed door, do not test element terminals or continue cooking; arrange qualified diagnosis.
Why this matters
Why: Fisher & Paykel documentation distinguishes an oven that is not heating from one that has no power. On some models the heating elements are disabled while the door is open, and the guide requires a cooking function and temperature before preheat begins.
-
Check 5
If the oven is part of a gas range or has a gas oven supply, confirm only the external condition: the appliance's gas control is in the documented position, there is no gas odor, and other household gas appliances behave normally. Do not repeatedly turn a control to ignite, remove burner parts, or inspect an internal gas valve.
Expected result: No gas supply can prevent a gas oven from operating even when electrical indicators work. A gas smell, hissing, failed ignition with persistent odor, or an outage affecting other appliances is an immediate stop condition, not a troubleshooting invitation.
Next step: If gas is absent without danger, contact the gas supplier or qualified service route. If gas is smelled, leave the area and use the local emergency gas procedure; do not operate switches or create an ignition source nearby.
Why this matters
Why: Fisher & Paykel range troubleshooting lists loss of gas supply separately from loss of electrical supply. Gas delivery, ignition, and combustion faults require the local gas supplier or a qualified appliance technician, and the safe response to odor takes priority over restoring the oven.
-
Check 6
If an F__ or other event code appears, photograph or write the exact code and note whether it appeared after a power interruption, cleaning cycle, overheating, or a failed start. Use the model manual's documented reset once; for a service-only code, leave the oven off.
Expected result: A code that clears and does not return may have followed a transient interruption, but a returning code, blank display, unresponsive controls, or repeated loss of heat indicates an unresolved fault. Do not substitute a generic code list for the exact model guide.
Next step: Give service the model, serial information, exact code, supply status, control behavior, and whether the oven heats. Stop immediately if the reset causes arcing, odor, smoke, or a breaker trip.
Why this matters
Why: Fisher & Paykel's user guides direct the owner to remove power and restore it for certain F__ messages, then record the code and contact Customer Care or a trained technician if it persists. This is a controlled reset, not permission to diagnose energized internal circuits.
Use your observations
Decision map
Find the observation that best matches what you see, then follow the next safe action.
-
PATH 01Next step
What you see
The display, interior light, and control indicators are all off.
Do this next
Check the visible wall switch or isolator and household breaker or fuse once. If supply is confirmed but the oven remains dead, arrange qualified electrical or Fisher & Paykel service; do not remove the oven from its cabinet.
-
PATH 02Next step
What you see
The display is lit but controls are locked, the clock is unset, or automatic cooking or Demo mode is shown.
Do this next
Use only the exact model guide's documented control action, then select a normal function and temperature. If the state returns or controls remain unresponsive, record it and request service.
-
PATH 03Next step
What you see
The oven accepts a function but does not heat with the door closed and a temperature selected.
Do this next
Allow the normal preheat interval once without repeatedly opening the door. If there is still no heat, stop using it and have the heating, sensor, relay, or supply circuit diagnosed by a trained technician.
-
PATH 04Next step
What you see
The oven is a gas model and gas is absent, ignition fails, or gas odor is present.
Do this next
For an ordinary supply outage without odor, contact the gas supplier or qualified service. For any gas odor or hissing, leave the area and follow local emergency gas guidance; do not operate the appliance or electrical switches nearby.
-
PATH 05Next step
What you see
An F__ or other fault code returns after the model-documented reset.
Do this next
Leave the oven off, preserve the code and model information, and contact Fisher & Paykel Customer Care or a trained service technician.
-
PATH 06Next step
What you see
The breaker trips again, the supply control is hot or damaged, or there is smoke, arcing, water, a burning smell, or a cracked door pane.
Do this next
Stop immediately and keep the oven disconnected if safe. Arrange qualified electrical or appliance service; do not retry the breaker or use the oven.
Helpful context
Understand the symptom
Identify what ‘not turning on’ means
Fisher & Paykel makes wall ovens, range ovens, and combination or speed ovens with different controls. A blank display and no light are a supply or control symptom; a lit display with no heat can be an unset clock, locked or Demo mode, automatic cooking, an unselected function or temperature, an open door, or a heating fault. Record the exact model from the identification plate, what the display or control halos do, whether the oven light responds, and any F__ code before changing settings.
Stay outside the electrical and gas enclosure
Do not remove panels, test live terminals, bypass a door switch or thermal protection, or work on the gas valve, igniter, or wiring. Fisher & Paykel manuals require the appliance to be disconnected from mains power before electrical work and direct other servicing to a trained technician. If there is smoke, a burning smell, arcing, a damaged cord, water on the controls, a hot or cracked door, a gas odor, or repeated breaker trips, stop using the oven. Turn off the gas supply only if it is safe and appropriate for the installation, leave the area if gas is present, and contact the relevant emergency or qualified service provider.
Safety boundary
Stop conditions
- Stop for gas odor or hissing, smoke, flames, arcing, a burning smell, a damaged cord, water near electrical controls, a cracked or shattered door pane, or a breaker that trips again.
- Do not remove cabinet panels, test live voltage, bypass door or thermal safety devices, open a gas line, replace an igniter or control on an unverified model, or use adapters or improvised wiring.
- Stop after one documented external reset when the oven remains dead, a fault code returns, or a lit display still produces no heat. Preserve the model, code, and symptom history for service.
Only after diagnosis
Potential parts
- oven control board or user interface
Consider this class only when a technician confirms that supply is correct but the display, controls, or mode logic fails after the documented reset.
Confirm the complete model and control revision; Fisher & Paykel ovens use different interfaces and service procedures. - oven thermal cutout or temperature sensor
Consider this class only when a qualified diagnosis links persistent no-heat or fault-code behavior to the protection or sensing circuit.
Do not bypass thermal protection or infer fit from appearance; verify the exact model and electrical ratings through service documentation. - gas oven igniter or ignition component
Consider this class only for a gas model when external gas supply is safe and a qualified technician confirms an ignition fault rather than a supply or control problem.
Gas and electrical work must follow model-specific service instructions and local requirements; do not test or replace it as a live DIY repair.
When checks do not resolve it
Need a professional?
Arrange Fisher & Paykel Customer Care, a trained service technician, or a qualified electrician when power is present but the oven stays blank, a breaker or fuse will not hold, the display is on but a normal function will not heat, an F__ code returns, the door or controls are damaged, or a gas-supply or electrical safety condition is involved.
Safety scope: Do not open the cabinet, test live terminals, bypass door or thermal protection, alter domestic wiring, or work on gas components. Fisher & Paykel directs non-user servicing to a trained and supported technician.
Common questions
FAQ
Why is my Fisher & Paykel oven display on but the oven will not start?
Check for a locked control, unset clock, automatic or delayed cooking, Demo mode, and a selected function and temperature. Close the door and use the exact model guide. If a normal cycle still will not heat or a code returns, arrange service.
What should I check when my Fisher & Paykel oven has no display?
Check the visible wall switch or isolator and household breaker or fuse once, provided there is no damage, moisture, smoke, or gas event. If confirmed supply does not restore the display, the oven needs qualified electrical or appliance diagnosis.
Can I keep trying to light a Fisher & Paykel gas oven that will not turn on?
No. If you smell gas or ignition fails with an odor, stop, leave the area, and follow local emergency gas guidance. A gas-supply or ignition repair belongs with the gas supplier or a qualified technician.
Read the exact guide
Official sources
- USER GUIDE NZ AU CONVECTION SPEED OVEN PROFESSIONALFisher & Paykel · Fisher & Paykel OM76NPX1 convection speed oven models; use control details conditionally and defer to the customer's exact guide
- TROUBLESHOOTINGFisher & Paykel · Fisher & Paykel RGV2 and RDV2 professional range models; apply gas and range-specific details only when the customer's configuration matches
- Help & SupportFisher & Paykel Appliances Ltd · Fisher & Paykel appliances; regional service options and manuals vary by product and location
- Oven | Wall Oven | Fisher & Paykel USAFisher & Paykel · Fisher & Paykel US wall-oven category; product-specific manuals remain authoritative for settings and service
Community feedback
Share a repair observation
Share a plain-text repair observation. Accepted observations are published automatically; this page may take a moment to update.