
On this page
Start here
Quick answer
First decide whether the GE Profile refrigerator is making no ice at all, making ice that will not dispense, or has lost water to both the icemaker and dispenser. For no production, confirm the icemaker is ON in the model's control panel or on-ice-maker switch, the feeler arm or paddle is not held up by clumped ice, and the freezer is at the model-recommended temperature; GE's general guidance lists 0°F for the freezer, 37°F for fresh food, and about 16°F at the icemaker mold before a cycle starts. Check the visible water supply and a model-matched filter, especially if dispenser flow is slow. A newly installed refrigerator or icemaker can need up to 24 hours to become cold enough. If the mold remains empty after these safe checks, if the fill tube may be frozen, or if the issue returns after a stuck-cube condition, keep the appliance in service-safe condition and arrange a technician; do not remove the icemaker, probe its heater or wiring, or perform live valve tests.
Before you begin
Safety first
- The owner may use model-authorized controls, inspect accessible ice-bin and feeler-arm conditions, check temperature settings, observe dispenser flow, and replace a confirmed model-matched filter. Qualified appliance service must handle icemaker removal, frozen fill-tube verification, valves, heaters, motors, controls, wiring, water-line disconnection, and live testing.
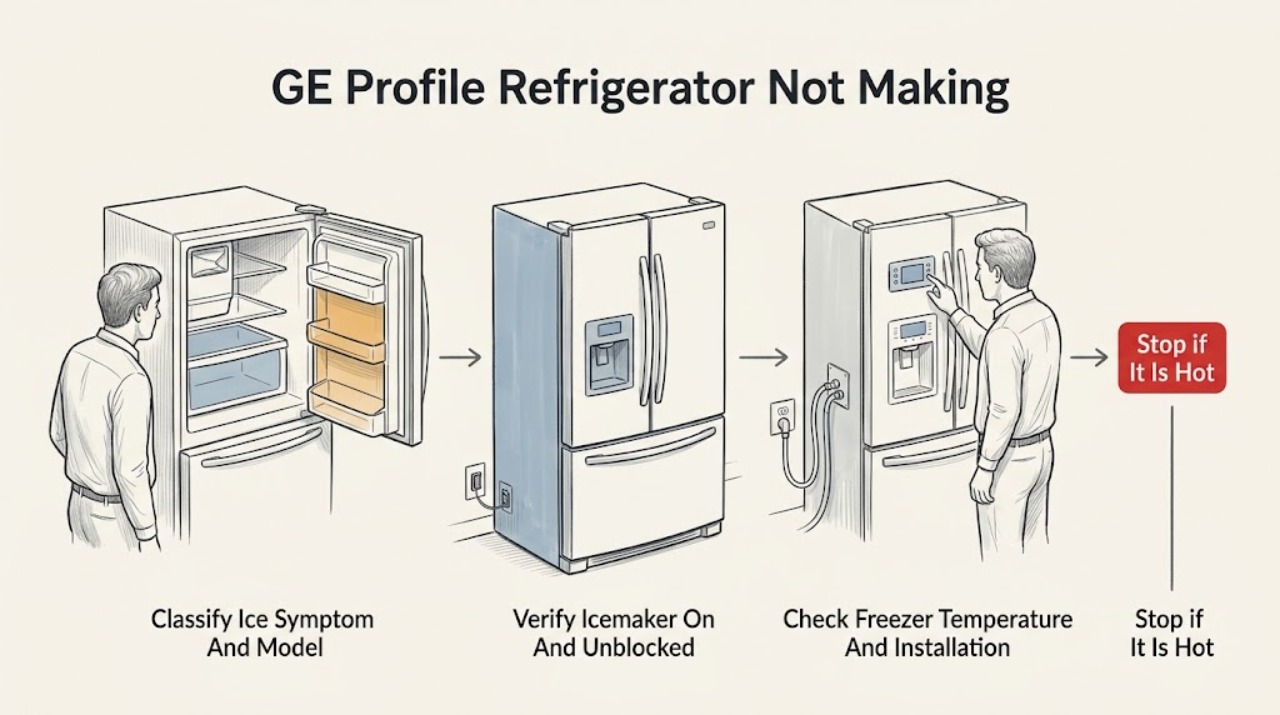
Work through in order
Diagnostic checks
Use only checks that match the exact appliance or system and its official guide.
-
Check 1
Read the complete model number and record the first failed function without removing covers. Decide whether the ice bin is empty, cubes are present but only the dispenser fails, the water dispenser is also slow or dry, or the refrigerator/icemaker was newly installed or recently moved. Note the icemaker location and any panel message or indicator.
Expected result: No cubes are being formed, cubes exist but do not dispense, both water functions have poor flow, the unit is new, or the control shows an icemaker state/message.
Next step: Use the exact owner's manual to identify the icemaker ON/OFF control and the model's ice-maker architecture, then follow only the matching checks below. If the refrigerator itself is not maintaining a safe cold temperature, address that service issue before treating this as an isolated ice problem.
Stop if: Do not guess a reset sequence, use a countertop ice-maker procedure, remove panels, or diagnose a dispenser-only complaint as failed ice production.
Why this matters
Why: An empty bin is a production problem; a full bin with a blocked dispenser is a different path. Shared poor water flow points to supply/filter conditions, while a working dispenser with an empty mold narrows attention toward the icemaker fill path. New installations have a separate waiting and air-purge phase.
-
Check 2
From a dry position, use the model's manual or control panel to verify that the refrigerator icemaker is ON. Look at the ice bin and the visible feeler arm or paddle, if fitted, for clumped cubes holding it in the stop position. Remove only loose, accessible ice that the manual permits you to remove; do not force the arm or reach into the mechanism.
Expected result: The icemaker is OFF, the feeler arm/paddle is held up or blocked by ice, the bin is overfilled/clumped, or the control is ON and the arm is free.
Next step: Correct the OFF setting using the model instructions and clear only a safe visible obstruction. If the arm cannot move freely, the ice is fused into the mechanism, or production does not resume after the visible obstruction is gone, stop and arrange service.
Stop if: Do not pry cubes from the mold, hold the arm down, defeat the stop mechanism, or run an unlisted harvest/diagnostic test.
Why this matters
Why: GE says icemakers may be turned off at the panel or on the icemaker, and ice blocking the arm or paddle can tell the icemaker to pause. If ON and unblocked, the next decision is temperature and water supply rather than repeatedly toggling controls.
-
Check 3
Check the freezer and fresh-food settings on the display and note whether the refrigerator was just installed, powered after an outage, or recently moved. Use GE's general reference of 0°F for the freezer and 37°F for fresh food only as a starting point, and use the model manual for the actual control behavior. Allow a newly installed icemaker up to 24 hours to become cold enough before concluding that it cannot cycle.
Expected result: The freezer is warmer than the model target, the refrigerator has not stabilized after installation or power restoration, the freezer has a very low food load, or temperatures are appropriate and stable.
Next step: Correct only the model-authorized setting and monitor the refrigerator's temperature behavior without repeatedly changing controls. If the freezer cannot reach or hold the target, or food is warming, arrange refrigerator service rather than focusing on the icemaker alone.
Stop if: Do not lower settings indefinitely, block vents with food, or use a warm freezer as a reason to expose or test the icemaker mechanism.
Why this matters
Why: GE says the icemaker mold must reach about 16°F before a cycle begins, and that a low freezer food load can make temperatures less stable. A new installation may simply be in its initial cooling/air-purge period. Appropriate stable temperature makes a water or mechanical path more likely.
-
Check 4
Compare the water dispenser's flow with its normal behavior, if the model has one. Inspect only the visible refrigerator water line and accessible shutoff from a dry position for an obvious closed valve, kink, or interruption. Check the filter indicator and installation date; replace or use a bypass plug only when the exact model manual authorizes that procedure and the correct filter/bypass is confirmed.
Expected result: The dispenser is also slow/dry, the filter is overdue or newly changed, a visible supply problem is present, or dispenser flow is normal while the icemaker mold remains empty.
Next step: Correct a visibly accessible supply interruption or install a model-matched filter according to the manual, then allow the water system's specified purge. If flow stays poor, the filter is not the cause, or the dispenser works but the mold never fills, keep the icemaker off as needed and arrange service.
Stop if: Do not disconnect water tubing, open the rear valve area, force a filter, substitute a bypass plug without model confirmation, or test water-valve voltage.
Why this matters
Why: A shared flow problem makes the filter or household supply more likely. GE says a clogged or partially clogged filter restricts water flow, and its refrigerator guidance distinguishes the icemaker and dispenser paths. Normal dispenser flow with an empty mold makes an icemaker-specific fill tube, valve, or control problem more likely; a frozen fill tube requires service to verify.
-
Check 5
With the icemaker OFF and without touching the heater or wiring, look for loose cubes physically blocking the visible mold/rake area. Record whether the mold is empty, contains a frozen batch that has not released, or shows an abnormal leak/ice buildup. Do not pour water into the mold or remove the icemaker as a test unless the exact model manual explicitly directs a safe owner procedure.
Expected result: A loose cube is visibly blocking the ejector, a batch is frozen in the mold, the mold is empty after the water/temperature checks, the fill tube appears iced, or there is leakage/damage.
Next step: Clear only a loose, accessible obstruction as the manual permits. For a frozen batch, suspected fill-tube ice, leakage, damaged mechanism, or an empty mold that persists, stop troubleshooting and schedule qualified service with the model and observations recorded.
Stop if: Do not force the rake, chip ice with a sharp tool, heat the mold, remove the icemaker, open panels, or perform live electrical tests.
Why this matters
Why: GE says a stuck ejector rake or cube can prevent the icemaker from completing its cycle, and warns that the mold may be hot. An empty mold after adequate temperature and flow suggests an internal fill, valve, icemaker, or control fault; a suspected frozen fill tube requires technician verification.
Use your observations
Decision map
Find the observation that best matches what you see, then follow the next safe action.
-
PATH 01Safety boundary
What you see
The control or local switch shows OFF, or a clump of ice holds the feeler arm/paddle in its stop position.
Do this next
Use the model manual to turn it ON and remove only loose, accessible clumped ice. If the arm remains stuck or the condition returns, arrange service rather than forcing the mechanism.
Why this path and its safety boundary
Why it matters: The icemaker is being intentionally prevented from starting, so a failed valve or heater is not established. GE says the arm/paddle position can pause production when ice blocks its movement.
Safety stop: Do not hold the arm down, pry ice out of the mold, or run an unlisted diagnostic sequence.
-
PATH 02Safety boundary
What you see
The refrigerator is new, was recently powered or moved, or the freezer is not yet at its model target.
Do this next
Use the model-authorized temperature setting and allow the specified stabilization time. If the freezer remains warm or food is not safely frozen, arrange refrigerator service.
Why this path and its safety boundary
Why it matters: Ice production is temperature-gated. GE says a new icemaker can need up to 24 hours and the mold must reach roughly 16°F before a cycle begins; a low food load can also make temperature less stable.
Safety stop: Do not repeatedly reset the refrigerator or expose the icemaker to test a temperature problem.
-
PATH 03Safety boundary
What you see
The water dispenser is also slow or dry, the filter is overdue/incorrectly seated, or the visible supply is interrupted.
Do this next
Check the visible supply and model-matched filter using the manual. If flow does not return, stop before disconnecting tubing and have the water system or appliance serviced.
Why this path and its safety boundary
Why it matters: The evidence points to shared water delivery before an icemaker-only failure. GE says a clogged or partially clogged filter can restrict flow and that the water supply must be ON.
Safety stop: Do not disconnect the line, open a valve assembly, or apply power to a water valve.
-
PATH 04Safety boundary
What you see
The water dispenser works normally, the freezer is cold, the icemaker is ON and unblocked, but the mold remains empty.
Do this next
Keep the refrigerator operating only if its cooling and water conditions are safe, but do not open the icemaker. Arrange qualified service with the model, mold condition, dispenser result, and temperature observations.
Why this path and its safety boundary
Why it matters: This pattern makes an icemaker-specific fill path, frozen fill tube, inlet valve, icemaker motor/control, or wiring more likely than a household filter restriction. GE specifically says a frozen fill tube requires icemaker removal to verify and should be checked by a technician.
Safety stop: No icemaker removal, rear-cover access, water-line disconnection, or live test.
-
PATH 05Safety boundary
What you see
The mold contains frozen cubes or the bin has ice, but cubes do not release or dispense as expected.
Do this next
Follow only the model's safe ice-bin/dispenser instructions for accessible clumps. If the condition returns, the mechanism leaks, or the ice is fused in the mold, arrange service.
Why this path and its safety boundary
Why it matters: Ice has been produced, so this is not proof that the icemaker cannot make ice. A stuck ejector, clumped bin, chute, or dispenser mechanism is more likely; GE warns the mold may be hot and provides separate dispenser guidance.
Safety stop: Do not chip the mold with tools, force the rake, heat the bin, or open the dispenser mechanism.
Helpful context
Understand the symptom
No ice is not always a failed icemaker
Start with the first missing function. If the ice bin is empty, follow the production path. If the bin contains cubes but the dispenser will not release them, follow the dispenser and ice-chute instructions for that model instead. If the water dispenser is also slow or dry, water supply and filter flow move ahead of the ice-making mechanism. If the water dispenser works while the mold stays empty, an icemaker fill path or internal component becomes more likely.
Use GE's temperature and model boundaries
GE's general refrigerator guidance uses 37°F for the fresh-food compartment and 0°F for the freezer, and says the icemaker mold must reach roughly 16°F before a cycle begins. These are general guidance values, not permission to ignore the exact owner's manual or a warm-freezer food-safety problem. GE Profile refrigerators have multiple configurations and model-dependent controls, so the model number determines whether the icemaker uses a panel setting, a local switch, a paddle, a filter, or a different diagnostic display.
Safe boundary for water and ice-maker work
The safe owner checks on this page are limited to controls, visible ice-bin conditions, temperature settings, accessible filter and supply observations, and model-authorized filter replacement. A fill tube that may be frozen, an inaccessible water valve, an icemaker heater, wiring, or an internal control requires qualified service. Do not force a rake or paddle, touch a potentially hot mold, remove the icemaker, or test a valve with power applied.
Only after diagnosis
Potential parts
- model-matched refrigerator water filter
Consider only when the model manual and flow symptom support a clogged or overdue filter rather than an icemaker or household-supply fault.
GE Profile refrigerators use model-dependent filter systems; confirm the complete model number and the manufacturer's fit information. - refrigerator icemaker assembly
Consider only after qualified diagnosis finds that the icemaker itself does not cycle or release ice despite correct ON state, temperature, water flow, and an unobstructed mold.
Icemaker locations, connectors, control methods, and assemblies vary across GE Profile configurations; do not infer fit from the symptom alone. - icemaker fill valve or fill-tube component
Consider only when service confirms an icemaker-specific water-fill fault; GE says a suspected frozen fill tube requires technician verification.
Water valves and fill-tube arrangements are model-specific and may require internal access; confirm the model and technician diagnosis first.
When checks do not resolve it
Need a professional?
Safety scope: The owner may use model-authorized controls, inspect accessible ice-bin and feeler-arm conditions, check temperature settings, observe dispenser flow, and replace a confirmed model-matched filter. Qualified appliance service must handle icemaker removal, frozen fill-tube verification, valves, heaters, motors, controls, wiring, water-line disconnection, and live testing.
Common questions
FAQ
Why is my GE Profile refrigerator not making any ice?
Start with the icemaker's ON state, a free feeler arm or paddle, freezer temperature, water/filter flow, and whether the refrigerator was newly installed. If the mold remains empty after those checks, an icemaker-specific fill path or internal component needs qualified diagnosis; do not remove the icemaker yourself.
How long should a new GE Profile refrigerator take to make ice?
GE says a newly installed refrigerator or icemaker may need up to 24 hours to become cold enough for a cycle, and the water line may need to purge air through initial cycles. Use the exact model manual for the icemaker setting and installation steps.
Could a water filter stop my GE Profile refrigerator from making ice?
Yes. GE says a clogged or partially clogged filter can restrict water flow. If the dispenser is also slow or dry, check the model-matched filter and visible supply. If dispenser flow is normal but the mold stays empty, the problem is more likely specific to the icemaker fill path and should be serviced.
What if the GE Profile ice mold is empty but the water dispenser works?
That pattern makes an icemaker-specific fill tube, valve, control, or wiring issue more likely than a shared filter problem. GE says a frozen fill tube requires removing the icemaker to verify and should be checked by a technician. Keep the mechanism closed and arrange service.
Is a GE Profile refrigerator with ice in the bin but no dispensing a no-ice problem?
Not necessarily. Ice in the bin proves that ice has been produced; a clumped bin, chute, or dispenser mechanism can prevent release. Use the exact model's safe dispenser instructions and arrange service if the issue repeats or the mechanism is jammed.
Read the exact guide
Official sources
- Refrigerator and Freezer Troubleshooting and SupportGE Appliances · GE refrigerator and icemaker support, model-specific support routing, and production-versus-dispensing distinctions
- Refrigerator - New Icemaker Not Producing IceGE Appliances · GE refrigerator and icemaker new-installation wait, temperature, ON setting, and water-line air-purge guidance
- Bottom Freezer Refrigerator - Not Making IceGE Appliances · GE bottom-freezer refrigerator icemaker controls, temperature, filter air, feeler arm, and supply connection guidance
- GE Profile Smart RefrigeratorsGE Appliances · GE Profile refrigerator product family, model-dependent refrigerator features, and controls
- Refrigerator - Icemaker Doesn't Fill With WaterGE Appliances · GE refrigerator icemaker feeler arm, water supply, filter, fill-tube, and service guidance
- Refrigerator - Icemaker Not Producing IceGE Appliances · GE refrigerator icemaker ON/OFF, temperature, filter, stuck-cube, and service guidance
Community feedback
Share a repair observation
Share a plain-text repair observation. Accepted observations are published automatically; this page may take a moment to update.