
On this page
Start here
Quick answer
For a GE DBSR463EG6WW that stops during a load and then will not start, first establish whether the dryer lost all power, the door opened or no longer latches, the control is still in a cycle, or the load stopped after a hot or restricted-airflow run. GE's support material for the DBSR463EG dryer family describes automatic cycles, timed drying, a no-heat fluff cycle, and an end-of-cycle wrinkle-care phase; a dryer that is tumbling without heat after dry clothes may be in an end phase, not a no-start fault. If the load is damp, the drum stopped while heat remained, the dryer is unusually hot, the breaker trips, or there is smoke, a burning smell, a hot connection, or damaged wiring, stop using it. After the dryer is cool, check only the door, lint screen, visible vent path, and user-accessible power. If one safe external correction does not restore operation, arrange GE or qualified appliance service; do not repeatedly run it, bypass the door switch, open the cabinet, or guess a motor or thermal-fuse replacement.
Work through in order
Diagnostic checks
Use only checks that match the exact appliance or system and its official guide.
-
Check 1
From outside the dryer, note the exact stop state before touching controls: is the drum stopped or turning, is the load dry or damp, is the timer or cycle indicator still active, and is there heat, smoke, odor, a hot connection, or visible damage? Do not restart it to reproduce the event.
Expected result: The load is dry and the drum is only tumbling without heat, the dryer is fully dead with a damp load, the drum stopped while hot, or a safety symptom is present.
Next step: For a safety symptom, leave the dryer off and isolate power only if safe without touching damaged or wet parts; arrange qualified appliance or electrical help. Otherwise photograph the controls and continue only after the dryer is cool.
Why this matters
Why: Dry clothes with intermittent unheated movement can fit an automatic end or wrinkle-care phase. A damp load, continued heat, full loss of power, or any smoke, odor, or electrical damage is not established as normal completion.
-
Check 2
Check the selected cycle and control position against the exact model literature. GE's linked manual distinguishes automatic cycles, Timed Dry, and Quick Fluff or other no-heat options; its wrinkle-care feature, when fitted, can continue unheated tumbling after clothes are dry. Do not force the cycle knob past a stop or repeatedly switch between positions.
Expected result: The control is in an automatic or wrinkle-care end area, a no-heat or short cycle was selected, the knob is stuck away from Off, or the same mid-cycle stop leaves clothes damp.
Next step: If the state matches a normal end phase, remove the load when the drum stops and verify the suffix-specific manual. If it stops damp or will not terminate normally, stop cycle experiments and arrange service.
Why this matters
Why: A dry load and unheated motion can be a documented end-phase behavior, while a damp load or a control that will not reach its normal end state needs diagnosis. A setting label alone does not prove that the timer, motor, or thermal part failed.
-
Check 3
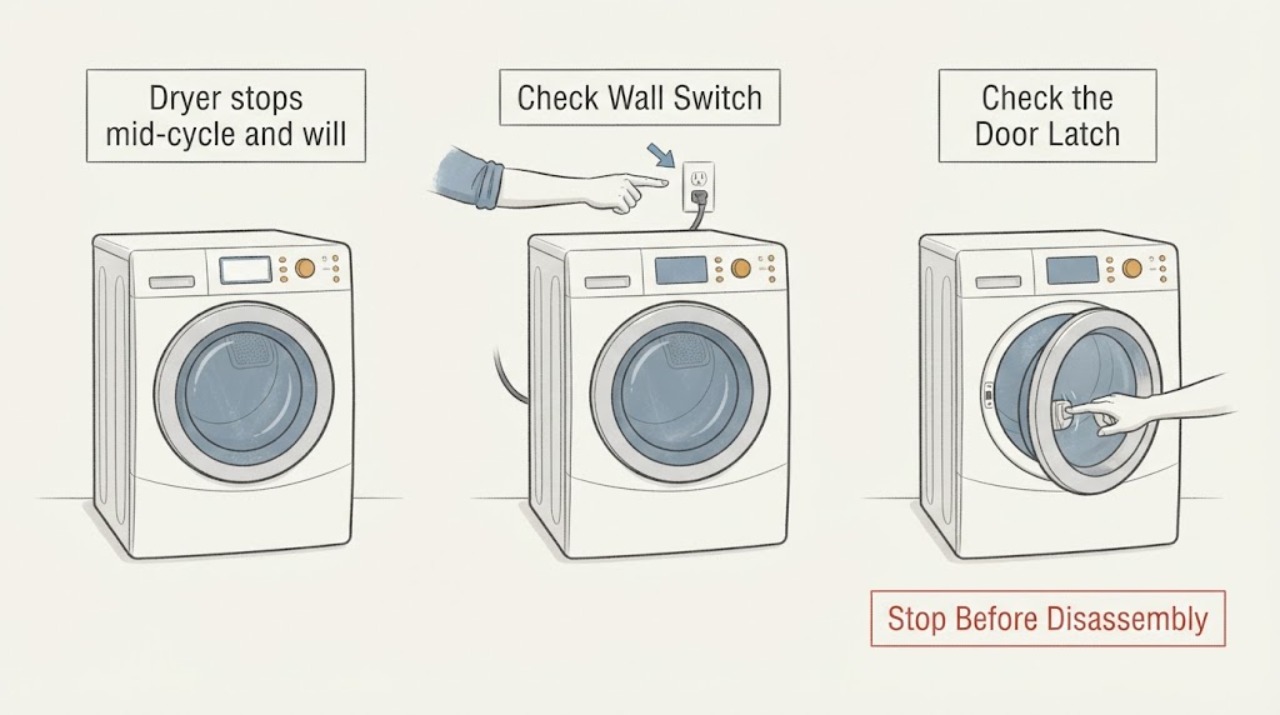
With the dryer off and cool, open and close the door gently. Inspect the visible latch, strike, hinge area, and door opening for lint, clothing, cracking, distortion, or an obstruction. Confirm that the door sits flush and remains latched without tape, a wedge, or pressure on the switch.
Expected result: The door closes and latches normally, lint or clothing was accessible and removed, the door springs open, or the latch or switch area is damaged or misaligned.
Next step: Remove only loose, accessible debris without tools. If the door will not latch, opens during operation, or the switch is cracked, scorched, pushed in, or displaced, leave the dryer unused and arrange service; never hold or bypass the interlock.
Why this matters
Why: GE requires a closed door for operation, and a door or latch problem can interrupt a cycle or prevent a restart. A visible latch that looks intact does not clear the hidden switch or control circuit.
-
Check 4
Clean the lint filter as directed and inspect the visible exhaust hose, wall connection, and outside hood from safe, cool positions. Look for lint buildup, a crushed or disconnected duct, a blocked hood, weak exhaust, or unusual heat or humidity in the laundry area. Do not open the cabinet or reach into the blower, heater, or duct inside the dryer.
Expected result: The lint filter or visible duct is restricted, the outside flap cannot open freely, the load was warm but damp, or the visible path is clear while the stop recurs.
Next step: Do not run the dryer with a crushed, disconnected, blocked, or unverified exhaust path. Correct only a safe, accessible external issue; if the stop or heat remains, arrange qualified inspection of the complete vent and dryer.
Why this matters
Why: GE says a restricted exhaust can lengthen drying and its manual requires suitable metal ducting and regular exhaust inspection. A clear visible path does not rule out internal lint, a blower problem, thermal protection, or a control fault.
-
Check 5
Check the user-accessible outlet, plug, and household breaker or fuse only after the dryer is cool and only when there is no odor, heat, water, or visible damage. Do not open a terminal cover, reconnect rear wiring, or repeatedly reset a breaker. Note whether the panel and interior light, if fitted, have lost power completely.
Expected result: A breaker or fuse is tripped and the cord and outlet appear normal, the dryer has partial or no power, or power appears present but the dryer remains inactive after the stop.
Next step: If one safe reset restores power and there is no hazard, do not assume the problem is fixed; monitor only as permitted by the manual and stop on recurrence. If power remains absent or trips again, leave the dryer off and arrange qualified electrical or appliance service.
Why this matters
Why: GE identifies the plug and household fuse or breaker as external no-start checks. A recurring trip, hot connection, damaged cord, or partial-power condition needs electrical or appliance diagnosis rather than more resets.
-
Check 6
Prepare a service handoff instead of making a parts guess. Record the complete model and serial information, cycle and temperature, approximate load size and fabric mix, whether the load was dry or damp, whether the drum and heat continued, the breaker result, door-latch result, vent observations, and any noise, odor, smoke, or unusual heat.
Expected result: The dryer resumes after one safe external correction and remains normal, or the same stop/no-start condition repeats with a sound door, reasonable load, clean accessible filter, and apparently available power.
Next step: Arrange GE or qualified appliance service and provide the complete evidence. Ask the technician to verify the vent, electrical connection, controls, door interlock, and protective functions before identifying a part; do not run with a panel removed or safety control bypassed.
Why this matters
Why: A repeatable failure after external checks points to an internal control, motor, door-switch, thermal, or power-path investigation. None of those components can be selected safely from a mid-cycle stop alone.
Use your observations
Decision map
Find the observation that best matches what you see, then follow the next safe action.
-
PATH 01Next step
What you see
The load is dry and the drum continues only in unheated motion after the apparent end, with no unusual heat, odor, smoke, or electrical symptom.
Do this next
Confirm the exact suffix and option in the GE manual, let the drum stop normally, and record the control state. If the same behavior occurs with damp clothes or heat remains, stop use and request service.
Why this path and its safety boundary
Why it matters: The dryer may be in an automatic end, wrinkle-care, or other no-heat phase documented for some DBSR463EG controls rather than failing to start.
-
PATH 02Next step
What you see
The dryer stops with damp clothes, the drum is not turning, the door will not latch, or the symptom repeats regardless of a valid cycle and a secure door.
Do this next
Leave the dryer out of service after the safe external checks and arrange qualified diagnosis. Do not restart repeatedly, reach into the drum, bypass the door switch, or open the cabinet.
Why this path and its safety boundary
Why it matters: A load, door/interlock, drive, power, control, airflow, or thermal problem is more likely than a normal end phase, but the observation does not identify a motor or fuse.
-
PATH 03Next step
What you see
A lint screen, visible exhaust hose, wall connection, or outside hood is restricted, or the dryer was unusually hot or the laundry area became hot and humid.
Do this next
Keep the dryer off until the exhaust path is safely restored. If the stop, heat, or damp-load condition returns, request professional inspection rather than running more cycles.
Why this path and its safety boundary
Why it matters: Airflow restriction can lengthen the cycle and increase heat stress; a corrected visible path still does not clear an internal blockage or thermal fault.
-
PATH 04Next step
What you see
The breaker trips again, the cord or outlet is hot or damaged, smoke or sparking occurs, or a burning or electrical smell is present.
Do this next
Stop using the dryer and isolate power only if safe without touching damaged parts. Seek qualified electrical or appliance help; for smoke or fire, leave the area and use emergency help from a safe location. Do not keep resetting the breaker.
Why this path and its safety boundary
Why it matters: This is an electrical or fire-safety condition, not a normal mid-cycle stop or a user-adjustable setting problem.
Helpful context
Understand the symptom
The compiled problem is “not starting,” but the reported event is a mid-cycle stop. Those are not interchangeable: a dryer can stop because a door opened, a breaker interrupted power, a control reached an end phase, or a protective condition occurred, and only then appear not to start. Record what the dryer was doing immediately before it stopped instead of repeatedly pressing Start.
Confirm the complete model suffix on the label behind the door before using a control diagram. GE's support page and linked manual cover the DBSR463EG dryer family; optional controls and cycle names can vary, so do not copy a test or setting from a visually similar GE dryer.
Do not reach into a moving drum or use a cycle to test an overheating or damaged appliance. If there is smoke, sparking, a burning or electrical smell, an unusually hot plug or outlet, exposed wiring, repeated breaker trips, or a gas smell from another nearby appliance, stop and obtain appropriate qualified or emergency help from a safe location.
When checks do not resolve it
Need a professional?
Arrange qualified GE or appliance service when DBSR463EG6WW stops with damp clothes, will not resume after the door and user-accessible power checks, has a repeatable no-start condition, has a latch or drum problem, or stops again after a visible lint or vent correction. Stop immediately for smoke, sparking, a burning or electrical smell, a hot or damaged cord or outlet, exposed wiring, unusual heat, repeated breaker trips, or an exhaust path that cannot be verified as safe; use emergency or electrical help from a safe location as appropriate. Do not open the cabinet or control console, bypass the door switch, test live terminals, or keep running the dryer to force a diagnosis.
Common questions
FAQ
Why did my GE DBSR463EG6WW stop mid-cycle and then not start?
The stop may have been caused by a door/latch interruption, loss of household power, a restricted exhaust, an automatic end phase, or an internal protective or control fault. First record whether the load was dry or damp and whether the drum or heat continued, then make only the safe external checks described above.
Is unheated tumbling after the cycle a failure?
Not necessarily. GE's dryer-family manual describes no-heat fluff and a wrinkle-care or automatic end phase on some models. It is not a normal explanation when the load is damp, the drum is still being heated, the dryer is unusually hot, or smoke, odor, or electrical symptoms appear.
Can I replace the motor or thermal fuse because the dryer stopped?
No. A mid-cycle stop does not identify either part. GE's guidance places concealed component inspection with appropriate service, and the dryer should remain out of use for overheating, smoke, electrical symptoms, repeated trips, or a damaged door or cord.
Read the exact guide
Official sources
- GE Appliances Frequently Asked QuestionsGE Appliances · GE's support FAQ explains model-number lookup and safe handling of power or water-damaged appliances; it supports escalation and identification boundaries rather than a dryer part claim.
- GE DBSR463EG Dryer Owner's Manual 49-90328GE Appliances · The manual is linked from GE's DBSR463EG support page and covers the DBSR463EG control family; it states that features vary by model, so exact suffix confirmation is required for optional settings.
- GE Dryer Takes Too Long to DryGE Appliances · General GE dryer airflow guidance used for visible lint, exhaust, and service boundaries; it does not establish an internal component diagnosis for DBSR463EG6WW.
- GE Dryer Will Not StartGE Appliances · General GE dryer guidance used only for safe checks of door closure, start control, plug, and household fuse or breaker; it does not identify an internal DBSR463EG6WW part.
- Troubleshooting for DBSR463EGWWGE Appliances · The official troubleshooting page is for the DBSR463EG dryer support family and provides the relevant no-start, drying-time, and service paths; exact optional controls must be checked against the full suffix.
- GE Appliance - Download a Copy of Your Owner's Manual or Installation InstructionsGE Appliances · GE says to enter the exact appliance model number to locate model-specific manuals and installation instructions, including for older products.
- User Manual & Care for DBSR463EGWWGE Appliances · The official support page identifies the DBSR463EG dryer family and links its owner manual, maintenance, troubleshooting, and installation resources; verify the complete DBSR463EG6WW suffix on the appliance label before relying on optional controls.
Community feedback
Share a repair observation
Share a plain-text repair observation. Accepted observations are published automatically; this page may take a moment to update.