
On this page
Start here
Quick answer
First confirm that the gas oven is set to Bake or Broil and that the Start command was accepted, then check the accessible breaker or fuse, the fully seated range plug where applicable, the gas shutoff, and any self-clean latch or Sabbath-mode state described by the exact Owner's Manual. If the display works but the burner does not light, you may observe the igniter through the open door only as GE describes: a red glow is useful evidence, but no glow can involve the igniter, controls, or another electrical component. Never try to light a GE gas oven with a match during a power outage, remove the regulator, open gas or live electrical parts, or repeatedly reset a tripping circuit. Stop for gas odor, hissing, smoke, scorching, sparks, or uncontrolled heating and arrange qualified service.
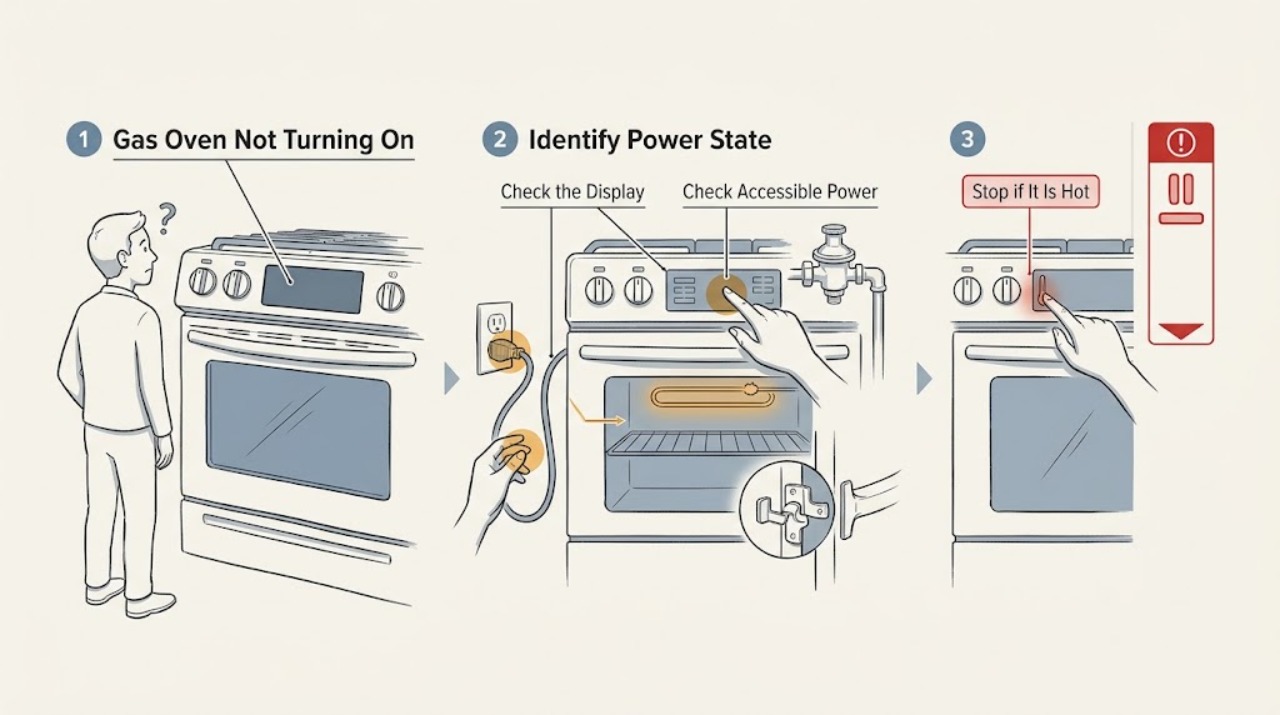
Work through in order
Diagnostic checks
Use only checks that match the exact appliance or system and its official guide.
-
Check 1
From a dry, stable position, check whether the GE oven display, interior light, and surface controls have power, and record whether the oven is a range or wall oven and whether the cooktop burners work.
Expected result: The display is blank, the display is active but ignores commands, the oven accepts a command but does not ignite, or the surface burners work while the oven remains inactive.
Next step: Record the exact model, display message, fuel configuration, and whether the failure affects Bake, Broil, or both, then follow the matching external check.
Stop if: Stop for gas odor, hissing, smoke, sparks, scorching, a hot or damaged cord, an exposed conductor, or a door or latch that is unsafe to operate.
Why this matters
Why: A blank display shifts the first check to the household supply and plug; a powered display with no response shifts attention to settings, lockout, or controls; a working cooktop with a dead oven leaves the oven gas path, igniter, or oven control unresolved.
-
Check 2
Set the oven to the exact model's normal Bake or Broil procedure and press Start when required; inspect the display for Child Lockout, Sabbath Mode, an invalid-entry message, or a self-clean door-latch state.
Expected result: The control was not in a valid heating mode, a lock or special mode is displayed, the self-clean latch is not in the required position, or a normal command is accepted with no ignition.
Next step: Exit a lock, Sabbath Mode, or self-clean state only with the model manual's instructions, then make one supervised Bake test; do not force the latch or enter undocumented service mode.
Stop if: Stop if the latch is jammed, the control panel is wet or cracked, the oven heats while showing a lock state, or any correction would require opening the console.
Why this matters
Why: An incorrect command or lockout can prevent the oven from turning on without a failed gas part. If the command state is normal and the oven still does not respond, continue to supply and ignition evidence rather than repeating button combinations.
-
Check 3
Check the accessible household breaker or fuse for the range or wall oven and, for a range where the installation permits a safe external check, verify that the plug is fully seated; do not pull a range, remove covers, or touch wiring.
Expected result: A breaker is open, a fuse is blown, the plug is loose, there was a recent installation or outage, or the accessible supply appears normal while the oven remains inactive.
Next step: Restore only an obviously open breaker or fuse once, if safe and permitted; after an outage set the clock and restart the oven as the manual requires. If the breaker or fuse opens again, leave the appliance off and call a qualified electrician or appliance technician.
Stop if: Stop for repeated trips, a blown fuse that returns, a hot outlet, damaged cord, exposed wiring, water near the connection, or uncertainty about the circuit.
Why this matters
Why: The oven controls, Glo-Bar igniter, and gas valve need power, so a supply interruption can stop a gas oven even though gas surface burners may behave differently. A normal breaker or plug does not rule out an appliance-side electrical fault.
-
Check 4
Only when there is no gas odor and the installation instructions identify the location, confirm that the accessible main gas shutoff is open; if the cooktop works after a recent move or installation, ask a qualified installer to verify the oven regulator rather than removing or adjusting it yourself.
Expected result: The main shutoff is closed, the cooktop works but the oven does not, the regulator status is uncertain, or the accessible gas valves appear correct.
Next step: Correct only an obvious main shutoff position described by the model instructions; do not remove the regulator, loosen a gas connection, or make a second ignition attempt when gas may have accumulated.
Stop if: Stop immediately for gas odor, hissing, damaged gas tubing, a regulator that would need removal, or any need to open or test a gas component.
Why this matters
Why: A closed supply or regulator can prevent oven gas flow, and the cooktop working does not prove that the oven path is open. An uncertain regulator or correct external valve state requires diagnosis of the igniter, valve, control, or related safety circuit.
-
Check 5
If the model instructions and conditions make it safe, select Bake, open the door, and observe briefly from outside the cavity for the GE-described red glow from the Glo-Bar igniter; do not touch or dismantle anything.
Expected result: A red glow appears but no flame or heat follows, no glow appears, or the oven behavior is intermittent or accompanied by odor, clicking, or a fault display.
Next step: Stop the test after the brief observation, record the result and any code, and arrange qualified appliance service for the igniter, gas valve, sensor, control, or safety circuit.
Stop if: Stop at once for gas odor, delayed ignition, a flash, smoke, scorching, uncontrolled flame, abnormal clicking, or any need to reach the burner or igniter.
Why this matters
Why: A glow with no ignition and no glow point to different service evidence, but neither observation identifies a single replaceable part. GE says no glow may involve the Glo-Bar, controls, or other electrical components, so part selection must wait for diagnosis.
-
Check 6
Arrange qualified GE appliance service when the oven remains inactive after one safe control, power, gas-path, and visual ignition check, or when a code or safety symptom appears; provide the complete model and the observed sequence.
Expected result: The failure repeats, Bake and Broil differ, the cooktop works but the oven does not, a code returns, or the oven cannot be safely tested.
Next step: Leave the oven off, preserve the code or a photo, and give the technician the model, gas configuration, power observations, valve status, control mode, and igniter result.
Stop if: Do not continue testing after any gas, electrical, smoke, overheating, door-latch, or uncontrolled-heating warning.
Why this matters
Why: The remaining possibilities include an igniter, gas valve, sensor, lock, control, wiring, or supply fault, and the symptom alone cannot establish which component is compatible or safe to replace.
Use your observations
Decision map
Find the observation that best matches what you see, then follow the next safe action.
-
PATH 01Next step
What you see
The oven display is blank or the appliance has no apparent power.
Do this next
Arrange qualified service and follow the exact model guidance.
Why this path and its safety boundary
Why it matters: Check the accessible plug, breaker, or fuse once as GE describes. If power is not restored or the supply trips again, stop and obtain qualified electrical or appliance service.
-
PATH 02Next step
What you see
The display shows Child Lockout, Sabbath Mode, invalid entry, a self-clean latch state, or another documented control restriction.
Do this next
Arrange qualified service and follow the exact model guidance.
Why this path and its safety boundary
Why it matters: Use only the exact Owner's Manual sequence to clear the state and make one normal Bake test. Do not force a latch or bypass a lock; recurring codes need service.
-
PATH 03Next step
What you see
The surface burners work but the gas oven does not turn on, especially after moving or installing the range.
Do this next
Arrange qualified service and follow the exact model guidance.
Why this path and its safety boundary
Why it matters: Check the documented external gas supply and have a qualified installer verify the regulator position; the oven path can be closed while the cooktop works.
-
PATH 04Next step
What you see
Bake is selected but no red Glo-Bar glow is seen during the brief safe visual check.
Do this next
Arrange qualified service and follow the exact model guidance.
Why this path and its safety boundary
Why it matters: Record the observation and arrange service. GE says the igniter, oven controls, or other electrical components may be involved; do not select a part from this observation alone.
-
PATH 05Next step
What you see
Gas odor, hissing, delayed ignition, flash, smoke, scorching, or uncontrolled flame occurs.
Do this next
Arrange qualified service and follow the exact model guidance.
Why this path and its safety boundary
Why it matters: Stop immediately, avoid switches or flames, leave the area, and follow local emergency or qualified gas-service guidance. Do not retry ignition.
-
PATH 06Next step
What you see
Controls, accessible power, and documented external gas checks are correct but the oven still will not turn on.
Do this next
Arrange qualified service and follow the exact model guidance.
Why this path and its safety boundary
Why it matters: Keep the appliance out of service and arrange qualified GE appliance diagnosis for the igniter, valve, sensor, control, wiring, or safety circuit.
Helpful context
Understand the symptom
Separate no power from no ignition
A blank display, a display that accepts no command, and a display that starts Bake but produces no flame are different observations. Check the accessible power and control state first. If the clock or light works, that still does not prove the oven controls or igniter are operating; GE specifically recommends a control reset on models so equipped even when a light or clock is working. Use one documented reset, not repeated cycling of a circuit that opens again.
A gas cooktop can mislead you
Surface burners may work while the oven does not. GE describes an oven-specific gas regulator path that can be OFF after a move or installation, and it warns that the regulator should not be removed without a plumber or qualified installer. If you are not certain which valve or regulator the installation instructions identify, stop at the external observation and arrange qualified service.
Keep the ignition check visual and brief
For a model where GE's instructions permit a visual check, select Bake and observe through the open oven door for the described red igniter glow. Do not touch the burner, remove the oven bottom, probe the igniter, bypass the safety valve, or attempt manual ignition. No glow is evidence for service diagnosis, not a reason to replace a part blindly.
Safety boundary
Stop conditions
- Gas odor, hissing, delayed ignition, a flash, uncontrolled flame, or uncertainty about a gas valve or regulator.
- Smoke, scorching, sparks, a hot or damaged cord or outlet, exposed wiring, or a breaker or fuse that opens again.
- A door latch or self-clean lock is jammed, damaged, or cannot be safely returned to its documented state.
- A fault code returns, the oven heats unpredictably, or heating continues after cancellation.
- Any need to remove the regulator, loosen a gas connection, open live electrical parts, reach the burner or igniter, or bypass a safety device.
- The oven remains inactive after one safe external test.
Only after diagnosis
Potential parts
- gas oven igniter or Glo-Bar ignition component
Consider this category only after qualified diagnosis confirms an ignition-component fault rather than a supply, control, wiring, sensor, or gas-valve problem.
Confirm the complete GE model, fuel configuration, connector and mounting details, electrical rating, and manufacturer fit information; no part is established by a no-glow observation alone. - gas oven safety valve or regulator component
Consider this category only when a qualified gas-appliance technician confirms the gas path and identifies a failed valve or regulator component.
Match the exact GE model, gas type, approved pressure and connection requirements, and manufacturer fit information; never remove or bypass a regulator or safety valve as a user check. - oven control, sensor, or door-latch assembly
Consider this category only after service diagnosis identifies the control, sensor, or latch as the failed cause of the no-start condition.
Confirm the full model, control revision, latch design, sensor type, wiring, and manufacturer fit information before any part decision; a display code or locked door does not prove a specific component.
When checks do not resolve it
Need a professional?
The display remains blank or the accessible supply is uncertain after the basic breaker, fuse, and plug check., Bake or Broil is selected correctly but the oven does not respond, does not ignite, or does not heat., The cooktop works but the oven remains inactive, particularly after installation or moving., No Glo-Bar glow, a recurring code, intermittent ignition, or a door-latch problem is observed., Any gas, smoke, electrical, scorching, flooding from cleaning, or uncontrolled-heating safety symptom is present.
Common questions
FAQ
Why does my GE gas oven have power but not turn on?
Verify the Bake or Broil command, Start action, Child Lockout, Sabbath Mode, and self-clean latch state for the exact model. If those are correct, check the accessible supply and gas path, then arrange service rather than opening the controls or gas components.
Why do the burners work but my GE gas oven does not?
The cooktop can work while an oven-specific regulator path is closed or the oven's ignition circuit has a fault. GE recommends checking the documented supply and observing the Glo-Bar only as instructed; a qualified technician should handle regulator or ignition diagnosis.
Can I light a GE gas oven with a match during a power outage?
No. GE states that the gas oven's Glo-Bar igniter and gas valve require electrical power, so the oven cannot be used during an outage and should not be manually lit with a match.
What does it mean if the GE oven igniter does not glow red?
No glow is useful evidence for service, but it does not identify one replacement part. GE says the Glo-Bar, oven controls, or other electrical components may be involved. Stop if there is odor, smoke, a flash, or any need to access the burner or wiring.
Read the exact guide
Official sources
- Gas Range - Oven Does Not Heat, But The Burners HeatGE Appliances · Supports the separate oven regulator, control, door, and Glo-Bar evidence path; exact model instructions and qualified service remain controlling.
- Range & Wall Oven - Oven Error, Fault or Function CodesGE Appliances · Supports recording codes, using the model manual, limited power reset, and service for recurring control or lock faults.
- Frequently Asked Questions About GE Ranges and Wall OvensGE Appliances · Supports checking controls, latch, and model-specific manuals and using service when a no-start or locked-door symptom persists.
- Gas Range & Wall Oven - Oven Will Not Come OnGE Appliances · Directly supports control, power, gas shutoff, Glo-Bar visual, electronic reset, self-clean latch, Sabbath Mode, and service checks for a GE gas oven.
- Gas Range - Checking the Gas RegulatorGE Appliances · Supports the warning that a regulator can be OFF and that it should not be removed without a plumber or qualified installer.
- Range, Cooktop & Wall Oven - Power Outage Tips and OperationGE Appliances · Supports the electrical-power requirement for a gas oven igniter and gas valve and the prohibition on manually lighting the oven during an outage.
- Range & Wall Oven - No PowerGE Appliances · Supports checking an accessible plug, breaker, and fuse before service when the oven control display is blank.
Community feedback
Share a repair observation
Share a plain-text repair observation. Accepted observations are published automatically; this page may take a moment to update.