
On this page
Start here
Quick answer
The Haier HRF420BEC is the Australian 433 L 500 Series bottom-freezer model and its official product information lists front levelling feet. First separate an uneven floor or a loose front foot from a cabinet or rear-wheel lean: empty the door shelves enough to work safely, use a level on the cabinet, and check whether the floor itself is uneven. With a helper and the exact Haier guide, adjust only the accessible front levelling feet and recheck door closure and stability. Do not lift the refrigerator alone, remove panels, or improvise a rear-wheel or frame repair. If the front feet are fully adjusted but the back or cabinet remains visibly crooked, the door seal will not contact evenly, or the unit rocks or shifts, document the gap and contact Haier or the supplier for an installation or warranty assessment.
Before you begin
Safety first
- Owner checks are limited to identifying the exact model, observing the floor and cabinet with a level, making small model-authorized adjustments to accessible front levelling feet with a helper, and checking external door/gasket contact. Do not lift or tip the refrigerator alone, work underneath it, remove panels or hinges, touch refrigerant tubing or wiring, bend the cabinet, or improvise a rear-wheel repair.
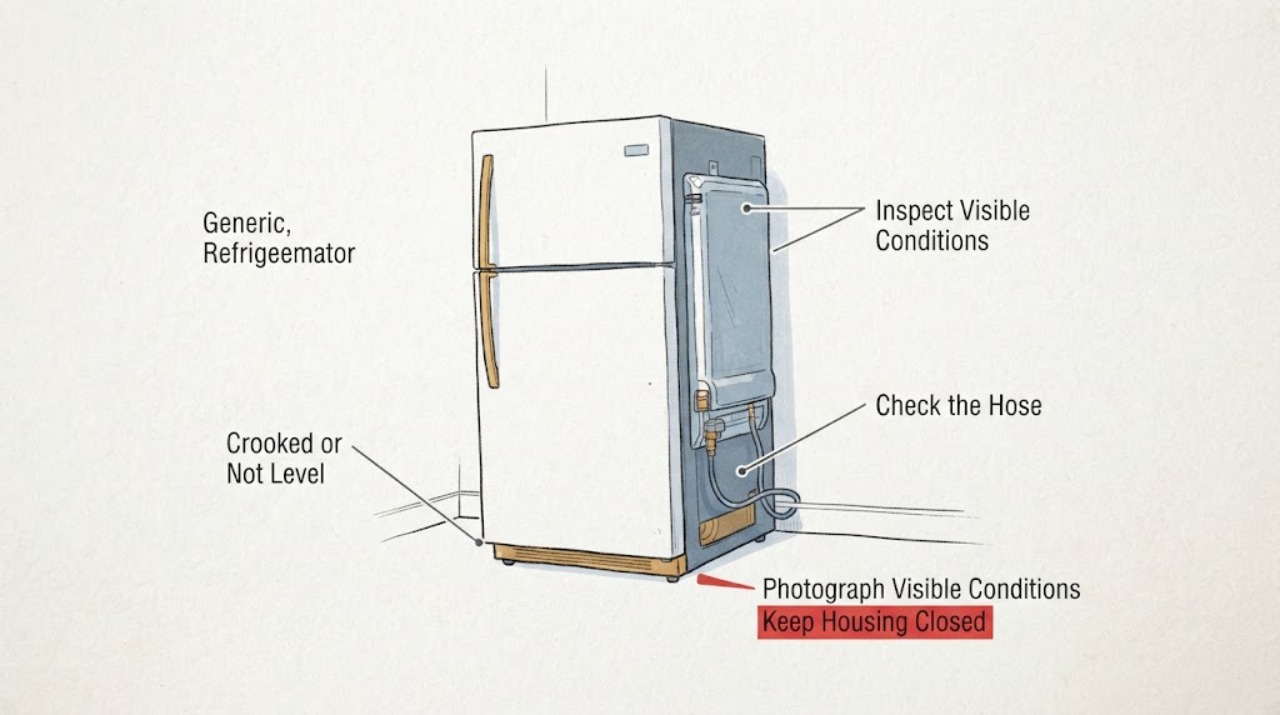
Work through in order
Diagnostic checks
Use only checks that match the exact appliance or system and its official guide.
-
Check 1
Identify the rating label as HRF420BEC and photograph the refrigerator from the front, side, and rear corner without moving it yet. Place a spirit level on the cabinet top or another rigid, non-shelf surface in both directions, and note whether the floor slopes or the cabinet itself is out of square.
Expected result: The level changes with the floor position, the cabinet remains tilted in both positions, the rear corner is visibly higher, or the model cannot be confirmed.
Next step: Use the exact HRF420BEC guide and continue only with an external front-foot adjustment when the model and floor condition are clear. If the model is different or the cabinet remains twisted, stop and arrange Haier or supplier assessment.
Stop if: Do not infer a bent frame, wheel replacement, or compatible part from a single visual angle, and do not pull the refrigerator away from the wall alone.
Why this matters
Why: A floor slope and a cabinet or wheel geometry problem are different decisions. The exact model matters because Haier lists front levelling feet for HRF420BEC, not a universal adjustment arrangement for every refrigerator.
-
Check 2
With another adult supporting the appliance and the doors secured, check that the accessible front levelling feet are contacting the floor and are not obviously damaged or backed off. Follow only the exact Haier instructions for turning those feet; make small changes, set the refrigerator upright, and recheck the level after each change.
Expected result: The cabinet becomes level and stable, one front foot does not contact or is damaged, or both front feet are adjusted but the rear or cabinet remains crooked.
Next step: If the external feet cannot correct the position, stop and provide the photos and level readings to Haier or the supplier. Keep the appliance stable and do not shim or lift it with an improvised object unless the exact installation instructions explicitly allow it.
Stop if: Do not tip the refrigerator more than the exact guide permits, work underneath it, remove wheels or panels, or attempt a one-person lift.
Why this matters
Why: A successful correction supports an installation adjustment. A damaged or ineffective foot, or a persistent rear lean after the available adjustment, is not evidence that the owner should dismantle the base or correct the frame.
-
Check 3
After the refrigerator is stable, close each door normally and inspect the gasket contact all the way around without forcing the door. Look for a continuous gap, a door that springs open, rubbing at one corner, or a cabinet that rocks when a door is opened.
Expected result: The doors close evenly and the gasket contacts the cabinet, or a gap, rubbing corner, self-opening door, rocking cabinet, or unusual scrape remains.
Next step: Do not keep loading or operating a unit whose door cannot seal or whose cabinet shifts. Photograph the gap and arrange model-specific service, delivery inspection, or warranty review.
Stop if: Do not remove the door, hinge, gasket, base cover, or rear hardware as a levelling experiment.
Why this matters
Why: Even closure and stability support a corrected installation. A persistent gap or rocking pattern can allow warm air in or indicate that levelling has not corrected the geometry; it does not identify a gasket, hinge, wheel, or frame part by itself.
-
Check 4
If the front feet are fully adjusted but the rear remains visibly short, the cabinet looks warped, or the same crooked geometry returns after repositioning, record the floor, level readings, foot positions, door gaps, date of delivery, and any supplier inspection. Keep the refrigerator upright and avoid repeated moves.
Expected result: The geometry is corrected and remains stable, or the rear/cabinet problem persists despite the available front adjustment.
Next step: Request Haier or supplier inspection and ask them to assess the floor, feet, cabinet/frame, door alignment, and seal contact before proposing a part. Protect food if the door cannot seal or temperatures are not maintained.
Stop if: Do not order a rear wheel, frame, hinge, or seal solely from the crooked appearance, and do not drill, bend, or shim the cabinet.
Why this matters
Why: A persistent rear or frame issue exceeds the documented front-foot owner check. The exact Reddit report describes this pattern on an HRF420BEC and says a same-model replacement reportedly showed it again; that is useful context for an inspection, not a universal defect finding.
Use your observations
Decision map
Find the observation that best matches what you see, then follow the next safe action.
-
PATH 01Next step
What you see
The HRF420BEC is level after small front-foot adjustments, the cabinet is stable, and both doors close with even gasket contact.
Do this next
Leave the feet in the stable position, avoid overloading the door shelves, and monitor door closure and temperature normally.
Why this path and its safety boundary
Why it matters: The symptom was consistent with an installation or front-foot adjustment issue rather than an established frame or part failure.
-
PATH 02Next step
What you see
The floor is uneven but the cabinet becomes stable and the gasket seals after the model's front-foot adjustment.
Do this next
Keep the unit upright and stable; do not use loose wedges or a makeshift shim unless the exact installation documentation authorizes it.
Why this path and its safety boundary
Why it matters: The floor condition likely explains the original lean, provided the refrigerator remains stable and the doors seal evenly.
-
PATH 03Next step
What you see
The front feet are adjusted but a rear corner stays high, the cabinet remains twisted, or the same geometry returns after a move or replacement.
Do this next
Stop moving or dismantling the appliance and request Haier or supplier inspection with photos, level readings, and delivery history.
Why this path and its safety boundary
Why it matters: The available owner adjustment has not corrected the problem. A rear wheel, floor interface, cabinet/frame, or delivery issue remains possible, but the source evidence does not select one.
-
PATH 04Next step
What you see
A door has a persistent gap, rubs at one corner, springs open, or the gasket does not contact evenly after levelling.
Do this next
Keep door openings minimal, verify food safety, and arrange model-specific service or warranty assessment. Do not remove the door or replace a seal as a levelling shortcut.
Why this path and its safety boundary
Why it matters: The refrigerator may not be sealing correctly, so continued use can affect food storage; the observation does not prove that the gasket or hinge is the failed part.
Helpful context
Understand the symptom
A crooked HRF420BEC needs an installation decision before a parts diagnosis. Haier's exact product information lists front levelling feet, so a small front-to-back or side-to-side correction may be an adjustment issue. A rear corner that stays high, a cabinet that appears twisted, or a door gasket that cannot make even contact is a different escalation path.
Work with the cabinet unloaded enough to move safely and keep the refrigerator upright. Record the level reading, floor condition, foot position, door gap, and whether the unit rocks. If the accessible feet cannot correct the geometry, stop rather than removing the base or attempting to bend a frame.
When checks do not resolve it
Need a professional?
Contact Haier or the supplier for persistent rear/cabinet lean, an ineffective foot, rocking, a door-seal gap, repeated recurrence, or any suspected delivery or frame issue. Use qualified electrical or appliance help for cord, wiring, refrigerant, or moving hazards.
Safety scope: Owner checks are limited to identifying the exact model, observing the floor and cabinet with a level, making small model-authorized adjustments to accessible front levelling feet with a helper, and checking external door/gasket contact. Do not lift or tip the refrigerator alone, work underneath it, remove panels or hinges, touch refrigerant tubing or wiring, bend the cabinet, or improvise a rear-wheel repair.
Have this ready
- Provide model HRF420BEC, delivery and installation date, floor and level readings in both directions, front-foot positions, photos of each corner and the gasket gap, whether doors close and remain closed, and whether the unit was inspected or replaced.
Common questions
FAQ
Does the Haier HRF420BEC have adjustable feet?
Haier's exact HRF420BEC product information lists front levelling feet. Use the exact guide and make only small external adjustments with the refrigerator supported; do not assume the rear wheels or cabinet are owner-adjustable.
What if the HRF420BEC is still crooked after adjusting the front feet?
Stop moving or dismantling it and document the floor, level readings, rear-corner gap, foot positions, and door-seal contact. Ask Haier or the supplier to inspect the floor interface, feet, cabinet/frame, and door alignment.
Can I remove the rear wheel or shim the refrigerator?
Not from the crooked appearance alone. The opened exact-model materials establish front levelling feet, while the rear/frame remedy is not established as an owner procedure. Use the matching installation guide or arrange inspection rather than drilling, bending, or improvising support.
Read the exact guide
Official sources
- 433L 500 Series Refrigerator Bottom Freezer, 8-star Energy Rating - HRF420BECHaier Australia · Exact Haier Australia HRF420BEC product page; it identifies the 433 L bottom-freezer model and lists front levelling feet, but does not authorize a rear-wheel or frame repair.
- QUICK REFERENCE GUIDE > HRF420BECHaier Australia · Exact-model Haier Australia quick-reference guide; it confirms front levelling feet and the Australian product dimensions, but not an internal or rear-frame repair.
- Crooked Fridge - Haier 433L Bottom Mount Refrigerator - HRF420BECReddit r/Appliances · Exact HRF420BEC user report from Australia; anecdotal and not a manufacturer diagnosis or proof of a universal defect.
Community feedback
Share a repair observation
Share a plain-text repair observation. Accepted observations are published automatically; this page may take a moment to update.