
On this page
Start here
Quick answer
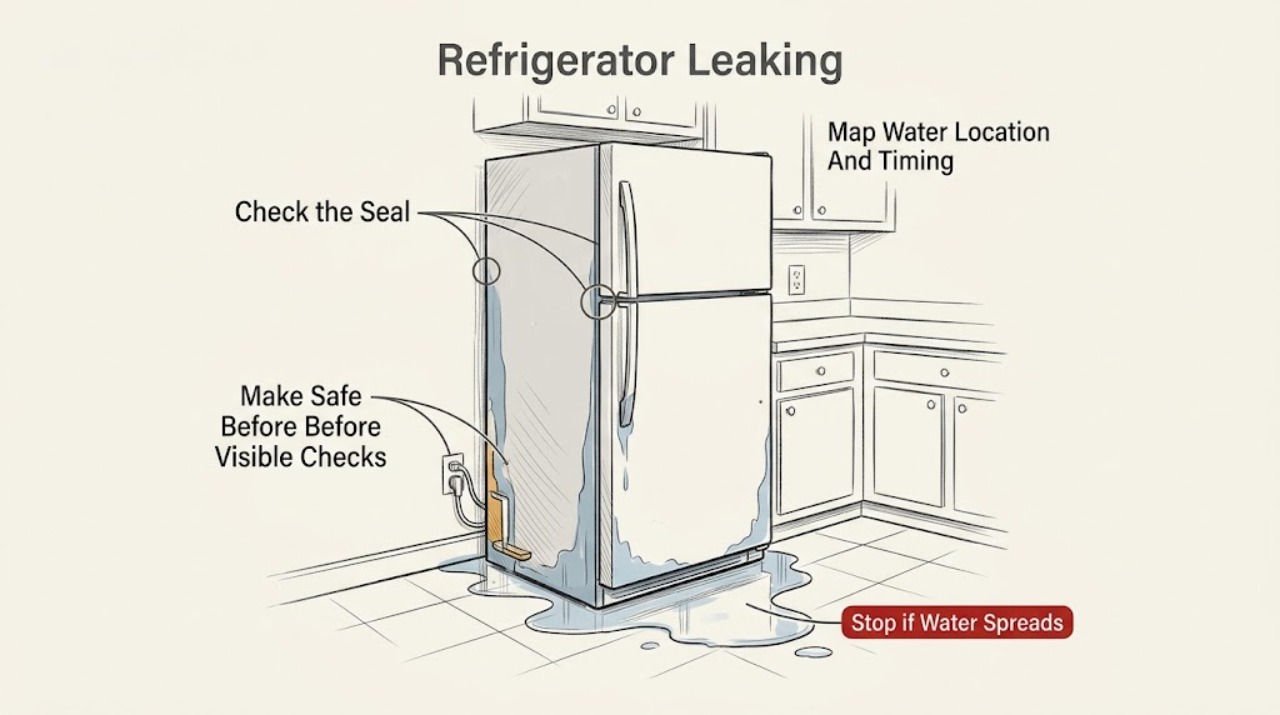
First locate the water rather than assuming the refrigerator itself has one common leak: moisture around a door points to a door-gasket gap or condensation, while water on the floor in front of a Haier refrigerator can come from an ice-maker water line or rear water valve if equipped, or from a clogged defrost-drain tube. Check only dry, visible areas and the exact model manual. If water is near an outlet, cord, control, or other electrical part, stop using the refrigerator and isolate power only from a dry, safe position; do not handle wet electrical parts. A leaking ice maker or water valve, a suspected clogged defrost drain, water inside inaccessible panels, or a leak that returns after visible checks requires qualified Haier service. Do not remove panels, puncture ice, apply heat, or perform live electrical or water-system tests.
Before you begin
Safety first
- The owner may photograph the leak, inspect dry visible gaskets and external surfaces, and follow an exact model manual's safe cleaning or drain-tray instruction. Qualified personnel must access hidden water lines, valves, defrost drains, trays, internal panels, sealed systems, wiring, and electrical components.
Work through in order
Diagnostic checks
Use only checks that match the exact appliance or system and its official guide.
-
Check 1
Without moving or opening the refrigerator, photograph the puddle and note its position: around a door gasket, inside on a shelf or floor, at the front kick area, behind the cabinet, or near the ice maker/dispenser. Record whether it follows ice or water dispensing, door opening, a defrost period, cleaning, or a recent move, and record the complete Haier model.
Expected result: Water is only around a door; pooled water is on the front floor; water is under or behind the cabinet; water is inside the compartment; or the leak follows ice/water use.
Next step: Use the matching branch below. Keep the refrigerator closed and out of service if the water is near electrical parts or if the source is not safely visible.
Stop if: Stop immediately for water near an outlet, plug, cord, control, light, smoke, burning odor, sparks, abnormal heat, or a damaged power cord.
Why this matters
Why: A door-area moisture pattern favors gasket or condensation checks. A front-floor puddle fits Haier's ice-maker water-line/valve or defrost-drain guidance. Water under, behind, or inside inaccessible areas needs a stronger service boundary because the source cannot be safely identified from outside.
-
Check 2
Keep hands, the floor, and the plug area dry. If water is approaching electrical parts, stop dispensing and stop using the refrigerator; isolate power from a dry, safe disconnect only when that can be done without touching water. Do not pull the refrigerator through a puddle or remove a rear cover.
Expected result: The leak is far from electrical parts and the plug area is dry; water is near an outlet, cord, control, or light; or the safe disconnect cannot be reached without contact with water.
Next step: For a wet electrical area or inaccessible disconnect, leave the refrigerator off and arrange qualified appliance/electrical assistance. Otherwise continue with the door-gasket and external-water-source checks.
Stop if: Do not touch wet plugs, cords, outlets, wiring, valves, or panels; do not use a meter on an energized refrigerator; do not restore power just to observe the leak.
Why this matters
Why: A dry, external observation can continue only when the hazard is separated from the work area. Water near electrical parts changes the task from diagnosis to making the appliance and area safe; the visible source is no longer a reason to continue user troubleshooting.
-
Check 3
With the appliance safe, inspect the fresh-food and freezer door gaskets around their full visible perimeter. Look for a split, tear, deformation, debris, or a section that does not contact the cabinet; wipe only with the model-approved mild cleaning method and do not use a sharp tool or abrasive pad.
Expected result: A gasket has a split, tear, persistent gap, heavy debris, or poor contact; or the gaskets look intact while water is pooling on the floor.
Next step: If cleaning does not restore contact or the gasket is damaged, keep the door closed as much as practical and arrange a model-matched gasket assessment. If the gasket is intact, follow the floor-puddle branch.
Stop if: Do not pry the gasket out, apply heat to reshape it, or continue if water has reached an electrical part.
Why this matters
Why: Haier says splits, tears, and gaps around the door gaskets can allow cold air to escape and are the relevant first check for moisture by the doors. An intact gasket does not explain a front-floor puddle by itself and shifts attention to water-supply or defrost drainage.
-
Check 4
Only if the exact Haier refrigerator has an ice maker or water dispenser, inspect from outside for fresh water at the visible supply connection, tubing, or rear valve area. Do not pull the refrigerator, disconnect tubing, remove a valve cover, or operate the dispenser to reproduce a leak.
Expected result: A visible supply tube or rear valve connection is wet; the leak starts after ice/water use; the refrigerator has no ice maker/dispenser; or no external supply leak is visible.
Next step: For any wet line, valve area, or use-linked leak, stop using the ice maker/dispenser and arrange qualified service. If the model has no such system or the area is dry, move to the defrost-drain branch rather than adding water-system parts.
Stop if: Do not handle a wet valve or fitting, tighten a pressurized connection, open the rear panel, or continue using a leaking water system.
Why this matters
Why: Haier specifically directs owners with a floor leak and an ice maker to check the refrigerator water line or rear water valve, and says a leak from the ice maker or valve requires service. Absence of a visible external leak does not clear a hidden line or valve.
-
Check 5
If the leak is a front-floor puddle and no ice-maker supply leak is visible, consult the exact Owner's Manual for whether a defrost drain outlet or tray is intended to be inspected by the owner. Look only at the plainly accessible exterior or compartment area described by that manual; do not remove panels, chip ice, pour boiling water, or push a tool into a drain.
Expected result: The manual identifies an accessible drain/tray check; the tray is visibly overflowing or displaced; the drain area is not user-accessible; or the model manual cannot be found.
Next step: If the manual gives a safe external check and the area is dry, follow only that procedure. Otherwise stop and arrange qualified service for a suspected clogged drain, overflowing tray, or recurrent puddle.
Stop if: Do not puncture ice or a liner, use a knife or metal probe, apply a heat gun/hair dryer, or open sealed-system or rear electrical covers.
Why this matters
Why: Haier lists a clogged defrost-drain tube as a possible floor-leak cause, while its transport guidance notes that some models have a defrost drain tray and tube. Those features and access points are model-dependent, so a blocked or hidden drain cannot be confirmed safely from a generic refrigerator layout.
-
Check 6
After one safe, model-approved visible check, dry the floor and document whether new water returns, its location, the timing, any ice-maker/dispenser use, and any temperature or alarm change. Do not keep cycling the appliance to reproduce a leak.
Expected result: The leak stops after an identified, safely corrected gasket or external condition; water returns; water is under or behind the cabinet; the source remains unclear; or cooling is also declining.
Next step: Keep the refrigerator stopped when the leak is active or near electrics and arrange qualified Haier service. Give the technician the full model, photos, timing, water location, ice-maker/dispenser status, gasket findings, and the manual section used.
Stop if: Do not open panels, test internal components live, handle refrigerant lines, or continue use when water reaches electrical parts, food safety is in doubt, or cooling is failing.
Why this matters
Why: A returning or unexplained leak means a hidden line, valve, defrost drain, tray, internal water path, or electrical-area problem remains possible. A falling temperature adds a refrigeration-system concern that cannot be diagnosed by puddle location alone.
Use your observations
Decision map
Find the observation that best matches what you see, then follow the next safe action.
-
PATH 01Next step
What you see
Moisture is concentrated around the fresh-food or freezer door and the floor is not receiving a continuous puddle.
Do this next
Inspect and gently clean the visible gasket. A damaged or still-gapped gasket needs a model-matched service assessment; do not reshape it with heat.
Why this path and its safety boundary
Why it matters: A split, tear, or gap in the door gasket is more relevant than an ice-maker water line. Haier links these gasket defects with cold-air escape and moisture around doors.
-
PATH 02Next step
What you see
The model has an ice maker or dispenser, and water is visible at the supply connection, rear valve area, or after ice/water use.
Do this next
Stop using the ice maker/dispenser and arrange qualified service. Keep water and electrical parts isolated; do not disconnect the line or open the rear cover.
Why this path and its safety boundary
Why it matters: This matches Haier's water-line/water-valve leak branch. A filter change or door-gasket cleaning cannot establish that a wet valve or line is safe.
-
PATH 03Next step
What you see
A puddle forms on the floor in front of the refrigerator, but no accessible ice-maker water-line or valve leak is visible.
Do this next
Check the exact Owner's Manual for a user-accessible drain/tray procedure; otherwise keep the refrigerator out of service and arrange qualified diagnosis.
Why this path and its safety boundary
Why it matters: Haier lists a clogged defrost-drain tube as another possible source. Because drain and tray layouts vary, the absence of a visible supply leak does not identify the blocked point or authorize panel removal.
-
PATH 04Next step
What you see
Water is pooling inside at an inaccessible rear/bottom area, under the cabinet, or behind a panel, or the source remains hidden after safe external checks.
Do this next
Stop use, isolate power only from a dry safe position, and arrange qualified Haier service. Do not tilt or move the refrigerator through water to inspect underneath.
Why this path and its safety boundary
Why it matters: A hidden defrost path, tray, water line, valve, or internal leak is possible. The visible symptom cannot distinguish those parts, and water under the cabinet may be close to electrical components.
-
PATH 05Next step
What you see
Water is near the plug, outlet, power cord, rear control/electrical area, light, or any wet electrical connection.
Do this next
Stop handling the refrigerator, keep people away from the water, and obtain qualified appliance/electrical assistance. Do not touch wet electrical parts or restore power to test.
Why this path and its safety boundary
Why it matters: The immediate hazard is electrical contact with water, not identifying the refrigerator part. Further inspection or a power-on test can increase risk.
Helpful context
Understand the symptom
The location changes the likely cause
A damp spot beside a door is a different symptom from a puddle at the front or water under the cabinet. Record whether the water appears after dispensing ice or water, after a defrost period, when the doors are opened, or continuously. The exact Haier model matters because an ice maker, dispenser, water connection, defrost tray, and drain arrangement are not present on every refrigerator.
Separate door moisture from a true puddle
Moisture around the fresh-food or freezer door should start with the gaskets: look for a split, tear, or visible gap along the seal. A gasket problem lets cold air escape and can create moisture without proving that an internal water line is leaking. If water is pooling on the floor, move to the ice-maker/valve and defrost-drain branches instead of repeatedly wiping the gasket.
Treat the ice-maker and defrost paths as separate systems
On an ice-maker-equipped model, a wet connection or water valve at the rear is a service symptom, not evidence that a filter or gasket will fix the leak. If no supply leak is visible, Haier lists a clogged defrost-drain tube as another possible source of a front-floor puddle. Do not assume that a drain opening, tray, or ice-maker layout exists in the same place on every Haier model; use the model's Owner's Manual.
Keep water away from electrical parts
Only inspect dry, accessible surfaces. If water reaches an outlet, plug, cord, rear control area, light, or other electrical part, stop using the refrigerator. Isolate power only if the disconnect is dry and can be reached without stepping into water; otherwise leave the area and have a qualified person make it safe. Do not restore power to reproduce a leak, remove covers, use a live meter, or touch wet wiring. During any approved cleaning, Haier says to turn the temperature control off and unplug, and warns against harsh chemicals and abrasive or metal cleaning tools.
Safety boundary
Stop conditions
- Stop immediately if leaking water reaches an outlet, plug, cord, control, light, or other electrical part; isolate power only from a dry and safe position.
- Stop using an ice maker or water dispenser when its line, fitting, or rear valve area is wet; do not disconnect or tighten a wet pressurized connection.
- Do not remove refrigerator panels, open rear electrical covers, perform live electrical tests, or restore power to reproduce a leak.
- Do not puncture ice or a liner, use a knife or metal probe, apply direct heat, or handle a suspected refrigerant/sealed-system line.
- Arrange qualified Haier service for a leaking valve or ice maker, suspected clogged defrost drain, water under/behind the cabinet, persistent unexplained water, or a leak accompanied by loss of cooling.
Only after diagnosis
Potential parts
- door gasket
Consider only when the exact model's gasket has a confirmed split, tear, deformation, or persistent gap after safe cleaning and alignment checks.
Gasket profile, door size, and installation differ by Haier model; confirm the complete model before ordering. - ice-maker water line or water valve
Consider only after qualified diagnosis confirms the leak is in the model's ice-maker/dispenser supply path or valve rather than condensation or defrost drainage.
Only models equipped with the relevant ice maker or dispenser use these parts, and valve/tubing connectors vary by model. - defrost drain or drain tray assembly
Consider only after qualified diagnosis confirms a blocked, damaged, or displaced defrost-drain path or tray; a floor puddle alone does not identify a part.
Drain and tray architecture and owner access vary by Haier model; do not order or open panels from a generic refrigerator layout.
When checks do not resolve it
Need a professional?
Arrange qualified Haier refrigerator service when a water line, ice maker, or rear valve is leaking; when a front-floor puddle persists after the safe external checks; when the suspected defrost drain or tray is inaccessible; when water is under or behind the cabinet; when cooling is also declining; or whenever water has reached electrical parts. Keep the refrigerator stopped for the electrical-water hazard and do not restore power to reproduce the leak.
Safety scope: The owner may photograph the leak, inspect dry visible gaskets and external surfaces, and follow an exact model manual's safe cleaning or drain-tray instruction. Qualified personnel must access hidden water lines, valves, defrost drains, trays, internal panels, sealed systems, wiring, and electrical components.
Common questions
FAQ
Why is my Haier refrigerator leaking water onto the floor?
For a front-floor puddle, first distinguish a model with an ice maker or dispenser from one without. Haier says to check the water line or rear water valve when an ice maker is present, and also lists a clogged defrost-drain tube; either a leaking valve/ice maker or a suspected blocked drain should go to qualified service.
Can a Haier refrigerator door gasket cause water?
Yes, a split, torn, or gapped gasket can let cold air escape and produce moisture around the doors. Inspect the visible seal and clean it using the model-safe method, but a puddle on the floor or water under the cabinet needs the separate water-path checks.
Should I unclog my Haier refrigerator defrost drain?
Do not assume a generic drain layout or push a tool into it. Haier identifies a clogged defrost-drain tube as a possible floor-leak cause, while its guidance notes that drain trays and tubes vary by model; follow only an exact Owner's Manual procedure that is plainly user-accessible, otherwise arrange service.
What should I do if water is near the refrigerator outlet or cord?
Stop using the refrigerator and do not touch wet electrical parts. Isolate power only from a dry, safe position; if that is not possible, leave the area and obtain qualified appliance/electrical assistance. Do not restore power to reproduce the leak.
Can I keep using the Haier ice maker while the refrigerator is leaking?
No if the leak is associated with the ice maker, dispenser, supply tubing, or rear valve. Haier says a leaking ice maker or valve requires service; stop using that water system and do not disconnect or tighten a wet connection yourself.
Can I use a knife or heat to remove refrigerator ice near a leak?
No. Haier says to use caution when manually defrosting and only a flat plastic scraper; puncturing a sealed-system line can cause a service-required leak and direct refrigerant contact may cause frostbite. Do not use a knife, metal probe, or direct heat.
Read the exact guide
Official sources
- Haier - Puncture in Sealed SystemHaier Appliances · Haier refrigerator sealed-system safety guidance; applies when defrosting or when a refrigerant line may be damaged.
- Haier - Refrigerator Transporting and StorageHaier Appliances · General Haier refrigerator transport/storage guidance; only some models have the described defrost drain tray and the Owner's Manual controls access.
- Haier - Refrigerator Moisture or Condensation By DoorsHaier Appliances · General Haier refrigerator door-moisture guidance; exact gasket design and replacement procedure are model-specific.
- Haier - Cleaning Inside the RefrigeratorHaier Appliances · General Haier refrigerator cleaning guidance; the exact model manual controls removable parts and access.
- Haier Refrigerator - Leaking / Water on FloorHaier Appliances · General Haier refrigerator support guidance; water-line checks apply only to models equipped with an ice maker or related water system, and exact access is model-specific.
Community feedback
Share a repair observation
Share a plain-text repair observation. Accepted observations are published automatically; this page may take a moment to update.