
On this page
Start here
Quick answer
A Haier washing-machine door can remain locked while the drum is moving, water level or temperature is too high, or a cycle has not been cancelled correctly. Do not pull or pry the door. Press Pause or cancel the cycle according to the exact model instructions, wait until the drum stops and the lock indicator clears, then check whether water remains in the drum. If water is present, use the model-approved drain or spin/drain program; do not open the pump filter with a full drum unless the manual provides a safe drain method and you can contain the water. Also check that clothing is not caught in the seal, the door is aligned, and Control Lock or a delay function is not preventing input. If the lock stays on after safe draining and cooling, the door or lock is damaged, water leaks, or there is a hot-water, electrical, burning, or sparking hazard, leave the machine off and arrange qualified service. Never force the door or bypass the lock.
Before you begin
Safety first
- This article supports safe pause, ordinary external observation, model-approved draining, and one documented reset only. Do not force or bypass the lock, open uncontrolled water paths, reach into internal components, or work on energized wiring.
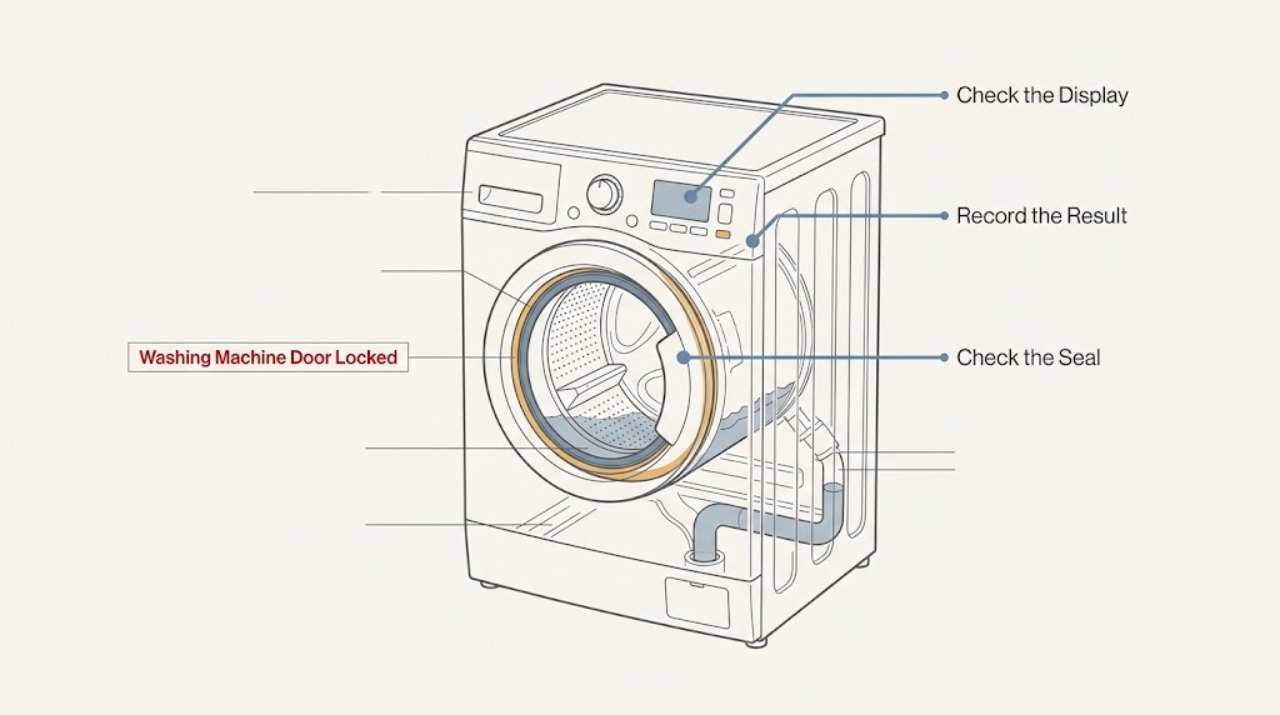
Work through in order
Diagnostic checks
Use only checks that match the exact appliance or system and its official guide.
-
Check 1
Press Pause or cancel the running program using the exact model controls, then wait without pulling the door until the drum has stopped and the lock indicator or message changes.
Expected result: The drum is still rotating, water is visibly high, the water may be hot, the lock indicator clears after the safe wait, or the lock remains displayed after the machine is quiet.
Next step: Keep the door closed and continue to the water-level and control checks; open it only when the indicator has cleared and the exact instructions permit it.
Stop if: Do not force the handle, insert a tool, defeat the latch, or open the door while the drum is moving or water is high or hot.
Why this matters
Why: A moving drum or high or hot water level is a designed lock condition. A lock that remains after a safe pause shifts the check to residual water, Control Lock, door fit, drain, or a fault in the lock system.
-
Check 2
Look through the door for residual water and check the display for a drain indication; if the model provides a drain or spin/drain program, run that program only under the exact manual conditions and keep the door closed while it works.
Expected result: No water remains and the lock persists; water drains normally and the lock clears; water does not drain, the pump is silent, or water is leaking.
Next step: If the drain path is visibly kinked and the manual allows an external correction, correct only that safe issue and retry once; otherwise leave the machine off and arrange service. Use an emergency drain only when the exact model manual provides it and water can be contained.
Stop if: Do not open a pump filter with an uncontrolled full drum, reach into the pump, remove panels, or continue if water reaches electrical parts, leaks heavily, or is hot.
Why this matters
Why: A drained drum removes one common safety reason for the lock but does not prove the lock is healthy. Failure to drain can keep the door locked and may result from a hose, pump-filter, pump, or control issue. A leak or water near electrical parts is a stop condition.
-
Check 3
Read the lock icon or message, check whether Control Lock or child lock is active, and verify that the selected program is not delay-start, a non-wash function, or another mode that intentionally keeps the door unavailable.
Expected result: A lock icon is active and buttons are ineffective, delay-start is selected, the program is a drain or other special function, or the controls and program appear normal.
Next step: Use only the model-specific key combination or cancellation method printed in the manual or on the panel; then wait for the lock indicator to clear before trying the door.
Stop if: Do not guess a key combination that starts a service mode, repeatedly cancel and restart a full load, or bypass the lock when the controls do not respond.
Why this matters
Why: Control Lock or a delayed or special program can make the machine seem stuck without a failed door lock. If the controls are normal and the lock remains after a completed, drained cycle, a door-lock or control fault becomes more plausible.
-
Check 4
Only after the lock indicator clears and the drum is safe to access, inspect the visible door opening, gasket, and latch area for clothing, debris, misalignment, cracks, or a door that cannot close evenly; remove only a loose item without tools.
Expected result: Clothing or debris is caught in the seal, the door closes evenly with no visible damage, or the gasket, latch, hinge, frame, or door is damaged or misaligned.
Next step: Remove only the loose obstruction, close the door normally, and run one appropriate test only if the model instructions permit it; request service for damage, misalignment, or a lock that still will not engage or release.
Stop if: Do not force the door, pry the gasket, insert objects into the latch, remove the lock, or continue using the machine with a damaged seal or frame.
Why this matters
Why: A trapped garment or obstruction can prevent correct door closure and lock sensing. Visible hardware damage or a door that cannot align is not a reason to bend, pull, or adjust the lock as a user repair.
-
Check 5
If the machine is quiet and there is no water or visible hazard, check that the plug is seated and the supply has not tripped; follow the exact model's single power-off or reset instruction, then wait before checking the lock again.
Expected result: The display returns and the lock clears; the machine remains unresponsive; the breaker trips again; or there is a burning smell, spark, hot cord, or water near electrical parts.
Next step: Leave the machine off and arrange qualified appliance or electrical service, providing the cycle, lock message, water state, drain result, and reset result.
Stop if: Do not reset repeatedly, use damaged wiring, bypass the breaker, touch exposed parts, or power the machine while water is contacting electrical components.
Why this matters
Why: A temporary control or power interruption may clear after one documented reset, but a dead panel or recurring trip is not solved by repeating it. Electrical or water hazards require the appliance to remain out of service.
-
Check 6
After the safe pause, drain, control, seal, and single-reset checks, record whether the door is locked with an empty drum, whether the lock indicator flashes, and whether the machine can start or finish another program without a hazard.
Expected result: The lock releases and a normal cycle works; or the lock persists with an empty or drained drum, a lock alarm repeats, the cycle cannot start or finish, or the door or drain fault returns.
Next step: Leave the door and machine as found, keep the appliance off, and arrange qualified service; provide the exact model, display behavior, drain state, and all observations.
Stop if: Do not use an emergency release bar unless the exact manual directs it after safe draining, and never bypass or defeat the lock to resume washing.
Why this matters
Why: A persistent lock after the safety conditions are gone points to a lock, sensor, drain, control, or alignment fault that cannot be safely confirmed from the outside.
Use your observations
Decision map
Find the observation that best matches what you see, then follow the next safe action.
-
PATH 01Safety boundary
What you see
The drum is still rotating, water is high, or the water may be hot.
Do this next
Pause or cancel using the exact model controls and wait for movement to stop, temperature to fall, and the lock indicator to clear.
Why this path and its safety boundary
Why it matters: The lock is performing its safety function and should not be overridden.
Safety stop: Do not pull the door, insert tools, or attempt an emergency release while water is hot, high, or moving.
-
PATH 02Safety boundary
What you see
Water remains in the drum, a drain error is shown, or the machine cannot complete its drain.
Do this next
Use the model-approved drain or spin/drain program, correct only a visible external hose issue, and use an emergency drain only under exact manual instructions with water contained.
Why this path and its safety boundary
Why it matters: Residual water can keep the safety lock engaged; the drain path needs attention before the door can be safely opened.
Safety stop: Do not open the filter with uncontrolled water, reach into the pump, or continue with a leak or water near electricity.
-
PATH 03Safety boundary
What you see
A lock icon is active, buttons do not respond, or delay-start or a special program is selected.
Do this next
Cancel the delay or release Control Lock only with the model-specific method, then wait for the lock indicator to clear.
Why this path and its safety boundary
Why it matters: The controls or selected program may be intentionally preventing operation or release rather than indicating a broken latch.
Safety stop: Do not enter service mode, repeatedly restart the cycle, or bypass the controls when the model method is unknown.
-
PATH 04Safety boundary
What you see
Clothing or debris is caught in the seal, or the visible door, gasket, latch, hinge, or frame is damaged or misaligned.
Do this next
Remove only a loose obstruction after the lock clears; leave the washer off and request service for damage, misalignment, or a persistent lock.
Why this path and its safety boundary
Why it matters: The obstruction may prevent lock sensing, while hardware damage requires model-specific repair and can create a leak or pinch hazard.
Safety stop: Do not pry the gasket, bend the door, insert tools, or operate with a damaged seal or frame.
-
PATH 05Safety boundary
What you see
The drum is empty or safely drained, the cycle is cancelled, and the lock remains after one applicable reset.
Do this next
Keep the machine off and arrange qualified service with the model, lock behavior, drain result, and any code.
Why this path and its safety boundary
Why it matters: A lock, sensor, control, drain, or alignment fault is more likely than a normal safety state.
Safety stop: Do not use an emergency release unless the exact manual authorizes it in this state, and do not bypass the lock to run the machine.
Helpful context
Understand the symptom
A locked door is often a safety state
Do not treat the lock icon as permission to pull harder. Haier explains that the door may remain locked while the drum is rolling, the water level is high, or the water is hot. Pause or cancel the program using the controls shown for the exact model, and wait for the drum to stop and the indicator to clear. A delay-start or child/Control Lock setting can also make the controls appear unresponsive.
Drain before considering an access problem
If water is visible or the machine reports a drain problem, keep the door closed and use the model-approved drain or spin/drain program first. Haier's support guidance points to a blocked or twisted drain hose and a blocked pump filter as possible drain causes, but filter access can release residual water. Only use an emergency drain or release method when the exact manual provides it, the machine is safely without power, and the water can be contained.
Check the seal and controls without bypassing the lock
From ordinary access, look for clothing caught between the door and gasket, a door that did not close fully, visible damage, or an active lock icon. Confirm that the selected program is not delay-only or a non-wash function and that Control Lock is not enabled. These checks can explain a door that will not start or release, but a damaged latch, lock, hinge, frame, or wiring requires model-specific service.
Know the stop point
A door that remains locked after the drum stops and the water is safely drained may have a failed lock, sensor, control, or drain condition. Do not insert tools into the latch, pull the door open, remove the lock, or reach behind panels. Water near electricity, hot water, a leak, burning smell, sparks, or repeated breaker trips changes this from a convenience problem to a safety and service issue.
Safety boundary
Stop conditions
- Do not force, pry, drill, or insert tools into the locked door or bypass the door-lock mechanism.
- Do not open a pump filter or emergency drain with uncontrolled water, hot water, or water near electrical parts.
- Stop for a leak, flooding, burning smell, smoke, sparks, hot cord, exposed wiring, or a breaker that trips again.
- Do not bend the door, gasket, latch, hinge, or frame, and do not operate with visible damage that could leak or pinch.
- Do not use a guessed key sequence or service-mode function; use only the exact model's manual and one safe reset when applicable.
When checks do not resolve it
Need a professional?
Arrange qualified appliance service when the door remains locked after the drum has stopped and the water is safely drained, the lock indicator or alarm repeats, the machine cannot start or finish, the drain fault returns, the door or seal is damaged, or the model-specific emergency-release or reset procedure is unavailable. Use appropriate electrical or emergency help for sparks, smoke, burning odor, flooding near electricity, or a repeated breaker trip. Keep the machine off until the condition is assessed.
Safety scope: This article supports safe pause, ordinary external observation, model-approved draining, and one documented reset only. Do not force or bypass the lock, open uncontrolled water paths, reach into internal components, or work on energized wiring.
Common questions
FAQ
Why is my Haier washing-machine door locked after the cycle?
The lock may remain while the drum is moving, water is high or hot, or the cycle has not been cancelled correctly. Wait for movement to stop, use the exact model cancellation or drain instruction, and do not pull the door.
Will draining the water unlock a Haier washer door?
It can remove one safety reason for the lock, but it does not prove the lock is working. Use the model-approved drain or spin/drain program; if manual draining is provided, contain the water and follow the exact manual.
Can Control Lock keep my Haier washer door locked?
Control Lock or child lock can make buttons ineffective and can make a program seem stuck. Confirm the lock icon and use only the model-specific key combination or cancellation method; never bypass the door lock itself.
What if the door is locked but the drum is empty?
After confirming the cycle is cancelled and the drum is safely stopped and drained, check for a visible door or gasket obstruction and try one model-approved reset if applicable. A persistent lock points to a lock, sensor, control, drain, or alignment fault and needs service.
Can I force open a locked Haier washing-machine door?
No. Do not pry the door, insert tools, pull the gasket, or bypass the latch. Emergency release procedures are model-specific and should be used only after safe power-off and draining steps in the exact manual.
When is a locked washer an emergency?
Stop using it for flooding, water near electricity, hot uncontrolled water, smoke, sparks, burning odor, a hot cord, exposed wiring, or a repeated breaker trip. Leave the machine off and use the appropriate local emergency or qualified service process from a safe location.
Read the exact guide
Official sources
- Front load washing machine - Door can not be openedHaier India · Haier support guidance for front-load washers; use an emergency release only when the exact model instructions provide it.
- The door lock light flashes ... Water can not pump outHaier United Arab Emirates · Haier regional support guidance for related washer models; filter location, drain hose arrangement, and emergency-drain steps vary by model.
- Special function-door LockHaier India · Haier support guidance for the related model shown on the page; exact door-release controls can differ by model.
- Door LockHaier Malaysia · Haier regional support page; apply the behavior to the exact model manual and control layout.
- Not wash of front load washing machineHaier India · Haier support guidance for front-load washers; details and terminology can vary by model.
Community feedback
Share a repair observation
Share a plain-text repair observation. Accepted observations are published automatically; this page may take a moment to update.