
On this page
Start here
Quick answer
Empty the door's closing path first: remove containers, food, shelves, or bins that protrude into the opening, then close the door gently and look for an even gasket contact around the cabinet. Hisense says an obstructed door can prevent sealing and recommends wiping the full rubber seal and its cabinet contact points with a damp washcloth, pressing the seal firmly around the edges, and retesting. If the door still will not close, appears sagged or twisted, or requires force, stop using it and arrange model-specific service; do not remove the door or hinge hardware without the exact manual.
Before you begin
Safety first
- The owner may remove accessible storage obstructions, clean the gasket and cabinet contact points with a damp cloth, and make visual observations. Door removal, hinge or leveling adjustment, wiring or water-tube disconnection, cabinet movement, and any electrical work require the exact model procedure and qualified help.
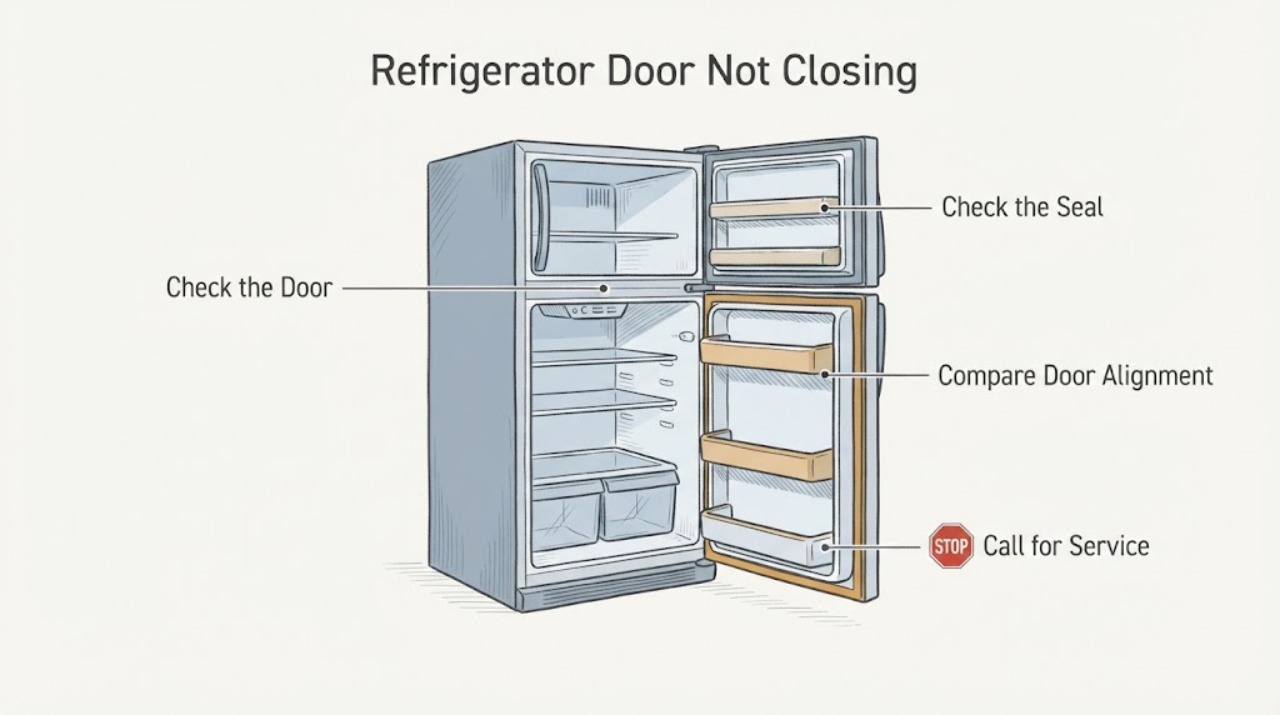
Work through in order
Diagnostic checks
Use only checks that match the exact appliance or system and its official guide.
-
Check 1
With clean, dry hands, open the affected door and inspect the entire closing path. Look at the door bins, shelves, drawers, front edges of stored packages, and anything resting on top of a drawer or shelf. Remove only an obvious item that protrudes past its normal storage position, then close the door gently.
Expected result: The door now closes fully; it stops at one item or corner; the door closes only when a shelf or bin is moved; or nothing visibly touches the frame.
Next step: Reposition or remove the interfering item and retest. If the door still stops with the cabinet empty enough to close, leave the contents in a safe arrangement and continue with the seal inspection.
Stop if: Do not force a drawer, shelf, bin, or door past an obstruction, and do not remove a heavy shelf or door assembly to make clearance without the exact model instructions.
Why this matters
Why: A repeatable contact point makes a loading or storage obstruction more likely. If no accessible item is touching the frame, continue to the gasket and alignment checks rather than forcing the door.
-
Check 2
Inspect the soft rubber gasket around the complete door perimeter. Wipe the gasket and the matching cabinet contact surface with a damp washcloth, dry away excess moisture, and gently press the gasket into its normal channel around the edges. Close the door without slamming it.
Expected result: The gasket now contacts the cabinet evenly; dirt or residue was present; a section is folded, pulled out, torn, hardened, or visibly deformed; or a gap remains with a clean, seated gasket.
Next step: Retest the closed door around all sides. If the gasket is damaged or the gap remains, record the affected edge and obtain model-specific service or parts guidance; do not glue, stretch, heat, or substitute a gasket.
Stop if: Do not use a knife, solvent, abrasive cleaner, heat gun, or adhesive on the gasket, and stop if cleaning reveals exposed wiring or a damaged door surface.
Why this matters
Why: Dirt, a loose section, or a fold can prevent sealing even when the door reaches the frame. A tear, hardening, persistent deformation, or uniform gap is not reliably corrected by pressing harder and may indicate a model-specific gasket or alignment issue.
-
Check 3
With the refrigerator stationary, view the closed door from the front and side. Compare the gap at the top and bottom, check whether the door rubs the cabinet, and gently observe whether the cabinet rocks when a door is opened or closed. Do not lift the door or loosen hardware during this check.
Expected result: The door sits square and closes after the obstruction and gasket checks; it sags, rubs, or sits higher on one side; the cabinet rocks; or the alignment changes when the door is loaded.
Next step: Consult the exact Hisense owner's manual for any permitted leveling or door-alignment procedure. If the manual is unavailable, the unit is built in, the door is heavy, or hardware is loose, arrange qualified appliance service instead of adjusting it by trial and error.
Stop if: Do not tilt or move a heavy refrigerator alone, remove hinge covers, loosen hinge bolts, disconnect a door wire or water tube, or support the door with improvised objects.
Why this matters
Why: A stable, square door makes an obstruction or seal issue more likely. Sagging, rubbing, a rocking cabinet, or alignment that changes under load can involve model-specific leveling, hinge, fastener, or door-load conditions; the visual symptom does not identify which part is at fault.
-
Check 4
After the door appears closed, check whether the interior light or door-open alert behaves normally for the exact model, and look for moisture, frost, or water around the affected edge. Keep the door closed for a short observation period and note whether it slowly springs open again. Do not hold the switch or door shut as a permanent workaround.
Expected result: The door stays closed with an even seal; it reopens or leaves a gap; moisture or frost is forming; or the light/alert indicates the door is still open.
Next step: Protect perishable food, photograph the gap and gasket, record the model and serial number, and contact Hisense or a qualified appliance technician if the issue persists. Tell the technician whether the problem is obstruction, gasket, sag, cabinet movement, or a door-open alert.
Stop if: Stop using the appliance if water reaches electrical components, the door or hinge is unstable, the cord or plug is damaged, there is sparking or a burning odor, or the refrigerator cannot keep food safely cold.
Why this matters
Why: A stable seal after clearing and cleaning supports a resolved external cause. Reopening, a persistent gap, moisture, frost, or a door-open indication makes a sealing or alignment fault more likely and can allow warm air into the cabinet; it does not prove a particular hinge, switch, or gasket part.
Use your observations
Decision map
Find the observation that best matches what you see, then follow the next safe action.
-
PATH 01Safety boundary
What you see
The door stops at the same point and an item, bin, shelf, or drawer edge is visible at that contact point.
Do this next
Remove or reposition only the accessible interfering item, close the door gently, and retest. If the contact remains with the cabinet cleared, escalate to the gasket and alignment branches.
Why this path and its safety boundary
Why it matters: A physical loading obstruction is more likely than a failed hinge or gasket.
Safety stop: Do not force the door or dismantle storage components without the exact model guide.
-
PATH 02Safety boundary
What you see
The door reaches the frame, but a clean visual gap remains or the gasket does not contact evenly.
Do this next
Clean and gently reseat the gasket as described, then retest around the perimeter. If the gap remains or the gasket is damaged, use the exact model manual and arrange service or model-specific parts guidance.
Why this path and its safety boundary
Why it matters: A dirty, displaced, damaged, or deformed gasket, or a door-alignment problem, is more likely than a simple container obstruction.
Safety stop: Do not glue, stretch, heat, cut, or substitute the gasket.
-
PATH 03Safety boundary
What you see
The door rubs, hangs low or high on one side, the cabinet rocks, or alignment changes when the door is loaded.
Do this next
Stop manipulating the door and consult the exact Hisense manual or arrange qualified service. Keep heavy items out of the affected door until alignment is assessed.
Why this path and its safety boundary
Why it matters: Leveling, hinge, fastener, or door-load issues are possible, but the generic symptom cannot identify the correct adjustment or replacement part.
Safety stop: Do not remove the door, loosen hinges, or move a heavy appliance alone.
-
PATH 04Safety boundary
What you see
The door remains ajar or fails the perimeter seal and the refrigerator also has moisture, frost, or water near the door.
Do this next
Clear the closing path and clean/reseat the gasket once. If moisture or the gap persists, protect food and arrange model-specific Hisense service.
Why this path and its safety boundary
Why it matters: Warm, moist air entering through an obstructed or poorly sealing door is more likely; the water does not by itself identify a drain or cooling component.
Safety stop: Disconnect or stop using the appliance for water near electrical parts, smoke, burning odor, sparking, damaged wiring, or repeated circuit trips.
Helpful context
Understand the symptom
Separate a physical obstruction from a sealing problem
A door that stops at the same point each time often meets a container, shelf, drawer, door bin, or food package. A door that reaches the frame but leaves a gap points more toward a dirty, displaced, folded, or damaged gasket, or toward door alignment. Open the door only as far as needed to inspect the perimeter; do not push harder to make an uncertain alignment close.
Use the exact manual for door style and adjustment
Hisense sells several refrigerator layouts, and the assigned topic does not identify a model. A single-door, bottom-mount, French-door, or side-by-side unit can have different hinges, leveling feet, mullions, and door wiring. Use the model and serial information to find the matching Hisense manual before attempting any foot, hinge, door-removal, or flap adjustment. Generic adjustment instructions can damage the seal or leave a heavy door unsupported.
A door gap can become a cooling and moisture problem
If the refrigerator is also warm, wet inside, or collecting water near the cabinet, treat the door as a sealing issue rather than repeatedly changing the temperature. Hisense notes that moisture can build up when the door is obstructed or not sealing properly. Keep the door closed while arranging service and move perishable food to a safe cold appliance if the seal cannot be restored.
Safety boundary
Stop conditions
- Stop immediately for sparking, smoke, burning odor, a hot or damaged cord or plug, exposed wiring, water near electrical components, or repeated circuit trips.
- Do not remove the refrigerator door, hinge hardware, hinge covers, wiring, or water tubing without the exact model instructions and safe support for the door.
- Do not force a door against a bin or shelf, hold the door shut as a permanent workaround, or repair a gasket with adhesive, heat, cutting, or an unverified substitute.
- If the door remains open or the gasket cannot seal after accessible obstruction removal and cleaning, protect perishable food and arrange qualified appliance service.
Only after diagnosis
Potential parts
- door gasket
Consider this only if inspection confirms a torn, hardened, persistently deformed, or model-specific ill-fitting gasket after cleaning and obstruction checks.
Confirm the exact Hisense model and the manufacturer's fit information before ordering. A door gap alone does not prove the gasket is the failed part. - hinge or door-alignment component
Consider this only after a qualified diagnosis confirms sagging, rubbing, loose hardware, or alignment failure that remains after the closing path and gasket are checked.
Hinge geometry and adjustment differ by refrigerator configuration. Do not order or adjust a hinge from the symptom alone; verify exact model fitment and service instructions.
When checks do not resolve it
Need a professional?
Arrange Hisense or qualified appliance service when the door still will not close after the closing path is clear and the gasket has been cleaned and gently reseated, when the door sags or rubs, when the cabinet is unstable, when the gasket is torn or persistently deformed, or when a model-specific adjustment is required. Escalate immediately for electrical hazards, water near electrical parts, an unstable heavy door, or a refrigerator that cannot keep food safely cold. Provide the exact model and serial number, door style, affected edge, photos of any gap, and what changed when contents were removed.
Safety scope: The owner may remove accessible storage obstructions, clean the gasket and cabinet contact points with a damp cloth, and make visual observations. Door removal, hinge or leveling adjustment, wiring or water-tube disconnection, cabinet movement, and any electrical work require the exact model procedure and qualified help.
Common questions
FAQ
Why will my Hisense refrigerator door not close all the way?
Start by checking for containers, food, shelves, bins, or drawers affecting the closing path. If the door reaches the frame but does not seal, clean the gasket and cabinet contact points with a damp washcloth and gently press the gasket firmly around the edges. Persistent gaps, rubbing, sagging, or a damaged gasket need exact-model service.
How do I check a Hisense refrigerator door seal?
Inspect the full rubber perimeter for dirt, folds, displacement, tears, or a section that does not touch the cabinet. Hisense recommends wiping the seal and cabinet contact points with a damp washcloth, pressing the seal firmly around the edges, and testing the door again. Do not use heat, adhesive, or a knife.
Should I adjust the hinges or leveling feet myself?
Only follow a procedure in the owner's manual for the exact model. Hisense refrigerator configurations differ, and a sagging or rubbing door may involve a heavy door, hinge hardware, leveling, or another alignment issue. Do not remove the door or loosen hinge hardware by trial and error.
Can a door that does not seal cause water or moisture?
Yes. Hisense notes that moisture can build up when a refrigerator door is obstructed or not sealing properly. Clear the closing path and check the gasket once; if the door still leaks air or moisture continues, protect food and arrange model-specific service.
Read the exact guide
Official sources
- Hisense Product & Support CentreHisense · Official Hisense support FAQ with generic refrigerator guidance; the assigned task has no model number, so model-specific hinge, leveling, door-style, and parts procedures remain conditional.
Community feedback
Share a repair observation
Share a plain-text repair observation. Accepted observations are published automatically; this page may take a moment to update.