
On this page
Start here
Quick answer
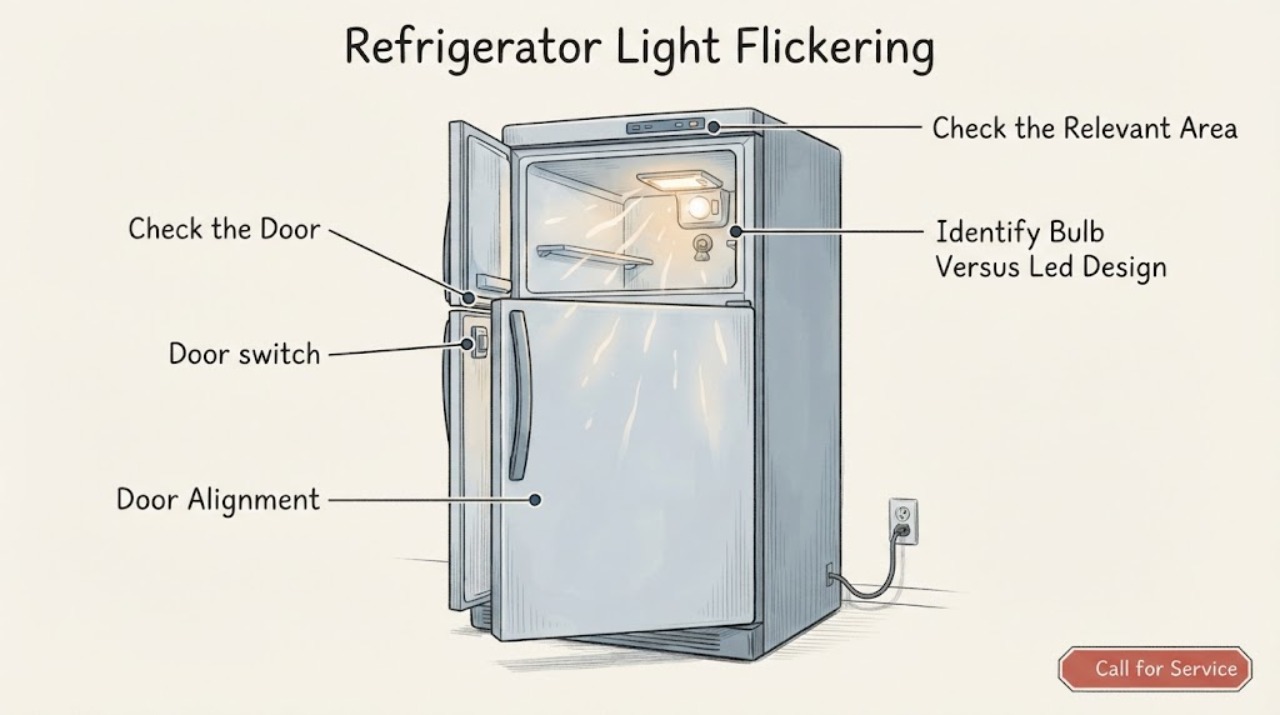
First determine whether the light flickers only when the door moves or is nearly closed, whether every interior light flickers, and whether the refrigerator, display, or outlet also loses power. Hisense manuals show that opening the refrigerator door controls the interior light; some models use a bulb while others use a sealed LED assembly, and one manual directs a qualified technician to replace a failed LED. With the refrigerator dry and power disconnected, check that the door closes fully, the gasket and hinge area are not forcing the door out of alignment, and any accessible bulb or cover is intact only if the exact manual permits inspection. Do not remove an LED lens or control panel, probe a socket, or perform a live test. If the flicker follows door movement, remains after a documented door reset, affects multiple lights or the display, or comes with a damaged cord, hot plug, burning smell, sparks, or breaker trips, leave the refrigerator connected only if safe for food preservation and arrange qualified service; isolate power when an electrical hazard is present.
Before you begin
Safety first
- The user may record the door angle and scope of flicker, inspect the gasket and visible frame, perform a dry external cord and outlet check, and follow a clearly documented bulb procedure with power disconnected. Qualified personnel must handle LED modules, sockets, door switches, hinges, harnesses, controls, cabinet access, live testing, and supply repairs.
Work through in order
Diagnostic checks
Use only checks that match the exact appliance or system and its official guide.
-
Check 1
Without repeatedly swinging the door, note whether the light flickers only when the door is opening, closing, nearly closed, or pressed inward; whether one compartment or every interior light is affected; and whether the display, compressor, fan, or outlet also loses power. Record the exact model before changing anything.
Expected result: Flicker follows door movement; occurs only at a particular door angle; affects one lamp; affects all lights and the display; or coincides with cooling interruption, noise, heat, odor, or breaker activity.
Next step: For a door-linked or single-light symptom, continue with the dry external door and light-area check. For whole-appliance flicker or any safety symptom, stop using the light as a diagnostic and arrange qualified electrical or appliance service.
Stop if: Stop immediately for smoke, sparks, flame, burning odor, scorching, a hot or damaged cord or plug, liquid in the light or control area, loss of cooling, or a repeated breaker trip.
Why this matters
Why: A door-position or single-light pattern makes the door sensor, alignment, bulb/LED connection, or local wiring more likely. Multiple lights or appliance functions flickering together makes supply, control, or broader wiring more likely. The observation is a direction, not proof of a particular part.
-
Check 2
With hands dry and the refrigerator not being forced, inspect the door gasket, frame, hinge-side clearance, and visible door-switch or sensor area for food, packaging, ice, or misalignment that prevents a full close. Clean only accessible surfaces with a dry or slightly damp cloth as the exact manual permits; do not remove the door, hinge, switch, or sensor.
Expected result: The gasket is folded or dirty; an item keeps the door from closing; the door sits unevenly; the visible switch or sensor is obstructed; or closure and the visible sensing path are normal but the light still flickers.
Next step: Remove only an obvious external obstruction and restore gasket seating without tools. If the door or hinge is misaligned, use the exact model instructions or a qualified technician. If the path is clear and flicker persists, leave the light system alone and arrange service.
Stop if: Stop for a torn gasket, loose hinge, door that can fall, exposed wiring, frost requiring panel removal, liquid in the light area, or any need to remove the door or switch.
Why this matters
Why: A door that does not reach a stable closed or open position can make a door-controlled light change state. A clean, aligned door with flicker at a fixed angle makes a switch, sensor, harness, control, or light-module fault more likely, and those parts are model-specific.
-
Check 3
Disconnect the refrigerator from power before any visual check of the light area. Use the exact manual to determine whether the model has a user-accessible bulb or a sealed LED assembly; look only for an intact cover, obvious blackening, cracking, moisture, or loose external trim. Do not touch a socket, remove an LED lens, or install a replacement based on a generic rating.
Expected result: The exact manual identifies a bulb; it identifies an LED module; the visible light cover or bulb is damaged or darkened; moisture or corrosion is present; or the light assembly appears intact.
Next step: Replace a bulb only if the exact manual clearly permits it and specifies the matching part; otherwise keep power disconnected and use qualified service for the LED, socket, module, or control. Do not energize a wet or damaged light area.
Stop if: Stop for a cracked lens, exposed contacts, moisture, corrosion, scorching, a loose assembly, a sealed LED module, or any need to remove a cover beyond the exact manual's user procedure.
Why this matters
Why: Bulb failure and LED-module failure follow different model procedures. Blackening, cracking, moisture, or a loose assembly can explain intermittent contact but can also create a shock or short risk. An intact assembly with door-linked flicker points toward sensing, wiring, or control service.
-
Check 4
With the refrigerator dry, inspect the cord, plug, and outlet externally for looseness, heat, scorching, or water. Confirm that other refrigerator functions remain stable without using an adapter, extension cord, or live meter test. Do not pull a built-in refrigerator out or access a rear junction, control board, or wiring harness as a home check.
Expected result: Only the interior light flickers; the display or cooling also flickers; the plug or outlet is hot or damaged; the circuit trips; or the cord, outlet, and other functions remain stable.
Next step: Use a qualified electrician for a damaged or unstable household outlet. For a stable supply with persistent light flicker, contact Hisense or qualified appliance service for model-specific light and door-control diagnosis.
Stop if: Stop immediately for a hot or loose plug, scorched receptacle, damaged cord, smoke, sparks, burning odor, liquid near power parts, or repeated breaker trips.
Why this matters
Why: A stable refrigerator with one flickering light supports a local light, door-sensing, or control-path problem. Whole-appliance flicker, hot hardware, or trips can indicate a supply or electrical fault and must not be narrowed by continued use.
-
Check 5
After the safe external checks, record whether the flicker stopped after door alignment or a permitted bulb replacement, whether it returns at the same door angle, and whether any display, cooling, code, heat, moisture, odor, or power symptom remains. Do not repeatedly reconnect the refrigerator to reproduce a spark or open the appliance to trace wiring.
Expected result: The flicker is gone; it returns with door movement; it persists with the door stationary; a new bulb did not help; multiple lights or controls flicker; or a safety or cooling symptom accompanies it.
Next step: Monitor only a stable refrigerator with no safety symptom. Otherwise keep the light or refrigerator out of service as appropriate, protect perishable food if cooling is affected, and give the technician the model, timing, door angle, scope, photos, and checks completed.
Stop if: Stop immediately for smoke, sparks, flame, burning odor, abnormal heat, liquid at the light or controls, damaged power hardware, loss of cooling, or repeated breaker trips.
Why this matters
Why: Resolution after an external obstruction or documented bulb procedure supports that limited cause. Recurrence, stationary flicker, failed LED or bulb replacement, multiple affected functions, or electrical symptoms makes a door switch/sensor, harness, module, control, or supply fault possible.
Use your observations
Decision map
Find the observation that best matches what you see, then follow the next safe action.
-
PATH 01Safety boundary
What you see
The flicker follows opening, closing, or a particular door angle, while the display, cooling, cord, and outlet remain stable.
Do this next
Correct only an obvious external obstruction or gasket seating without tools. If the door is misaligned or the light still flickers, arrange model-specific appliance service; do not remove the switch or door.
Why this path and its safety boundary
Why it matters: Door alignment, gasket contact, a door switch or sensor, local harness, or the light's control path is more likely than a whole-refrigerator power failure.
Safety stop: Stop for a loose hinge, damaged gasket, exposed harness, liquid in the light area, or a door that cannot be safely supported.
-
PATH 02Safety boundary
What you see
One light flickers while the door is stationary and the refrigerator otherwise operates normally; the exact manual identifies a bulb or LED assembly.
Do this next
With power disconnected, follow only the exact manual's permitted bulb inspection or replacement. Treat an LED module, sealed lens, moisture, scorching, or persistent flicker as a qualified-service condition.
Why this path and its safety boundary
Why it matters: A local bulb, socket, LED module, cover, or connector issue is more likely, but the light design and replacement boundary depend on the model.
Safety stop: Do not touch energized contacts, substitute a generic bulb or LED, remove a sealed lens, or energize a wet, cracked, or scorched assembly.
-
PATH 03Safety boundary
What you see
Multiple interior lights, the display, cooling, or other functions flicker together, or the cord, plug, outlet, or breaker shows a power symptom.
Do this next
Stop repeated testing. Use a qualified electrician for the outlet or circuit, and contact Hisense or qualified appliance service for the refrigerator after safely isolating power when required.
Why this path and its safety boundary
Why it matters: A household supply, cord, connection, control, or internal wiring fault is more likely than one failed light source.
Safety stop: Stop immediately for heat, scorching, smoke, sparks, burning odor, water near power parts, damaged cord or plug, or repeated breaker trips.
-
PATH 04Safety boundary
What you see
The light stops responding after the door has been open for a long time, then behaves differently after the door is closed and reopened, with no other electrical symptom.
Do this next
Close the door fully and reopen it once as the exact manual describes. If flicker continues, occurs at normal door use, or affects other functions, arrange service rather than repeatedly cycling the door.
Why this path and its safety boundary
Why it matters: Some Hisense documentation describes a control state that can disable the light after prolonged door opening; this behavior is model-specific and should not be assumed for every refrigerator.
Safety stop: Stop for heat, smoke, odor, damage, moisture, or any symptom that extends beyond the light.
-
PATH 05Safety boundary
What you see
Door, gasket, external supply, and any model-permitted bulb check are correct, but the flicker persists or returns, especially with a stationary door or after a new bulb.
Do this next
Keep the refrigerator connected only if it is electrically safe and cooling normally, and arrange Hisense or qualified appliance service. Provide the exact model, light design, door angle, frequency, scope, photos, and power observations.
Why this path and its safety boundary
Why it matters: An LED module, socket, door sensor, harness, control board, or internal supply fault is possible; flicker does not identify a safe part.
Safety stop: Do not open panels, perform live tests, bypass a door sensor, splice wiring, or continue operating with smoke, burning odor, heat, moisture, or power trips.
Helpful context
Understand the symptom
A flicker tied to the door is a different clue from a power flicker
If the light blinks when the door is moved, nearly closed, or pressed against the gasket, suspect the door position, switch or sensor path, wiring at the door, or a light connection before assuming a bad refrigerator power supply. If every light and the display flicker together, or the compressor stops at the same time, supply or control service becomes more important. Hisense manuals do not publish one universal flicker code for every refrigerator.
Bulb and LED procedures cannot be mixed
The opened LMT33M6AVE and LMT43M6AVE manuals refer to a light bulb, while the HQD20 troubleshooting table refers to a burned-out LED and qualified replacement. A bulb socket, an LED module, and a control board are not interchangeable. Identify the exact model before removing any cover, and do not substitute a wattage or LED module based only on appearance.
Keep food safety and electrical safety separate
A refrigerator can continue cooling while its light flickers, but that does not make a hot plug, scorched cord, burning smell, sparks, moisture in the light area, or a repeated breaker trip safe. Use only a dry external inspection with power disconnected. If the refrigerator loses cooling or power as the light flickers, move perishable food as appropriate and arrange prompt service.
Model-specific support is part of the diagnosis
Hisense support pages identify manuals and replacement-parts routes by model. That matters because some models have a replaceable bulb, some use an LED module, and door or control layouts differ. Record the full model and serial label, the door position when flicker occurs, and whether the display or cooling changes before contacting service.
Safety boundary
Stop conditions
- Stop immediately for smoke, sparks, flame, burning odor, scorching, abnormal heat, a hot or damaged cord or plug, liquid in the light or control area, loss of cooling, or repeated breaker trips.
- Do not probe a socket, perform live measurements, bypass a door switch or sensor, splice wiring, remove a control panel, or open the refrigerator cabinet as a flicker test.
- Do not substitute a generic bulb or LED module, remove a sealed lens, energize a wet or cracked light assembly, or replace an LED unless the exact manual clearly permits the procedure.
- Do not remove the refrigerator door, hinge, harness, or rear junction as a home check; use qualified service for misalignment requiring hardware work or internal access.
- If flicker persists after safe, model-documented checks, keep the appliance out of service when unsafe and arrange Hisense or qualified appliance/electrical service.
Only after diagnosis
Potential parts
- model-matched refrigerator bulb, socket cover, or LED light module
Consider only after the exact manual establishes the light design and inspection confirms a damaged bulb or module; flicker alone does not select a part.
Verify the full Hisense model, light type, connector, lens, and approved part. Bulb-based and sealed LED designs are not interchangeable by appearance. - model-matched door switch, sensor, gasket, hinge, or door harness component
Consider only after qualified diagnosis confirms a door-position, sensing, or alignment fault; a light that changes with door movement is a clue, not proof.
Confirm exact model, door configuration, sensor type, hinge side, and harness routing; do not remove or bypass a switch to test it. - model-matched control board, power component, or wiring harness
These internal parts are relevant only after qualified diagnosis of multi-light/display flicker, persistent local flicker, supply symptoms, or a control fault; do not infer fit from the light symptom.
Internal electrical parts and harness repairs require qualified service and exact model identification; do not open the cabinet or order a generic board.
When checks do not resolve it
Need a professional?
Contact Hisense or qualified service when a Hisense refrigerator light flickers with the door stationary, returns after a model-permitted bulb replacement, affects multiple lights or the display, follows a door angle despite a clear gasket and frame, or is associated with a failed LED module, moisture, code, or control symptom. Use a qualified electrician for a damaged or unstable household outlet or supply. Stop immediately and isolate power when safe for smoke, sparks, burning odor, scorching, abnormal heat, a hot or damaged cord or plug, liquid near electrical parts, loss of cooling, or repeated breaker trips. The user may identify the exact light design, inspect the closed-door path and visible gasket, perform a dry external power check, and follow an exact manual's limited bulb procedure; LED modules, sockets, door switches, harnesses, controls, and live electrical work belong to qualified personnel.
Safety scope: The user may record the door angle and scope of flicker, inspect the gasket and visible frame, perform a dry external cord and outlet check, and follow a clearly documented bulb procedure with power disconnected. Qualified personnel must handle LED modules, sockets, door switches, hinges, harnesses, controls, cabinet access, live testing, and supply repairs.
Common questions
FAQ
Why is my Hisense refrigerator light flickering when I open the door?
Because the light is door-controlled, a flicker that follows door movement can involve gasket or door alignment, the switch or sensor path, a local light connection, or the control. Check only the visible gasket and frame with power disconnected; persistent flicker needs model-specific service.
Does my Hisense refrigerator use a bulb or an LED?
It depends on the exact model. Hisense manuals for some LMT models refer to a light bulb, while the HQD20 troubleshooting table refers to a burned-out LED and qualified replacement. Identify the model before ordering or removing anything.
Can I replace a flickering LED in my Hisense refrigerator?
Do not assume it is a user-replaceable LED. Hisense's HQD20 manual directs a qualified technician to replace a burned-out LED. Use the exact model manual; do not remove a sealed lens, probe contacts, or perform live tests.
Why do all the lights and the display flicker together?
That pattern is broader than one bulb and can involve the outlet, cord, supply, control, or wiring. Stop repeated testing, use a qualified electrician for the household supply, and contact Hisense or qualified appliance service for the refrigerator.
Is a flickering refrigerator light an electrical hazard?
It can be, especially with a hot plug, scorching, smoke, sparks, burning odor, moisture, loss of cooling, or repeated breaker trips. Isolate power when safe and arrange qualified service; do not bypass the door switch or test live wiring.
Read the exact guide
Official sources
- Hisense LMT33M6AVE User ManualHisense USA · Directly applies to LMT33M6AVE; use only conditionally for other Hisense refrigerators after checking the exact manual.
- Hisense Support - For All Your Appliance NeedsHisense USA · General Hisense USA support routing; exact light and control procedures remain model-specific.
- Hisense LMT43M6AVE User ManualHisense USA · Directly applies to LMT43M6AVE; not a universal bulb or LED procedure for other Hisense models.
- Hisense HQD20 User ManualHisense USA · Directly applies to HQD20; its LED and electrical instructions are not universal for bulb-based or other Hisense refrigerators.
Community feedback
Share a repair observation
Share a plain-text repair observation. Accepted observations are published automatically; this page may take a moment to update.