
On this page
Start here
Quick answer
First record the exact Hitachi model and identify whether the problem is a normal hinged door, a freezer drawer, or an electrically assisted Auto Refrigerator Door. Remove any food, shelf, case, drawer, or bottle that visibly prevents the door from closing, and check that the cabinet is stable and level enough for the doors to meet. Inspect the gasket for dirt, folds, gaps, or damage and clean only the accessible seal with a soft damp cloth, then dry it. Hitachi manuals say a poorly closed door can allow condensation or frost and that an unlevel floor or a door that sags after loading may require model-specific leveling or parallelism adjustment. For an Auto Refrigerator Door, a power interruption or obstacle can stop the movement partway; follow the exact manual's safe recovery instruction and never force or bypass the actuator. Keep the door closed as much as possible to protect food. If it still will not seal, the gasket or hinge is damaged, the door is sagging, an automatic door repeatedly stops, or there is scraping, broken glass, exposed wiring, smoke, or water near electricity, stop using the appliance and arrange qualified Hitachi service.
Before you begin
Safety first
- This article covers model identification, visible loading, gasket, closure, stability, and manual-approved external checks. Door removal, hinge adjustment, Auto Door actuator, sensors, electrical controls, wiring, and any work under or behind the appliance require qualified service.
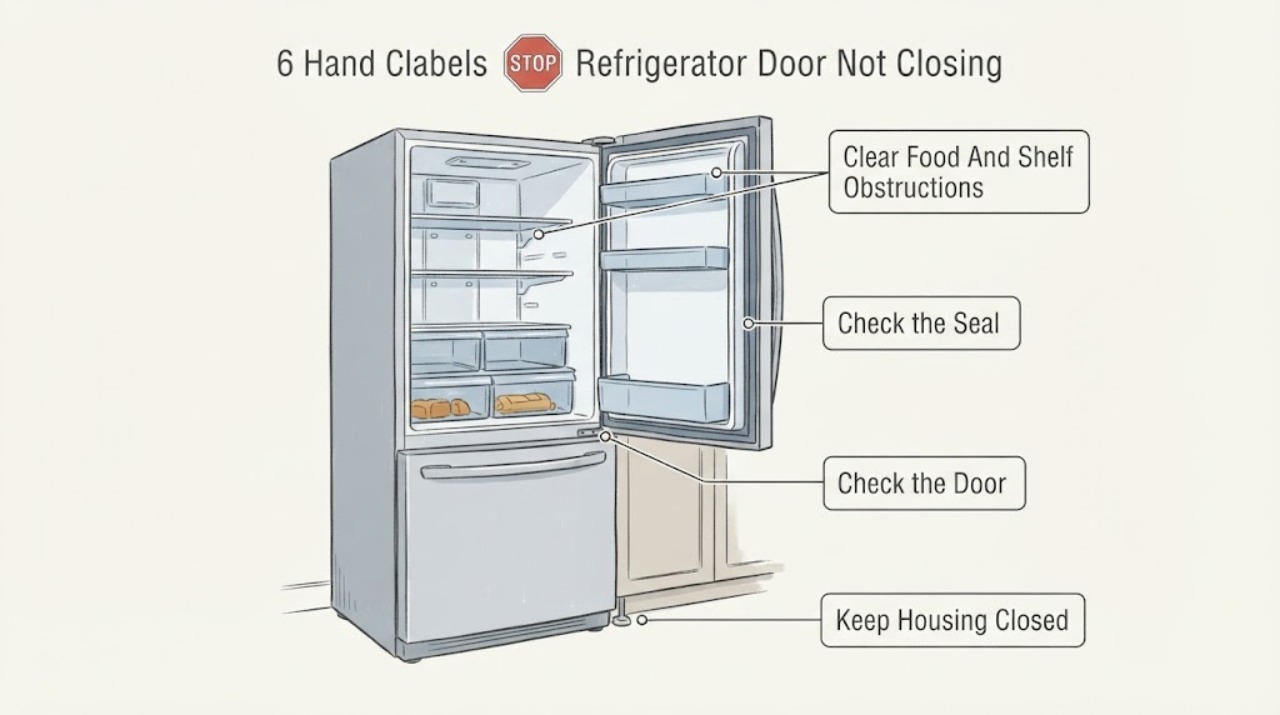
Work through in order
Diagnostic checks
Use only checks that match the exact appliance or system and its official guide.
-
Check 1
Record the complete Hitachi model and determine whether the affected part is a manual hinged door, freezer or vegetable drawer, or an Auto Refrigerator Door. Observe whether it is blocked, misaligned, rubbing, springing back, failing to latch, or stopping during a powered movement.
Expected result: The door has no powered actuator, an Auto Door button or actuator is present, a drawer is partly open, the door closes only when pushed, or it stops after power or an obstacle.
Next step: Use the matching obstruction, seal, level, auto-door, or service branch below and the exact model manual.
Stop if: Stop for broken glass, exposed wiring, smoke, burning odor, sparking, water near electricity, or a heavy door that could fall.
Why this matters
Why: Hitachi uses different closing and alignment mechanisms across models. A manual obstruction or level issue should not be diagnosed with an Auto Door sequence, and an auto actuator should not be forced like a normal hinge.
-
Check 2
Open the affected compartment only as far as needed and inspect door bins, bottles, food packages, drawers, shelves, cases, and ice or storage compartments for anything protruding into the closing path. Reposition or remove only an obvious obstruction without forcing the door.
Expected result: A package is caught, a bottle or shelf projects beyond its normal position, a drawer or case is not seated, or the path is clear but the door remains open.
Next step: Correct the visible loading or seating issue and close the door gently. If it still fails to meet the cabinet, continue to the gasket and level checks rather than pushing harder.
Stop if: Do not force the door, overload door shelves, hang on the handle, or reach beneath the refrigerator or into a powered drawer mechanism.
Why this matters
Why: Hitachi manuals directly connect caught food, squeezed items, and incorrectly fitted cases with doors that cannot close completely. If the path is clear, the cause is more likely seal contact, level, alignment, hinge, or auto-door hardware.
-
Check 3
Inspect the rubber door gasket and the cabinet contact surface around the full perimeter for dirt, folds, gaps, tears, or a section pulled out of its channel. Wipe an accessible gasket with a soft damp cloth and dry it, then close the door and observe whether contact is even.
Expected result: The gasket is dirty or folded, one corner has a gap, the gasket is torn or detached, or the gasket is clean and contacts evenly but the door still will not stay closed.
Next step: Clean only the accessible gasket and remove no hardware. Arrange model-specific service for a torn or detached gasket, persistent gap, or door alignment problem.
Stop if: Do not glue, stretch, heat, cut, or remove the gasket, and do not continue operation if the door cannot seal and food temperature is unsafe.
Why this matters
Why: A contaminated or distorted gasket can prevent a seal and allow warm moist air to enter. A torn gasket, persistent corner gap, or even contact with a door that still sags points toward a replacement, alignment, hinge, or cabinet issue.
-
Check 4
From outside the appliance, check whether the floor and cabinet appear stable, whether the door edges sit at different heights, and whether the refrigerator contacts nearby furniture. If your exact manual provides adjustable mounts or feet, follow it to make only the documented external leveling adjustment; do not unload or lift a heavy refrigerator alone.
Expected result: The unit rocks, the floor is uneven, one door is lower, the door sagged after loading or installation, or the unit is stable and aligned but still will not close.
Next step: Use the exact manual's leveling and parallelism procedure or arrange an installer/qualified technician. Recheck the door after the unit is stable; do not improvise hinge adjustment.
Stop if: Do not tip, lift, roll, or pull the refrigerator alone, put hands under the base, loosen hinge hardware under load, or work near the cord or water line.
Why this matters
Why: Hitachi manuals say an unlevel floor or settling mount can change door parallelism and describe model-specific adjustable mounts. A stable, aligned cabinet with persistent failure is less likely to be corrected by further leveling and may need hinge or door service.
-
Check 5
For a confirmed Auto Refrigerator Door model, note whether the door stopped after a power failure or obstacle and whether food or a neighboring compartment interfered. Follow only the exact manual's recovery instruction; if the manual permits a gentle hand push to complete a stopped movement, keep fingers clear and use no force.
Expected result: The actuator stopped against an obstacle, power was interrupted, the door resumes normally after the model-approved step, or it repeatedly stops or makes abnormal motor noise.
Next step: Clear only the visible obstruction and use the exact manual's recovery procedure once. If the function does not complete or the door will not seal, disable further powered operation as the manual permits and arrange service.
Stop if: Do not bypass the door sensor, hold switches, force the actuator, remove panels, or place fingers between moving doors.
Why this matters
Why: Hitachi's Auto Door manual says an obstacle or power failure can stop the door partway and identifies food caught in the compartment as a check. Repeated stops with a clear path suggest actuator, sensor, control, or alignment service.
-
Check 6
After the obstruction, gasket, level, and applicable Auto Door checks, observe whether the door now seals all around, whether condensation or frost is forming, and whether the refrigerator is maintaining temperature. Record photos and the model before contacting Hitachi support.
Expected result: The door closes and seals, frost or condensation persists, the door remains ajar, an alarm or cooling problem appears, the gasket or hinge is damaged, or an automatic door repeatedly stops.
Next step: Protect or relocate perishable food when safe and arrange qualified Hitachi appliance service for a persistent gap, damaged seal, hinge, auto-door mechanism, or cooling symptom.
Stop if: Do not disassemble the door, adjust concealed hinges, test auto-door wiring, operate with exposed parts, or continue if there is smoke, burning odor, sparking, water near electricity, or unsafe food temperature.
Why this matters
Why: A closed door should prevent ongoing moisture entry; persistent frost, warming, or an alarm can result from a continuing seal, alignment, hinge, drawer, sensor, or control fault. Food safety and electrical hazards override further adjustment.
Use your observations
Decision map
Find the observation that best matches what you see, then follow the next safe action.
-
PATH 01Safety boundary
What you see
A bottle, package, drawer, shelf, case, or ice/storage item visibly protrudes into the closing path or is caught between the door and cabinet.
Do this next
Reposition or remove only the obvious obstruction, seat the drawer or case, and close the door gently. If the gap remains with a clear path, use the seal and level branches.
Why this path and its safety boundary
Why it matters: A loading or seating obstruction is more likely than a failed gasket or hinge.
Safety stop: Do not force the door, overload shelves, or hang on the handle.
-
PATH 02Safety boundary
What you see
The gasket is dirty, folded, torn, detached, or leaves a repeatable gap around one edge even after visible loading is corrected.
Do this next
Clean and dry the accessible gasket only. Arrange service for a torn, detached, or persistent-gap seal; do not glue or remove it.
Why this path and its safety boundary
Why it matters: The door cannot maintain an even seal, allowing moisture and frost and potentially affecting cooling.
Safety stop: Do not keep using the refrigerator if food temperature is unsafe or condensation is reaching electrical parts.
-
PATH 03Safety boundary
What you see
The cabinet rocks, the floor is uneven, the door edges sit at different heights, or the door sagged after installation or loading while the gasket itself is intact.
Do this next
Follow the exact Hitachi manual's external leveling procedure or contact the installer/technician. Do not improvise hinge adjustment or move a heavy unit alone.
Why this path and its safety boundary
Why it matters: Installation level, adjustable mounts, or door parallelism is more likely than a simple obstruction.
Safety stop: Do not place hands beneath the base, tip the appliance, or loosen loaded hinge hardware.
-
PATH 04Safety boundary
What you see
A model with Auto Refrigerator Door stopped during powered movement after a power interruption or obstacle, or the motor repeats without completing the close.
Do this next
Clear only the visible obstruction and follow the exact manual's one-time recovery instruction. Stop powered troubleshooting and arrange service if it repeats or the door remains unsealed.
Why this path and its safety boundary
Why it matters: The official Auto Door manual allows for an obstruction or interrupted movement, but repeated failure points toward actuator, sensor, control, or alignment service.
Safety stop: Do not bypass switches, force the motor, place fingers in the mechanism, or remove the auto-door cover.
-
PATH 05Safety boundary
What you see
The door still will not seal after safe external checks, frost or warming develops, the door or glass is damaged, or smoke, burning odor, sparking, exposed wiring, water near electricity, or a falling-door hazard is present.
Do this next
Stop using the refrigerator and arrange qualified Hitachi or appliance service. Protect food and isolate power only from a dry, safe position.
Why this path and its safety boundary
Why it matters: A hinge, door frame, actuator, sensor, control, gasket, or other internal fault may be present; a hazard overrides adjustment.
Safety stop: Do not continue operation, disassemble the door, perform live tests, bypass an auto-door interlock, or attempt a concealed hinge or actuator repair.
Helpful context
Understand the symptom
Identify the door mechanism first
Hitachi sells refrigerators with ordinary hinged doors and drawers as well as models with an electrically assisted Auto Refrigerator Door. A manual door that rebounds against a bottle needs a different check from an auto door that stops after a power interruption. Find the model label and describe whether the door is misaligned, springs open, rubs, fails to latch, or stops during a powered movement.
A visible obstruction is the safest first correction
Hitachi's troubleshooting tables ask whether food or packages are caught in the door, whether food is squeezed in, and whether cases in each compartment are fitted securely. Check door shelves, drawers, shelves, and tall containers without forcing anything. A door left slightly open can lead to frost, dew, water on the floor, and loss of cooling, so protect perishable food while diagnosing.
Seal and level are related, but not the same repair
A dirty or folded gasket can prevent contact even when the cabinet is level. An unlevel floor or settling adjustable mount can make the doors sit at different heights, and Hitachi manuals describe rechecking door parallelism after installation or loading. Clean and observe the gasket first; do not remove hinges, lift the door, or adjust hidden hardware without the exact manual.
Safety boundary
Stop conditions
- Stop using the refrigerator for smoke, burning odor, sparking, exposed wiring, a hot or damaged cord, water near electricity, broken glass, a falling-door hazard, or unsafe food temperature.
- Do not force the door, overload shelves, hang on the handle, or place fingers between doors or drawers.
- Do not remove, glue, heat, stretch, or cut the gasket, and do not improvise hinge, mount, or Auto Door actuator adjustments.
- Do not bypass door switches or sensors, remove panels, perform live electrical tests, or work beneath or behind a heavy refrigerator alone.
- Keep doors closed as much as practical while arranging service; do not leave a door ajar while relying on a temporary obstruction fix.
When checks do not resolve it
Need a professional?
Arrange qualified Hitachi or appliance service when an obstruction, accessible gasket cleaning, and model-approved leveling or Auto Door recovery do not restore a complete seal; when the gasket, hinge, door frame, actuator, or sensor is damaged; or when frost, condensation, warming, alarms, or repeated powered-door stops occur. Stop immediately for smoke, burning odor, sparking, exposed wiring, a hot or damaged cord, water near electricity, broken glass, or a falling-door hazard.
Safety scope: This article covers model identification, visible loading, gasket, closure, stability, and manual-approved external checks. Door removal, hinge adjustment, Auto Door actuator, sensors, electrical controls, wiring, and any work under or behind the appliance require qualified service.
Common questions
FAQ
What should I check first when my Hitachi refrigerator door will not close?
Find the exact model, then check for food, bottles, drawers, shelves, cases, or ice that visibly obstruct the door. Inspect and gently clean the accessible gasket, and note whether the cabinet is stable and level. Do not force the door or start by adjusting hinges.
Can an unlevel Hitachi refrigerator make the door stay open?
Yes. Hitachi manuals describe an unlevel floor or settling adjustable mount changing door height or parallelism. Use only the exact model's leveling procedure, and do not tip or lift a heavy refrigerator alone.
Why is there frost or condensation when the Hitachi door does not close?
A door left slightly open allows moist air in. Hitachi troubleshooting guidance links an incompletely closed door and frequent or prolonged opening with frost, dew, or condensation. Correct the safe external cause and protect food; recurring frost after the door seals needs service.
What if my Hitachi refrigerator has an Auto Refrigerator Door?
Identify the model first. Hitachi's Auto Door manual says a power failure or obstacle can stop the door during electrical operation and gives model-specific recovery guidance. Clear only visible obstructions and never bypass or force the actuator.
Should I replace the Hitachi refrigerator door gasket myself?
A dirty gasket can be wiped with a soft damp cloth, but a torn, detached, or persistently gapped gasket may require model-specific replacement and alignment. Do not glue, stretch, heat, cut, or remove it without the exact manual and appropriate service procedure.
When should I stop using a Hitachi refrigerator with a door problem?
Stop for broken glass, a falling door, smoke, burning odor, sparking, exposed wiring, a hot or damaged cord, water near electricity, or unsafe food temperature. Also stop and arrange service when the door remains unsealed after safe external checks or an Auto Door repeatedly stops.
Read the exact guide
Official sources
- 使用說明書 INSTRUCTION MANUAL 日立多門電冰箱 REFRIGERATOR-FREEHitachi Home Appliances Hong Kong · Official English Hitachi R-G420KH_B multi-door refrigerator manual; its exact buttons, dimensions, and adjustment sequence are model-specific examples, while obstruction and closure principles are used with that limitation.
- RX730G, RS620G, RS670G User ManualHitachi Global / Hitachi Australia · Official Hitachi manual for RX730G, RS620G, and RS670G models; Auto Door behavior applies only to models equipped with that function.
- refrigeratorsArçelik Hitachi Home Appliances Sales Middle East Fze · Official Hitachi refrigerator FAQ; general support guidance should be combined with the exact model manual for any adjustment or repair.
Community feedback
Share a repair observation
Share a plain-text repair observation. Accepted observations are published automatically; this page may take a moment to update.