
On this page
Start here
Quick answer
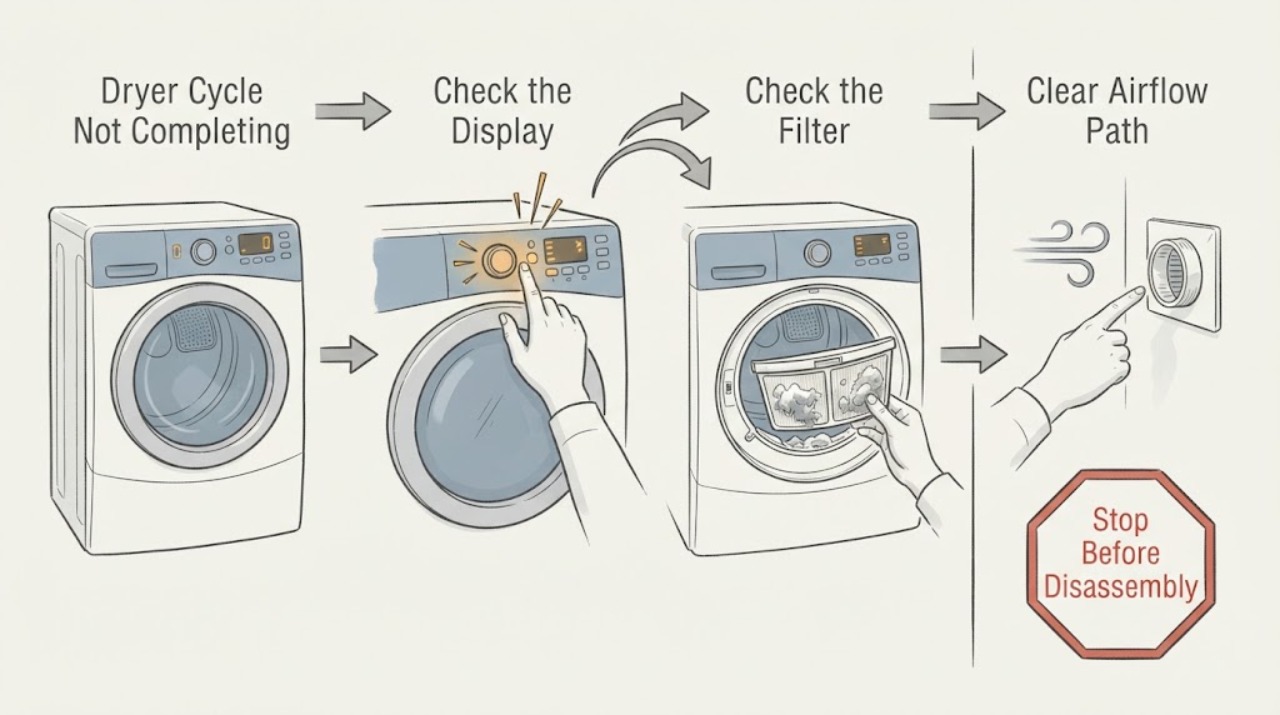
First determine whether the dryer is actually stuck or is using a normal sensor, crease-care, or progress-indicator behavior. On some Hotpoint models the programmer dial does not rotate and indicator lights show progress; on other sensor cycles the time display or knob can advance in pauses. If the drum continues for an unusually long time, clothes remain damp, or the timer never changes on a timed cycle, clean the lint path, check the model-appropriate vent or condenser and water-container condition, then retest a correctly sized load. Stop using the dryer for smoke, a burning smell, a gas smell, or severe overheating, and arrange qualified service if the checks do not restore a complete cycle.
Work through in order
Diagnostic checks
Use only checks that match the exact appliance or system and its official guide.
-
Check 1
Run the symptom once more while noting the selected programme, whether the drum keeps turning, whether heat is present, whether the clothes are dry, and whether the display uses a countdown, a dial, or progress lights.
Expected result: A sensor or named automatic programme may advance in intervals; a Hotpoint model may show progress with lights rather than a rotating programmer. A timed-dry control should move slowly as time counts down. Also note whether the drum eventually stops, continues intermittent cool tumbling, or runs continuously.
Next step: If the model manual confirms the behavior is normal, monitor one complete load. If the timed control never advances or the appliance runs indefinitely, continue with the load and airflow checks and plan service if they pass.
Why this matters
Why: Intermittent advancement, progress lights, or brief post-cycle tumbling can be normal model behavior. A timed control that never moves, or a drum that never reaches an end state, is a fault symptom rather than evidence that the dial must be forced.
-
Check 2
Remove an overloaded or unusually small mixed load, clean the lint or fluff filter, and select a suitable programme and heat setting for a normal, similar-fabric load. For a condenser model, empty and refit the water container; for a model with an accessible condenser, clean it as directed by the manual.
Expected result: The dryer completes a normal load after the filter and water container are serviced, or it still leaves the load damp and running. A small load can fail to make reliable contact with moisture sensors, while a heavy mixed load can extend drying time.
Next step: Use the model manual for any condenser access or cleaning details. If the same suitable load still does not complete, check the exhaust or condenser airflow path next; do not replace a sensor or control based on this check alone.
Why this matters
Why: Improvement after changing the load or cleaning the filter indicates a sensing, moisture-removal, or load-condition issue rather than proof of a failed timer. Persistent dampness or a full water container warning points to a condenser or water-removal condition that is model-specific.
-
Check 3
With the dryer off and cool, inspect the vented model’s rear hose for crushing, kinks, lint, or unsuitable flexible plastic ducting. Check the outside wall cap for obstruction and compare the airflow with the model’s installation instructions. For a condenser or heat-pump model, follow the manual’s filter, condenser, and water-container checks instead of treating it as a vented appliance.
Expected result: A restricted hose, blocked wall cap, weak outlet airflow, or a visibly dirty condenser corresponds with long drying times, a hot cabinet, moisture around the door, or a cycle that appears never to finish. Clear airflow and a clean condensation path produce a shorter, more consistent test cycle.
Next step: Correct only accessible external restrictions and retest. Do not disconnect a gas dryer’s vent to run a diagnostic load; the official guidance warns that combustion fumes can enter the room. Have a qualified technician inspect persistent airflow, heating, or control faults.
Why this matters
Why: The dryer has to remove heat and moisture to finish a load. Restricted airflow can make the cabinet hot and prolong drying; a clean path that does not change the symptom makes an internal heating, sensing, motor, or control issue more likely.
-
Check 4
Separate a control-timing symptom from a heating symptom: on an electric model, check that the dedicated supply and breakers are intact without opening the appliance; on a gas model, confirm the intended dry cycle is selected and that the gas supply has not been shut off, then stop if heat is absent or the appliance smells of gas.
Expected result: The drum tumbles with normal heat and the load dries, but a timed control stays fixed; or the drum tumbles with little or no heat and the load stays wet. A tripped breaker, incorrect cycle, or closed supply can prevent heating, but a running dryer that still does not heat after these external checks needs service.
Next step: If the power, cycle, and external supply checks are normal but the timer does not advance or the dryer does not heat, stop the test and arrange qualified appliance service. Never open the terminal block or gas components as a consumer check.
Why this matters
Why: A timer/control fault and a heating or fuel-supply fault can both look like an unfinished cycle, but they require different service diagnosis. Do not infer a failed heater, thermostat, timer, or gas valve without model-specific testing.
Use your observations
Decision map
Find the observation that best matches what you see, then follow the next safe action.
-
PATH 01Next step
What you see
The dial pauses or does not rotate, but the manual says the model uses progress lights or intermittent sensor advancement.
Do this next
Judge completion by the end indicator and the load condition; continue only if the drum or heat behavior is also abnormal.
Why this path and its safety boundary
Why it matters: The control indication is likely normal for that model.
-
PATH 02Next step
What you see
The timed-cycle control stays at its starting position throughout a test, even though the drum runs.
Do this next
Do not force the dial or open the console; record the programme and model information and arrange qualified service.
Why this path and its safety boundary
Why it matters: A stationary timed-cycle timer is not normal and may require service.
-
PATH 03Next step
What you see
Clothes remain damp, the cabinet is unusually hot, or outside airflow is weak.
Do this next
Stop and cool the appliance, clean only the accessible model-appropriate filter or condenser, correct an external hose or wall-cap restriction, and retest once. Escalate if the symptom remains.
Why this path and its safety boundary
Why it matters: A lint, exhaust, condenser, water-container, load, or heat-setting condition is more likely than a simple timer display issue.
-
PATH 04Next step
What you see
A burning smell, smoke, sparking, gas odor, a very hot cabinet, or abnormal noise appears.
Do this next
Stop the cycle, keep clear of smoke or gas, and disconnect power only if it can be done safely without reaching through a hazard. Arrange qualified appliance or gas service; do not restart the dryer to collect more observations.
Why this path and its safety boundary
Why it matters: This is a safety stop, not a further troubleshooting branch.
Helpful context
Understand the symptom
Identify what ‘not completing’ means
A dryer that pauses briefly, tumbles intermittently after the end, or shows progress lights instead of moving a dial may be operating as designed. The useful symptom is the combination of the control behavior, drum motion, heat, airflow, and the condition of the load. A cycle that runs for a long time with damp clothing points toward drying performance or heat removal; a timed-cycle timer that remains at its starting position points toward a control or timer fault.
Use the model manual for controls
Hotpoint dryer interfaces differ. Confirm the selected programme, dryness or heat setting, and what the end-of-cycle indicator means in the manual for the exact model. Do not assume a stationary dial is a fault until you know that the model uses the dial as its progress display.
Keep the test safe
For cleaning or inspection, switch the appliance off and disconnect it from the mains when the manual permits. Do not remove panels, test live terminals, bypass a door or safety switch, or open a gas circuit. A gas dryer must not be operated with its exhaust vent disconnected.
Safety boundary
Stop conditions
- Stop immediately for smoke, a burning smell, sparking, a gas smell, or a cabinet that becomes abnormally hot.
- Do not run a gas dryer with the exhaust vent disconnected.
- Do not bypass the door or safety switch, open live electrical terminals, or disassemble gas or heating components.
- If water is leaking from a condenser system or the appliance is wet around electrical controls, disconnect power only if safe and arrange service.
Only after diagnosis
Potential parts
- timer or electronic control
Only consider this category if a timed cycle runs but its control never advances after the external power and programme checks, and a technician confirms the control fault.
Confirm the full model identifier and the manufacturer’s fit information before ordering; Hotpoint controls vary by model. - moisture sensor
Only consider this category if the model uses sensor drying and the filter, load, level, and condensation or exhaust path are correct but sensor-cycle decisions remain abnormal.
Use the exact model documentation and have a qualified technician confirm the sensor and wiring before replacement. - thermal or heating component
Only consider this category when the dryer tumbles but repeatedly has no or insufficient heat after the correct cycle and external supply checks, and service diagnosis identifies a failed component.
Heating parts and safety cut-outs are model-specific and must be matched and installed by a qualified technician.
When checks do not resolve it
Need a professional?
Arrange qualified appliance service when a timed-cycle timer never advances, a correctly loaded and cleaned dryer still runs indefinitely, the dryer repeatedly fails to heat or dry, an error indicator returns, or the symptom involves internal wiring, the motor, a heater, a thermostat, a moisture sensor, a control board, or gas components. Stop immediately for smoke, burning odor, sparking, gas odor, or severe overheating.
Common questions
FAQ
Why does my Hotpoint dryer keep tumbling after the programme ends?
Some Hotpoint models use a crease-care feature that intermittently tumbles the load in cool air after the programme. Check the model manual and the end indicator before treating this behavior as a fault.
Why is my dryer timer not moving?
A sensor-cycle timer can advance in intervals, and some Hotpoint dryers use progress lights instead of a rotating dial. A timed-cycle control that never moves throughout the cycle is not normal and should be assessed by service.
Can a blocked vent make a dryer cycle take too long?
Yes. A kinked or obstructed exhaust path limits heat and moisture removal, which can leave the cabinet hot and prolong drying. Clean only accessible external areas and follow the exact model installation instructions.
What should I do if a Hotpoint dryer smells of gas or burning?
Stop the dryer immediately, keep clear of smoke or gas, and arrange qualified service. Do not restart it or open gas, heater, or live electrical components to investigate.
Read the exact guide
Official sources
- Gas Dryer - Runs But Does Not HeatGE Appliances · General gas-dryer cycle, airflow, supply and no-heat service guidance
- Dryer - Taking Too Long To Dry Clothes or Not Drying at AllGE Appliances · General dryer load, lint-filter, vent, breaker, sensor and drying-time guidance
- Dryer - Timer Stops During the CycleGE Appliances · General dryer timer, overheating, sensor-load and reverse-tumble behavior
- Hotpoint Service Tumble Dryer Repair - HotpointHotpoint · Hotpoint tumble dryer troubleshooting, filter, water container, programmer and service guidance
- Dryer - Things To Check For A Venting IssueGE Appliances · General dryer exhaust airflow, vent obstruction and gas-dryer safety guidance
- Why Is My Hotpoint Tumble Dryer Not Working? Troubleshooting GuideHotpoint · Hotpoint tumble dryer load, sensor, filter, condenser, vent, dial and post-cycle troubleshooting
- Dryer - Timer is Not AdvancingGE Appliances · General dryer timed-cycle and automatic-cycle timer behavior
Community feedback
Share a repair observation
Share a plain-text repair observation. Accepted observations are published automatically; this page may take a moment to update.