
On this page
Start here
Quick answer
Do not start by ordering an in-door water tube for the Hotpoint CSX22DMC. The official Hotpoint/GE manual for the CSX22D family shows household water entering a dual solenoid valve, then feeding both the reservoir and icemaker; chilled water reaches the door through tubing when the selector is set to CHILLED WATER and the cradle is pressed. First confirm the exact model suffix and whether the icemaker also has water, then check only the visible supply valve, selector/cradle response, filter if fitted, and accessible leaks or kinks. If the refrigerator was recently connected, the manual says to hold the dispenser cradle for about two minutes to remove trapped air and fill the reservoir, then discard the first six glasses. No flow with an otherwise working icemaker points toward the door/reservoir/dispensing branch, but it still does not identify a tube or valve. Do not disconnect a pressurized line, remove the door, open panels, or guess an interchangeable part; use Hotpoint/GE model-specific service, or the landlord/property manager if this is a rental.
Before you begin
Safety first
- Do not disconnect a pressurized water line, cut or splice the in-door tube, remove the refrigerator door or trim, pull the cabinet forward, open electrical covers, bypass the dispenser or door switch, or make live electrical tests. Stop for a leak, water near the cord/outlet, a damaged line, a hot or damaged cord, smoke, or a tripping breaker.
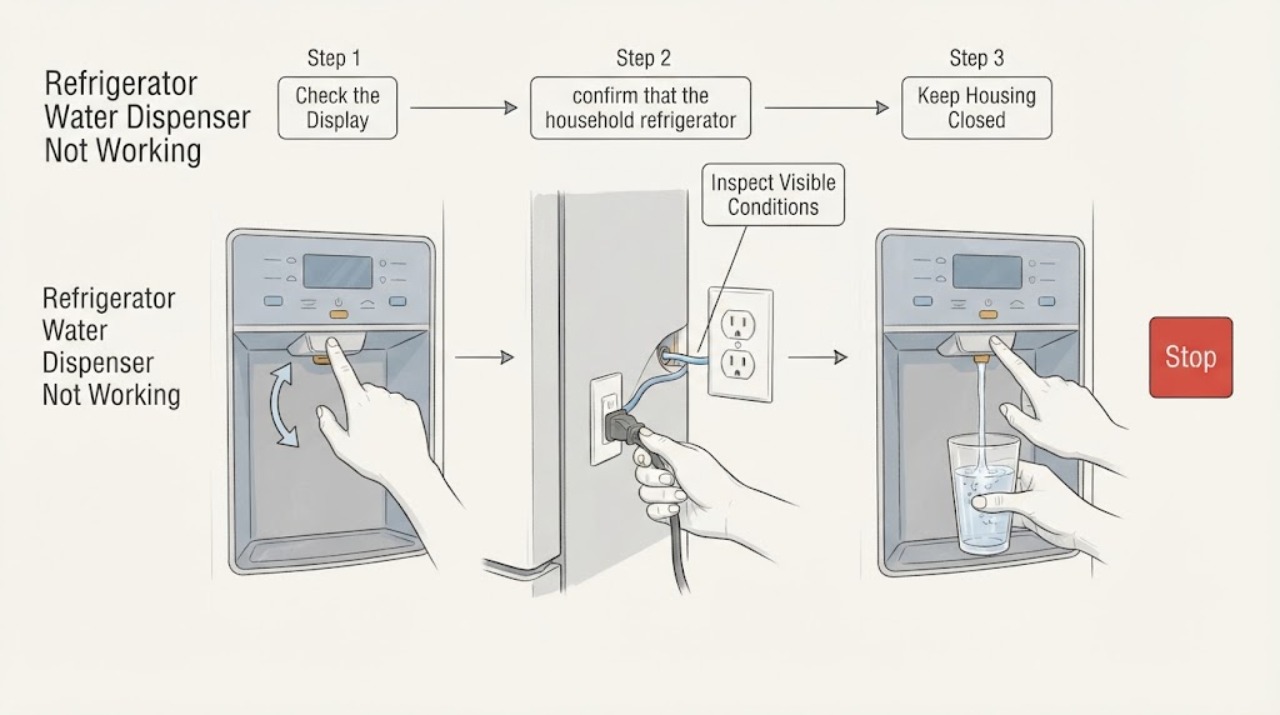
Work through in order
Diagnostic checks
Use only checks that match the exact appliance or system and its official guide.
-
Check 1
Read the model and serial label from the lower area inside the fresh-food compartment door without moving the refrigerator. Confirm whether it is Hotpoint CSX22DMC and whether the dispenser control has the CSX22-style ICE CUBES/CHILLED WATER selector and cradle; note whether the refrigerator is a rental or was recently connected to water.
Expected result: The label and controls match the CSX22D family, or the suffix/layout differs or cannot be confirmed.
Next step: If identity is uncertain, stop part selection and send the complete label information and a safe external control-panel photo to Hotpoint/GE support or the property manager. Continue only when the manual and appliance family match.
Why this matters
Why: The available official manual identifies CSX22D and CSX24D family models, not every suffix variant. A different control layout or market can route water differently, so a generic door-tube instruction would be unsafe.
-
Check 2
With a dry floor and hands, confirm that the household refrigerator water shut-off valve is open and the visible supply connection is not kinked, crushed, or leaking. Do not pull the refrigerator, loosen a fitting, or disconnect the line under pressure.
Expected result: The valve is closed or partly closed, the visible line is kinked/damaged, water is leaking, or the accessible supply path appears normal.
Next step: If the valve is safely reachable, correct only an obvious closed setting and watch the connection without touching it. For a leak, damaged line, inaccessible valve, or any water near electrical parts, close the valve only if safe and arrange qualified appliance/plumbing service; in a rental, notify the landlord.
Why this matters
Why: The Hotpoint manual lists a water supply that is turned off or not connected as a direct reason the dispenser does not work. A damaged or wet connection is a leak/safety issue, not permission to open the door or replace tubing.
-
Check 3
Set the selector to CHILLED WATER, place a container under the dispenser, and press the rubber-cushioned cradle gently once. Observe whether there is no sound or response, a valve sound with no water, a weak/intermittent stream, or a normal stream that is initially warm. Keep the test brief and keep the floor dry.
Expected result: Water flows normally, flows weakly or intermittently, the dispenser responds but remains dry, or the cradle/selector does not respond.
Next step: If water flows, stop looking for a replacement tube. If it is weak or absent, continue with the icemaker comparison and filter/installation checks; do not hold the cradle continuously or disassemble the dispenser.
Why this matters
Why: A normal stream moves the problem away from a failed in-door line. A weak stream can fit restriction or sediment; a response with no water can involve the supply, valve, reservoir, or door path; no response can involve the selector/cradle or control path. A first glass that is warmer after long inactivity is specifically described as normal in the manual.
-
Check 4
Compare the water dispenser with the icemaker without touching the icemaker mechanism: note whether the icemaker has recently filled or made ice, whether its feeler arm is in the normal ON/down position, and whether the refrigerator was connected or its water supply was interrupted recently.
Expected result: The icemaker also has no water, the icemaker works while the dispenser does not, or the icemaker status is unknown/not fitted.
Next step: For a recently connected system, follow the manual's user-level purge only: after water is connected, press the water cradle for about two minutes to remove trapped air and fill the reservoir, then discard the first six glasses. If both features remain dry, or the model has no matching icemaker setup, arrange service rather than changing the door line.
Why this matters
Why: If both features lack water, the shared household supply, filter, inlet-valve supply path, or connection becomes more likely than a door-only tube. If the icemaker works but the dispenser is dry, the fault is narrowed to the dispenser selection/cradle, reservoir, valve branch, or door tubing; it still does not identify one part.
-
Check 5
If a user-accessible water filter is actually fitted, record its label and installation state and inspect only for an obvious seating problem or a documented replacement interval. Do not force a cartridge, bypass the filter, or assume a filter belongs to this old model without the exact literature.
Expected result: A matching filter is overdue or visibly mis-seated, no filter is fitted, or the filter path appears normal but dispensing still fails.
Next step: Use only the exact model instructions for a user-level filter correction. If no exact filter procedure is available, leave the appliance assembled and have Hotpoint/GE service identify the water path and approved part before replacement.
Why this matters
Why: The manual identifies poor incoming water and an optional filter accessory, but filter presence does not prove that a no-flow complaint is caused by the door tube. A filter obstruction can restrict flow while leaving other components intact.
-
Check 6
Look from outside at the dispenser recess, lower hinge area, and floor for fresh water, a damp door edge, or a stream that appears only when the cradle is pressed. Do not remove the door trim, pull the refrigerator forward, cut tubing, or test hidden connections.
Expected result: There is no visible leak, water appears at the dispenser/hinge or under the door, the door line is visibly damaged, or water is near the power cord/outlet.
Next step: Stop dispensing, keep the area dry, and close the household water valve only if it is safely reachable. Leave electrical parts untouched and arrange qualified appliance/plumbing service; for a rental, notify the landlord/property manager before any door work.
Why this matters
Why: A visible leak or door-line damage makes the water path a physical repair and possible water-damage hazard. Hidden tubing in the door and its routing cannot be safely assessed from the outside, and a wet electrical area requires immediate caution.
Use your observations
Decision map
Find the observation that best matches what you see, then follow the next safe action.
-
PATH 01Next step
What you see
The icemaker also lacks water, the visible supply valve is closed or the line is kinked, or the refrigerator was recently connected or had its water supply interrupted.
Do this next
Correct only an obvious accessible valve setting or follow the manual's two-minute water-cradle purge after a confirmed connection. If both features remain dry, stop and arrange model-specific service; do not replace the door tube first.
Why this path and its safety boundary
Why it matters: A shared supply, connection, trapped air, filter, or inlet-valve path is more likely than an isolated in-door line. The official manual explicitly lists a turned-off/unconnected supply and says a newly connected system needs a user-level purge.
-
PATH 02Next step
What you see
The icemaker works, the selector is on CHILLED WATER, and the cradle gives a response but no water reaches the glass.
Do this next
Record the exact model, selector/cradle response, filter status, and any recent freezing or door work, then request Hotpoint/GE diagnosis. Do not disconnect a pressurized line, remove the door, or order a generic tube.
Why this path and its safety boundary
Why it matters: The shared household supply is less likely to be the only cause. The remaining path includes the dispenser selection/cradle, the dispenser side of the valve, the reservoir, a restriction or freeze, and tubing through the freezer door; the symptom does not isolate the tube.
-
PATH 03Next step
What you see
The stream is weak or intermittent, the manual's supply checks are normal, and there is no visible door leak.
Do this next
Use only the exact model's accessible filter or purge instruction. If flow does not recover, arrange service to trace the path before selecting a tube or valve.
Why this path and its safety boundary
Why it matters: A restriction from sediment, filter seating, trapped air, a partially restricted valve, or a frozen/restricted portion of the reservoir or door path remains possible. Flow strength alone cannot distinguish those causes.
-
PATH 04Next step
What you see
Water appears around the dispenser, door edge, hinge, or floor, especially when the cradle is pressed, or water reaches electrical parts.
Do this next
Stop dispensing, close the water valve only from a dry safe position, keep away from wet electrical parts, and arrange qualified appliance/plumbing service. In a rental, report it to the landlord/property manager before moving or dismantling the refrigerator.
Why this path and its safety boundary
Why it matters: This is a leak and water-damage/electrical-safety branch, not a routine tube replacement. Hidden door tubing and connections require controlled access and the source cannot be confirmed safely from the outside.
Helpful context
Understand the symptom
Why the dispenser line is not the first diagnosis
The rating label says CSX22DMC, while the opened official Hotpoint manual is the CSX22D/CSX24D family book and labels the CSX22 ice-and-water dispenser. Confirm that the control layout and model family match before using it. In that manual, household water passes through a dual solenoid valve to a reservoir and the icemaker; selecting CHILLED WATER and pressing the cradle sends reservoir water through tubing in the freezer door. That means a no-flow complaint can begin at the house valve, supply line, filter or valve, the selector/cradle, the reservoir, the door tube, or a leak. The symptom alone cannot select a replacement tube.
Use model-specific literature before touching a water connection
GE Appliances says older product literature can be found by entering the complete model number, and that most repair parts are model specific. The CSX22DMC suffix matters because door routing, dispenser parts, and valve connections must match the actual appliance. If this is a rental, a leaking or inaccessible door line is an installation/property repair issue as well as an appliance issue; document the safe external symptom and route it through the landlord or property manager rather than modifying the door.
When checks do not resolve it
Need a professional?
Arrange Hotpoint/GE or qualified appliance service when the exact model family is confirmed but the dispenser remains dry after the safe supply, selector, icemaker comparison, and documented purge/filter checks; call sooner for any visible door-line leak or inaccessible connection. In an apartment, use the landlord/property manager or installer as the first repair route.
Safety scope: Do not disconnect a pressurized water line, cut or splice the in-door tube, remove the refrigerator door or trim, pull the cabinet forward, open electrical covers, bypass the dispenser or door switch, or make live electrical tests. Stop for a leak, water near the cord/outlet, a damaged line, a hot or damaged cord, smoke, or a tripping breaker.
Have this ready
- Provide the complete CSX22DMC label and serial information, the CSX22/CSX24-style control layout, market, whether the icemaker makes water/ice, valve and visible line status, filter presence, selector/cradle response, stream strength, recent connection or interruption, and the location of any leak.
Common questions
FAQ
Should I replace the Hotpoint CSX22DMC in-door water line first?
No. The official CSX22D-family manual lists a turned-off or disconnected supply and a supply line clogged with sediment as dispenser causes, and the same water supply feeds the reservoir and icemaker. Confirm those paths and compare the icemaker before diagnosing the door tubing.
What if the icemaker works but the water dispenser does not?
That makes a total household-supply failure less likely and narrows attention to the dispenser selector/cradle, the dispenser side of the valve, reservoir, restriction or freeze, and the door tubing. It still does not prove which component failed, so do not order a generic valve or tube.
How do I purge air after connecting this refrigerator to water?
The official manual says that after the water supply is connected, press the water dispenser cradle for about two minutes to remove trapped air and fill the reservoir automatically, then discard the first six glasses. Keep the test controlled and stop if a connection leaks.
Who handles an in-door water-line leak in an apartment?
Stop dispensing and close the household water valve only if it is safely reachable. Do not remove the door or disconnect tubing; report the leak to the landlord/property manager and arrange qualified appliance or plumbing service, especially if water is near electrical parts.
Read the exact guide
Official sources
- Appliance - Customizing or ModifyingGE Appliances · Supports refusing unverified modifications or interchangeable door/dispenser components; it does not diagnose CSX22DMC water flow.
- GE Appliance - Download a Copy of Your Owner's Manual or Installation InstructionsGE Appliances · Supports confirming the complete CSX22DMC model and the matching older manual; it does not prove a part fit or replace the exact family manual.
- Use and Care of Hotpoint Models CSX22D and CSX24D with Ice & Chilled Water ServiceHotpoint / GE Appliances · Official older Hotpoint family manual; the task label is CSX22DMC, so the complete suffix and control layout must be confirmed before applying model-specific procedures. It directly supports the water-path, dispenser operation, purge, filter, leak, and troubleshooting claims used here.
- GE Appliance - Finding Parts for Your ApplianceGE Appliances · Supports the no-guessing-parts boundary for the CSX22DMC water path; it does not identify the failed part or authorize a door-line replacement.
Community feedback
Share a repair observation
Share a plain-text repair observation. Accepted observations are published automatically; this page may take a moment to update.