
On this page
Start here
Quick answer
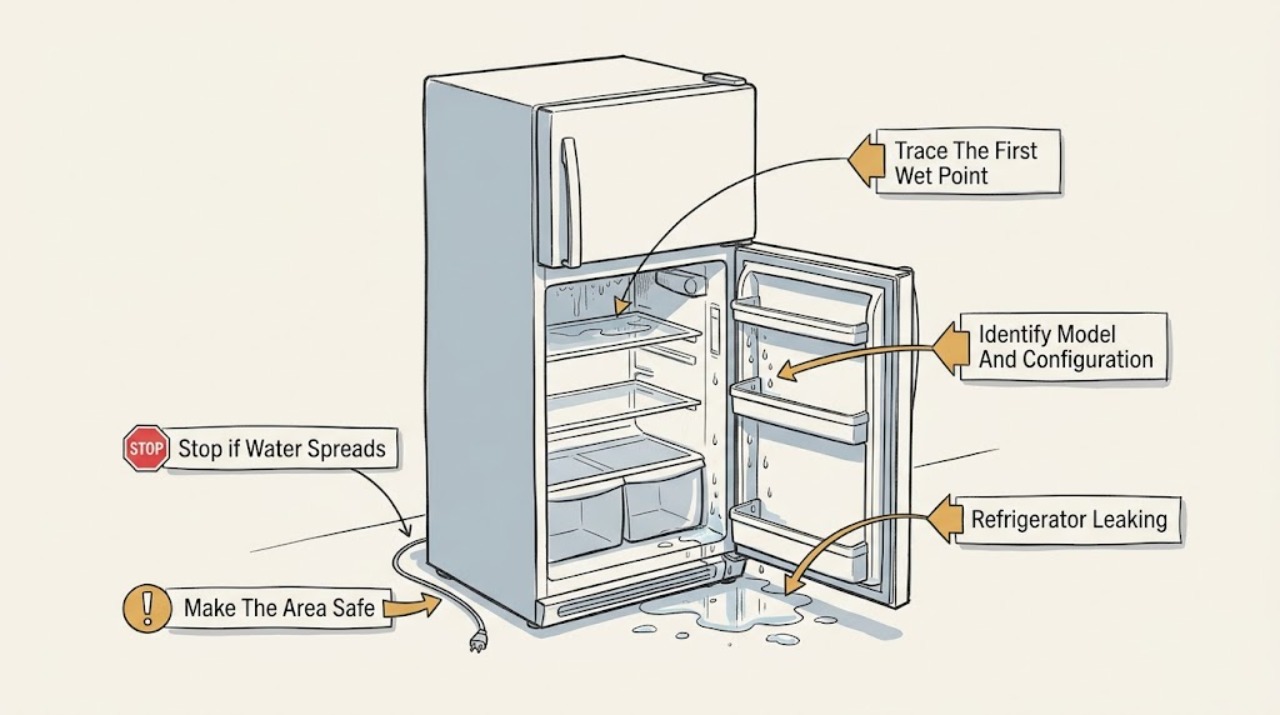
Do not start by replacing a water part. First identify whether the appliance is a refrigerator or fridge-freezer and record the exact model/industrial code. From a dry, safe position, find the first wet point: door seal or front edge, inner rear gutter/base, ice-cube tray or factory-fitted ice maker if present, or underneath/behind the cabinet. Hotpoint says inner-base moisture is commonly associated with a blocked rear gutter outlet or items touching the back wall, and that defrost water can travel to a rear collection point above the compressor. A damaged ice tray, condensation, or defrost drain is a different path from a plumbed water connection. Remove only an accessible obstruction and wipe visible water as the exact manual permits. If water reaches the plug, outlet, light, control, or wiring, or the source is under/behind the cabinet, stop using the refrigerator and disconnect power only from a dry, safe position; do not pull an integrated unit, open panels, disconnect tubing, or handle refrigerant. Arrange Hotpoint or qualified service for persistent leaks, an inaccessible source, or any ice-maker/water-path fault.
Before you begin
Safety first
- This article covers model identification, dry external observation, visible door/gutter/tray checks, and limited accessible cleaning only. Do not move the appliance, open panels, disconnect tubing, handle wet wiring, chip ice, apply heat, or repair refrigerant or sealed-system components.
Work through in order
Diagnostic checks
Use only checks that match the exact appliance or system and its official guide.
-
Check 1
Read the Hotpoint model or industrial code from the door frame or rating label without moving the appliance. Note whether it is a refrigerator or fridge-freezer, freestanding or integrated, and whether it visibly has a manual ice tray, factory-fitted ice maker, or water connection.
Expected result: The model and configuration are known, an ice feature is present, a water connection is present, or the architecture cannot be verified.
Next step: Use the exact manual and the matching branch below. If the model cannot be identified safely, limit checks to visible water and safety isolation and arrange service.
Stop if: Stop if identifying the label requires moving the refrigerator, opening a panel, or approaching water near electricity.
Why this matters
Why: Hotpoint's troubleshooting and parts guidance are model-specific. Configuration determines whether the likely path is condensation/defrost, an ice feature, or an external/internal water connection.
-
Check 2
Keep the refrigerator still and inspect from a dry position. If water is near a plug, outlet, lamp, control, or wiring, stop operating it and disconnect power only from a dry, safe position; otherwise protect the floor with towels without reaching behind the unit.
Expected result: The water is confined inside the cabinet, reaches the door/front edge, is under or behind the cabinet, or is near electrical parts.
Next step: Leave the appliance off when water contacts electrics, spreads under the cabinet, or cannot be traced safely. Arrange qualified service and do not restore power just to observe another cycle.
Stop if: Do not touch wet electrical parts, restore power to wet equipment, pull or tilt the appliance, or loosen a water connection.
Why this matters
Why: A contained inner leak may permit limited source identification, but water near electrics or an inaccessible rear/under-cabinet source is a stop-use condition. Moving a heavy or integrated appliance can worsen a water or electrical hazard.
-
Check 3
With power isolated when required and the area safe, use a dry cloth to trace moisture from the visible puddle toward its highest or first wet point: door gasket/front edge, inner rear wall/gutter, cabinet base, ice tray/ice-maker area, or under/behind the cabinet. Do not remove liners or covers.
Expected result: Water starts at the door edge, inner rear gutter/base, tray or ice-maker area, or arrives from below/behind the cabinet.
Next step: Follow the corresponding branch and photograph the model label and first wet point for service. If no source is visible without dismantling, stop and arrange diagnosis.
Stop if: Do not use sharp tools, heat, compressed air, or chemicals to clear ice or a drain, and stop if water is near electricity.
Why this matters
Why: The first wet point separates condensation/door sealing, defrost drainage, an ice feature, and an external or inaccessible water path. A final puddle location alone cannot identify the source.
-
Check 4
Inspect the accessible door gasket and door edge for a visible gap, trapped food, ice, or moisture. Check whether doors were left ajar and whether uncovered food or liquid could add condensation; do not remove the gasket or alter hinges.
Expected result: The gasket does not appear to seal, the door was ajar, food/liquid is uncovered, or the door edge is dry and sealed while water begins elsewhere.
Next step: Remove only accessible debris from the gasket and close the door fully. If the seal is damaged, the door cannot close, or water persists, arrange model-specific service.
Stop if: Do not pry, stretch, glue, or replace a gasket without the exact model instructions, and do not keep operating with water reaching electrical areas.
Why this matters
Why: Hotpoint associates frost/moisture with doors left ajar and advises covering food and liquids. A door or condensation pattern is less consistent with a leak that starts at the rear gutter, ice feature, or under-cabinet connection.
-
Check 5
If the first wet point is the inner rear wall or cabinet base, check whether food or packaging touches the back wall and whether the rear gutter opening is visibly obstructed. Follow the exact manual for any permitted gentle cleaning; do not probe deeply or dismantle the liner.
Expected result: Items touch the back wall, the gutter opening is visibly blocked, water returns after mopping, or the ice/door areas remain dry.
Next step: Remove only an accessible item touching the back wall, mop visible water, and follow the model manual. If the gutter is inaccessible or water returns, leave the appliance off as needed and arrange service.
Stop if: Do not insert rigid objects, pour chemicals, apply heat, remove the rear liner, or continue if water is near electrics.
Why this matters
Why: Hotpoint identifies a blocked rear gutter outlet or items touching the back wall as common inner-base moisture causes. Defrost water may also travel to a rear collection point above the compressor, so this pattern does not prove a failed ice maker.
-
Check 6
For a verified ice tray or factory-fitted ice maker, inspect only the accessible tray, bin, and surrounding area for a crack, overflow, frost, or water trail. If water appears under/behind a plumbed model, record that fact without moving or disconnecting it; use the exact manual to stop the ice function if provided.
Expected result: The tray is cracked or overflowing, water begins around a fitted ice maker, the water connection area is involved, or all visible ice features are dry.
Next step: Remove a damaged manual tray from use and confirm a replacement by exact model. For a fitted ice maker or plumbed path, leave the relevant function/appliance off and arrange Hotpoint or qualified service.
Stop if: Do not disconnect tubing, open a valve, remove the ice-maker housing, chip ice, apply heat, or test internal water/electrical parts.
Why this matters
Why: A local tray issue, automatic ice-maker path, and rear/under-cabinet water path require different parts and service routes. Hotpoint labels ice-maker faults “if fitted” and routes them to an engineer; a refrigerator without that feature needs the condensation/defrost branches instead.
Use your observations
Decision map
Find the observation that best matches what you see, then follow the next safe action.
-
PATH 01Safety boundary
What you see
Moisture begins at the door edge or gasket, the door was left ajar, or uncovered food/liquids are present, with no water at the rear or ice feature.
Do this next
Remove accessible gasket debris, cover food/liquids, close the door fully, and monitor without moving the appliance. Arrange service if the gasket or door does not seal or moisture returns.
Why this path and its safety boundary
Why it matters: Condensation or incomplete door closure is more likely than a hidden drain or ice-maker leak.
Safety stop: Do not remove the gasket, force the door, or operate if water reaches electrical parts.
-
PATH 02Safety boundary
What you see
Water starts on the inner rear wall or base, especially where an item touches the back wall or a visible gutter opening is obstructed, while the door and ice area are dry.
Do this next
Remove only an accessible obstruction and mop visible water, following the exact manual. Arrange service if the gutter is inaccessible or the water returns.
Why this path and its safety boundary
Why it matters: Hotpoint's rear-gutter/defrost explanation is more likely than an ice-maker leak.
Safety stop: Do not probe the drain, use heat or chemicals, remove liners, or continue with water near electricity.
-
PATH 03Safety boundary
What you see
The exact model uses a manual ice-cube tray and water begins at a cracked, distorted, overfilled, or poorly seated tray.
Do this next
Stop using the tray, dry the compartment, and verify a replacement by the exact model/industrial code. Seek service if water persists with the tray removed.
Why this path and its safety boundary
Why it matters: A local tray spill is more likely than a refrigerator drain fault, but Hotpoint lists trays only for selected models.
Safety stop: Do not use a mismatched tray or allow overflow toward lights, controls, or wiring.
-
PATH 04Safety boundary
What you see
A verified factory-fitted ice maker or water connection is present and the first wet point is around that assembly or under/behind the cabinet.
Do this next
Stop the ice function if documented, keep the appliance off when water is near electrics, do not move the unit, and arrange Hotpoint/qualified service with the model and first wet point.
Why this path and its safety boundary
Why it matters: A model-specific inlet, fill path, ice-maker assembly, seal, or connection is possible, but public Hotpoint guidance does not identify a universal leak repair.
Safety stop: Do not disconnect tubing, open panels, handle wet wiring, or cycle the ice maker to reproduce the leak.
-
PATH 05Safety boundary
What you see
Water appears under or behind the appliance, spreads toward a plug/outlet, or the first wet point cannot be seen without moving or opening the cabinet.
Do this next
Disconnect power only from a dry, safe position, protect the area without touching wet electrics, and arrange qualified appliance/electrical service. Do not pull an integrated appliance.
Why this path and its safety boundary
Why it matters: An inaccessible drain, collection point, water connection, or internal leak is possible; electrical safety overrides source diagnosis.
Safety stop: Do not restore power, move the refrigerator, loosen fittings, or touch wet electrical parts.
Helpful context
Understand the symptom
Find the first wet point, not the biggest puddle
Water can run along shelves, liners, door edges, and the floor before it reaches the visible puddle. Hotpoint's refrigerator guidance separates inner-base moisture, rear-gutter obstruction, items touching the back wall, defrost collection, and ice-tray conditions. A careful first-wet-point check is therefore more useful than guessing a valve, drain, or seal from the final location.
Not every Hotpoint refrigerator has the same water path
Hotpoint sells refrigerators, fridge freezers, and integrated variants with model-dependent controls and accessories. Some have only condensation and defrost drainage; some have a manual ice-cube tray; some may have a factory-fitted ice maker if the exact model supports it. Use the model manual and do not apply an ice-maker or plumbed-water procedure to a refrigerator that does not have that architecture.
Water near electricity changes the task
Wipe only visible water from a dry, safe position. If water reaches a plug, outlet, lamp, control, or wiring, stop operating the appliance and disconnect power only without touching wet electrical parts. Hotpoint's support guidance requires the appliance to be unplugged before replacing a part; pulling an integrated appliance or opening the rear cabinet is not an ordinary leak check.
Safety boundary
Stop conditions
- Stop use when water reaches a plug, outlet, lamp, control, wiring, or other electrical part; disconnect only from a dry, safe position.
- Do not pull or tilt a refrigerator, especially an integrated unit, and do not disconnect a water line or open panels.
- Do not probe drains with rigid or sharp tools, apply heat, pour chemicals, chip ice, or remove liners to chase a leak.
- Do not assume an ice maker is fitted; verify the exact model and distinguish manual tray, automatic ice maker, defrost, condensation, and external water paths.
Only after diagnosis
Potential parts
- exact-model defrost hole or drain plug
Consider only when the first wet point and exact manual/service diagnosis confirm a selected model's damaged or blocked defrost-hole/drain-plug component.
Hotpoint lists this type of part for selected refrigerators and fridge freezers; verify the exact model before ordering. - exact-model door gasket or ice tray
Consider only when the exact model and visible inspection confirm a damaged gasket or manual ice tray rather than a drain or water-path fault.
Gaskets and trays are model-specific; do not substitute by dimensions or appearance.
When checks do not resolve it
Need a professional?
Arrange Hotpoint or qualified appliance service when water returns after an accessible door/gutter/tray check, the source is under or behind the cabinet, an ice maker or water connection is involved, the model requires internal access, or water reaches electrical parts. Use the exact model/industrial code for any part or manual decision.
Safety scope: This article covers model identification, dry external observation, visible door/gutter/tray checks, and limited accessible cleaning only. Do not move the appliance, open panels, disconnect tubing, handle wet wiring, chip ice, apply heat, or repair refrigerant or sealed-system components.
Common questions
FAQ
Why is my Hotpoint refrigerator leaking from the inside bottom?
Trace the first wet point. Hotpoint associates inner-base moisture with a blocked rear gutter outlet or items touching the back wall, and defrost water can travel to a rear collection point. Remove only an accessible obstruction as the exact manual permits; persistent water needs service.
Could a Hotpoint refrigerator leak because of the door?
Yes, moisture can follow a door left ajar, a poor gasket seal, or uncovered food/liquids. Check the accessible door edge and gasket without removing it. Water that starts at the rear base or under the cabinet points elsewhere.
Does a Hotpoint refrigerator always have an ice maker?
No. Hotpoint's ice-maker error guidance says “if fitted,” and its parts site lists ice-cube trays only for selected models. Confirm the exact model before using an ice-maker or tray procedure.
What if the leak is from a Hotpoint ice maker or water connection?
Stop the ice function if the exact manual provides that control, keep water away from electrics, and do not disconnect tubing or open panels. Leave the appliance off when the source is inaccessible or persistent and arrange qualified service.
When is a Hotpoint refrigerator leak an emergency?
Stop using it for water near a plug, outlet, lamp, control, or wiring, or for an active leak spreading under the cabinet. Disconnect only from a dry, safe position and do not move an integrated unit or touch wet electrical parts.
Read the exact guide
Official sources
- Hotpoint Fridge Freezer Error CodesHotpoint · Official Hotpoint UK fridge-freezer support; ice-maker codes apply only if the exact appliance is fitted with that feature.
- Freezer Ice Cube Tray J00072993Hotpoint · Official Hotpoint UK parts page; the tray is suitable only for selected models and does not establish an automatic ice-maker architecture.
- Hotpoint Fridge Troubleshooting & Repair ServiceHotpoint · Official Hotpoint UK fridge troubleshooting page; exact drain, door, and ice features vary by model.
- Hotpoint Service Fridge RepairHotpoint · Official Hotpoint UK fridge service page; regional service routes and model features vary.
- Integrated Fridge Freezer Troubleshooting & FAQHotpoint · Official Hotpoint UK troubleshooting page for integrated fridge freezers; exact drain and ice features vary by model.
- Defrost Hole / Drain Plug J00226437Hotpoint · Official Hotpoint UK parts page; fit is limited to selected models and must be confirmed by model number.
Community feedback
Share a repair observation
Share a plain-text repair observation. Accepted observations are published automatically; this page may take a moment to update.