
On this page
Start here
Quick answer
An IKEA refrigerator door that will not close is most often blocked by a shelf, drawer, bottle or food package, a dirty or damaged gasket, an unlevel cabinet, or a door that is out of alignment. Empty only the items that visibly interfere, clean the gasket gently, and check the cabinet's level using the exact IKEA model manual. IKEA manuals for different refrigerator families give similar user checks but different closing, leveling and service instructions, while IKEA says appliances sold through IKEA can come from other manufacturers and the manufacturer/model/serial number is on the rating plate. If the gasket is torn, the door remains misaligned after the model-approved adjustment, a hinge is bent/loose, the cabinet is damaged, or the door still leaves a gap, stop forcing it and arrange authorized service; do not remove a built-in door or alter hinges without the exact manual and proper support.
Before you begin
Safety first
- This article covers model identification, removing visible load obstructions, gentle gasket cleaning, external visual checks and only the exact manual's supported leveling/adjustment. It does not authorize door removal, hinge disassembly, wiring or water-line disconnection, drilling, gasket modification, live electrical work or sealed-system repair.
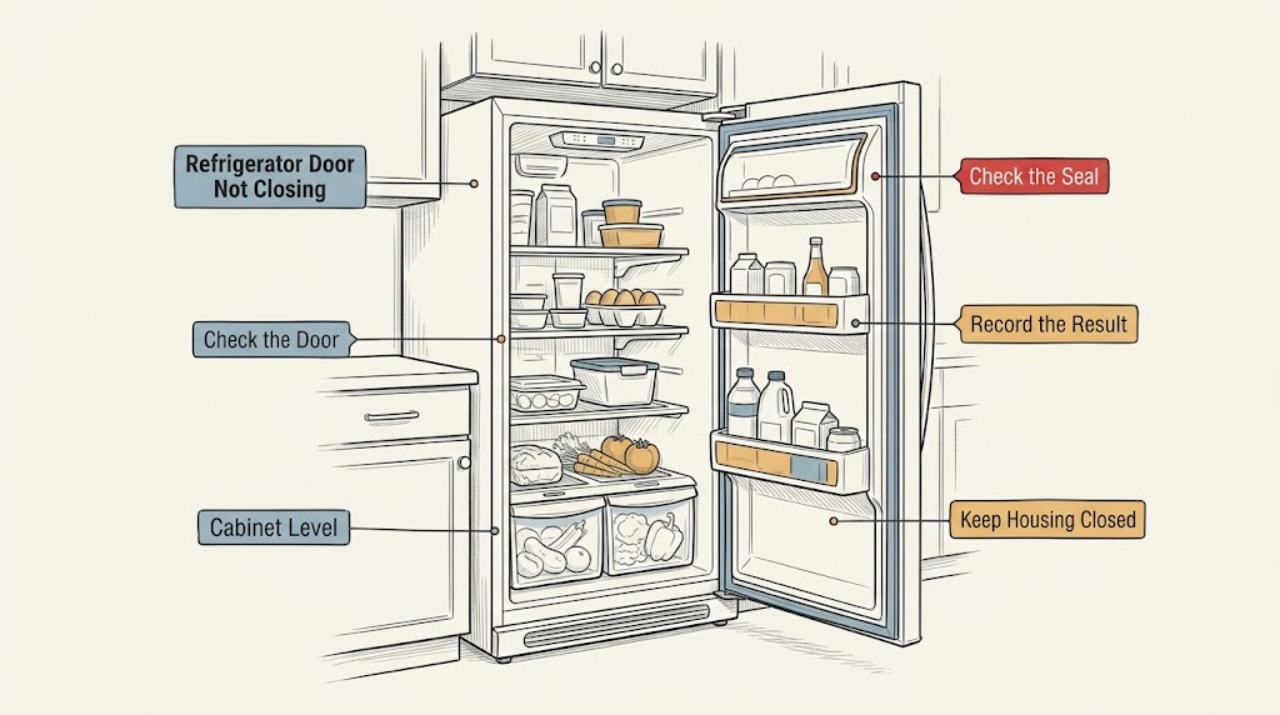
Work through in order
Diagnostic checks
Use only checks that match the exact appliance or system and its official guide.
-
Check 1
Read the rating plate without moving the appliance and record the IKEA article/model number, manufacturer, serial number and service number if present. Note whether the unit is freestanding, integrated, single-door, bottom-freezer or multi-door, and which door has the gap.
Expected result: The unit is a freestanding IKEA model, an integrated model, an appliance made by another OEM sold through IKEA, or the rating plate/manual cannot be matched.
Next step: Use only the matching IKEA manual and installation instructions for the remaining checks. If identity cannot be confirmed, do not adjust a hinge; contact IKEA or the authorised service centre with the rating-plate data.
Stop if: Do not remove an integrated door or cabinet panel to find the identity, and stop if the rating plate or cabinet is damaged.
Why this matters
Why: IKEA's appliance range is not one mechanical platform. Hinge type, door-front attachment, leveling method and permitted self-repair can change with the OEM and model.
-
Check 2
Open the affected door and inspect the full swing path, shelf fronts, drawers, door bins, tall bottles and food packages. Reposition or remove only the item that visibly prevents the door from reaching the cabinet, leaving enough front clearance for the gasket.
Expected result: A shelf, drawer, bottle, package or bin lip touches the cabinet/other door, the load is clear, or the door still stops at the same point with the compartment empty.
Next step: Correct the visible obstruction and close the door gently. If the empty door still will not close, continue to the gasket inspection; do not force it or remove shelves that the manual does not identify as user-removable.
Stop if: Stop if a shelf is cracked, a drawer rail is detached, glass is broken, or closing requires force against a hard obstruction.
Why this matters
Why: A repeatable contact point makes loading or shelf position more likely than a hinge fault. If nothing contacts the door, the next distinction is gasket condition, level or alignment.
-
Check 3
Inspect the accessible gasket all the way around for dirt, food residue, twisting, a fold, separation or a tear. Clean only with the method permitted by the exact manual and wipe the matching cabinet surface; do not stretch, glue, heat or trim the seal.
Expected result: The gasket is dirty but intact, twisted or folded, torn/detached, or clean and continuous while the door still leaves a gap.
Next step: Clean and reseat only a simple fold if the manual permits it. For a tear, detachment or persistent gap, keep the door closed as far as it safely will and arrange model-matched service.
Stop if: Do not use the refrigerator if the gasket cannot seal, the door is bent, or the seal is held on by improvised adhesive or fasteners.
Why this matters
Why: IKEA manuals distinguish a cleanable gasket from a damaged gasket that requires after-sales replacement. A clean, continuous seal with a gap makes level or door alignment more likely.
-
Check 4
With the refrigerator in its installed position, check for rocking, a cabinet that leans forward, or a door that swings away instead of settling closed. Use the exact model's leveling section or assembly instructions; make only the documented external foot/roller adjustment and keep the cabinet stable.
Expected result: The cabinet rocks or leans forward, the model manual specifies a slight rearward tilt, the cabinet is level/stable, or leveling hardware is inaccessible on an integrated installation.
Next step: Level the appliance only as the matching manual directs, then recheck the door without force. If the unit is stable but the door remains low, high or skewed, use the alignment/service branch.
Stop if: Do not lift or pull a heavy refrigerator alone, defeat cabinet restraints, adjust hidden hinges blindly, or leave an unstable appliance connected.
Why this matters
Why: IKEA manuals identify an unlevel appliance or forward tilt as a cause of poor door closing, but the adjustment hardware and target position differ by model. An inaccessible integrated adjustment is not a cue to dismantle the cabinet.
-
Check 5
With the compartment unloaded near the door, compare the door edge with the cabinet and the gasket contact on all sides. Look externally for a shifted door, loose visible fastener, bent hinge or door-front interference; do not remove hinge covers, panels or the door unless the exact manual explicitly provides a supported procedure.
Expected result: The door is visibly low/high or skewed, a hinge or fastener is bent/loose, the door-front panel rubs, or alignment looks normal but a continuous gap remains.
Next step: Use only a model-specific adjustment documented in the IKEA assembly instructions. For damage, a loose structural hinge, an integrated door-front issue or an unexplained gap, stop and arrange authorised service.
Stop if: Do not support a door with improvised blocks, remove water/electrical connections, drill new holes, or tighten unknown hinge hardware while the door is unsupported.
Why this matters
Why: Misalignment or hinge damage can prevent a good gasket contact even when shelves and seals are clear. A normal-looking alignment with a persistent gap may indicate a deformed door, gasket or hidden hinge issue that an external check cannot distinguish.
-
Check 6
After the load, gasket and model-approved leveling checks, document whether the door closes flush, whether a paper-thin gap remains, and whether frost, condensation or water has appeared. Keep the door closed as much as possible while arranging service and avoid moving an integrated appliance.
Expected result: The door closes after a load or leveling correction; it still leaves a gap; frost/condensation is increasing; or the door/cabinet/hinge is damaged or unstable.
Next step: Use the exact model and service number to book authorised service for a persistent gap, damaged part, unstable cabinet or worsening frost/condensation. Do not keep forcing or repeatedly adjusting the door.
Stop if: Stop use for a loose/broken hinge, cracked door, exposed wiring, water near electrics, refrigerant-pipe damage or a door that could fall.
Why this matters
Why: A corrected obstruction or level supports an external installation cause. A persistent gap can let warm air in and needs a gasket, alignment, hinge or cabinet diagnosis; frost or water can be a consequence of the gap rather than proof of a cooling-system failure.
Use your observations
Decision map
Find the observation that best matches what you see, then follow the next safe action.
-
PATH 01Safety boundary
What you see
The door stops at a repeatable point against a shelf, drawer, bottle, bin or food package.
Do this next
Reposition or remove the interfering item and leave front clearance for the seal. Recheck gently; if the empty door still stops, inspect the gasket and level.
Why this path and its safety boundary
Why it matters: A physical obstruction is more likely than a damaged hinge or gasket.
Safety stop: Do not force the door against glass, a drawer rail or a hard object.
-
PATH 02Safety boundary
What you see
The door reaches the cabinet but the gasket is dirty, folded, torn, detached or fails to make continuous contact.
Do this next
Clean or correct only a simple fold using the exact manual. Arrange model-matched gasket/service replacement for damage or a continuing gap.
Why this path and its safety boundary
Why it matters: The seal itself is preventing closure or cannot maintain a cold-air seal; a damaged gasket is not fixed by increasing latch force.
Safety stop: Do not heat, glue, trim or substitute a generic seal, and do not continue normal use with a visible unsealed gap.
-
PATH 03Safety boundary
What you see
The cabinet rocks, leans forward, or the door swings away rather than settling closed, while the load and gasket are clear.
Do this next
Follow the matching IKEA leveling/assembly instructions for external feet or rollers, then check the seal. Call service if the cabinet cannot be made stable without moving it.
Why this path and its safety boundary
Why it matters: An installation or leveling problem is more likely than a failed door part; the exact correction depends on freestanding versus integrated construction.
Safety stop: Do not lift, pull or leave an unstable refrigerator unsupported.
-
PATH 04Safety boundary
What you see
The door is visibly low, high or skewed, a hinge/fastener is bent or loose, the door-front rubs, or an integrated door no longer aligns with the cabinet.
Do this next
Stop forcing the door and use only the exact IKEA assembly instructions for a supported adjustment. Arrange authorised service for damage, hidden hardware or an integrated installation.
Why this path and its safety boundary
Why it matters: Alignment or structural hardware is likely involved, but the correct hinge and adjustment path is OEM/model-specific.
Safety stop: Do not remove the door, disconnect wiring/water lines, drill or replace hinge hardware without model-specific instructions and proper support.
-
PATH 05Safety boundary
What you see
Shelves/food are clear, the gasket is clean and intact, the cabinet is stable, but the door still leaves a gap or frost/condensation is worsening.
Do this next
Keep the door closed as far as it safely will and contact the authorised service centre with the rating-plate identity, photographs and the checks already completed.
Why this path and its safety boundary
Why it matters: A hidden hinge, deformed door/gasket, cabinet alignment or installation issue is more likely; the user checks cannot distinguish these safely.
Safety stop: Do not keep tightening, wedging or repeatedly adjusting an unexplained gap.
Helpful context
Understand the symptom
Identify the IKEA appliance before adjusting a hinge
IKEA sells refrigerators and fridge freezers made by more than one manufacturer. Read the rating plate for the manufacturer, model, serial number and any service/article number, then download that model's IKEA manual. A freestanding LAGAN-style cabinet, an integrated TINAD-style unit and an OEVERNÄS-style integrated model can share the same symptom but not the same hinge or leveling procedure.
Start with what physically blocks the seal
Open the door and look for a shelf, drawer, tall bottle, food package or bin lip that contacts the cabinet or the opposite door. IKEA manuals explicitly list these obstructions and recommend repositioning or removing them. Leave air space at the front of shelves and do not force the door against a load; a refrigerator that is technically running with a gap can accumulate frost, condensation or warm air.
Clean versus damaged gasket
A dirty gasket can be cleaned, but a split, permanently deformed or detached gasket is a service part, not a reason to push the door harder. Clean the accessible rubber seal and mating cabinet surface with the model manual's permitted method, then check for a continuous contact line. Do not use heat, solvents, glue or a generic seal on an unidentified model.
Level and alignment are different checks
If the door swings open or sits low/high against the cabinet, inspect whether the refrigerator is stable and level. Some IKEA manuals call for leveling or a slight rearward tilt; an integrated appliance may instead require cabinet and door-front alignment from its installation instructions. Do not copy a roller, screw or hinge adjustment from another IKEA model.
When to stop and call service
Stop if the door, hinge, cabinet or gasket is cracked, bent or loose; if the unit is unstable; if water is near electrical parts; or if closing requires force. Keep the appliance supported and do not remove an integrated door, disconnect wiring or disturb water lines without the exact manual and another person to support the door. IKEA manuals reserve persistent faults and damaged parts for authorised service, and IKEA's appliance-part guidance says the original manufacturer and model determine the correct replacement.
Safety boundary
Stop conditions
- Stop forcing the door for a bent, cracked, loose or falling door, hinge, cabinet or door-front panel; keep people clear and arrange authorised service.
- Do not remove an integrated refrigerator door, cabinet panel, wiring or water line without the exact IKEA/OEM manual and proper door support.
- Do not heat, glue, trim or stretch a gasket, drill new hinge holes, or install a generic door part on an unidentified model.
- Stop for water near electrical parts, exposed wiring, damaged cooling pipes, smoke, burning smell, repeated breaker trips or an unstable appliance; unplug only when safe.
- IKEA appliances can have different OEMs and mechanisms. Do not copy a leveling, hinge or self-repair procedure from another IKEA refrigerator model.
Only after diagnosis
Potential parts
- model-specific refrigerator door gasket
Consider only when the exact model's seal is torn, detached or permanently deformed and the manual or authorised service confirms replacement.
IKEA sells appliances from multiple OEMs; match the manufacturer, model and rating-plate/service information before selecting a gasket. - model-specific door hinge or alignment hardware
Consider only after qualified diagnosis confirms a bent, worn or damaged hinge/alignment assembly and the exact installation instructions identify the part.
Freestanding and integrated IKEA models use different door and cabinet arrangements; do not substitute a hinge from another model. - model-specific door or door-front assembly
Consider only for a cracked, warped or structurally damaged door after authorised service confirms the repair path.
Door removal can involve heavy unsupported parts and, on some models, wiring or water connections; professional handling may be required.
When checks do not resolve it
Need a professional?
Arrange authorised IKEA/OEM appliance service when the gasket is damaged, the door remains misaligned after the exact model's external leveling/assembly check, a hinge or door-front is loose or bent, an integrated door requires removal, the cabinet is unstable, or a persistent gap is causing frost or condensation. Stop immediately for structural damage, water near electrics, exposed wiring, damaged cooling pipes, smoke, burning smell or a door that could fall.
Safety scope: This article covers model identification, removing visible load obstructions, gentle gasket cleaning, external visual checks and only the exact manual's supported leveling/adjustment. It does not authorize door removal, hinge disassembly, wiring or water-line disconnection, drilling, gasket modification, live electrical work or sealed-system repair.
Common questions
FAQ
Why will my IKEA refrigerator door not close completely?
Check for a shelf, drawer, bottle, bin or food package blocking the swing path; then inspect and clean the gasket, check the cabinet is stable/level, and compare the door alignment with the exact model manual. IKEA manuals list these as separate causes. A persistent gap after those checks needs authorised service.
Can I adjust the hinge on an IKEA refrigerator myself?
Only if the exact IKEA/OEM assembly instructions explicitly describe a supported adjustment and the door can be safely supported. IKEA refrigerators are made by multiple OEMs. Do not remove an integrated door, disconnect wiring or water lines, or copy a hinge procedure from another model; use authorised service for a bent, loose or hidden hinge.
Should I replace the gasket if the IKEA fridge door has a gap?
First determine whether the gasket is merely dirty or folded. Clean it only as the exact manual permits. A torn, detached or permanently deformed gasket should be replaced with the exact model part through authorised service; a gap caused by a shelf, leveling or alignment will not be fixed by a new generic seal.
Why does my IKEA refrigerator need to be tilted or leveled for the door to close?
Some IKEA refrigerator manuals identify a cabinet that is not level or tilts forward as a door-closing cause and provide a model-specific leveling method. An integrated unit may instead require cabinet/door-front alignment. Use the matching assembly instructions and do not move a heavy appliance alone.
How do I find the correct door part for an IKEA refrigerator?
Read the rating plate for the manufacturer, model, serial number and any service/article number. IKEA says its appliance range includes products from other manufacturers, so use that exact identity with the IKEA/OEM manual or authorised service centre. Do not order a gasket, hinge or door by IKEA brand alone.
Read the exact guide
Official sources
- LAGAN Fridge Freezer Freestanding White – User ManualInter IKEA Systems B.V. · Specific LAGAN manual example; use it to illustrate a model-specific path, not as a universal IKEA procedure.
- OEVERNÄS Fridge Freezer IKEA 700 Integrated – User ManualInter IKEA Systems B.V. · Specific integrated IKEA model example; integrated installation and controls must be matched to the user's exact model.
- What spare parts can I get from IKEA and how much do they cost?IKEA US · IKEA customer-service guidance; availability and service route can vary by country and exact appliance.
- TINAD Fridge Freezer IKEA 500 Integrated – User ManualInter IKEA Systems B.V. · Specific TINAD integrated model example; do not transfer its controls or adjustments to another IKEA/OEM appliance.
Community feedback
Share a repair observation
Share a plain-text repair observation. Accepted observations are published automatically; this page may take a moment to update.