
On this page
Start here
Quick answer
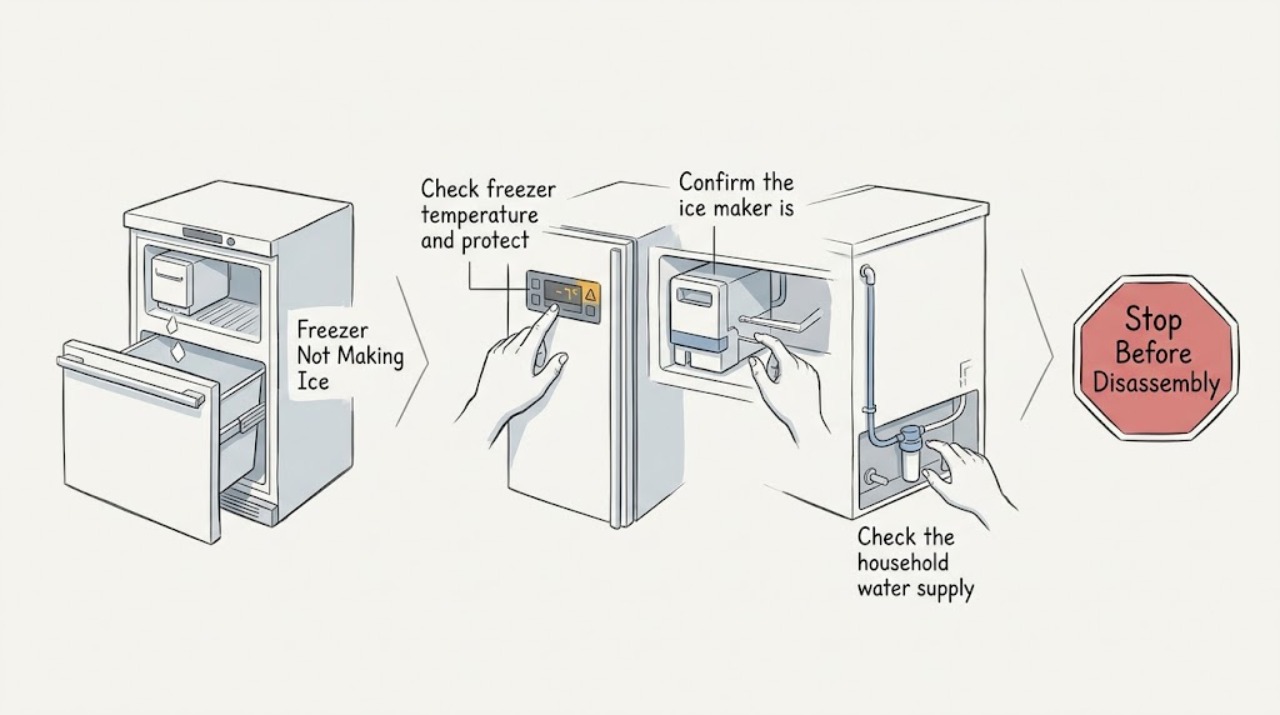
When a Kenmore freezer stops making ice, first protect food and determine whether the freezer itself is cold or whether only the ice maker has stopped. Keep the freezer door closed while checking that the ice maker is switched on, the ice bin is seated, the shutoff arm or level sensor is not held in the stop position, and the door closes fully. Check the household water valve and the visible supply line for a closed valve, kink, leak, or filter that is overdue or not locked in place. Do not pry frozen fill tubing, pour boiling water into the freezer, reach into a moving ice maker, or remove electrical covers. If the freezer is warm, the water path remains blocked, water leaks, the ice maker keeps cycling without filling, or a reset does not restore production after the model manual's startup period, stop and arrange qualified appliance service.
Work through in order
Diagnostic checks
Use only checks that match the exact appliance or system and its official guide.
-
Check freezer temperature and protect food first
Keep the freezer door closed and check whether food is remaining solidly frozen or softening. Note whether the refrigerator or freezer has lost cooling, whether there is heavy frost, and whether water is collecting around the appliance. If food is thawing, move it to a functioning freezer or safe cold storage and do not repeatedly open the door for tests.
Expected result: The freezer is cold but the ice maker is empty, the freezer is also warm, heavy frost is present, or water, smoke, burning odor, or electrical damage is visible.
Next step: For smoke, burning odor, or water near electrical parts, leave the appliance off and disconnect power only if safe; arrange qualified service. If the freezer is warming, protect food and arrange service for the cooling problem. If it is cold, continue with the ice-maker control and bin check.
Why this matters
Why: An ice maker cannot produce normal ice when its freezer compartment is not maintaining the needed cold condition. A warm freezer points to a broader cooling or airflow fault, while water or electrical symptoms create a safety and food-protection priority.
-
Confirm the ice maker is enabled and not sensing a full bin
With the freezer door open only briefly, check the model manual for the ice maker's ON/OFF control, shutoff arm, or level sensor. Confirm the bin is fully seated, the arm or sensor is not held in the stop or full position by ice or packaging, and the freezer door closes completely. Do not force a stuck arm or reach into a powered mechanism.
Expected result: The ice maker was off, the bin was out of position, the arm or sensor was held in the stop position, the door was not closing, or all visible controls and positions are normal.
Next step: Correct only the visible setting or bin position described by the exact manual and close the door. If a sensor or arm is broken, frozen in place, or cannot move normally, stop and arrange service. Otherwise check the accessible water supply without disconnecting tubing.
Why this matters
Why: The control and level-sensing arrangement varies by Kenmore model, and a full-bin signal can intentionally stop production. A corrected control or bin position can restore a normal cycle; a correctly enabled ice maker shifts the concern to temperature, water, or internal service.
-
Check the household water supply and visible line
Check the accessible household water shutoff and the visible supply line behind or below the refrigerator for a closed valve, kink, pinch, crack, or leak. If the model uses a water filter, confirm it is the correct model-specific filter and is fully seated and locked as the manual describes. Do not loosen compression fittings or test water pressure with improvised equipment.
Expected result: The water valve is closed, the line is kinked or leaking, the filter is missing or not locked, or the visible supply appears normal.
Next step: Open an accessible shutoff only if it can be done without a leak; do not use the appliance if a line is cracked or leaking. Reseat a filter only according to the exact manual and stop if it will not lock. If supply is normal, inspect only for visible ice at the accessible fill opening.
Why this matters
Why: No water or restricted water can leave an otherwise cold freezer with an empty ice bin. A leak or damaged line is not a no-ice adjustment; it is a water-safety and service condition. A normal visible supply shifts attention to the fill path or ice-maker mechanism.
-
Inspect the accessible fill path without forcing ice free
With the ice maker off and the freezer door open briefly, look for a visible sheet of ice blocking the fill opening or an ice bridge preventing the mold or ejector from moving. Do not poke the tube, use a knife, pour boiling water, apply a heat gun, or dismantle the ice maker. If the model manual gives a safe thaw or reset procedure, follow only that procedure with power and water handled as directed.
Expected result: A visible blockage or ice bridge is present, or the fill opening and ice-maker area look clear while no water enters during a normal cycle.
Next step: Use the model manual's safe procedure if one exists and then make only one supervised production check. If the blockage returns, the fill path cannot be safely thawed, or no water enters with a clear path, stop and arrange service.
Why this matters
Why: A frozen or obstructed fill path can prevent water from reaching the mold, but forcing it can damage tubing, the liner, or the ice maker. A clear path with no fill points toward a valve, control, sensor, or internal ice-maker fault that is not safely diagnosed by probing.
-
Allow the model-specific recovery period after a correction
After correcting an OFF setting, a seated bin, a supply interruption, or a safe filter condition, close the freezer and allow the startup or ice-production period specified by the exact Kenmore manual. Avoid opening the door repeatedly; note whether a fresh fill occurs, whether cubes freeze and release, and whether the freezer remains cold.
Expected result: Water enters and ice production resumes, the freezer is cold but no fill or harvest occurs, or the freezer is warming or a leak appears.
Next step: If production resumes, monitor the next batches and keep the door and bin area clear. If the freezer remains cold but the ice maker does not fill or harvest after the manual's period, stop using the ice maker and arrange qualified service. Protect food and stop immediately for warming or leaks.
Why this matters
Why: Ice production may not resume immediately after a control, power, or water correction. A completed fill and harvest supports a temporary setup issue; no fill or harvest with a cold freezer points to an internal valve, motor, thermostat, sensor, or control issue. Warming or leaking requires a broader service response.
-
Perform one controlled check and set the service boundary
Only when the freezer is cold, the bin and control are correct, the visible water supply is sound, and there is no frost, leak, or electrical hazard, perform one normal ice-maker check from outside the mechanism. Record whether you hear a fill, see water enter, observe an ejector movement described by the manual, or see no activity. Do not repeatedly cycle the ice maker or bypass a door switch.
Expected result: A normal fill and harvest occurs, the ice maker is silent, it cycles without water, it freezes but cannot eject, or a leak, grinding sound, electrical odor, or fault indication appears.
Next step: If ice production returns, monitor it without forcing the arm or overfilling the bin. For any failed sequence or hazard, leave the ice maker off and arrange qualified appliance service. Provide the exact model number and the observed control, temperature, supply, filter, fill, and harvest results.
Why this matters
Why: A successful fill and harvest confirms that the basic control, temperature, and water path are currently working. Silence, no-fill cycling, failure to release cubes, or a hazard after those checks points to an internal ice-maker, valve, sensor, wiring, or control fault.
Use your observations
Decision map
Find the observation that best matches what you see, then follow the next safe action.
-
PATH 01Next step
What you see
The freezer is warm as well as making no ice, or food is softening.
Do this next
Protect the food, keep the door closed, and arrange service for the freezer cooling problem; do not troubleshoot the ice maker as an isolated issue.
-
PATH 02Next step
What you see
The ice maker was OFF, the bin was mis-seated, the arm or sensor was held in the stop position, or the door was not closing.
Do this next
Correct the visible condition using the exact Kenmore manual and allow its ice-production period. Arrange service if the control, arm, sensor, or latch is damaged.
-
PATH 03Next step
What you see
The household water supply is closed or the visible line or filter is kinked, leaking, missing, or not locked.
Do this next
Correct only an accessible shutoff, kink, or model-approved filter seating issue. Stop for a leak or damaged line and arrange service.
-
PATH 04Next step
What you see
A fill opening or ejector area has visible ice, or the ice maker cycles without filling.
Do this next
Use only the model manual's safe thaw or reset procedure. Do not pry, heat, probe, or dismantle the mechanism; arrange service if the blockage returns or no water enters.
-
PATH 05Next step
What you see
The freezer is cold and all visible controls and supply checks are normal, but the ice maker does not fill, harvest, or resume after the manual's recovery period.
Do this next
Leave the ice maker off and arrange qualified service for the valve, sensor, motor, wiring, or control. Do not bypass a door switch or replace an unverified part.
-
PATH 06Next step
What you see
A water leak is near electrical parts, smoke, burning odor, damaged wiring, severe frost, or another immediate hazard is present.
Do this next
Stop immediately, keep clear, and disconnect power or water only if safe. Seek qualified emergency or appliance service from a safe location.
Helpful context
Understand the symptom
A full ice bin, an ice maker that is switched off, and a freezer that is not cold enough can all look like the same problem. Start by checking whether frozen food is staying hard. If the freezer is warming as well as producing no ice, food protection and freezer cooling take priority; do not focus on the ice maker alone. Kenmore's manual portal is important here because the brand uses different ice-maker controls, shutoff arms, sensors, filters, and freezer layouts across models.
Keep user checks at the control, bin, door, visible water line, and accessible filter. Do not remove the ice-maker module, bridge an electrical contact, force an ejector, or thaw a frozen line with a flame or high heat. If water is leaking near electrical parts, food is thawing, or the appliance shows smoke or burning odor, stop and obtain qualified help.
When checks do not resolve it
Need a professional?
Arrange qualified service when the freezer is warm, the ice maker remains inactive after its model-specific recovery period, no water enters despite a normal visible supply, cubes cannot harvest, a filter or fill path repeatedly freezes, or diagnosis would require removing the ice-maker module, electrical cover, or water valve. Stop immediately for leaks near electrical parts, smoke, burning odor, damaged wiring, severe frost, or food-safety loss.
Common questions
FAQ
Why is my Kenmore freezer not making ice?
Check that the freezer is cold, the ice maker is ON, the bin and door are correctly seated, and the shutoff arm or level sensor is not in the stop position. Then check the visible water valve, line, and model-specific filter. If it still does not fill or harvest after the manual's recovery period, arrange service.
Can a warm freezer stop a Kenmore ice maker?
Yes. If food is also softening, treat the problem as a freezer-cooling fault rather than only an ice-maker fault. Protect food, keep the door closed, and arrange qualified service if the freezer does not recover safely.
Can I thaw a frozen Kenmore ice-maker fill tube myself?
Do not pry the tube, use a knife, pour boiling water, apply a heat gun, or remove the ice-maker module. Use only a clearly described model-specific safe thaw procedure; if the blockage returns or the path cannot be safely accessed, arrange service.
Read the exact guide
Official sources
- Kenmore ManualsKenmore · Kenmore model-specific owner manuals and resources for freezers, refrigerators, and ice makers
- Best Appliances for Home, Kitchen, Laundry, & Cooking | KenmoreKenmore · Kenmore refrigeration products and factory-installed ice-maker product context
- Contact UsKenmore · Kenmore product support and repair assistance routing
Community feedback
Share a repair observation
Share a plain-text repair observation. Accepted observations are published automatically; this page may take a moment to update.