
On this page
Start here
Quick answer
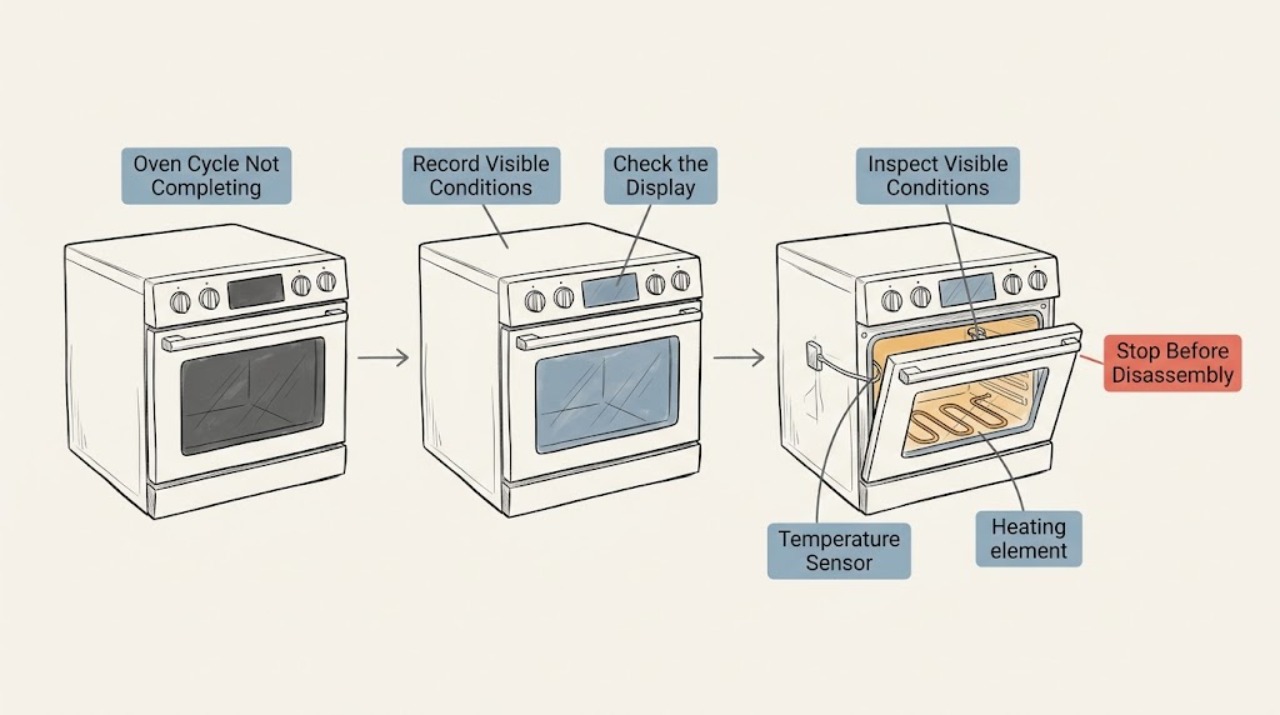
When a Kenmore oven cycle does not complete, first record which cycle is running, where it stops, and every display message or error code. A bake cycle that stops before the oven reaches temperature points toward a control, heating, sensing, or power problem; a self-clean cycle may remain locked during its normal cool-down. Confirm the door is fully closed, the selected mode and time are correct, and any control lock, delayed start, or demo setting is not blocking the cycle. Use the Kenmore model manual for the exact procedure, then perform only one documented power reset if the display or cycle became abnormal. Stop using the oven for gas odor, smoke, flame that will not stop, burning smell, arcing, repeated breaker trips, or uncontrolled heating; arrange qualified appliance service rather than opening live wiring, gas parts, a latch, or the control panel.
Work through in order
Diagnostic checks
Use only checks that match the exact appliance or system and its official guide.
-
Check 1
Before pressing Cancel or turning anything off, write down the cycle name, elapsed or remaining time, the exact stop stage, and every display message or error code. Note whether the oven was preheating, baking, timed cooking, self-cleaning, steam-cleaning, or cooling.
Expected result: The display may show a code, Locked, End, cooling text, a paused state, or no text at all; the oven may be hot, cool, or still heating.
Next step: Use the Kenmore manual found by the exact model number to interpret that message. If there is smoke, gas odor, uncontrolled heat, or a damaged display, stop and use the safety guidance below.
Why this matters
Why: The stop stage separates normal cool-down or door-lock behavior from a cycle that lost heat, lost power, or stopped accepting control input. A code is model-specific and should not be guessed from a different Kenmore platform.
-
Check 2
Decide whether the incomplete cycle is a cooking cycle or a cleaning cycle, then check the selected mode and any delayed-start, control-lock, demo, or pause indicator without removing a panel.
Expected result: A cooking cycle may be waiting for a start command or remain in a lock/demo state; a self-clean cycle normally shows heat or clean status and may keep the door locked while it cools.
Next step: Follow the model manual to clear an intentional lock or delay and start the intended cycle once. If the controls will not accept the documented command or the same stage repeats, stop testing and arrange service.
Why this matters
Why: An incorrect mode or locked control can make the oven appear stuck without proving that a heating component failed. A locked self-clean door alone is not evidence that the latch should be forced.
-
Check 3
For a self-clean or steam-clean cycle, observe the door and cooling behavior from a safe distance and do not touch the door, gasket, vent, or cavity while hot. Wait for the model's documented cool-down period before deciding that the cycle failed.
Expected result: The door may stay locked during high-temperature cleaning and release only after cooling; the display may change to End or clear a lock indicator after completion. A door that remains locked after the oven is cool, or a cycle that stops with a code, is abnormal.
Next step: Use Cancel/Off only as the manual directs. If the latch will not release after cooling, do not force it; leave the oven off and request qualified service.
Why this matters
Why: A cooling interval is part of many cleaning cycles. Forcing the latch or opening the door while hot can cause burns or damage; a persistent lock or repeatable interruption points to a latch, temperature-sensing, control, or power issue that needs model-specific service.
-
Check 4
For a bake or roast cycle, observe whether the oven actually starts heating and whether heat stops before the selected temperature or timed stage. Check only the visible display, indicator, and normal sound; do not touch elements, igniters, wiring, or a hot cavity.
Expected result: The control may accept the setting but never heat, heat briefly and stop, or lose the display during the cycle. A gas model and an electric model can show similar symptoms while requiring different service checks.
Next step: Record the energy type, cycle, stop point, and code, then stop if the failure repeats. Have a qualified technician test the model-specific heating and control circuits rather than probing live parts.
Why this matters
Why: Correct controls with no heat or repeatable early heat loss shift the problem toward the oven's power, heating, ignition, sensor, or control system; the symptom does not identify a replaceable part by itself.
-
Check 5
Check the accessible household power state without opening the oven: note whether the display and interior light work, whether a nearby appliance has power, and whether the oven's circuit protection has tripped. For a gas oven, do not disturb the gas connection or valve.
Expected result: A blank display or a tripped circuit can follow a power interruption; normal display power with a failed bake stage suggests a different path. A breaker that trips again, a hot outlet, or gas odor is a stop condition.
Next step: If the model manual permits it, perform one power reset at the household disconnect and observe the oven briefly. Do not repeatedly reset a breaker or continue if it trips again, smells hot, sparks, or shows smoke.
Why this matters
Why: A recent power event can leave controls in an error or incomplete state, but repeated trips indicate an electrical fault rather than a harmless reset issue. Gas supply and ignition faults require qualified assessment.
-
Check 6
Inspect only the outside of the door and control area after the oven is cool: check that the door closes normally, the gasket is not visibly displaced, and no object is blocking the vent. Do not remove or bend the gasket and do not force a latch.
Expected result: A door that does not close or latch, a visibly damaged gasket, a blocked vent, or a control panel that is unresponsive can correlate with an incomplete cycle; a normal-looking door does not rule out an internal fault.
Next step: Remove only a loose external obstruction when the oven is cold and the manual permits it, then run the intended cycle once. If the door, latch, vent, or controls remain abnormal, arrange service.
Why this matters
Why: The door and vent are part of safe temperature management and cleaning-cycle interlocks. A visual check can identify a user-correctable obstruction but cannot prove that a latch switch, sensor, relay, element, or igniter is good.
-
Check 7
If the display and controls are normal, use one model-approved short bake or other ordinary cycle as a confirmation test only after the oven is cool and no safety symptom is present. Do not repeat a self-clean cycle to test it.
Expected result: The test may complete normally, stop at the same stage, fail to heat, show a code, or create an abnormal smell, sound, smoke, or heat pattern.
Next step: If it fails again, cancel normally if possible, leave the oven off, and provide the technician with the recorded stage and display. If it completes, monitor it and use the manual's normal operating instructions.
Why this matters
Why: A single successful cycle supports a transient setting or power-state issue but does not prove that a marginal component is sound. A repeatable stop or any safety symptom means the oven is not ready for continued use.
-
Check 8
Before requesting service, collect the model number, fuel type, cycle selected, stop stage, exact display text or code, recent power event, and any smell, smoke, noise, or breaker behavior. Keep the oven off if the fault is repeatable.
Expected result: A complete symptom record lets service identify whether the call concerns a latch, control, sensor, heating element, igniter, power supply, or a normal cool-down instead of guessing from the title alone.
Next step: Use Kenmore customer care or a qualified appliance technician; do not order a part or disassemble the oven solely from the symptom.
Why this matters
Why: Kenmore manuals and support are model-number driven, and the same plain-language symptom can map to different controls and safety procedures across ovens.
Use your observations
Decision map
Find the observation that best matches what you see, then follow the next safe action.
-
PATH 01Next step
What you see
Do this next
Treat the cool-down as potentially normal. Keep the vent clear, keep people and pets away, wait for the model-specific release condition, and never force the door. If the lock remains after cooling or a code returns, arrange service.
Why this path and its safety boundary
Why it matters: The oven stopped during self-clean or is still hot with the door locked.
-
PATH 02Next step
What you see
Do this next
Check the model manual for the exact control-lock, delayed-start, demo, and Start sequence. Clear only an intentional setting; if the panel remains unresponsive, stop and request service.
Why this path and its safety boundary
Why it matters: The oven never starts the selected cycle, shows a lock/demo/delay state, or accepts no commands.
-
PATH 03Next step
What you see
Do this next
Do not infer a particular part. Record fuel type, cycle, stage, and code, then have a qualified technician evaluate the model-specific sensor, heating, ignition, control, and power circuits.
Why this path and its safety boundary
Why it matters: Bake or roast starts but stops before reaching temperature or before the timed stage completes.
-
PATH 04Next step
What you see
Do this next
Stop resetting the circuit. Leave the oven off and arrange electrical or appliance service; do not open a hard-wired oven or test live terminals.
Why this path and its safety boundary
Why it matters: The display is blank, power is intermittent, or the breaker trips during the cycle.
-
PATH 05Next step
What you see
Do this next
Monitor the next normal use and keep the recorded code or stop point. If the same symptom returns, stop using the oven and provide the record to service.
Why this path and its safety boundary
Why it matters: One model-approved cycle completes after a single documented reset and no safety symptom returns.
-
PATH 06Next step
What you see
Do this next
Stop using the oven immediately. If gas odor is present, avoid flames, switches, and electrical controls, leave the area, and contact the appropriate emergency or gas authority from a safe location. For smoke, fire, arcing, or electrical danger, leave and use emergency services as appropriate; do not troubleshoot further.
Why this path and its safety boundary
Why it matters: There is gas odor, smoke, a burning smell, arcing, uncontrolled heating, a flame that will not stop, or repeated breaker operation.
Helpful context
Understand the symptom
Cycle not completing is a symptom, not a single failed part. Write down whether the oven stopped during preheat, normal baking, timed cooking, self-clean, steam clean, or the cooling period. Also note whether the display is blank, still counting, showing End, showing Locked, beeping, or showing a code. Kenmore has used more than one oven platform, so the model number and the wording in its own manual matter more than a generic code table.
The safest owner checks are external: confirm the selected cycle, door position, visible controls, accessible power status, and any unusual smell or sound. Do not remove a control panel, test mains voltage, adjust a gas valve, force a locked door, or probe a hot cavity.
Start with the exact stop point
A self-clean cycle normally locks the door and includes a cool-down; the display may not indicate the end until the cavity is cool. A bake cycle that repeatedly quits while food remains undercooked is a different path. If the display shows a code, preserve it exactly, including letters, numbers, and punctuation, before cancelling or resetting.
Why the cycle can stop
A wrong mode, control lock, delayed start, demo setting, door-latch state, or recent power event can prevent a cycle from progressing. If a normal bake cycle starts but loses heat or never reaches the requested temperature, the cause may be in the model-specific heating, sensing, or control system. Those components require service-level testing, especially on a gas or hard-wired oven.
Use the result to choose the next step
If the oven completes a simple, model-approved test after a single reset, monitor it rather than repeatedly resetting it. If the same stage, code, lock condition, or heating failure returns, keep the appliance off and give the technician the model, cycle, stop point, display text, and any safety symptoms.
Safety boundary
Stop conditions
- Stop immediately for gas odor, smoke, visible flame outside the normal burner area, a burning or melting smell, arcing, a hot or damaged outlet, repeated breaker trips, or heating that continues after the controls are turned off.
- Do not force a self-clean lock, open the control panel, measure live voltage, adjust gas components, remove an igniter or element, or bypass a door-latch or temperature safety.
- Keep children and pets away from a hot or locked oven. If a gas or fire emergency is possible, leave first and seek help from a safe location.
Only after diagnosis
Potential parts
- door latch or latch switch
Consider this category only if the model manual identifies a latch fault or the door will not lock or release after the oven is cool; a locked door during normal self-clean cool-down is not enough evidence.
Confirm the complete Kenmore model number and the manual's part information before any purchase; do not force or bypass the latch. - oven temperature sensor
Consider this category only when model-specific service diagnosis links a repeatable early stop or temperature fault to sensing; an incomplete cycle alone does not identify the sensor.
Fit and procedure vary by model and fuel type. Use the exact model documentation and qualified service rather than a generic resistance test. - bake element or gas igniter
Consider the appropriate heating category only after service confirms that an electric element or gas ignition path is not delivering heat during the assigned cycle.
Electric and gas ovens use different parts and safety procedures. Verify the exact model and energy type; never work on live wiring or gas components. - oven control or relay assembly
Consider this category only after a qualified technician rules out settings, supply, latch, sensor, and heating causes and identifies a control output fault.
Control assemblies are model-specific and may require programming or wiring work. Confirm fitment through Kenmore documentation and qualified service.
When checks do not resolve it
Need a professional?
Arrange qualified Kenmore or appliance service when the cycle stops at the same stage, the controls remain locked or unresponsive, a code returns, the oven fails to heat, the door remains locked after the documented cool-down, or a single safe reset does not restore normal operation. Request electrical or gas-qualified help when the supply or installation may be involved.
Have this ready
- Provide the exact model number, fuel type, selected cycle, stop stage, remaining time, display text or code, whether the cavity was hot, and any odor, smoke, noise, or breaker event.
Common questions
FAQ
Why is my Kenmore oven still locked when the cycle appears finished?
If it was a self-clean cycle, the lock may remain until the cavity cools. Wait for the model's documented release condition and never force the latch. If the oven is cool and the lock remains, or a code returns, arrange service.
Should I reset the breaker when a Kenmore oven cycle stops?
Only perform a single power reset when the Kenmore manual permits it and there is no gas odor, smoke, burning smell, arcing, or repeated trip. A breaker that trips again is a reason to leave the oven off and request qualified service.
Is a cooling fan or cooling period evidence that the oven failed?
Not by itself. High-temperature cleaning includes a cool-down and may keep the door locked until it is safe to release. Compare the display and timing with the exact model manual; a repeatable stop during ordinary baking is a different symptom.
Can I replace the sensor, element, igniter, or control because the cycle did not complete?
Do not choose a part from this symptom alone. Electric and gas ovens use different heating systems, and a latch, sensor, control, or supply fault can look similar. Have the model-specific fault diagnosed and confirm fitment before ordering anything.
What should I tell the technician?
Give the complete model number, fuel type, cycle, point where it stopped, remaining time, exact display or code, whether the cavity was hot, and any smell, smoke, unusual sound, or breaker event. This is more useful than reporting only that the cycle did not complete.
Read the exact guide
Official sources
- Find Your Manual | Kenmore Appliance Manuals & GuidesKenmore Appliances · Use the exact model number to retrieve the owner's manual and model-specific operating and troubleshooting instructions.
- Bake Cycle Not Working - Wall Oven - Product Help | WhirlpoolWhirlpool Corporation · Supports external checks for demo mode, control lock, bake setup, recent power outage, and model-specific electrical installation; it does not identify a Kenmore part.
- High Temperature Self-Clean Cycle Information - Product Help | WhirlpoolWhirlpool Corporation · Supports normal cleaning-cycle lock, cool-down, vent clearance, door closure, and smoke/heat precautions; use the Kenmore manual for exact controls.
- Customer Care & Support | Kenmore AppliancesKenmore Appliances · Use for the model-specific support and repair escalation path after safe owner checks.
- Oven Door Locked - Wall Oven - Product Help | WhirlpoolWhirlpool Corporation · Supports the general distinction between normal self-clean lock/cool-down, interrupted cleaning, one controlled reset, and service escalation; Kenmore controls may differ by model.
Community feedback
Share a repair observation
Share a plain-text repair observation. Accepted observations are published automatically; this page may take a moment to update.