
On this page
Start here
Quick answer
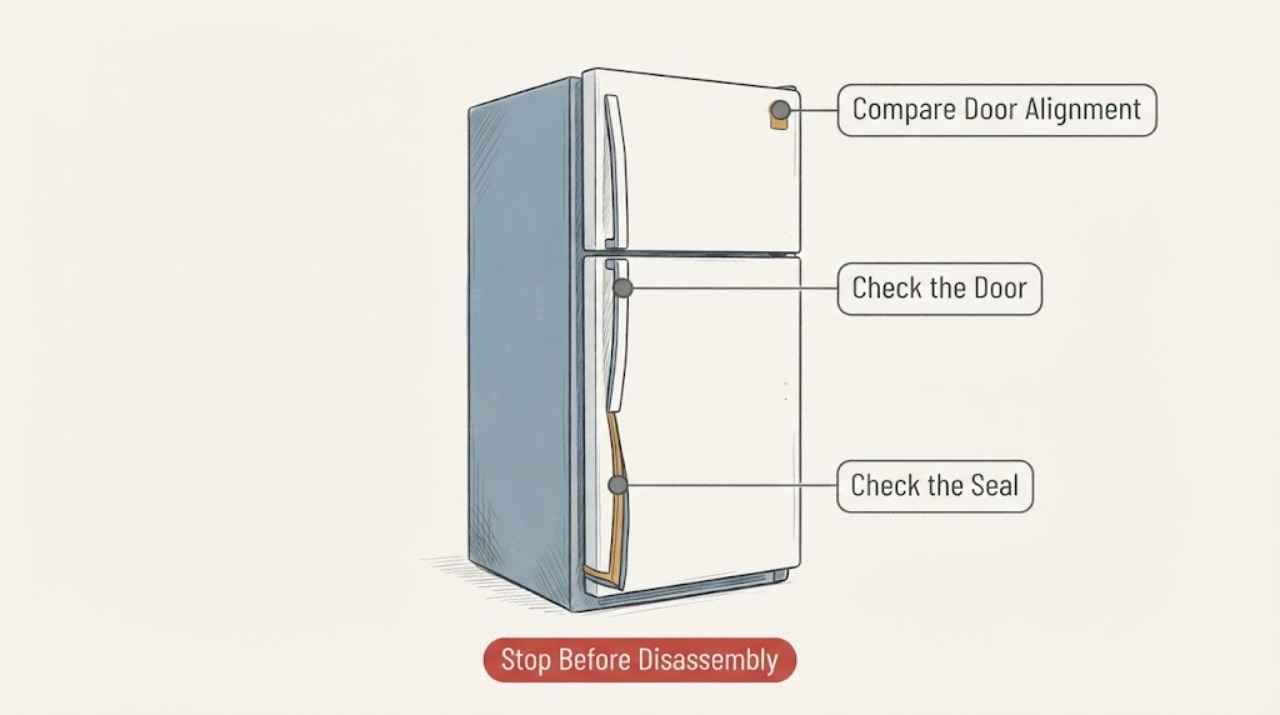
A Kenmore refrigerator door gasket that does not seal can be caused by a door obstruction, debris on the gasket or cabinet contact surface, a visibly torn or flattened gasket, or a door that is not sitting square. Start with the outside of the appliance: check the closed-door gap, clear anything preventing closure, clean and dry the accessible seal, and inspect for damage. Kenmore's official gasket page explains that the gasket seals the inner door against warm air and says to protect food that could deteriorate while the door is open; it does not establish one gasket part as a fit for every Kenmore refrigerator. Use the full model number in Kenmore's manuals lookup before ordering a replacement or attempting model-specific work.
Work through in order
Diagnostic checks
Use only checks that match the exact appliance or system and its official guide.
-
Check 1
With the refrigerator door closed, look around the entire gasket perimeter and note whether the gap is at the hinge side, handle side, top, bottom, or one short section; do not force the door against resistance.
Expected result: The gap is continuous around most of the door, limited to one section, or disappears when the door is gently closed without an obstruction.
Next step: Use the location to guide the obstruction, cleaning, and damage checks below. If the door cannot close without force, leave the appliance closed as far as it safely allows and arrange service.
Why this matters
Why: A local repeatable gap points toward contact, debris, or visible gasket damage, while a door that will not sit closed can also be held by loading or alignment; the observation does not identify an internal refrigerator part.
-
Check 2
Remove only visible items that could hold the door open, including an overfilled door bin, a package projecting past the shelf, ice at the frame, or a container touching the cabinet; then check that the door closes freely.
Expected result: The door closes flush after one item is moved, or the same gap remains with the shelves and frame clear.
Next step: Rearrange the load and monitor closure. If the gap remains with no visible obstruction, continue with the accessible cleaning and gasket inspection rather than ordering a part from a generic image.
Why this matters
Why: A changed seal after the obstruction is removed supports a loading or closure problem. A persistent gap means the gasket, door position, or cabinet contact still needs attention and should not be solved by forcing the door.
-
Check 3
Wipe the accessible gasket and the matching cabinet contact surface with a soft cloth lightly dampened with mild soapy water, then dry both surfaces before closing the door; keep liquids away from controls and electrical openings.
Expected result: Food residue, dirt, or a sticky section is removed and the gasket now contacts the cabinet evenly, or the same gap remains after the surfaces are clean and dry.
Next step: Close the door gently and recheck the same gap. If contact is still uneven, inspect the gasket for physical damage and use the exact model manual before any part decision.
Why this matters
Why: A changed contact pattern supports a surface-contamination problem. No change means cleaning did not restore the seal and does not prove that a replacement gasket is compatible or needed.
-
Check 4
Inspect the gasket without removing it: look for a split, loose edge, hard or permanently flattened area, distortion, or a section that folds away from the cabinet when the door is closed.
Expected result: The seal is visibly torn or deformed, or it appears intact but the same perimeter gap returns after the door is clear and the surfaces are clean.
Next step: Photograph the affected area and record the full refrigerator model number. Use Kenmore's model lookup or a qualified appliance technician for the model-specific next step; do not use heat, solvents, adhesive, or a forced hinge adjustment as a substitute for that check.
Why this matters
Why: Visible damage supports a gasket-specific service or replacement lookup. A recurring gap with no visible damage can involve door or cabinet alignment, so it is not enough evidence to select a universal seal or to reshape the gasket with heat.
-
Check 5
Find the complete Kenmore model number on the appliance and enter it in Kenmore's official manuals lookup before ordering a gasket or following a door, hinge, or cabinet procedure.
Expected result: A complete model number returns a matching refrigerator manual and parts/accessory information, or the number is missing, incomplete, or returns no matching result.
Next step: Use only a matching model result or provide the model number to a qualified technician. If the lookup cannot be matched, stop the parts search and use service rather than substituting a similar-looking gasket.
Why this matters
Why: A successful exact-model lookup can bound the applicable part and procedure. Without that match, the example gasket on Kenmore's product page cannot establish compatibility for this refrigerator.
Use your observations
Decision map
Find the observation that best matches what you see, then follow the next safe action.
-
PATH 01Next step
What you see
The door closes fully after a bin, package, ice, or other visible obstruction is removed.
Do this next
Keep the load below the door path and monitor the same perimeter; arrange service if the gap returns with a clear door.
Why this path and its safety boundary
Why it matters: The immediate seal failure was consistent with a closure obstruction rather than proof of a failed gasket.
-
PATH 02Next step
What you see
The gasket or cabinet contact surface is dirty, and the gap improves after gentle cleaning and drying.
Do this next
Keep both surfaces clean and dry, then use the exact model manual if the seal becomes uneven again.
Why this path and its safety boundary
Why it matters: Residue was interrupting contact at the observed location.
-
PATH 03Next step
What you see
A tear, hard section, permanent flattening, or repeatable damaged area is visible after the door path is clear.
Do this next
Record the complete model number and obtain the matching gasket through Kenmore's model lookup or a qualified appliance technician; do not heat or glue the seal.
Why this path and its safety boundary
Why it matters: The gasket itself needs a model-specific replacement assessment; the official example part does not prove universal fit.
-
PATH 04Next step
What you see
The gasket looks intact but the door is sagging, the cabinet is obstructed, the gap remains around the frame, or food is warming.
Do this next
Keep the door closed, protect perishable food if the seal has been unreliable, and arrange qualified refrigerator service rather than removing hinges or panels.
Why this path and its safety boundary
Why it matters: The visible symptom may involve door or cabinet alignment or a broader cooling/sealing issue that cannot be diagnosed from the gasket alone.
Helpful context
Understand the symptom
Find the reason for the gap before buying a gasket
A seal that looks loose is not proof that the gasket is the failed part. A shelf or package can hold the door open, debris can interrupt contact, and a damaged or permanently flattened section can leave a repeatable gap. Compare the whole perimeter with the door closed, record the location of the gap, and keep the inspection to accessible surfaces. The Kenmore product page describes the gasket's sealing function but does not make its example part a universal fit.
Model identity controls any part decision
The task does not include a refrigerator model number. Kenmore says to enter the model number, which is at least 11 characters, to reach the applicable manual and parts/accessory information. Treat the model number as required before ordering a door gasket or following a door or hinge procedure; do not use a similarly shaped Kenmore seal as a compatibility claim.
Only after diagnosis
Potential parts
- refrigerator door gasket
Use this only after visible gasket damage or a model-specific service assessment supports replacement.
Kenmore's official page shows one OEM refrigerator gasket example and explains its sealing function; it does not establish that the example fits every Kenmore refrigerator. Confirm the complete model number and matching manual or parts result.
When checks do not resolve it
Need a professional?
Arrange qualified refrigerator service when the door will not close without force, the gap persists after visible obstruction and surface checks, the gasket is torn or permanently deformed, the door or cabinet appears misaligned, or food is not staying cold. Do not remove hinges, panels, or electrical parts as a gasket diagnosis.
Common questions
FAQ
Can I use the Kenmore gasket shown on the official product page for any Kenmore refrigerator?
No. The page identifies that listing as one OEM refrigerator gasket and explains the seal function, but the task has no model number. Confirm the complete model number in Kenmore's manuals lookup before treating any gasket as compatible.
Should I heat or glue a refrigerator gasket that is not sealing?
Do not use heat, glue, or solvents as a generic fix. First clear the door path, clean and dry accessible contact surfaces, and inspect the gasket. If the gap persists or the seal is damaged, use the exact model manual or qualified service.
What should I do with food while the refrigerator door is open?
Keep the door open only as long as needed for a safe external check and move food that could deteriorate to appropriate cold storage. Kenmore gives this caution on its gasket product page.
Read the exact guide
Official sources
- Find Your Manual | Kenmore Appliance Manuals & GuidesTransform SR Brands LLC / Kenmore · Kenmore exact-model manual lookup and model-specific parts/accessory guidance for refrigerators and other appliances
- A Refrigerator Door Gasket Genuine Original Equipment Manufacturer (OEM) part | KenmoreTransform SR Brands LLC / Kenmore · Kenmore refrigerator door gasket function, OEM listing scope, and food-storage caution while the door is open
Community feedback
Share a repair observation
Share a plain-text repair observation. Accepted observations are published automatically; this page may take a moment to update.