
On this page
Start here
Quick answer
A Kenmore washer that does not finish is usually waiting on one stage: filling, washing, draining, spinning, or the lid/door lock. Note the stage, the displayed code, and whether water remains; then check only the matching external cause, such as a closed supply valve, a kinked hose, an unbalanced load, or a blocked accessible drain path. Pause or cancel the cycle according to the model instructions and perform one normal reset. If the washer leaks, smells hot or burnt, smokes, sparks, shakes violently, repeatedly trips power, or will not release the lid/door, stop using it and arrange qualified service.
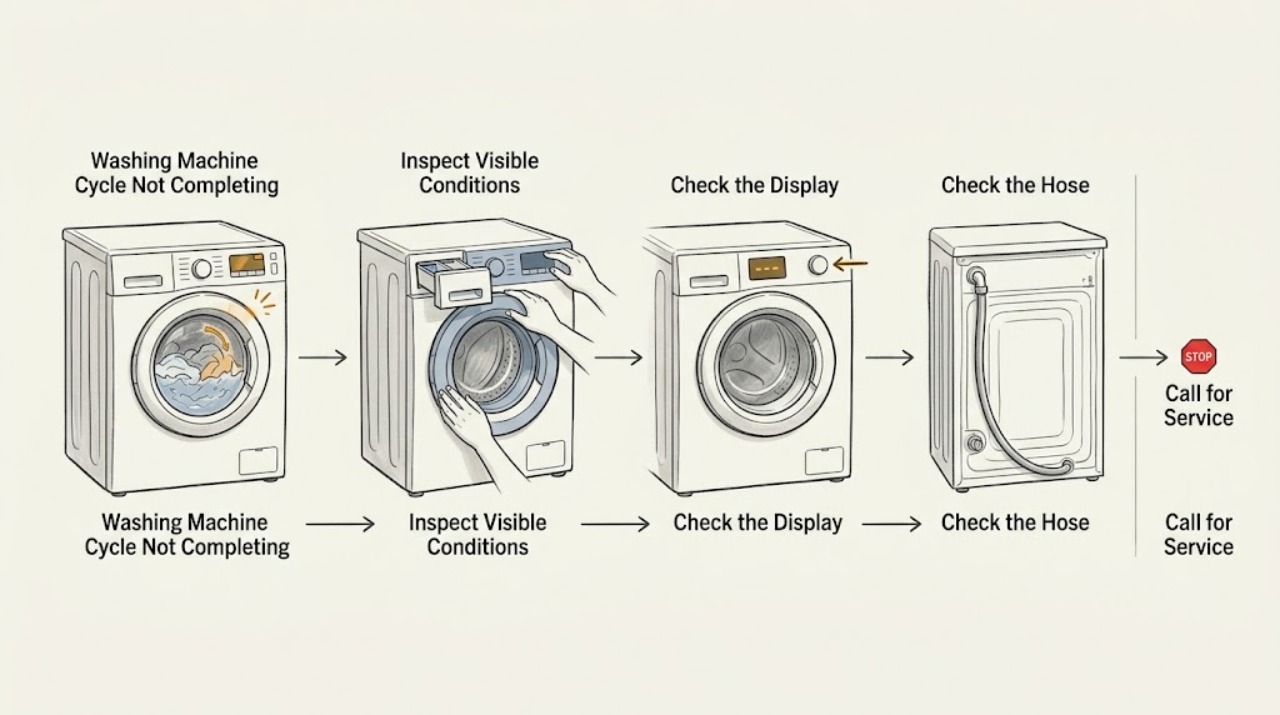
Work through in order
Diagnostic checks
Use only checks that match the exact appliance or system and its official guide.
-
Check 1
Observe one failed cycle without opening a locked lid or door: record the selected cycle, the exact stage or status indicator, any displayed code, whether the pump is humming, and whether water remains in the tub.
Expected result: The washer may stop during fill, wash/agitation, drain, or spin; it may also pause while balancing a load or while a lid/door lock is engaged.
Next step: Choose the matching branch below. Stop immediately for a leak, smoke, burning or electrical odor, sparks, abnormal heat, violent movement, or repeated power trips.
Why this matters
Why: The last completed stage narrows the safe check. Remaining water points toward the drain branch; a dry tub points toward fill or control/lock behavior; a repeated code needs the manual for the exact model.
-
Check 2
Use the washer's Pause or Cancel control as labeled for the exact model, wait for the lock indicator to clear, and check that the lid or door is fully closed without forcing it. If the control is unresponsive, disconnect power only by a dry, safe method and leave it disconnected briefly for one reset.
Expected result: The lock releases and the control responds, or the washer stays locked/unresponsive; note whether the cycle restarts and whether the same stage fails again.
Next step: If the lock remains engaged or the panel fails again, keep the washer off and arrange qualified service. If it responds, continue with the branch identified in the first check.
Why this matters
Why: A recovered control state can explain a one-time interruption. A lock that will not release, an unresponsive panel, or a repeat failure suggests a door/lid-lock, control, or water-level condition that should not be bypassed.
-
Check 3
For a cycle that stops while filling, verify that both household supply valves are open and that the inlet hoses are not kinked. With power off and the area dry, inspect only the hose ends and any user-accessible inlet screens described by the model manual; do not remove a cabinet panel.
Expected result: Water enters normally, enters slowly, or does not enter; check whether the fault returns at the same fill stage.
Next step: If external supply checks do not restore filling, stop repeating the cycle and request service with the model number and any code recorded.
Why this matters
Why: Normal flow makes a supply restriction less likely. Slow or absent flow can indicate a closed valve, kink, clogged accessible screen, inlet valve, pressure-sensing, or control issue; the model manual is needed before any further check.
-
Check 4
For a cycle that stops with water remaining, observe whether the washer tries to drain. Once it is safely off and the floor is dry, check the visible drain hose for a kink or crushed section and use only the model's stated user-accessible filter or clean-out procedure; do not reach into the pump or remove internal hoses.
Expected result: Water drains and the washer advances, the pump hums without moving water, or there is no drain sound.
Next step: If the drain path is not plainly accessible, if water cannot be contained, or if the washer still will not drain, leave it off and arrange service.
Why this matters
Why: A clear external path that still leaves water suggests a pump, wiring, level-sensing, or control fault. A humming pump or a blocked path can worsen if the cycle is repeatedly restarted.
-
Check 5
For a cycle that stops at wash or spin, remove a few items only after the basket has stopped and the lock has released, then redistribute the load evenly. Reduce a single bulky item or an overloaded basket, confirm the washer is stable, and run one appropriate rinse-and-spin or normal cycle if the model offers it.
Expected result: The washer completes after redistribution, repeatedly pauses while trying to balance, or makes hard impacts, grinding, or unusual movement.
Next step: Stop and arrange service for violent movement, grinding, a loose basket, or recurrence with a small balanced load. Do not defeat the lid/door lock or hold it closed to force spin.
Why this matters
Why: A one-time recovery supports a load-balance or selected-cycle explanation. Repeated balancing, severe impacts, or abnormal mechanical noise can indicate installation or drive trouble and is not a reason to keep testing.
-
Check 6
After the external checks, run one supervised test with a small, balanced load and the model-recommended cycle. Watch whether the washer fills, washes, drains, spins, and ends without a code; record the exact point of any repeat failure.
Expected result: The complete cycle ends normally, or the same stage/code returns despite safe external checks.
Next step: Use the model manual and recorded observations when arranging service; do not perform live electrical tests or open sealed, powered, or moving assemblies.
Why this matters
Why: A completed test supports a temporary interruption or load/supply issue. A repeat at the same stage is evidence for a component or control diagnosis, not permission to substitute a part without model confirmation.
Use your observations
Decision map
Find the observation that best matches what you see, then follow the next safe action.
-
PATH 01Next step
What you see
Water remains after the stop
Do this next
Follow the drain observation: check only a plainly visible hose or model-approved user filter procedure, then arrange service if draining does not recover.
-
PATH 02Next step
What you see
The washer stops before water enters
Do this next
Follow the fill branch: confirm supply valves and hose condition, then stop and arrange service if filling remains slow or absent.
-
PATH 03Next step
What you see
The washer pauses at wash or spin and the load is uneven
Do this next
Redistribute or reduce the load and supervise one test. Recurrence with a balanced load or any violent movement requires service.
-
PATH 04Next step
What you see
The lock will not release, a code repeats, or the panel remains unresponsive
Do this next
Keep the washer off, do not bypass the lock or open the cabinet, and provide the model and exact code to qualified service.
-
PATH 05Next step
What you see
Smoke, burning or electrical odor, sparks, abnormal heat, a leak near electrics, violent movement, or repeated power trips occurs
Do this next
Stop the cycle, keep clear of water and electrical hazards, isolate power only if it can be done safely, and seek qualified help. Do not restart the washer.
-
PATH 06Next step
What you see
The supervised small-load test completes and no hazard is present
Do this next
Return to ordinary use while monitoring the next load; arrange service if the incomplete-cycle symptom returns.
Helpful context
Understand the symptom
Start with the stage, not a guessed part
Write down the selected cycle, the stage where the timer or status stopped, any letters or numbers on the display, and whether the tub is empty, partly full, or full. A pause during sensing, filling, or balancing can look like a failed cycle. The same symptom has a different next check on a top-load model than on a front-load model, so confirm the model-specific control labels before using a procedure.
Keep the first test controlled
Keep hands out of a moving basket and do not force a locked lid or door. If water is on the floor near the power connection, isolate the area and use the home's electrical safety procedure rather than touching a wet plug. Never run repeated tests when there is smoke, a burning smell, sparking, unusual heat, or severe movement.
Safety boundary
Stop conditions
- Do not force a lid or door lock.
- Do not reach into a moving basket or pump.
- Do not open the cabinet or perform live electrical tests.
- Do not keep restarting a washer that leaks, smokes, smells burnt, sparks, overheats, shakes violently, or trips power.
Only after diagnosis
Potential parts
- water inlet valve
Consider only when the supply valves and hoses are correct but filling remains slow or absent, and a technician confirms the inlet circuit or valve fault.
Confirm the complete model number and manufacturer fit information before ordering; do not assume a part fits every Kenmore washer. - drain pump
Consider only when the external drain path is clear but the washer cannot move water and service diagnosis identifies the pump or its circuit.
Confirm exact model fitment and have service handle internal water and electrical connections. - lid or door lock
Consider only when the lock does not engage or release and the model-specific diagnosis points to the lock assembly.
Top-load and front-load lock assemblies differ; verify the complete model before any replacement.
When checks do not resolve it
Need a professional?
Use qualified appliance service for a repeated stage/code, a failed lock, an unresolved fill or drain fault, or an electrical or mechanical symptom.
Have this ready
- full model number
- exact display code
- stage where the cycle stops
- whether water remains
- what the single reset and external checks changed
Common questions
FAQ
Why does my Kenmore washer stop before the cycle ends?
Identify whether it stopped while filling, washing, draining, spinning, or waiting on the lid or door lock. Water left in the tub points to the drain branch; a dry tub points toward fill, lock, or control behavior; an uneven load can interrupt spin.
Should I reset a Kenmore washer that will not finish?
Use the model's Pause or Cancel control first and perform one safe power reset only if the control is unresponsive. If the same stage or code returns, stop repeating resets and arrange qualified service.
Can an unbalanced load prevent a cycle from completing?
Yes. A bulky or uneven load can cause repeated balance pauses during wash or spin. Redistribute or reduce the load after the basket stops, then supervise one test; violent movement or recurrence with a balanced load needs service.
Read the exact guide
Official sources
- 4.5 cu. ft. ENERGY STAR® HE Top Load Washer w/ Triple Action Impeller - WhiteKenmore · Kenmore washer cycle features and user-facing controls for the listed product page; use the exact model manual for model-specific troubleshooting.
Community feedback
Share a repair observation
Share a plain-text repair observation. Accepted observations are published automatically; this page may take a moment to update.