
On this page
Start here
Quick answer
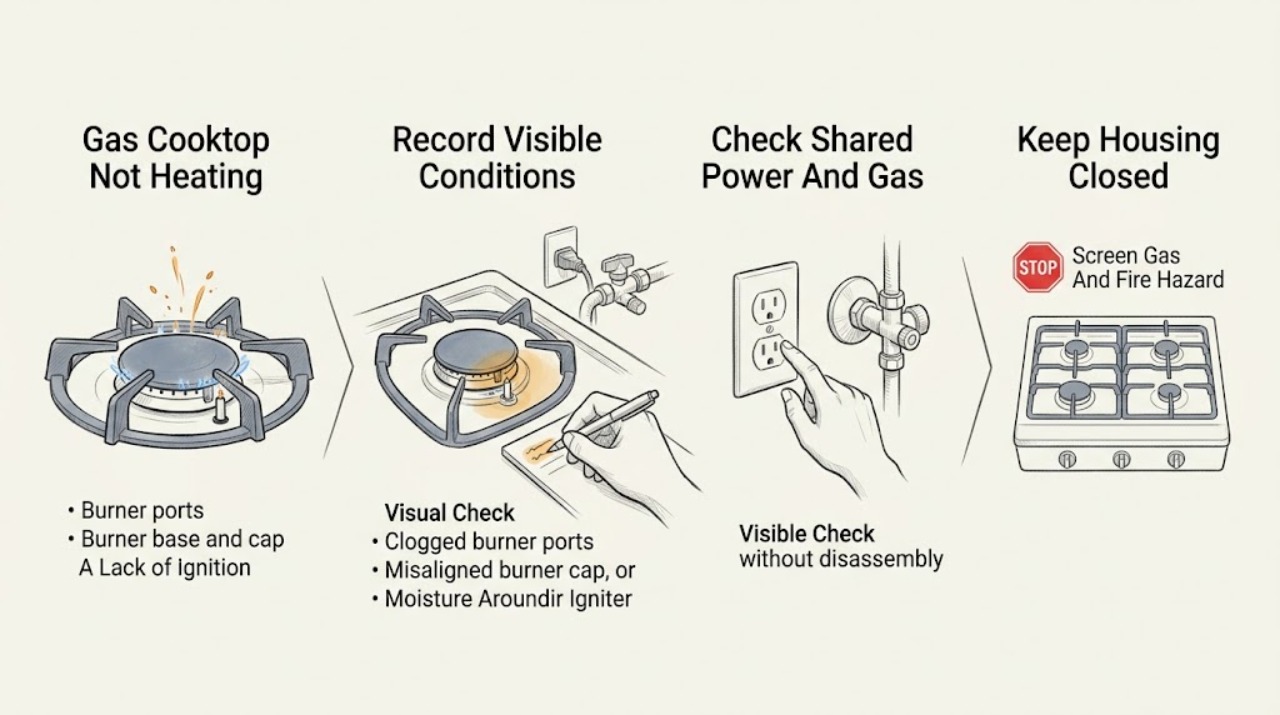
A KitchenAid gas cooktop that does not heat may have an unlit burner, a wet or obstructed port, a misaligned burner cap, a control lock, loss of electrical ignition power, a closed gas supply, a flame or fuel-conversion issue, or a component fault. Stop immediately for gas odor, a continuous gas sound, smoke, sparks, arcing, a yellow or unstable flame, scorching, or a cracked or wet cooktop. For gas odor, leave the building and contact the gas supplier or emergency services from outside. If there is no hazard, determine whether one burner or all burners are affected, whether the igniter clicks, and whether gas ignites. With all controls off and the cooktop cool, use the exact KitchenAid guide to clean accessible ports and igniter, dry the burner, and seat the correct cap on the correct base. KitchenAid's official guidance also identifies power, gas supply, control lock, port blockage, cap alignment, flame condition, and model-specific service as decision points. If the burner still does not heat, the flame is abnormal, all burners fail, or the check requires opening the cooktop or adjusting gas components, stop and arrange qualified appliance service.
Before you begin
Safety first
- This article supports ordinary-access observation and model-approved cleaning only. Do not open the cooktop, test gas pressure or live wiring, alter flame or conversion components, bypass protective controls, or operate with an abnormal flame.
Work through in order
Diagnostic checks
Use only checks that match the exact appliance or system and its official guide.
-
Check 1
Stop using the KitchenAid gas cooktop and inspect only from a safe distance for gas odor, a continuous escaping-gas sound, smoke, sparks, arcing, scorching, a yellow or unstable flame, a cracked or wet surface, or controls that do not respond normally.
Expected result: Record whether any gas, fire, electrical, glass, or uncontrolled-flame hazard is present without touching a hot, wet, cracked, or damaged area.
Next step: For gas odor or an escaping-gas sound, leave immediately and contact the gas supplier or emergency services from outside; for smoke, sparks, arcing, scorching, or damage, keep the cooktop off and arrange qualified service.
Stop if: Do not relight repeatedly or continue using a gas-smelling, smoking, sparking, scorching, cracked, wet, or unstable cooktop.
Why this matters
Why: A gas or fire hazard overrides burner diagnosis. A normal exterior permits cool-down and ordinary-access checks, but it does not make gas-valve, orifice, wiring, or live electrical work appropriate.
-
Check 2
Record the KitchenAid model and serial information, affected burner or burners, knob position, clicking or sparking, flame appearance, cookware result, and whether the issue began after cleaning, a spill, installation, reconnection, or a power interruption.
Expected result: Classify the event as one burner cold, several burners cold, all burners cold, clicking without ignition, ignition followed by shutdown, weak flame, uneven flame, or abnormal flame color or sound.
Next step: Use the exact KitchenAid model guide for the recorded burner type and symptom before cleaning, checking a lock, or resetting power.
Stop if: Stop if the model or gas configuration cannot be confirmed without disturbing the installation or opening a panel.
Why this matters
Why: One burner failing points toward its cap, port, igniter, or local gas path; all burners failing points toward shared power, control lock, or gas supply. Flame color and sound can indicate a flow, moisture, ventilation, or conversion concern rather than a simple setting.
-
Check 3
If all burners fail and there is no gas odor or other hazard, inspect the accessible plug and receptacle and breaker or fuse condition, then confirm the main gas valve is in the normal position only as the KitchenAid installation guide permits; do not open an enclosure or move the cooktop.
Expected result: Record whether the igniters click, a breaker or fuse appears abnormal, the receptacle or cord is hot or damaged, the main supply status is normal, and whether the cooktop was recently installed or reconnected.
Next step: Correct only an obvious accessible power or installation condition allowed by the guide and make one normal ignition attempt; if all burners remain cold, keep the cooktop off and request service.
Stop if: Do not repeatedly reset a tripping circuit, open the gas line, test gas pressure, move the cooktop, or remove covers.
Why this matters
Why: KitchenAid identifies electrical power, a lockout during power loss, and gas supply as possible shared causes when none of the burners lights. A normal accessible supply with no ignition requires qualified diagnosis of the ignition and gas systems.
-
Check 4
With every control off and the cooktop completely cool, remove only the burner cap and base if the model guide identifies them as removable, then check that each correct cap is on its matching base, centered, flush, clean, and dry.
Expected result: Record whether a cap is on the wrong base, off-center, rocking, wet, dirty underneath, or obstructed, and whether the igniter area is visibly damp or contaminated.
Next step: Restore only the documented cap and base arrangement, allow moisture to dry naturally, and make one normal ignition attempt; arrange service when the cap will not seat, the igniter is damaged, or the burner remains cold.
Stop if: Do not force or swap caps by appearance, use a wet burner, scrape the igniter, or operate without the cap in place.
Why this matters
Why: KitchenAid says cap and base alignment and cleanliness affect ignition and performance, while moisture can cause poor or popping ignition. A correctly seated, dry assembly with no flame points toward supply, port, igniter, control, or internal diagnosis.
-
Check 5
With the cooktop cool and controls off, inspect visible burner ports and the gas-tube opening for spill residue or blockage and clean them only with the tool and method specified by the KitchenAid manual; do not enlarge or distort any opening.
Expected result: Record whether ports are visibly blocked, whether residue or moisture is present, whether the opening remains damaged or obstructed after the permitted clean, and whether the igniter sparks normally afterward.
Next step: Restore the cap and base exactly, let all parts dry, and make one normal ignition attempt; stop and request service if the burner remains cold or flame behavior is abnormal.
Stop if: Do not use a wooden toothpick, dishwasher, abrasive, chemical, oversized tool, or any method that enlarges or distorts the gas port.
Why this matters
Why: A localized blocked or wet port can explain one weak or unlit burner. A clear port with no spark, no gas ignition, an abnormal flame, or a repeated failure requires qualified service rather than a larger opening or deeper probing.
-
Check 6
After the permitted cap, base, and port check, observe one normal ignition from a safe position and note whether the flame is stable and appropriate for the model; keep cookware, linens, and a downdraft vent from interfering with the burner as the installation guide directs.
Expected result: Record whether the flame lights promptly, remains stable, is even around the cap, changes when the downdraft runs, or is yellow, noisy, flickering, lifting, or too high or low.
Next step: Turn the control off if the flame is abnormal, preserve the observation and fuel type, and arrange qualified gas-appliance service; do not adjust the gas train or flame yourself.
Stop if: Do not continue operating with a yellow, lifting, noisy, flickering, unstable, or gas-smelling flame, and do not alter an orifice or regulator.
Why this matters
Why: KitchenAid links abnormal flame to port blockage, cap position, moisture, downdraft effects, or improper propane conversion. An unstable or abnormal flame is not evidence that the burner simply needs more gas and may require professional adjustment or service.
-
Check 7
After the applicable external checks are complete and no hazard is present, make one normal ignition attempt on the affected burner and stop at the first gas odor, failed ignition, abnormal flame, smoke, spark, or control problem.
Expected result: Record whether the burner heats cookware, whether the igniter clicks and sparks, whether the flame stays stable, and whether the same symptom returns immediately or after warming.
Next step: Keep the cooktop off and provide the technician with the model, gas type, affected burner, power and supply observations, cap and port findings, flame description, and test result.
Stop if: Do not repeat failed ignition attempts, bypass protective controls, open the cooktop, adjust gas pressure or conversion parts, or replace an igniter, valve, or module by symptom alone.
Why this matters
Why: A stable flame after correcting a cap, moisture, port, or documented supply condition supports that condition as a contributor. Recurrence, no spark, no gas ignition, all-burner failure, or abnormal flame requires professional diagnosis and does not identify a replacement part.
Use your observations
Decision map
Find the observation that best matches what you see, then follow the next safe action.
-
PATH 01Safety boundary
What you see
Gas odor, an escaping-gas sound, smoke, sparks, arcing, scorching, a cracked surface, or an unstable or abnormal flame is present.
Do this next
For gas odor or escaping gas, leave immediately and contact the gas supplier or emergency services from outside; for fire or electrical signs, keep the cooktop off and arrange qualified service.
Why this path and its safety boundary
Why it matters: This is a safety stop, not an ordinary burner check.
Safety stop: Do not relight, operate switches inside a gas-smelling area, move the cooktop, or open panels.
-
PATH 02Safety boundary
What you see
One burner fails while other burners work, and its cap, base, port, or igniter area is visibly wet, dirty, blocked, or misaligned.
Do this next
With controls off and the cooktop cool, follow the model-approved cleaning and alignment procedure and make one ignition attempt.
Why this path and its safety boundary
Why it matters: A local cap, base, moisture, or port condition is plausible.
Safety stop: If the burner remains cold, the cap will not seat, or the flame is abnormal, stop and request service; do not enlarge a port.
-
PATH 03Safety boundary
What you see
No burner lights, the igniters do not click or spark, or the cooktop was recently installed or reconnected.
Do this next
Check only the accessible power and gas-supply conditions the model guide permits and make one normal ignition attempt, then arrange service if all burners remain cold.
Why this path and its safety boundary
Why it matters: Shared power, lockout, gas supply, or installation air may be involved; a shared symptom does not identify a component.
Safety stop: Do not open the gas line, move the cooktop, test gas pressure, or remove covers.
-
PATH 04Safety boundary
What you see
A burner lights but the flame is yellow, noisy, flickering, lifting, uneven, too high, too low, or changes with a downdraft vent.
Do this next
Turn the burner off, record the fuel type and flame behavior, and arrange qualified gas-appliance service.
Why this path and its safety boundary
Why it matters: Port blockage, cap position, moisture, ventilation, fuel conversion, or adjustment may be involved.
Safety stop: Do not adjust the flame, orifice, regulator, or gas train as an ordinary-user step.
-
PATH 05Safety boundary
What you see
Power and gas supply appear normal, cap and port checks are complete, and one normal test still produces no heat or a recurring failure.
Do this next
Keep the cooktop off and arrange qualified KitchenAid appliance service with the complete observation record.
Why this path and its safety boundary
Why it matters: An igniter, valve, burner, control, wiring, conversion, or installation fault remains possible; the symptom does not identify a part.
Safety stop: Do not disassemble the cooktop, perform live electrical or gas tests, or substitute parts by symptom alone.
Helpful context
Understand the symptom
First decide whether the problem is ignition, gas flow, or heat transfer
A knob that clicks without a flame, a flame that lights but stays small, a flame that is uneven or yellow, and a burner that heats one pan slowly are different symptoms. Note whether one burner or all burners fail, whether clicking occurs, and whether the burner was recently cleaned or the gas supply reconnected. Do not keep a knob in an ignition position while a burner is not lighting.
Cool, dry, aligned burner parts matter
KitchenAid says a burner cap must be on its matching base, centered, flush, and clean for proper ignition and performance. Moisture after a spill or cleaning can also affect ignition and flame behavior. With all controls off and the cooktop cool, inspect and clean only the accessible parts allowed by the model guide; do not enlarge a port or force a component.
All burners failing points upstream
If no burner lights, the issue may involve electrical ignition power, a control lock during a power failure, or the main gas supply. KitchenAid's support identifies a grounded supply, breaker or fuse, gas valve, and model-specific lock behavior as checks. A normal-looking supply with no ignition still needs service; it does not justify opening the cooktop or testing gas pressure.
Abnormal flame is a stop signal
KitchenAid identifies clogged ports, cap position, moisture, downdraft effects, and improper propane conversion as possible reasons for an abnormal flame, and directs service for flame adjustment or conversion concerns. A yellow, lifting, noisy, flickering, or unstable flame is not a heat setting to tune by guesswork. Stop the burner and arrange qualified gas-appliance service.
Safety boundary
Stop conditions
- Stop for gas odor, an escaping-gas sound, smoke, sparks, arcing, scorching, a cracked or wet surface, a hot or damaged cord, or an unstable or abnormal flame.
- For gas odor, leave immediately and contact the gas supplier or emergency services from outside; do not use switches, phones, matches, or the cooktop inside.
- Do not relight repeatedly, open the cooktop, test gas pressure, adjust the flame, alter an orifice or regulator, or disturb wiring or gas connections.
- Do not use a burner with a missing, wet, damaged, or misaligned cap, and do not use a tool, chemical, or method that enlarges or distorts a gas port.
- Stop repeating tests when the burner remains cold, all burners fail, an abnormal flame returns, a control or breaker problem recurs, or the exact model guide does not explain the result.
When checks do not resolve it
Need a professional?
Arrange qualified KitchenAid gas-appliance service when one burner remains cold after the exact model's cool, dry, cap, base, and port checks; when all burners fail; when ignition does not spark; when a flame is yellow, unstable, noisy, or otherwise abnormal; when propane conversion or flame adjustment is suspected; or when diagnosis requires opening the cooktop or testing gas or live electrical circuits. For gas odor, leave immediately and contact the gas supplier or emergency services from outside. Provide the model and serial information, fuel type, affected burner, power and gas-supply observations, cap and port findings, flame description, and test result.
Safety scope: This article supports ordinary-access observation and model-approved cleaning only. Do not open the cooktop, test gas pressure or live wiring, alter flame or conversion components, bypass protective controls, or operate with an abnormal flame.
Read the exact guide
Official sources
- Burner Not Lighting - Gas Cooktop - Product HelpKitchenAid · KitchenAid's official gas-cooktop support page for a burner that will not light; exact cleaning access and controls vary by model.
- None of the Burners are Lighting - Gas Cooktop - Product HelpKitchenAid · KitchenAid's official gas-cooktop support page for all burners failing; exact supply and lock procedures depend on the installed model and local installation.
- Gas Burner Flame Level Incorrect - Product HelpKitchenAid · KitchenAid's official gas-burner flame support page; fuel type, flame adjustment, conversion, and installation requirements are model-specific and may require service.
Community feedback
Share a repair observation
Share a plain-text repair observation. Accepted observations are published automatically; this page may take a moment to update.