
On this page
Start here
Quick answer
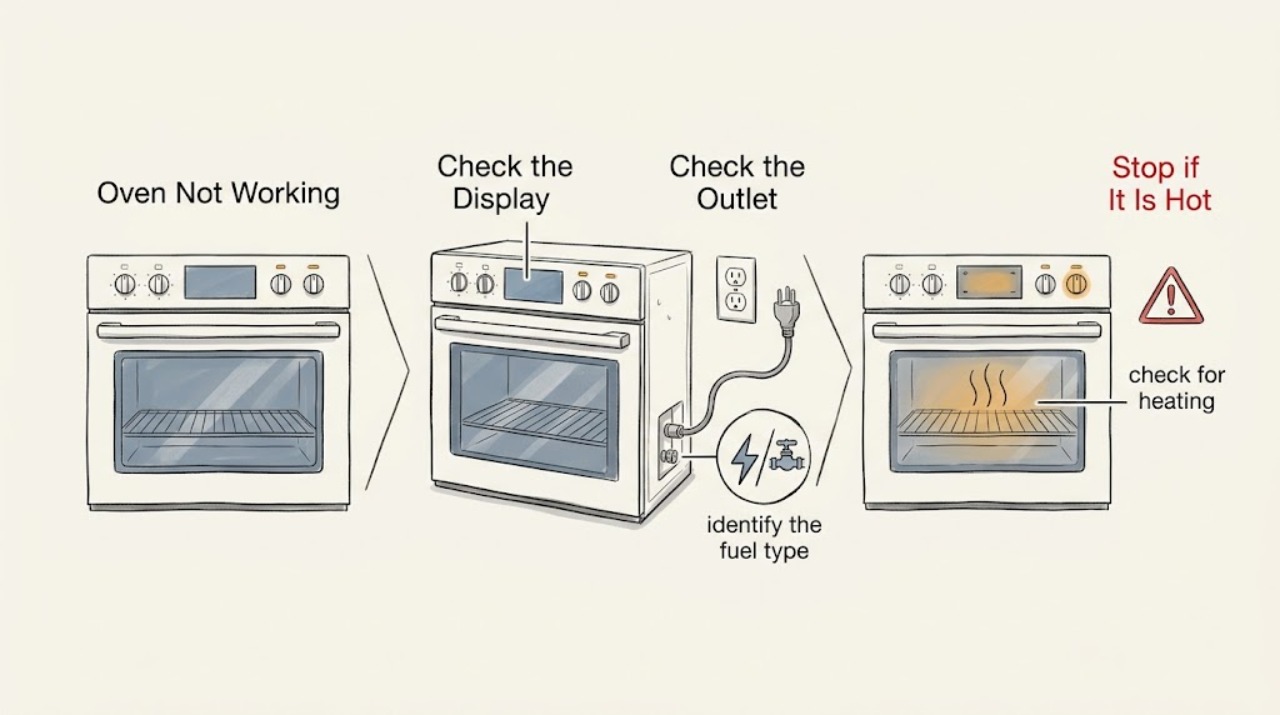
Start by separating a completely dead KitchenAid oven from one that has a live display but will not start, heat, or ignite. Confirm the exact model and whether it is electric, gas, or dual fuel. With the appliance cool and no hazard present, check the grounded supply, a single safe breaker reset, Control Lock or Demo Mode, Delayed Start, the closed door, and the correct cooking mode. For a gas model, the accessible main gas valve and ignition sequence also matter; for an electric model, heating elements and supply are model-specific service checks. Stop immediately for gas odor, delayed ignition, a bang, smoke, abnormal flame, carbon-monoxide alarm, water contact, hot or damaged wiring, electric arc, or a breaker that trips again. Do not open panels, manually light a burner, test leaks with a flame, or repeatedly reset the appliance. If these external checks do not restore safe operation, arrange qualified appliance service.
Work through in order
Diagnostic checks
Use only checks that match the exact appliance or system and its official guide.
-
Check 1
Before troubleshooting, identify the fuel type from the rating label or owner's manual and look from a safe position for gas odor, smoke, soot, a bang or delayed whoosh, an abnormal flame, a carbon-monoxide alarm, water near the appliance, a hot or discolored receptacle, damaged wiring, or a breaker that keeps tripping.
Expected result: Any gas, combustion, water, overheating, arcing, shock, or repeated-trip symptom is present.
Next step: Stop using and do not retest. Leave for fresh air for gas or carbon-monoxide symptoms and contact the appropriate emergency, gas, fire, or qualified electrical service from a safe location.
Stop if: Stop immediately for gas odor, smoke, flare, delayed ignition, bang, abnormal flame, carbon-monoxide alarm, water contact, burning smell, visible arc, hot wiring, or a repeated breaker trip.
Why this matters
Why: The oven has a safety fault, not a routine setting problem. Delayed gas ignition can accumulate fuel, while wet or heat-damaged electrical equipment can remain dangerous.
-
Check 2
Press Power or another normal control once with the oven cool and empty of active cooking; note whether the display, clock, interior light, and any surface controls respond.
Expected result: Everything is dark, only some controls respond, or the display is active but commands are rejected.
Next step: Use the matching power and control branches without opening the appliance. Record any code or indicator exactly as shown.
Stop if: Stop if the display flashes abnormally, smells hot, sparks, or the control becomes hot or erratic.
Why this matters
Why: A dark panel points to supply or power-circuit symptoms. A live panel that rejects commands points more toward lock, demo, delay, control, or model-specific error behavior.
-
Check 3
With the area dry and the connection safely accessible, check that the power cord is seated in an operational grounded outlet and is not connected through a two-prong adapter or extension cord; verify the outlet only with a known-working small appliance if appropriate.
Expected result: The outlet is dead, grounding is uncertain, the cord or receptacle is damaged, or the test appliance also fails.
Next step: Leave the oven off and have a qualified electrician or installer correct the supply. If the outlet is safe and operational, continue to the breaker and controls.
Stop if: Stop for a hot, wet, loose, scorched, cracked, sparking, or discolored outlet or cord.
Why this matters
Why: KitchenAid identifies correct electrical supply as necessary for oven operation and for gas-oven igniter grounding. An outlet or installation fault is not an oven ignition repair.
-
Check 4
If the circuit is clearly tripped and the appliance area is dry with no damage or odor, switch the household breaker off for the model's documented reset interval and back on once; do not remove the range or keep resetting it.
Expected result: The display returns and the breaker stays on, or it trips again immediately or when a function is selected.
Next step: If stable, record the reset and continue with the control and fuel-type branches. If it trips again, leave the oven off and arrange qualified electrical or appliance service.
Stop if: Stop after one reset if the breaker trips again, the panel flashes, wiring heats, or any odor, spark, or smoke appears.
Why this matters
Why: A single reset may clear a power interruption. A repeat trip indicates an unresolved electrical fault, overload, or miswired supply and should not be challenged with another start.
-
Check 5
Check the display for Control Lock, Demo Mode, Delayed Start, Sabbath or other model-specific state, then cancel it only as described in the exact KitchenAid manual and try a normal cooking command once.
Expected result: A special mode or lock indicator clears and the oven accepts the command, or the control remains locked, delayed, blank, or unresponsive.
Next step: If the command is accepted, observe the correct fuel branch. If it is not, record the indicator and arrange service rather than guessing at a reset sequence.
Stop if: Stop if the control shows an unknown fault, becomes erratic, smells hot, or the oven starts an abnormal ignition sequence.
Why this matters
Why: A lock, demo mode, or delayed start can make a working oven appear dead or prevent a heating sequence from beginning. The button combination varies by model.
-
Check 6
Close the cool oven door fully and inspect only for an obvious rack, pan, or debris preventing closure; leave a self-clean latch in its normal position unless the manual directs otherwise.
Expected result: The door closes and latches normally, or it remains misaligned, locked, or visibly damaged.
Next step: Remove only an obvious cool obstruction if the manual allows it. If the latch, hinges, glass, or alignment are damaged, stop and request service.
Stop if: Stop if the glass is broken, the latch is damaged, the door is hot, or the lock will not release normally.
Why this matters
Why: Some KitchenAid models will not operate normally with the door open. A damaged latch or door can block a safe cycle and is not a reason to force or bypass the interlock.
-
Check 7
For an electric KitchenAid oven, select a normal Bake mode and temperature from the model manual and press Start once; for a gas or dual-fuel oven, use the corresponding gas mode and observe only from a normal position without opening panels or the hot door.
Expected result: The cycle does not begin, begins without heat, or the expected heating sequence starts and then stops.
Next step: Cancel the cycle and record the mode, temperature, time, display, sounds, and heat response. Arrange qualified service if the oven remains cold or does not start.
Stop if: Stop immediately for gas odor, delayed ignition, flare, bang, smoke, abnormal flame, arc, burning odor, or a breaker trip.
Why this matters
Why: The result separates a control/start issue from a heating-system issue. Electric elements, gas igniters, valves, sensors, and controls need model-specific diagnosis; a visible flame is not required for a homeowner test.
-
Check 8
If the oven was recently installed or reconnected, compare the fuel type, installation instructions, and accessible main gas shutoff with the exact model documentation; do not loosen fittings, move the appliance, or try to purge a suspected leak.
Expected result: The fuel type or valve position is uncertain, the gas supply was recently changed, or the installation does not match the manual.
Next step: Stop and use a qualified gas or installation professional for uncertain fuel, valve, connector, or conversion issues. If there is no hazard and the setup is confirmed, continue with the error and service handoff.
Stop if: Stop for any odor, hissing, damaged connector, inaccessible valve, or a check that requires tools or moving the oven.
Why this matters
Why: KitchenAid notes that a recently reconnected gas line and an off main valve can prevent gas-oven operation, but connection, conversion, and leak work require a licensed professional.
-
Check 9
Inspect only visible, cool, user-accessible areas for foil or an aftermarket liner covering the oven bottom, an obvious rack obstruction, or items blocking a storage drawer; do not remove the oven bottom, burner cover, heating element, or wiring.
Expected result: A liner or item is obstructing the documented area, or no external obstruction is visible.
Next step: Remove only a loose, cool, user-removable obstruction as allowed by the manual. Leave fixed, baked-on, or internal obstructions for service.
Stop if: Stop if removal requires tools, heat exposure, contact with a burner or element, or disturbing a gas component.
Why this matters
Why: KitchenAid warns that an oven-bottom liner can restrict air or gas flow. A clear external area does not prove that an internal element, igniter, valve, sensor, or control is good.
-
Check 10
Write down the exact model, fuel type, display or error text, time of failure, selected mode, whether Start was accepted, door behavior, breaker history, and whether the cooktop or other oven functions work.
Expected result: The symptom remains after safe external checks, or a repeatable code or branch points to an internal component.
Next step: Arrange qualified appliance service; use a licensed electrician for supply faults and a qualified gas professional when gas connections, conversion, or suspected leaks are involved.
Stop if: Do not continue DIY diagnosis once internal parts, live voltage, gas connections, repeated trips, or combustion warnings are implicated.
Why this matters
Why: This record lets service distinguish no-power, no-start, no-heat, gas-supply, ignition, and code or door-lock paths without hazardous consumer testing.
Use your observations
Decision map
Find the observation that best matches what you see, then follow the next safe action.
-
PATH 01Safety boundary
What you see
Gas odor, delayed ignition, bang, smoke, abnormal flame, carbon-monoxide alarm, water contact, arcing, or heat-damaged wiring is present.
Do this next
Stop using the oven and do not create a spark, operate controls near suspected gas, open a hot door, or retry. Leave for fresh air when indicated and contact the appropriate emergency, gas, fire, or qualified electrical service from a safe location.
Why this path and its safety boundary
Safety stop: Continue with model identification and low-risk external checks.
-
PATH 02Safety boundary
What you see
The display, clock, and all oven controls are dark.
Do this next
Check the dry accessible outlet and household circuit once without opening the appliance; repeated failure or a tripped circuit requires qualified electrical or appliance service.
Why this path and its safety boundary
Safety stop: Treat the problem as a control-state, door, fuel-supply, error-code, or heating symptom rather than assuming a total power failure.
-
PATH 03Safety boundary
What you see
The display works but the oven will not accept Start or shows Lock, Demo, Delayed Start, Sabbath, or another special state.
Do this next
Follow the exact model manual to cancel or unlock the state, then try the normal mode once; persistent or unknown control behavior needs service.
Why this path and its safety boundary
Safety stop: Continue to the door, fuel-type, and heating-path checks.
-
PATH 04Safety boundary
What you see
The appliance is gas or dual fuel and was recently installed or reconnected.
Do this next
Verify fuel configuration and the clearly identified accessible main gas valve only as the installation instructions permit; leave conversion, connection, purge, and leak work to a licensed professional.
Why this path and its safety boundary
Safety stop: Use the normal gas-supply and ignition observations without opening the appliance or repeatedly starting it.
-
PATH 05Safety boundary
What you see
Bake is accepted but an electric oven remains cold, or a gas oven gives no ignition cue or no stable flame.
Do this next
Cancel the cycle and arrange qualified service for the element, igniter, valve, sensor, control, or supply path; do not measure live voltage, manually light gas, or remove panels.
Why this path and its safety boundary
Safety stop: If the oven works only intermittently or another function fails, record the exact branch and use model-specific service rather than repeating tests.
-
PATH 06Safety boundary
What you see
The breaker trips again or the cord/receptacle becomes hot, loose, scorched, or discolored.
Do this next
Leave the appliance off and arrange qualified electrical or appliance service; do not keep resetting the breaker.
Why this path and its safety boundary
Safety stop: Record the stable supply and continue only with external control, door, and fuel checks.
-
PATH 07Safety boundary
What you see
A door, latch, glass, rack, liner, or visible obstruction prevents normal operation.
Do this next
Remove only a cool, obvious user-removable obstruction allowed by the manual; damaged doors, latches, glass, and fixed obstructions require service.
Why this path and its safety boundary
Safety stop: Proceed to the correct electric or gas service handoff based on the observed symptom.
Helpful context
Understand the symptom
Classify what not working means
A blank display and a live display are different faults. If the panel is dark, begin with the household supply and appliance connection. If the panel is live but a cycle will not begin, check lock, demo, delay, door, and Start behavior. If a cycle begins but the cavity stays cold, use the electric or gas branch that matches the appliance. Do not assume that a symptom from a gas range applies to an electric wall oven, or that a model-specific error code has a universal meaning.
Keep the first checks external
The useful homeowner checks are limited to controls, an accessible dry outlet and breaker, door closure, visible obstructions, and a clearly identified gas shutoff when the installation instructions permit that check. Internal wiring, heating elements, igniters, valves, sensors, and live voltage measurements belong to qualified service. Keep the model number and the exact symptom sequence for the handoff.
Treat combustion warnings as urgent
A gas odor, delayed ignition, flare, bang, soot, or unusual flame is not a reason to try one more start. A carbon-monoxide alarm also requires leaving for fresh air and not operating the appliance until trained personnel have assessed it. Do not operate switches or make sparks near suspected gas, and do not open a hot oven door to look for a flame.
Only after diagnosis
Potential parts
- oven igniter
Consider only after qualified diagnosis confirms an igniter or ignition-circuit fault for the exact model.
Confirm the complete model number and manufacturer's fit information before ordering; gas ignition parts should be installed by qualified service. - oven heating element
Consider only when qualified model-specific testing identifies a failed electric heating element rather than a supply or control issue.
Do not infer fit from appearance; verify the full model and have service isolate power before replacement. - oven temperature sensor or gas valve
These parts are candidates only after service testing identifies the matching sensor or valve fault.
Confirm exact model compatibility and professional installation requirements before ordering any gas or electrical component.
When checks do not resolve it
Need a professional?
Arrange qualified appliance service when the oven remains dead, will not accept a cycle, stays cold, will not ignite, shows an unexplained code, or has a door or control fault after safe external checks. Use a licensed electrician for outlet, grounding, cord, installation, or repeat-breaker symptoms and a qualified gas professional for fuel conversion, gas connections, valves, suspected leaks, delayed ignition, or abnormal flames.
Common questions
FAQ
Why is my KitchenAid oven not working at all?
First determine whether the display is dark or live. A dark display points toward supply or power-circuit checks; a live display can still be locked, delayed, in demo mode, blocked by the door, or affected by a model-specific fault. Use the matching fuel-type branch and stop for any safety symptom.
Why does my KitchenAid gas oven not ignite?
A gas oven needs a correctly grounded electrical supply and available gas, and the door and controls must permit the cycle. Check only the external outlet, breaker, door, control state, and clearly identified gas shutoff for the exact model; no ignition cue or no stable flame after one safe observation needs service.
Can a control lock or delayed start make an oven look broken?
Yes. KitchenAid identifies Control Lock, Demo Mode, and Delayed Start as states that can limit or postpone operation. Follow the exact manual, cancel the state, and try the normal command once; do not guess at model-specific key combinations.
What does a breaker trip mean for a KitchenAid oven?
A single reset can clear an ordinary power interruption only when the area is dry and there is no odor or damage. If the breaker trips again, the outlet or cord heats, or the control flashes, leave the oven off and use qualified electrical or appliance service.
Should I manually light a KitchenAid gas oven that will not ignite?
No. Do not manually light the oven, test a suspected leak with a flame, open panels, or repeat a failed ignition. Delayed ignition can allow gas to accumulate and flare; use qualified gas or appliance service instead.
What should I do if I smell gas or a carbon-monoxide alarm sounds?
Stop using the appliance and do not operate switches or create a spark near suspected gas. Leave for fresh air when indicated and contact the appropriate emergency, gas, or fire service from a safe location. Do not operate the appliance again until trained personnel assess it.
When should I call a KitchenAid oven technician?
Call when safe external checks do not restore operation, the oven stays cold, a gas ignition fails, an error remains, the door or control is damaged, or any internal element, igniter, sensor, valve, or wiring may be involved. Use a licensed electrician for supply faults and a qualified gas professional for gas work.
Read the exact guide
Official sources
- Oven Not Working - Electric - Product Help | KitchenAidKitchenAid Product Help · KitchenAid electric ovens and ranges; model-specific controls and manual apply
- Oven Not Heating Up: Possible Causes and FixesKitchenAid · KitchenAid gas and electric ovens; licensed technician for complex repairs
- Carbon Monoxide Fact SheetU.S. Consumer Product Safety Commission · Homes using fuel-burning appliances including gas ranges and ovens
- Gas Range Delayed Ignitions - Tests and Examinations of RangesU.S. Consumer Product Safety Commission · Residential gas ranges and ovens; safety context for delayed or abnormal ignition
- Oven Not Working - Product Help | KitchenAidKitchenAid Product Help · KitchenAid electric and gas oven and range troubleshooting entry points
- Oven Not Working - GasKitchenAid Product Help · KitchenAid gas ovens and ranges; exact model instructions control
- Oven Not Working - Gas and Dual Fuel RangeKitchenAid Product Help · KitchenAid gas and dual-fuel ranges; exact model and installation instructions apply
Community feedback
Share a repair observation
Share a plain-text repair observation. Accepted observations are published automatically; this page may take a moment to update.