
On this page
Start here
Quick answer
An LG freezer that is not making ice may have its ice maker switched off or locked, may be too warm, may not be receiving water, or may have clumped ice blocking the bin. If the freezer was recently installed or power-cycled, allow the model's stated initial cooling and ice-production interval. Then confirm the ice maker is on, unlock the controls if needed, check the accessible water valve and hose for an obvious closed valve or kink, and make sure the door closes and seals. Use a reset or test cycle only when the exact model's instructions support it and only once. If the freezer is warm, water is leaking, an electrical hazard or burning smell is present, a test fails, or no ice returns after the model's stated interval, stop and arrange appliance service.
Before you begin
Safety first
- This article covers ordinary-access observation and model-authorized controls only. Do not open sealed or live components, force the ice maker, bypass a safety device, or continue operation with a leak or electrical hazard.
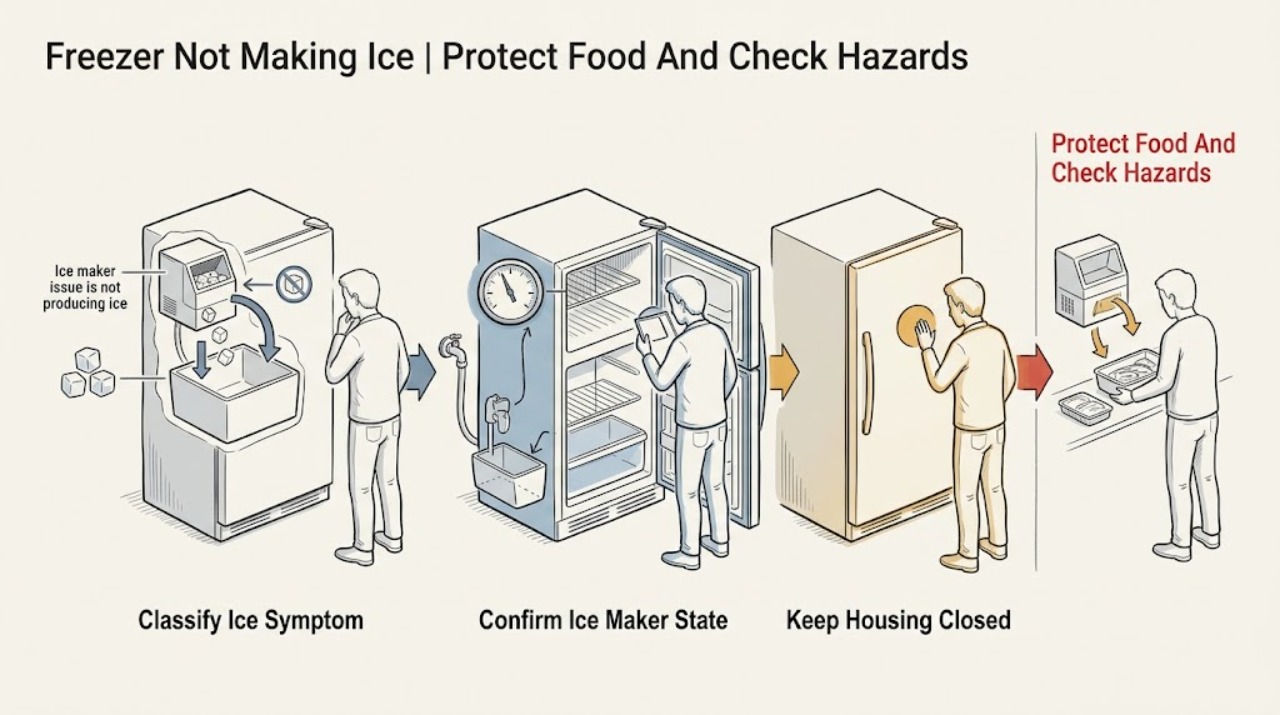
Work through in order
Diagnostic checks
Use only checks that match the exact appliance or system and its official guide.
-
Check 1
Without removing covers, check for water on the floor or inside the freezer, heavy frost blocking airflow, a door that will not close, a damaged power cord, smoke, arcing, burning odor, or food that is becoming soft.
Expected result: Record whether there is a leak, electrical or heat warning, unsafe food temperature, a frost obstruction, or none of these hazards.
Next step: For a leak, close the accessible water shut-off valve; for smoke, arcing, a damaged cord, or burning odor, disconnect power only if it is safe to do so and obtain appliance service. Move vulnerable food according to local food-safety guidance. Otherwise continue to identify the ice symptom.
Stop if: Do not operate or repeatedly reset the appliance when there is smoke, arcing, a burning odor, exposed wiring, a damaged cord, active leaking, or unsafe freezer temperature.
Why this matters
Why: A leak, electrical warning, or freezer that is warming changes this from an ice-production check into a safety and appliance-service issue. No hazard allows ordinary external diagnosis while preserving the cold chain.
-
Check 2
Identify whether the freezer is newly installed or recently power-cycled, whether the ice bin is empty or contains clumps, whether the dispenser is the only failure, whether one or all ice makers are affected, and whether the display shows a model-specific warning.
Expected result: Write down the installation or restart date, the last time ice was produced, the bin condition, dispenser behavior, affected ice-maker location, and any exact display message.
Next step: Use the symptom record to choose the control and water checks below. If the exact display message indicates a fault, keep it with the model information and follow the model's official service path instead of guessing at a part.
Stop if: Do not break apart an obstruction with a sharp tool or continue testing when the freezer is warming, leaking, or showing a hazard warning.
Why this matters
Why: A new installation can still be within the model's initial wait; clumps suggest a storage or dispensing obstruction rather than proof that the ice maker cannot harvest. A single affected ice maker narrows the check, while a warm cabinet or several affected functions points to a broader cooling or water issue.
-
Check 3
Using the exact model's panel or switch instructions, confirm that the ice maker is on and unlock the control panel if a lock indicator is active; do not force the ice tray or remove hidden covers.
Expected result: Observe whether the Ice On or Ice Off state changes, whether a lock indicator clears, and whether the ice maker now responds to its normal operating control.
Next step: Leave the ice maker enabled, close the freezer door, and allow the model's stated production interval before judging the result. Continue to the water and temperature checks if it remains empty.
Stop if: Do not bypass the lock, apply force to a switch, or use a tool inside the ice maker to make it run.
Why this matters
Why: An off or locked control can explain an empty bin without a failed part. If the control is on and unlocked but the ice maker remains silent, the next distinctions are water supply, freezer temperature, bin condition, and a model-specific test.
-
Check 4
From ordinary access, confirm that the household water shut-off valve serving the appliance is open and aligned for flow, and inspect the visible inlet hose for a kink, crushed section, or obvious connection leak.
Expected result: Record whether the valve is closed, the hose is kinked, the connection is wet, or the accessible supply appears normal; do not disconnect the hose to inspect internal parts.
Next step: Open a clearly closed valve only if it can be done without force or leakage, straighten an accessible kink without stressing the connection, then allow the model's normal cycle. If water remains absent or any connection leaks, keep the valve closed and arrange service.
Stop if: Do not force a seized valve, loosen a pressurized connection, bypass a filter or safety device, or continue operating with water on the floor or at a fitting.
Why this matters
Why: A closed valve or restricted hose can prevent the ice maker from filling. A wet connection indicates a leak and requires the supply to be shut off and service. A normal visible supply does not prove that the inlet valve, filter arrangement, or internal water path is working.
-
Check 5
Check from normal use whether the freezer is maintaining its configured cold setting, whether the door closes fully, whether the gasket contacts the cabinet, and whether stored items block vents or the door; do not remove interior cooling covers.
Expected result: Note a warm cabinet, soft food, excessive frost, a door gap, a damaged gasket, blocked airflow, or normal cold operation and closure.
Next step: Reposition only loose items that block the door or visible vents, close the door, and monitor according to the model's instructions. If the freezer remains warm, frost is extensive, the gasket is damaged, or cooling does not recover, stop ice-maker troubleshooting and request service.
Stop if: Do not chip frost with a sharp object, use heat on the liner, open the sealed system, or keep food in an appliance that is not maintaining safe cold conditions.
Why this matters
Why: An ice maker cannot produce normally if the freezer is not cold enough. A gap, blocked vent, or excessive frost can raise temperature and slow production; normal cold operation shifts attention back to the ice maker, water fill, or bin.
-
Check 6
Only if LG's instructions for the exact model identify an ice-maker test or reset, perform that controlled procedure once and observe the tray or mechanism from the safe access described by the instructions.
Expected result: Record whether the mechanism completes its harvest movement, calls for water, remains unchanged, jams, or displays a fault; do not infer hidden electrical or valve operation from silence alone.
Next step: Leave the appliance in its normal operating state and allow the manufacturer's stated interval. If the test fails or no ice returns after that interval, provide the model, symptom record, water check, temperature result, and test behavior to appliance service.
Stop if: Do not repeat resets, insert tools into the ice maker, force a tray, bypass a sensor, or expose live wiring; stop immediately for grinding, arcing, smoke, leakage, or abnormal heat.
Why this matters
Why: A successful test with water and later no ice suggests a waiting, temperature, bin, or intermittent supply issue. A failed harvest, no fill, jam, or recurring fault indicates a model-specific assembly, valve, sensor, control, or cooling diagnosis is needed.
Use your observations
Decision map
Find the observation that best matches what you see, then follow the next safe action.
-
PATH 01Safety boundary
What you see
There is smoke, arcing, a burning odor, active water leakage, a damaged cord, unsafe warming, or heavy frost blocking normal cooling.
Do this next
Stop using the affected function, shut the accessible water valve for a leak, disconnect power only when safe for an electrical hazard, protect food, and arrange appliance service.
Why this path and its safety boundary
Why it matters: The immediate issue is safety, water damage, food preservation, or cooling—not a routine ice-maker setting.
Safety stop: Do not run a test cycle, remove covers, chip frost, or continue operation until the hazard is assessed.
-
PATH 02Safety boundary
What you see
The freezer was recently installed or power-cycled and it is otherwise cold, closed, and free of leaks.
Do this next
Confirm the ice maker is on, keep the door closed, and wait the exact model's stated interval before escalating; record the date and result.
Why this path and its safety boundary
Why it matters: The unit may still be within LG's stated initial cooling and ice-production interval; an empty bin alone does not establish a failed part.
Safety stop: Escalate sooner for warming, leakage, electrical hazards, a recurring error, or any condition that threatens food safety.
-
PATH 03Safety boundary
What you see
The ice maker was off or the control panel was locked, and no separate cooling or water hazard is present.
Do this next
Enable Ice On using the model's control or switch, clear the lock as instructed, close the door, and allow the normal production interval.
Why this path and its safety boundary
Why it matters: The control state can account for the lack of production and does not by itself justify a part replacement.
Safety stop: Do not force the switch, defeat the lock, or insert anything into the ice maker.
-
PATH 04Safety boundary
What you see
The supply valve is closed, the accessible hose is kinked, or a fitting is visibly leaking.
Do this next
Open a safe, clearly closed valve or remove a gentle accessible kink only when there is no leak; shut the valve and request service for leaks, seized valves, or an unchanged no-fill symptom.
Why this path and its safety boundary
Why it matters: The ice maker may not be receiving water; a leak also creates a separate water-damage risk.
Safety stop: Do not loosen pressurized fittings, force the valve, bypass a filter or safety device, or run the appliance with water on the floor.
-
PATH 05Safety boundary
What you see
The ice maker is on, the freezer is cold and closed, visible water supply is normal, but a model-supported test fails or no ice returns after the model's stated wait.
Do this next
Arrange appliance service and provide the exact model, symptom timeline, control state, water and temperature observations, error text, and test result.
Why this path and its safety boundary
Why it matters: A model-specific ice-maker, inlet-valve, temperature, fan, control, or internal water-path fault is plausible and cannot be safely identified by repeated resets.
Safety stop: Do not repeat resets, order a generic part, open sealed or live components, or continue testing after a failed cycle or safety warning.
Helpful context
Understand the symptom
First separate a delayed cycle from a failed ice maker
A recently installed or power-cycled LG freezer may need the initial cooling and ice-production interval stated for that model. An empty bin is different from ice that is present but clumped, a dispenser that cannot release it, or an ice maker that is turned off. Keep the door closed as much as practical while checking the symptom, because warm air and poor door closure can slow production. If the freezer itself is warming or food is no longer safely frozen, treat cooling and food safety as the priority rather than repeatedly resetting the ice maker.
Check controls and water access before any reset
LG's support guidance starts with the ice-maker state, control lock, water supply, and freezer temperature. Confirm Ice On or Ice Off is enabled using the panel or switch fitted to the exact model, and unlock the panel if its controls are locked. From ordinary safe access, check that the household shut-off valve is open and that the accessible inlet hose is not kinked. Do not remove covers, open the sealed cooling system, or disassemble the water path to prove a theory.
Use a model-specific test or reset only once
Some LG ice makers provide a model-dependent test mode or reset procedure. Use it only when the model manual or LG support instructions identify the control and sequence; never insert tools into a hidden mechanism or force a tray. Observe whether the ice maker can harvest and call for water. A failed test, an unchanged tray, or a continuing lack of ice after the manufacturer's stated waiting period points to service rather than repeated resets.
Know when the fault needs appliance service
Close the water valve and stop using the appliance if a hose or connection leaks. Stop immediately for a damaged power cord, burning or electrical odor, smoke, arcing, unusual heat, or a freezer that is not maintaining safe cold conditions. A persistent no-ice condition can involve the ice-maker assembly, inlet valve, temperature sensing, fan, control, or another model-specific part; those components need an exact model assessment before replacement.
Safety boundary
Stop conditions
- Stop for smoke, arcing, burning or electrical odor, a damaged power cord, exposed wiring, abnormal heat, or any other electrical hazard.
- Close the accessible water valve and stop using the appliance for an active leak, water on the floor, or a wet electrical connection.
- Do not chip frost, force an ice tray, insert tools into a hidden mechanism, bypass a sensor, or remove covers to reach live or sealed components.
- Do not keep food in a freezer that is warming or no longer maintaining safe cold conditions; arrange service for the cooling fault.
- Do not repeat a reset, substitute a part by symptom alone, or continue after a model-specific test fails; obtain exact-model appliance service.
Only after diagnosis
Potential parts
- ice-maker assembly
Consider this category only after the exact model's control, water supply, temperature, bin, and manufacturer-supported test point to an ice-maker mechanism fault.
Confirm the complete LG model and the ice-maker location or design; do not order by symptom or force a universal replacement. - water inlet valve
Consider this category only when the visible household supply is normal but an exact-model diagnosis confirms that the appliance is not admitting water.
Verify the exact model, connector, water-path configuration, and service procedure before replacement; a technician should assess leaks and electrical isolation. - temperature sensor or control component
Consider this category only when the exact model diagnosis confirms a temperature-sensing or control fault after the freezer's cooling and door checks.
Confirm the model-specific service information and cause before ordering; do not open the sealed cooling system or live control area as a user check.
When checks do not resolve it
Need a professional?
Arrange appliance service when there is a leak, electrical or heat warning, unsafe freezer temperature, extensive frost, a recurring display fault, a failed model-supported test, or no ice after the exact model's initial and post-reset interval. Service is also appropriate when the visible water supply is normal but the ice maker does not fill or harvest, or when a part, cover, filter arrangement, or internal water path would need disassembly.
Safety scope: This article covers ordinary-access observation and model-authorized controls only. Do not open sealed or live components, force the ice maker, bypass a safety device, or continue operation with a leak or electrical hazard.
Common questions
FAQ
How long should an LG freezer take to make ice after installation?
Use the initial cooling and ice-production interval stated for the exact model. Keep the freezer door closed, confirm the ice maker is on, and escalate sooner for warming, leaks, an electrical hazard, or a recurring error.
How do I know whether the LG ice maker is turned off?
Check the model's panel or physical switch for Ice On or Ice Off and look for a control lock. Enable Ice On and clear the lock only through the model's normal instructions; do not force the switch or tray.
Can a closed water valve stop an LG freezer from making ice?
Yes. From safe ordinary access, check that the appliance's household shut-off valve is open and that the visible inlet hose is not kinked. Shut the valve and call service if a fitting leaks, the valve is seized, or water still does not reach the ice maker.
What if the ice bin has clumps but the ice maker is working?
Clumped ice can prevent normal storage or dispensing and is not proof that the ice maker has failed. Follow the exact model's bin instructions, avoid sharp tools, and arrange service if the bin, tray, or mechanism is jammed or damaged.
When should I call for LG freezer ice-maker service?
Call when the freezer is warm, there is a leak or electrical warning, the model-supported test fails, a display fault recurs, or no ice returns after the model's stated waiting interval despite an enabled ice maker and normal visible water supply.
Read the exact guide
Official sources
- LG Refrigerator - Troubleshooting water/ice related issues in an LG fridgeLG USA Support · Official LG guidance for ice-maker state, lock, water supply, ice-bin condition, door closure, and installation timing.
- LG Refrigerator – Why is My Refrigerator Not Making Ice?LG USA Support · Official LG no-ice troubleshooting guidance for installation wait, freezer temperature, ice-maker state, reset, test, and service.
- LG [Refrigerator] Troubleshooting water, ice related issues | LG USA SupportLG USA Support · Official LG support for water supply, ice-maker state, door closure, ice-bin condition, and initial ice production.
Community feedback
Share a repair observation
Share a plain-text repair observation. Accepted observations are published automatically; this page may take a moment to update.