
On this page
Start here
Quick answer
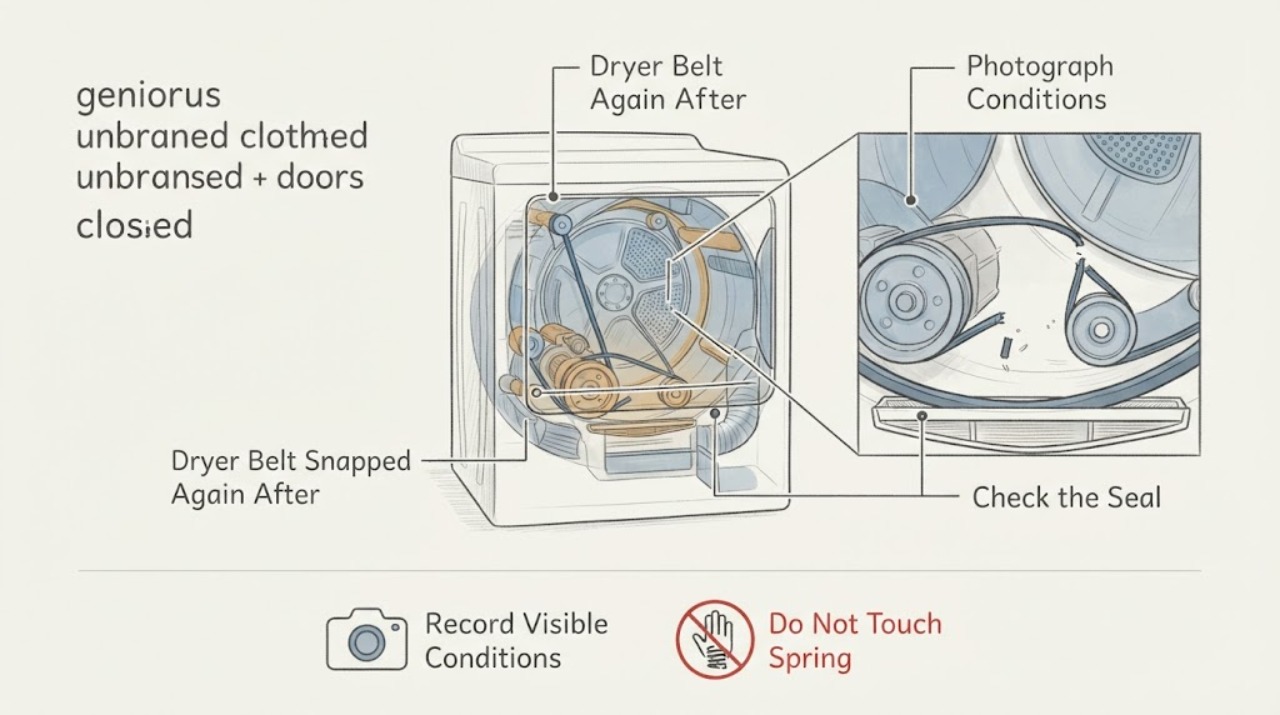
A Maytag DE412 belt that snaps again the day after replacement should be treated as an unresolved belt-path or drum-load problem, not as a reason to keep installing belts. Maytag's official material says loud squeaks can involve the belt path, drum supports, idler or other drive areas, and that a noise may require professional inspection; it does not make a belt alone the diagnosis. First confirm the complete model and serial from the dryer label—Maytag's official manual lookup requires the model number, and DE412 is an older-style entry for which a matching current manual was not found on the opened portal. From a dry, safe position, isolate power, remove the load, inspect only visible drum edges and the exhaust/lint path, and gently assess the empty drum only if it moves freely and the exact manual permits it. A binding, wobbling, scraping, or off-center drum, visible foreign object, misaligned belt path, repeated belt failure, unusual heat, burning rubber, smoke, gas odor, or electrical warning means stop using the dryer and arrange qualified service. Decide repair versus replacement only after a written diagnosis and estimate explain why the first belt failed, what else was inspected, and what recurrence or safety condition applies.
Before you begin
Safety first
- Do not keep trying belts, run repeated heated tests, operate with a missing or disconnected lint screen/duct, move the dryer alone, disconnect gas, open panels, handle springs, lubricate unknown parts, or perform live electrical or gas tests.
Work through in order
Diagnostic checks
Use only checks that match the exact appliance or system and its official guide.
-
Check 1
Stop the dryer, remove the load, and isolate power from a dry, safe position before inspecting anything. If the unit is gas-fired and gas is smelled, do not operate switches or relight anything; leave the area and follow local emergency guidance. Photograph the complete model and serial label, fuel/type information, and the failed belt and packaging; record when the new belt was installed, when it snapped, and whether the drum was turning or hot at the time.
Expected result: The label confirms a complete DE412-family identity and fuel type, the entry is incomplete or does not match, the belt is visibly cut/charred/frayed, or smoke, burning rubber, gas odor, sparks, abnormal heat, or a breaker trip occurred.
Next step: Use only the matching Maytag documentation after the rating label is confirmed. For any hazard or identity that cannot be confirmed without opening or moving the dryer, leave it off and arrange qualified appliance, gas, electrical, or vent service.
Stop if: Do not restart the dryer, reset a breaker repeatedly, touch damaged electrical equipment, operate switches during a gas odor, or open panels.
Why this matters
Why: The exact model controls belt routing, drum support design, access, fuel hazards, and fit. A damaged belt or safety symptom is evidence that continued operation may worsen the failure, not proof that the belt itself was the root cause.
-
Check 2
With power isolated and the dryer cool, inspect only the visible front and rear drum edges and door opening for a trapped coin, screw, zipper, sharp edge, torn seal, displaced felt, uneven gap, or clothing caught in the opening. Preserve any object or belt fragments as evidence; remove only a loose object that is plainly reachable without tools or entering the cabinet.
Expected result: A foreign object or torn/displaced seal is visible, the drum edge has an uneven gap, the visible area is clear, or the suspected obstruction is behind a panel or in the blower/drive area.
Next step: Remove only the loose reachable object and keep the failed belt with the service evidence. Leave the dryer off for a damaged seal, uneven gap, trapped object, or any condition requiring panel access.
Stop if: Do not pry the drum seam, insert a pick or screwdriver, pull the belt through an opening, or operate with metal contact or damaged felt/seal.
Why this matters
Why: A foreign object or seal/gap problem can damage a belt or cause repeated contact, but a clear edge does not clear the hidden drive path. Maytag lists loose items, drum glides/supports, belt, and other drive areas among possible noise sources; the observation does not identify one failed part.
-
Check 3
Only if the dryer is empty, cool, unplugged, and the exact manual does not prohibit the check, gently turn the drum by hand through a few slow turns from the opening. Do not force it or remove the belt. Record smooth motion, a tight or rough spot, binding, wobble, an off-center drum, or a scrape that repeats at one position, and note any squeal or motor-hum history from the last safe cycle.
Expected result: The drum turns smoothly, feels tight or rough, binds, wobbles, scrapes once per turn, or cannot be turned safely without reaching behind the drum.
Next step: Record the exact hand-turn result and leave the dryer unplugged if it is abnormal. Give the technician the belt fragment, sound timing, and whether the drum was hard to turn; do not install another belt to test the theory.
Stop if: Do not force the drum, remove panels, remove the belt, lubricate unknown parts, handle springs, or reach into the motor or blower area.
Why this matters
Why: Smooth hand motion does not rule out incorrect belt routing, an idler or motor-area problem, or a powered airflow/heat issue. Roughness, binding, wobble, or repeatable contact makes a drum-support, seal, alignment, or drive-path problem more likely and requires professional inspection.
-
Check 4
With the dryer off and cool, inspect the removable lint screen and only the visible exhaust hose, wall connection, and exterior hood for heavy lint, crushing, kinks, disconnection, or little/no visible exhaust evidence from an already safe prior observation. Do not move the dryer or disconnect a gas connector or duct as a user test.
Expected result: The screen or visible duct is packed or crushed, drying has become longer or towels remain damp, the outside hood appears obstructed, the visible path looks clear, or inspection requires moving the appliance.
Next step: Clean only the removable lint screen as the matching manual directs and arrange qualified vent service for an inaccessible, damaged, or hidden restriction. Keep the dryer off if drying remains abnormal or any heat/odor symptom exists.
Stop if: Do not operate without the lint screen, with a crushed/disconnected exhaust path, or with the cabinet opened; do not move the dryer alone to reach the rear.
Why this matters
Why: Kenmore-style general dryer safety evidence from CPSC applies to dryers broadly: longer drying can signal a blocked lint screen or exhaust, and restricted airflow can build heat. A clear visible section does not prove the belt failure is caused by airflow or rule out a hidden restriction.
-
Check 5
Before authorizing another belt or replacing the dryer, request a written model-specific diagnosis and estimate. Ask the provider to document the complete model/fuel version, belt routing and tensioning inspection, drum hand-turn or support findings, visible foreign-object/seal findings, airflow and lint checks, the test that isolated the failed condition, parts and labor separately, and the recurrence or safety condition after repair.
Expected result: The provider proves a mechanical or airflow fault and explains the belt failure, proposes another belt without inspecting the surrounding path, cannot verify DE412, finds a gas/electrical/vent installation issue, or recommends replacement without a written fault and estimate.
Next step: Compare repair and replacement only after exact identity, safety condition, verified cause, parts/labor, warranty or availability assumptions, and recurrence risk are written down. Seek a second qualified diagnostic opinion when the provider cannot distinguish belt installation from drum, support, airflow, heat, gas, or electrical causes.
Stop if: Do not authorize repeated belt replacement by elimination, accept a generic Maytag belt match, or operate the dryer to prove a repair estimate.
Why this matters
Why: A confirmed cause and complete estimate support a targeted repair decision. A belt snapping again does not show that the next belt will last, and an unsupported replacement recommendation does not establish that replacement is safer or more economical.
Use your observations
Decision map
Find the observation that best matches what you see, then follow the next safe action.
-
PATH 01Safety boundary
What you see
The belt is visibly charred, cut, frayed, or shredded, the drum was hard to turn or wobbling, or a repeatable scrape/uneven gap is present with the dryer unplugged.
Do this next
Keep the dryer off and request qualified model-specific inspection. Provide the failed belt, full rating-label identity, hand-turn result, and sound timing; do not fit another belt as a test.
Why this path and its safety boundary
Why it matters: The recurrence is consistent with a surrounding drum, support, seal, alignment, or drive-path problem, but the appearance does not identify one component or prove a belt fit issue.
Safety stop: No forced rotation, panel removal, belt removal, lubrication, or heated cycle.
-
PATH 02Next step
What you see
The drum turns freely by hand, no object or seal damage is visible, but the belt snapped again and the exact model or routing cannot be confirmed from the available documentation.
Do this next
Stop parts purchasing and obtain a written diagnosis for the complete model and fuel version. Ask the technician to verify routing, tension, alignment, and the adjacent drive path before any new belt is installed.
Why this path and its safety boundary
Why it matters: A hidden belt-path, tensioning, motor, blower, heat, installation, or model-identity problem remains possible. Smooth hand motion is not evidence that a replacement belt is correct.
-
PATH 03Safety boundary
What you see
Drying has become longer or towels remain damp, and the lint screen or visible exhaust path is restricted, crushed, disconnected, or inaccessible.
Do this next
Keep the dryer off, clean only the owner-accessible screen, and arrange qualified vent/appliance service for the hidden or damaged path. Ask the provider to assess airflow and belt failure together.
Why this path and its safety boundary
Why it matters: CPSC identifies longer drying and damp clothes as possible signs of a blocked lint screen or exhaust; restricted airflow can create excessive heat. This may stress the dryer but does not by itself explain a snapped belt.
Safety stop: Do not run heated loads through a questionable vent, operate without a lint screen, or move the appliance alone to disconnect the duct.
-
PATH 04Next step
What you see
The model label cannot confirm DE412, fuel type is uncertain, or the only available repair proposal is based on a different Maytag platform.
Do this next
Obtain a clear rating-label photo and a qualified model identification. Use the matching manual and service information only after the complete identity is confirmed.
Why this path and its safety boundary
Why it matters: The belt route, drum support, supply hazard, access procedure, and part fit are unresolved. Similar Maytag appearance is not enough to apply another model's repair instructions.
-
PATH 05Safety boundary
What you see
Smoke, burning rubber, gas odor, sparks, electrical odor, abnormal heat, a hot or damaged cord/outlet, lint near heat, violent vibration, or repeated breaker trips occurred.
Do this next
Leave the dryer off and clear. For active fire or dangerous smoke, obtain emergency help from a safe location; otherwise arrange prompt qualified appliance, gas, electrical, or vent service as indicated.
Why this path and its safety boundary
Why it matters: This is an immediate fire, gas, electrical, or mechanical safety branch. The dryer is out of service regardless of whether another belt is available.
Safety stop: Do not operate switches during a gas odor, touch damaged electrical equipment, reset a breaker repeatedly, open panels, or restart the dryer.
Helpful context
Understand the symptom
A belt failure one day after replacement is a recurrence event. The safe question is why the belt was overloaded, cut, misrouted, or exposed to an abnormal drum or drive condition—not which belt to buy next. The drum must be free enough to turn, the belt path must be confirmed for the exact model, and the airflow path must be assessed because longer drying can add heat stress. Those are service evidence questions, not instructions to open the cabinet.
Maytag's public pages provide general dryer guidance and model-number locations, but they do not establish that the supplied DE412 entry is a complete current platform or that a particular replacement belt fits it. Confirm the label and fuel type, preserve the failed belt and receipt, and ask for a written explanation before approving another repair or replacing the appliance.
When checks do not resolve it
Need a professional?
Contact qualified Maytag-compatible dryer service for a belt that fails again within a day, any abnormal empty-drum hand-turn result, a persistent squeal or scrape, longer drying with a questionable vent, an incomplete DE412 identity, or any need to inspect belt routing, tension, drum supports, blower, motor, heat, gas, or electrical parts.
Safety scope: Do not keep trying belts, run repeated heated tests, operate with a missing or disconnected lint screen/duct, move the dryer alone, disconnect gas, open panels, handle springs, lubricate unknown parts, or perform live electrical or gas tests.
Have this ready
- Provide the complete rating-plate model and serial, market, fuel type, failed belt and packaging, installation date, time to failure, load and cycle, sound character/location, drum hand-turn result, visible object/seal/gap observations, lint/vent observations, drying-time change, odor/heat/power symptoms, and any prior repairs.
Common questions
FAQ
Does a Maytag DE412 belt snapping again mean the new belt was defective?
Not necessarily. A repeated failure can reflect an unresolved belt-path, drum support, seal, alignment, motor, blower, airflow, installation, or model-fit issue. Preserve the failed belt and ask for a written inspection that explains the surrounding cause before installing another one.
Can longer towel drying be related to the belt failure?
It can be related, but it is not proof. CPSC says damp clothes or longer-than-normal drying may indicate a blocked lint screen or exhaust duct, and restricted airflow can build heat. Have airflow and the belt/drive path assessed together rather than treating one as the automatic cause of the other.
Is DE412 enough information to order a belt?
Do not assume so. Maytag's official manual and owner-support pages direct users to the appliance model and serial for applicable documentation and service. Confirm the complete rating-plate model, fuel type, and market before considering a belt or any other part.
How should I choose repair versus replacement after a second belt failure?
First obtain a written, model-specific diagnosis and estimate. It should identify the verified reason for the belt failure, the condition of the drum and drive path, airflow/vent findings, parts and labor, warranty or availability assumptions, and the recurrence condition after repair. Then compare the documented repair risk and cost with replacement options; do not decide from a belt failure alone.
Read the exact guide
Official sources
- CPSC Publication 5022 - Overheated Clothes Dryers Can Cause FiresU.S. Consumer Product Safety Commission · Official CPSC safety alert used for general dryer fire and airflow boundaries, not for identifying a Maytag DE412 component or belt fit.
- Possible Fixes for a Dryer That’s Making Loud Noises | MaytagMaytag · Official Maytag blog guidance used for general noise interpretation only, not as a DE412-specific belt or component diagnosis.
- Service & Support Owners Center | MaytagMaytag · Official Maytag Owner Center used to locate the dryer rating label and reinforce model-specific support; it does not establish DE412's exact platform or fuel type.
- Appliance Manuals and Literature | MaytagMaytag · Official Maytag manual portal used to establish that model-specific documentation must be looked up by the complete model; the opened page did not return a DE412-specific manual.
- Why Is My Dryer Squeaking? 8 Possible Causes | MaytagMaytag · Official Maytag blog guidance used to support the need to inspect the surrounding drive path and to keep repair/upgrade decisions evidence-based; it is not an exact DE412 repair manual.
Community feedback
Share a repair observation
Share a plain-text repair observation. Accepted observations are published automatically; this page may take a moment to update.