
On this page
Start here
Quick answer
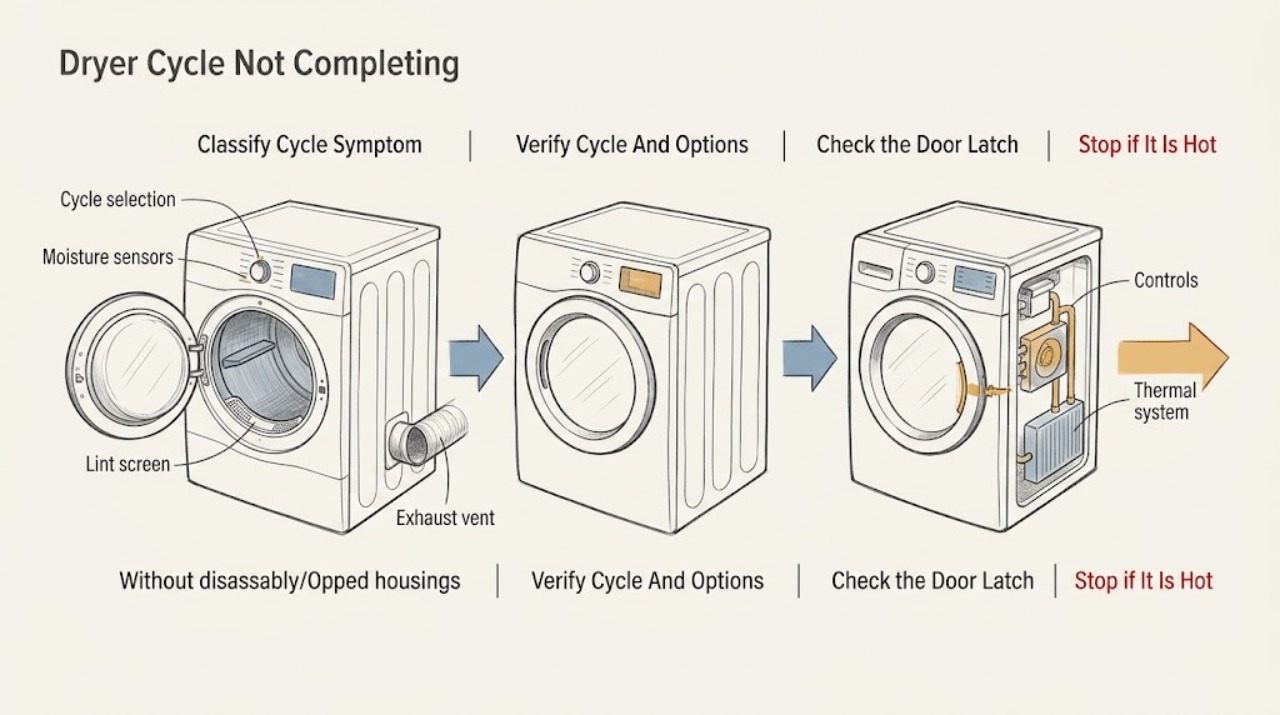
A Maytag dryer that appears not to complete its cycle may be following a sensor-cycle decision, stopping because of a door, control, power, or airflow problem, or running an option such as Wrinkle Prevent after the main dry cycle. First record whether the dryer stops early, keeps extending the remaining time, leaves clothes wet, or tumbles after the end signal. With no burning odor, smoke, sparks, scorching, unusual heat, gas odor, or repeated breaker trip, identify the exact model, confirm the selected cycle, clean the lint screen, inspect the visible vent path, use a suitable load, and check the door and controls. Automatic cycles sense load moisture and can adjust time, while timed cycles run for the selected duration; the model manual controls which cycles and options exist. Stop using the dryer for any fire, gas, electrical, or uncontrolled-heat symptom, and arrange qualified service when one safe external check does not resolve the problem.
Work through in order
Diagnostic checks
Use only checks that match the exact appliance or system and its official guide.
-
Check 1
With the dryer off, record whether it stopped before the clothes were dry, kept extending the estimated time, stopped with a code or blank display, stopped because the door opened, or continued occasional tumbling after the main cycle. Note the selected cycle, options, load, heat setting, and any odor, smoke, scorch, spark, or unusual heat.
Expected result: The dryer ends early, extends an automatic-cycle estimate, stops mid-cycle, displays an error, or tumbles intermittently after the end of the heated cycle.
Next step: If there is no hazard, write down the model and continue to the cycle, door, filter, airflow, and load checks. If there is smoke, burning or gas odor, scorching, sparks, uncontrolled heat, or a repeated trip, keep the dryer off and use the service path.
Stop if: Stop immediately for smoke, flame, burning or gas odor, sparks, scorched material, a hot or damaged cord or outlet, uncontrolled heating, or a breaker that trips again.
Why this matters
Why: An automatic estimate can move up or down as moisture and load conditions change, and a wrinkle-prevention option can add heat-free tumbling. An early stop with damp items, a fault code, a dead control, or a cycle that cannot stop is a different branch and needs targeted checks.
-
Check 2
Read the selected cycle and options against the exact Maytag owner documentation. Confirm whether the panel is using an automatic or sensor cycle, a timed cycle, Air Dry or Fluff, Quick or Rapid Dry, Steam, EcoBoost, or Wrinkle Prevent, and whether an end-of-cycle option is still active.
Expected result: The dryer is on a sensor cycle, a timed cycle, an air-only cycle, a small-load cycle, an option that changes time, or a wrinkle-prevention mode after the main cycle.
Next step: Choose only a cycle appropriate for the load and care label, using the exact model instructions. If the dryer still stops early, leaves clothes wet, or cannot leave the selected mode, continue with the door, filter, airflow, and sensor checks.
Stop if: Stop for a cycle that cannot be canceled normally, heating that continues when the cycle is off, a control that smells hot, or any need to bypass a control or open the console.
Why this matters
Why: Sensor cycles stop when the selected dryness is detected and may change the estimate; timed cycles run for the chosen duration; Air Dry or Fluff does not add heat; EcoBoost can lengthen a cycle on applicable models; Wrinkle Prevent can restart intermittent tumbling after the main cycle. A cycle mismatch can look like failure without being a hardware fault.
-
Check 3
With the drum stopped, inspect the door opening and latch from the outside for clothing, lint, packing material, or an obstruction. Close the door firmly, confirm the control panel is dry and responsive, and check whether Control Lock is active; do not remove the latch or panel.
Expected result: The door is not latching, an item blocks the latch, the control is locked or damp, the display is blank, or the door and controls appear normal.
Next step: Remove only an accessible obstruction, dry the panel and hands, and release Control Lock using the model instructions. Make one controlled start only if no safety symptom exists; if the door or controls still interrupt the cycle, arrange service.
Stop if: Stop for a damaged latch, loose door, exposed wiring, a hot control, a wet electrical connection, a blank display with a burning smell, or any need to remove the console.
Why this matters
Why: A door that is not latched can interrupt a cycle, while a locked or wet control can prevent commands from registering. A blank display or recurring interruption with a clear latch needs power and service diagnosis rather than repeated door slamming.
-
Check 4
After the dryer has cooled, remove the user-accessible lint screen as the model manual directs. Clear lint, inspect the screen and housing for damage or residue, and reinstall it fully; do not reach into the heater, fan, or cabinet.
Expected result: The screen is packed, coated, damaged, missing, poorly seated, or clean and correctly fitted.
Next step: Clean or replace only the accessible screen using model guidance, then continue to the visible exhaust check. If lint is present inside a cabinet or the housing is damaged, stop and request service.
Stop if: Stop for smoke, scorched lint, a torn or missing screen, lint inside inaccessible areas, a stuck screen, or any need to dismantle the dryer.
Why this matters
Why: Maytag identifies a blocked lint screen as a cause of longer drying. A clean screen does not rule out a restriction farther along the exhaust or an internal control fault, and a damaged or missing screen can allow lint into areas that are not user-serviceable.
-
Check 5
Only when the model uses an outside exhaust, inspect the visible hose and wall connection for crushing, kinks, disconnection, lint, or excessive bends, and observe the outside hood for a free flap and reasonable airflow during one safe test. Do not probe the duct or move a loaded appliance.
Expected result: The vent is crushed, disconnected, visibly blocked, has a restricted hood, produces weak airflow, or appears clear and appropriately routed.
Next step: Stop operation until an accessible external restriction is corrected according to the model installation instructions. Use qualified vent cleaning or appliance service for an inaccessible, damaged, long, or repeatedly restricted path; do not modify the vent with unapproved materials.
Stop if: Stop for lint escaping into the room, a hot or damaged hose, smoke, an inaccessible restriction, a loose gas connection, a need to move a stacked unit, or any panel access.
Why this matters
Why: Maytag states that restricted exhaust slows moist air removal and extends drying time; a heated dryer with damp clothes or a cycle that seems endless can therefore have an airflow cause. A clear visible route does not rule out a concealed wall restriction or internal fan problem.
-
Check 6
Use a load that fits the exact model guidance and lets items tumble freely. Separate a single small item, tightly packed load, heavy towels mixed with light fabrics, or bulky item; confirm the dryer is stable and level from an appropriate cabinet edge, and do not adjust feet while the appliance is unstable or stacked without help.
Expected result: The load is too small, overfilled, badly mixed, unable to tumble, the dryer is not level, or the load and level are suitable.
Next step: After the dryer is cool and all prior checks are safe, run one appropriate automatic cycle with a suitable load. If it still stops early, leaves damp items, or extends abnormally, record the result and stop repeated testing.
Stop if: Stop for a violently unbalanced drum, unstable stack, excessive heat, scorched fabric, unusual noise, smoke, sparks, or any need to move the loaded appliance.
Why this matters
Why: Small or poorly tumbling loads may not contact moisture sensors, while overloading restricts tumbling and airflow. An unlevel dryer can also reduce sensor contact. A cycle that completes correctly with a suitable load points to load or sensor contact; the same fault with a suitable load points toward airflow, controls, or service.
-
Check 7
If a code, check-vent light, blank display, repeated mid-cycle stop, or persistent incomplete cycle remains, record the exact characters, lights, cycle, load, model, and what happened immediately before the stop. Use only the exact model's Maytag documentation for a single permitted reset; do not repeat resets or run the dryer if a hazard symptom occurred.
Expected result: The code clears once and the dryer completes a safe test, the code returns, no code is shown but the cycle still fails, or the dryer cannot be stopped or restarted normally.
Next step: Keep the dryer off when the symptom persists and arrange Maytag appliance service. Provide the exact model, code or indicator sequence, cycle and options, load, airflow findings, and safety observations.
Stop if: Stop for a returning code, repeated breaker trip, smoke, burning or gas odor, sparks, scorching, uncontrolled heating, or any request to test live circuits or bypass a safety device.
Why this matters
Why: A model-specific code can identify a sensor, power, airflow, door, or control branch, but the code alone does not authorize a component replacement. A recurring code or incomplete cycle after external checks needs qualified diagnosis.
Use your observations
Decision map
Find the observation that best matches what you see, then follow the next safe action.
-
PATH 01Next step
What you see
Smoke, flame, burning or gas odor, sparks, scorching, uncontrolled heat, a hot connection, or a breaker that opens again is present.
Do this next
Arrange qualified service and follow the exact model guidance.
Why this path and its safety boundary
Why it matters: Keep the dryer off, leave the area for gas or smoke, and contact the appropriate emergency or qualified service provider from a safe location. Do not operate switches near a gas odor, repeat a cycle, or open the appliance.
-
PATH 02Next step
What you see
The dryer is in an automatic cycle that changes its estimate, a timed cycle running for its selected duration, Air Dry or Fluff, or a wrinkle-prevention phase after the main cycle.
Do this next
Arrange qualified service and follow the exact model guidance.
Why this path and its safety boundary
Why it matters: Compare the behavior with the exact model documentation and allow the selected option to finish or cancel it as directed. Continue troubleshooting only if it leaves damp clothes, stops unexpectedly, or cannot exit the mode.
-
PATH 03Next step
What you see
The door does not latch, clothing blocks the latch, Control Lock is active, the panel is wet, or the display or commands are intermittent.
Do this next
Arrange qualified service and follow the exact model guidance.
Why this path and its safety boundary
Why it matters: Correct only an accessible obstruction, dry the controls, or release the lock using the model instructions. A damaged latch, blank display, or recurring interruption needs service without console access.
-
PATH 04Next step
What you see
The lint screen or visible exhaust path is blocked, crushed, disconnected, or weak at the outside termination.
Do this next
Arrange qualified service and follow the exact model guidance.
Why this path and its safety boundary
Why it matters: Stop operation until the accessible restriction is safely corrected or qualified vent service is arranged. If airflow remains weak after an external correction, do not keep running cycles to test it.
-
PATH 05Next step
What you see
The load is too small, overloaded, poorly mixed, unable to tumble, or the dryer is not level and the complaint is an early stop or sensor-related behavior.
Do this next
Arrange qualified service and follow the exact model guidance.
Why this path and its safety boundary
Why it matters: Use a suitable load and correct cycle as the model allows, then make one supervised test. If the same issue occurs with suitable load and level, arrange service for the sensor, control, or other cause.
-
PATH 06Next step
What you see
A code, check-vent light, blank display, or mid-cycle stop returns after the documented external checks or one permitted reset.
Do this next
Arrange qualified service and follow the exact model guidance.
Why this path and its safety boundary
Why it matters: Stop testing and give Maytag service the exact model, code sequence, cycle, load, airflow findings, and safety observations. Do not infer a replacement part from the code alone.
-
PATH 07Next step
What you see
Cycle selection, door, controls, lint screen, visible airflow, load, and level are correct but the dryer still does not complete normally.
Do this next
Arrange qualified service and follow the exact model guidance.
Why this path and its safety boundary
Why it matters: Keep the dryer off and arrange qualified appliance service for the sensor, heater or thermal system, fan, control, wiring, or door circuit. Do not open the cabinet or bypass a safety device.
Helpful context
Understand the symptom
Define what not completing means
Write down the actual behavior before changing settings. Stopping before clothes are dry, adding time repeatedly, showing an error, stopping with a blank display, and tumbling after the end signal are different symptoms. A Maytag automatic cycle may change its estimate as it senses moisture, and a wrinkle-prevention option may tumble after the main heated cycle has ended. Neither behavior alone proves that a component has failed.
Use the model's cycle and safety instructions
Maytag dryer controls and cycle names differ by model. Use the model and serial label to find the matching owner documentation. Do not substitute a generic timed or sensor procedure when the panel uses different names. Keep all checks external: do not remove the rear panel, reach into the blower or heater area, test energized wiring, or bypass a door or thermal safety.
When a cycle complaint is really an airflow complaint
A dryer can heat while still taking too long if damp air cannot leave. A clean lint screen does not prove that the full exhaust path is clear. Inspect only accessible sections and the outside termination as the model instructions allow. If the vent is inaccessible, damaged, or still restricted after a safe external check, use qualified vent or appliance service.
Safety comes before one more test
Stop immediately for burning odor, smoke, sparks, scorching, a hot or damaged cord or outlet, uncontrolled heating, a repeated breaker trip, or a gas odor. For a gas odor, do not ignite the appliance or operate nearby switches; leave the area and contact the appropriate emergency or qualified service provider from a safe location. Do not restart the dryer to reproduce a hazardous symptom.
Safety boundary
Stop conditions
- Smoke, flame, burning or gas odor, sparks, scorched lint or fabric, or heating that continues when the cycle is off.
- A hot, damaged, loose, wet, or discolored cord, plug, outlet, gas connection, or control, or a breaker that opens again.
- A door or drum that cannot stop normally, a violently unstable appliance, or an unsafe stacked installation.
- Lint inside inaccessible areas, a blocked internal blower or vent, exposed wiring, or any need to remove a panel.
- Any need to test live circuits, bypass a door latch or thermal control, alter gas or electrical connections, or repeatedly reset a code.
- A cycle that remains incomplete after one safe external cycle, filter, airflow, load, and control check.
Only after diagnosis
Potential parts
- dryer moisture or temperature sensor
Consider this category only after qualified testing links recurring early completion, sensor code, or incorrect automatic-cycle behavior to a sensor fault on the exact model.
Confirm the complete Maytag model, sensor location, connector, and manufacturer fit information; load size and level can mimic a sensor problem. - dryer door latch or door switch
Consider this category only after qualified testing confirms that a correctly aligned door cannot maintain the run circuit or repeatedly interrupts a cycle.
Confirm the complete Maytag model, latch or switch position, connector, and manufacturer fit information; do not bypass the door circuit. - dryer thermal control or heating component
Consider this category only after qualified diagnosis confirms a thermal, heater, control, or wiring fault after cycle, load, filter, and airflow causes are excluded.
Confirm the exact Maytag model and electrical specification with the manufacturer or technician; never replace or bypass a safety device from an incomplete-cycle symptom alone.
When checks do not resolve it
Need a professional?
The dryer produces smoke, sparks, burning or gas odor, scorching, uncontrolled heat, repeated trips, or a hot electrical or gas connection., The dryer stops mid-cycle, ends early, or keeps extending time after the selected cycle, door, lint, visible airflow, load, and level checks are correct., A code, check-vent light, blank display, or control interruption returns after one model-documented reset or external correction., The vent path is inaccessible, damaged, repeatedly restricted, or requires movement of a stacked or loaded dryer., The exact model instructions or the safe distinction between a normal option and a fault cannot be confirmed.
Common questions
FAQ
Why does my Maytag dryer stop before the clothes are dry?
Check whether an automatic cycle is ending because the sensors do not detect the expected moisture, or whether the load is too small to contact the sensors. Then check the lint screen, visible exhaust, load, level, door, and exact cycle. A recurring early stop with a suitable load needs service.
Why does the remaining time keep changing on my Maytag dryer?
On automatic cycles, Maytag says the dryer continuously senses moisture and can adjust the estimate up or down based on load size, fabrics, and drying rate. A restricted vent, packed load, added damp items, or an airflow problem can make the cycle take longer. If it never completes normally, arrange service after safe external checks.
Is it normal for a Maytag dryer to turn back on after the cycle ends?
If Wrinkle Prevent, Wrinkle Shield, or a similar option is selected, Maytag describes intermittent heat-free tumbling after the main cycle. Check the exact model option. It is not a normal explanation for heating, smoke, scorching, or a dryer that cannot be stopped.
Can a small load make a Maytag dryer end early?
Yes, on applicable sensor cycles a very small load or a single item may not contact the moisture sensors reliably. Use a suitable load or the model's appropriate timed option once it is safe to test. If the issue occurs with a suitable load, do not assume the sensor is bad without diagnosis.
What should I do if my Maytag dryer stops with a code?
Record the exact code, lights, model, cycle, load, and event before the stop. Use only the exact model's Maytag guidance for one permitted reset. If the code returns, the cycle remains incomplete, or any smoke, odor, spark, scorch, heat, or trip occurred, keep the dryer off and arrange service.
Read the exact guide
Official sources
- F3 E2 - Error Code - DryerMaytag · Supports recording the exact code, checking level and small-load sensor contact, and using one model-directed power procedure before service.
- Long Dry Times - DryerMaytag · Supports visible vent and hood checks, lint checks, cycle selection, and service escalation after persistent performance problems.
- Owner's ManualMaytag · Provides model-specific example behavior; readers must use the manual for their exact model before applying a setting or reset.
- Manuals & LiteratureMaytag · Supports selecting the exact manual before applying cycle, control, vent, or reset instructions.
- Dry Time Keeps Going Up - DryerMaytag · Supports explaining why automatic-cycle time can increase or decrease with moisture, load size, material, and added damp items.
- Clothing Wet at End of Cycle - DryerMaytag · Supports lint-screen, exhaust restriction, cycle selection, load dryness, and level or sensor-contact checks.
- Not Starting or Not Operating - DryerMaytag · Supports external door-latch, control-lock, dry-panel, and selected-cycle observations when a cycle stops or cannot restart.
- Dryer Stops Mid-CycleMaytag · Supports distinguishing automatic, timed, air-only, EcoBoost, and other model-dependent cycle behavior from a fault.
Community feedback
Share a repair observation
Share a plain-text repair observation. Accepted observations are published automatically; this page may take a moment to update.