
On this page
Start here
Quick answer
If a Maytag washer dryer has a bad smell, first identify whether it comes from the washer tub, a front door seal or dispenser, the dryer drum, the laundry room, or the load itself. Damp clothes left in the washer, detergent residue, and moisture in the seal commonly point to the washer side; lint, drum residue, a recently painted room, or a new dryer's first-use odor point to the dryer side. Empty the appliance, remove wet laundry promptly, use the model's Clean Washer cycle with only a cleaner permitted by its manual, and leave the washer door or lid open to dry. With power safely disconnected, clean the accessible dryer drum and lint screen and check the vent path without opening panels. Stop immediately for smoke, sparking, a strong burning or electrical smell, overheating, gas odor, or a damaged cord, and arrange qualified service for a smell that remains after the correct cleaning and environmental checks.
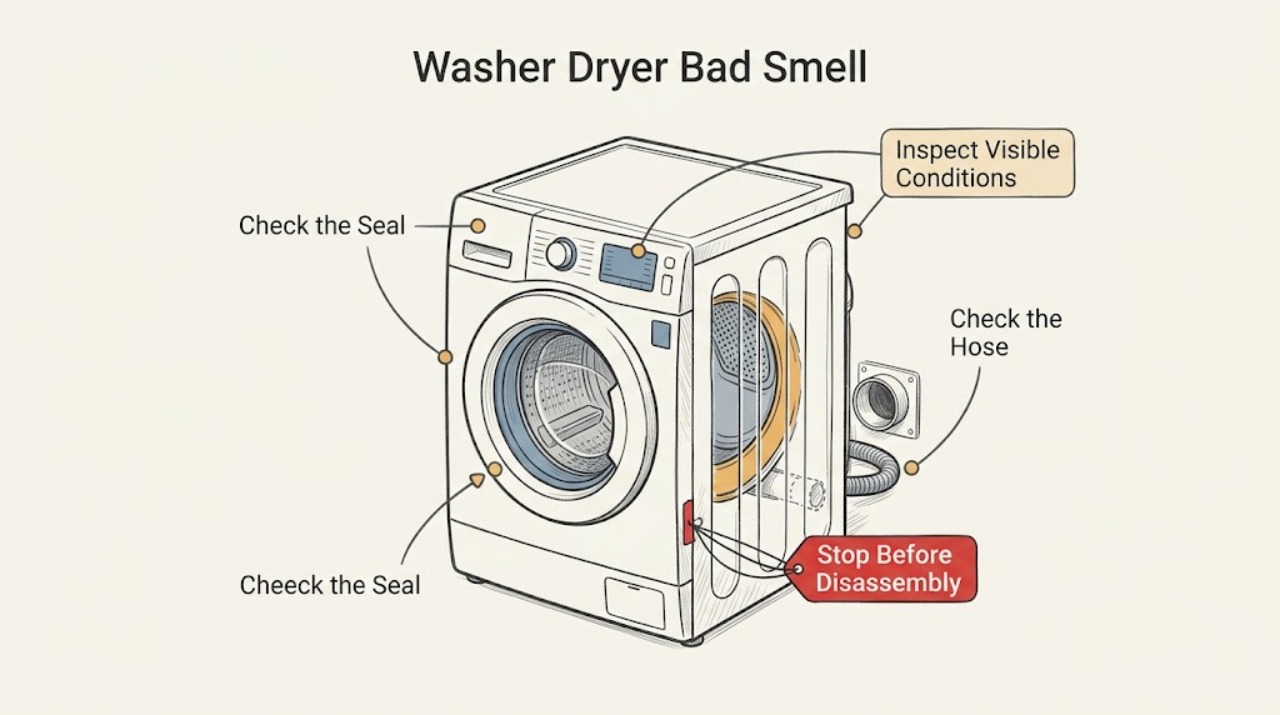
Work through in order
Diagnostic checks
Use only checks that match the exact appliance or system and its official guide.
-
Check 1
Empty both the washer and dryer, remove any damp laundry, and locate the odor with the appliances off: smell the washer basket or tub, door seal or lid opening, dispenser, dryer drum and lint-screen area, and the surrounding room. Do not perform a running test for smoke, gas odor, sparking, or a strong burning smell.
Expected result: The odor is strongest in the washer, in the dryer, on the load but not in either empty appliance, or in the room near recent paint, stain, varnish, or another chemical source.
Next step: Record when the smell appears, whether the washer or dryer was running, and whether the load was left damp. Follow the matching branch below instead of adding cleaner to both appliances at once.
Why this matters
Why: The location changes the next check: washer moisture and residue, dryer drum and lint path, contaminated laundry, or outside fumes drawn through the dryer each needs a different response.
-
Check 2
Inspect the washer opening with the machine empty. On a front loader, gently pull back the door-seal folds and look for moisture, lint, residue, or trapped items; on a top loader, inspect the basket and lid opening. Check the visible dispenser for buildup, and wipe accessible surfaces with a soft cloth and the model-approved mild cleaner.
Expected result: Moisture, mildew-like residue, detergent film, debris in the seal folds, or a dirty dispenser is present; or the washer interior is clean and dry while the odor remains.
Next step: Finish the accessible cleaning without damaging the seal, remove wet laundry promptly after future cycles, and leave the door or lid open between uses. Continue to the Clean Washer cycle if the odor is inside the washer.
Why this matters
Why: Residue and trapped moisture can create a washer-side odor and can transfer it to clothing. A clean, dry washer makes the dryer, laundry load, drain condition, or room environment more likely.
-
Check 3
Run the exact model's Clean Washer cycle with the washer empty, using only the cleaner or liquid chlorine bleach procedure allowed by its owner's manual. Follow the product-help sequence for the chosen method; do not add detergent or other chemicals, do not mix cleaners, and do not put a cleaner tablet in the dispenser.
Expected result: The smell decreases after the complete cycle, residue remains, the model has no Clean Washer cycle, or the odor returns quickly despite correct cleaning.
Next step: Run a model-directed rinse if the cleaning instructions require it, dry the opening, and leave it open for ventilation. If the smell persists or the cycle cannot complete, stop repeated chemical treatments and arrange service.
Why this matters
Why: Improvement supports odor-causing residue or moisture as the washer source. No improvement or a rapid return suggests a persistent seal, drain, hidden-residue, or mechanical condition that a surface wipe will not identify.
-
Check 4
With the dryer switched off, cool, and safely disconnected from power, inspect the accessible drum, door area, lint screen, and vent opening for lint, fabric-softener film, detergent residue, or a foreign item. Clean only the accessible surfaces using the model's instructions and a nonflammable cleaner; do not remove panels or reach into the heater or blower housing.
Expected result: The drum or lint area has visible residue or lint, airflow has fallen, the vent is obstructed, or these areas are clean while the smell remains when the dryer runs.
Next step: Clean the lint screen as directed and have the vent path serviced if it is obstructed or inaccessible. Do not run the dryer with smoke, overheating, sparking, or a persistent burning smell; arrange qualified service.
Why this matters
Why: Residue and lint can create musty odors, restrict air movement, and increase overheating risk. A clean accessible path with a continuing odor moves the diagnosis toward an internal component or an outside-air source.
-
Check 5
Compare the smell with the dryer off and the laundry room ventilated. If the dryer is new and the odor is only a mild first-use oily or semi-burning smell, follow Maytag's model guidance for a short empty first-use run only when there is no smoke, overheating, sparking, gas odor, or electrical smell. If painting, staining, or varnishing occurred nearby, do not run the dryer until the fumes are gone.
Expected result: The odor disappears when the room is ventilated, occurs only on a new dryer's first heating, remains in the drum after the room is clear, transfers to clothing, or is accompanied by a hazardous symptom.
Next step: Ventilate, rewash affected clothing after fumes are gone, and do not operate near active refinishing. For a persistent smell unrelated to the room or first use, leave the dryer out of service and provide the technician with the odor timing and cleaning record.
Why this matters
Why: A dryer pulls surrounding room air through the load, so environmental fumes can be mistaken for an appliance fault. A limited first-use odor may be temporary; a persistent or hazardous odor needs a stop and service boundary.
Use your observations
Decision map
Find the observation that best matches what you see, then follow the next safe action.
-
PATH 01Next step
What you see
The odor is strongest in the washer opening and the seal, dispenser, or tub has moisture or residue.
Do this next
Clean the accessible seal or dispenser, run the model-directed Clean Washer cycle with one approved method, remove laundry promptly, and leave the door or lid open to dry.
Why this path and its safety boundary
Why it matters: A washer-side mildew or detergent-residue source is more likely than a dryer fault.
-
PATH 02Next step
What you see
The odor appears after damp clothes were left in the washer or dryer.
Do this next
Remove the load promptly, clean the suspected appliance, and rewash and dry the clothing according to its care labels. Do not mask the smell with extra detergent.
Why this path and its safety boundary
Why it matters: Mildew odor may be in the load as well as the appliance interior.
-
PATH 03Next step
What you see
The smell appears only in the dryer after recent painting, staining, or varnishing nearby.
Do this next
Ventilate the area and wait until fumes are gone before operating the dryer; then rewash and dry the affected load. Do not run the dryer during refinishing work.
Why this path and its safety boundary
Why it matters: The dryer may be drawing room fumes through the load rather than generating the odor itself.
-
PATH 04Next step
What you see
The dryer is new and has only a mild first-use oily or semi-burning smell with no smoke or other hazard.
Do this next
Follow the exact model instructions and Maytag's first-use guidance for a short empty run. Stop if the smell is strong, persists, or changes to smoke, overheating, or an electrical odor.
Why this path and its safety boundary
Why it matters: Maytag identifies a limited first-use odor as a possible normal condition for a new gas or electric dryer.
-
PATH 05Next step
What you see
The drum, lint screen, and accessible vent path are clean, but the smell returns whenever the dryer runs.
Do this next
Leave the dryer out of service and arrange qualified Maytag service. Do not open panels or keep cycling the dryer to reproduce the smell.
Why this path and its safety boundary
Why it matters: An internal heater, motor, wiring, control, or airflow fault is possible and cannot be identified from odor alone.
-
PATH 06Next step
What you see
There is smoke, sparking, a strong burning or electrical smell, abnormal heat, gas odor, water near electrical equipment, or a damaged cord.
Do this next
Stop using the appliance. Disconnect power only if it is safe without touching damaged parts or standing in water, leave the area for a gas or smoke emergency, and arrange qualified service before further use.
Why this path and its safety boundary
Why it matters: This is an immediate fire, gas, water, or electrical safety stop.
Helpful context
Understand the symptom
Find the side producing the odor
A washer-dryer setup can transfer one smell to the clothes, so the source is not always the compartment where the odor is noticed. Smell the empty washer opening, door seal or dispenser, dryer drum, lint-screen area, and surrounding room separately. A musty smell with damp laundry points to retained moisture; a solvent-like smell after painting or refinishing points to the room air pulled through the dryer.
Clean according to the appliance type
Maytag's washer guidance recommends a model-supported Clean Washer cycle and correct detergent use, with the door or lid left open afterward. Its dryer guidance treats the drum, lint screen, and vent as separate maintenance areas. Do not mix bleach, vinegar, detergent, or other cleaners, and follow the exact owner's manual when a model has different cleaning instructions.
A burning smell is a stop signal
A mild first-use odor from a new dryer is different from smoke, sparking, overheating, or a persistent electrical smell. Never keep running a dryer to see whether a hazardous odor disappears. Disconnect power only when it is safe, keep clear of water or damaged wiring, and use qualified service for an internal heater, motor, wiring, or control diagnosis.
Only after diagnosis
Potential parts
- front-load washer door seal or gasket
Consider this category only if qualified diagnosis confirms that a damaged or persistently contaminated door seal is the source after safe cleaning and moisture checks.
Confirm the complete Maytag model and manufacturer fit information before ordering; a bad smell alone does not identify a seal replacement. - washer dispenser component
Consider this category only when the exact model's dispenser is damaged or cannot be cleaned and qualified diagnosis links it to retained residue or leakage.
Use the owner's manual and complete model number to verify the correct component; do not substitute a dispenser based only on odor. - dryer airflow or heating component
Consider this category only after the accessible drum, lint screen, vent path, and room-air checks pass and qualified service identifies an internal fault.
Do not open the dryer cabinet or choose a heater, motor, or airflow part from an odor symptom alone; verify exact model compatibility through qualified service.
When checks do not resolve it
Need a professional?
Request qualified Maytag laundry-appliance service when the smell remains after the correct washer cleaning and dryer drum or lint checks, returns immediately, comes from an inaccessible internal area, accompanies a drain or water problem, or prevents a cycle from completing. Stop immediately for smoke, sparking, a strong burning or electrical smell, abnormal heat, gas odor, water near electrical equipment, or a damaged cord.
Common questions
FAQ
Why does my Maytag washer dryer smell musty?
Damp clothes left in the washer or dryer, moisture in a front-load door seal, and detergent residue can create a musty odor. Remove the load promptly, inspect and clean accessible washer areas, and run the model's Clean Washer cycle with one approved method.
How do I clean a Maytag washer that smells bad?
Empty the washer, follow the owner's manual for the Clean Washer cycle and approved cleaner, and do not mix cleaners or add detergent to that cycle. Clean the accessible dispenser or door seal and leave the door or lid open afterward.
Why does my Maytag dryer smell after painting the laundry room?
Maytag says a dryer pulls surrounding room air through the load, so paint, stain, or varnish fumes can transfer an odor. Ventilate until fumes are gone, avoid running the dryer during refinishing, then rewash and dry affected clothing.
Is a burning smell from a Maytag dryer normal?
A mild oily or semi-burning odor can occur during the first use of a new dryer, but smoke, sparking, overheating, a strong burning smell, or an electrical odor is not a troubleshooting condition. Stop using the dryer and arrange qualified service.
Read the exact guide
Official sources
- Removing Odors or Smells - DryerMaytag · Maytag dryer first-use odor, room fumes, damp-load mildew, room ventilation, and service guidance.
- Cleaning a Front Load Washer Door SealMaytag · Maytag front-load washer seal residue, moisture, cleaning, and ventilation guidance.
- Removing Odor or Smell - WasherMaytag · Maytag washer moisture, damp-load, detergent-type, Clean Washer cycle, and service guidance relevant to washer-side odor in a washer-dryer setup.
- Removing Odors or Smells - Front Load WasherMaytag · Maytag front-load washer door ventilation, Clean Washer cycle, dispenser cleaning, damp-load handling, and HE detergent guidance.
- Cleaning the Dryer DrumMaytag · Maytag dryer drum residue, lint screen, vent, airflow, overheating, and odor prevention.
- Removing Odors from the Interior of a WasherMaytag · Maytag washer Clean Washer cycle, cleaner-use boundaries, detergent residue, ventilation, and moisture prevention.
Community feedback
Share a repair observation
Share a plain-text repair observation. Accepted observations are published automatically; this page may take a moment to update.