
On this page
Start here
Quick answer
A Maytag washer dryer that finishes with wet clothes may be set to a low or no-spin cycle, paused while it balances a load, unable to close its lid or door, or unable to drain. First check the selected spin setting, redistribute or reduce the load, confirm the appliance is level and the lid or door closes, and inspect the external drain hose for a kink, clog, or incorrect installation. Run Drain & Spin only after the water can leave safely. If the tub still contains water, the lid or door will not latch, the washer repeatedly stops with a balanced load, or the motor, pump, wiring, or control appears faulty, stop user checks and arrange qualified service.
Before you begin
Safety first
- Keep hands out of a moving basket, do not bypass a lid or door switch or open internal electrical panels, and stop if smoke, burning odor, sparking, damaged wiring, or water near electrical connections is present.
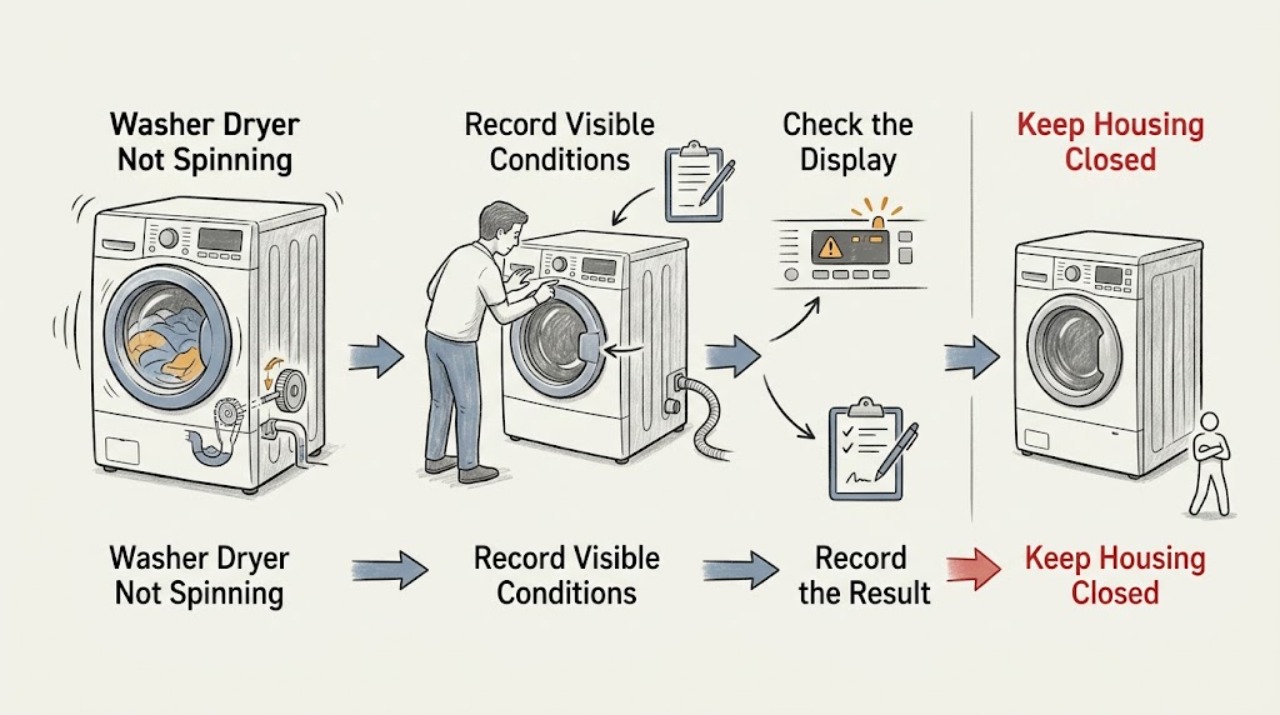
Work through in order
Diagnostic checks
Use only checks that match the exact appliance or system and its official guide.
-
Check 1
Record what happened at the end of the last cycle: whether the drum or basket moved at all, whether clothes were merely damp or dripping wet, whether water remained in the tub, whether an unbalanced-load message appeared, and whether the control panel showed a pause or add-garment state.
Expected result: There is no standing water, standing water remains, the washer paused or reported an imbalance, or the control indicates a deliberate pause or low-spin result.
Next step: Use the no-water branch to check the cycle and load. Use the standing-water branch to check the external drain hose and safe drainage conditions before trying Drain & Spin.
Why this matters
Why: No water with damp clothes points first to a spin selection, load, leveling, or balance issue. Standing water points to drainage before spin. A pause or imbalance message can be the washer's protective response rather than proof that the drive motor failed.
-
Check 2
Review the selected cycle and spin option on the control panel. If the load and appliance are otherwise safe, select a cycle with an appropriate spin speed or use Drain & Spin as the manual permits; do not choose No Spin when the goal is to remove water. Check whether the earlier cycle was delicate, hand-wash, bulky, or bedding.
Expected result: The control was set to Low Spin, No Spin, or a gentle cycle; Drain & Spin completes; or the washer still will not spin with a normal setting.
Next step: For a setting-related result, use the desired spin option on a small, balanced load. If the appropriate setting still produces no movement or leaves water, continue to the load and drain checks.
Why this matters
Why: A deliberate low or no-spin setting can explain wet clothes without a mechanical failure. A successful Drain & Spin makes a setting or prior-cycle condition more likely. Failure on an appropriate setting moves attention to load balance, level, closure, and drainage.
-
Check 3
Pause the appliance using its normal control and redistribute the clothes evenly around the basket. Remove some items if the load is tightly packed, and avoid testing with one heavy item by itself; add a few similar items only if the owner manual permits. Keep hands clear of a moving basket and do not reach in while it is operating.
Expected result: The load is bunched to one side, is a single bulky item, is overloaded, or becomes evenly distributed; the washer resumes spin or still stops.
Next step: Run one suitable balanced test load. If it spins normally, change loading practice. If it still stops, check leveling and lid or door closure, then arrange service if those checks pass.
Why this matters
Why: A lopsided, overloaded, or bulky load can trigger the washer's balance correction and prevent a full-speed spin. If a smaller balanced load spins, the original load was the strongest explanation. If every balanced load stops, continue rather than repeatedly forcing cycles.
-
Check 4
With the appliance empty and idle, check that it sits level and does not rock. Clear an item caught between the lid or door and the frame, then close the lid or door fully and observe whether the control recognizes it as closed. Do not tape, hold, or bypass the lid or door switch.
Expected result: The cabinet rocks, the basket is visibly out of level, an obstruction prevents closure, the display does not recognize a closed lid or door, or closure and level are normal.
Next step: Follow the exact owner manual to level the feet and remove only obvious closure obstructions. If the lid or door still will not latch or the appliance cannot be leveled, stop and call for service; otherwise continue to the drain check.
Why this matters
Why: An unlevel washer can create repeated out-of-balance corrections. A lid or door that is not fully closed, or is not recognized as closed, can prevent spin as a safety condition. A normal level and closure make those causes less likely but do not prove a drive fault.
-
Check 5
If water remains, inspect only the accessible external drain hose and its connection. Look for kinks, crushing, visible blockage, or an installation that is too deep or sealed into the standpipe. Maytag's guidance uses a U-shaped hose form, about 4.5 inches of insertion, and a standpipe height of 39 to 96 inches; compare your installation with the exact model manual and keep the hose end able to drain.
Expected result: The hose is kinked or blocked, the hose is inserted too deeply, the standpipe is outside the stated range, the sink is obstructed, or the external drain path looks clear.
Next step: Correct only an obvious external hose or sink installation issue according to the manual, then run one appropriate Drain & Spin. If water remains or the pump behaves abnormally after the external path is clear, stop before opening panels and request service.
Why this matters
Why: A restricted or incorrectly installed drain can leave water in the tub and prevent the washer from entering or completing spin. A clear, correctly installed external path makes a pump obstruction, pump failure, control issue, or another internal condition more likely, especially if the washer hums but does not drain.
-
Check 6
Consider detergent and power history. If the load created excessive suds, use only the amount and type of HE detergent specified for the model and let the washer complete its correction or rinse process. If the issue followed a power interruption, restore safe power and run the model's recommended recovery or Drain & Spin procedure once; do not repeatedly cycle the controls.
Expected result: There are excessive suds, the issue followed a power outage, one recovery cycle restores spin, or the washer still fails with a balanced load and clear drain path.
Next step: If spin remains unavailable after the appropriate setting, balanced load, closure, level, drain, detergent, and power checks, stop user diagnosis and provide the recorded symptoms and model number to a qualified technician.
Why this matters
Why: Excess suds can interfere with draining and spin timing, while a power interruption can leave a cycle incomplete. If normal operation returns after the documented recovery, monitor the next balanced load. Persistent failure after the simple checks points beyond user settings or loading.
Use your observations
Decision map
Find the observation that best matches what you see, then follow the next safe action.
-
PATH 01Next step
What you see
Clothes are damp but there is no standing water and the cycle used Low Spin, No Spin, delicate, or hand-wash settings
Do this next
Choose an appropriate spin setting for the fabric and test one balanced load; do not treat that result alone as a failed motor.
-
PATH 02Next step
What you see
The load is one bulky item, tightly packed, or visibly bunched to one side
Do this next
Redistribute or reduce the load and run one suitable balanced test. If balanced loads still stop, continue to service-level diagnosis.
-
PATH 03Next step
What you see
Standing water remains in the tub
Do this next
Check the accessible external drain hose and sink or standpipe installation. Use Drain & Spin only when water can drain safely; arrange service if the path is clear but water remains.
-
PATH 04Next step
What you see
The washer rocks, cannot be leveled, or the lid or door is not recognized as closed
Do this next
Follow the owner manual for leveling or clear an obvious obstruction. Do not bypass the lid or door switch; call for service if closure or leveling cannot be restored.
-
PATH 05Next step
What you see
A balanced load, normal spin setting, level cabinet, closed lid or door, and clear external drain path still produce no spin
Do this next
Stop repeated tests and request qualified appliance service for the pump, switch, motor, control, wiring, or drive system.
Helpful context
Understand the symptom
Separate a true no-spin problem from a low-speed result
Look at the end of the cycle before assuming a failed motor. Wet clothes with no standing water can result from Low Spin, No Spin, delicate, or hand-wash settings. A bulky item or a single heavy item can also make the washer pause or reduce spin while it tries to correct the balance. Standing water changes the diagnosis: the washer may be protecting itself because it could not drain, so do not keep starting spin cycles until the drain path is checked.
Use the exact model manual for access and settings
Maytag has both top-load and front-load washer designs, and the controls, lid or door arrangement, and drain access differ. Record the model number and use its owner manual for any panel access, filter location, reset instruction, or replacement part. The checks below are external observations and loading or control changes; they are not a recommendation to defeat a lid or door safety device.
Safety boundary
Stop conditions
- Stop if there is smoke, a burning odor, sparking, a damaged power cord, water near electrical connections, repeated breaker trips, or an unsafe motor or pump noise; disconnect power only if it can be done without contacting water or damaged wiring and arrange service.
- Do not reach into a moving basket, bypass or tape a lid or door switch, remove panels, or work on internal wiring or live electrical parts as a user check.
- Do not repeatedly start spin with standing water, a severe leak, or a drain path that cannot safely contain the water.
- Stop after the external checks if the washer still will not spin with a balanced load and normal settings, or if the lid, door, pump, motor, control, or drive system appears faulty.
Only after diagnosis
Potential parts
- lid or door latch and switch assembly
Only consider this part class if the washer does not recognize a safely closed lid or door and a technician confirms the latch or switch is the cause.
Confirm the exact Maytag model and assembly revision before ordering; do not bypass the safety switch. - drain pump
Only consider this part class if the external drain path is correctly installed and a technician confirms the pump is obstructed or failed.
Confirm the exact model, pump configuration, and approved repair procedure before ordering. - drive or motor assembly
Only consider this class after a qualified diagnosis rules out spin settings, balance, leveling, closure, suds, power, and drainage causes.
Confirm the exact model and whether the diagnosis identifies a motor, actuator, belt, coupling, or control-related fault.
When checks do not resolve it
Need a professional?
Call a qualified appliance technician when the washer will not recognize a closed lid or door, cannot be leveled, leaves water after the accessible drain path is clear, repeatedly stops with balanced loads, makes an abnormal motor or pump noise, or still will not spin after the documented setting, load, leveling, closure, drain, detergent, and power checks.
Safety scope: Keep hands out of a moving basket, do not bypass a lid or door switch or open internal electrical panels, and stop if smoke, burning odor, sparking, damaged wiring, or water near electrical connections is present.
Have this ready
- Maytag model number
- top-load or front-load configuration
- selected cycle and spin option
- whether standing water remained
- whether a lid or door message or unbalanced-load message appeared
- whether one balanced test load spun
- whether the external drain hose was kinked or incorrectly installed
- any abnormal noise, odor, leak, or breaker event
Common questions
FAQ
Why is my Maytag washer dryer not spinning but the clothes are wet?
If there is no standing water, first check whether the cycle used Low Spin, No Spin, delicate, or hand-wash settings, then redistribute or reduce the load and confirm the washer is level. If water remains, check the external drain path before treating it as a motor problem.
Can an unbalanced load stop a Maytag washer from spinning?
Yes. A single bulky item, an overloaded basket, or clothes bunched to one side can trigger balance correction and prevent a full-speed spin. Pause normally, redistribute or reduce the load, and run one suitable balanced test.
What should I check if my Maytag washer has water left in it?
Inspect the accessible external drain hose for kinks, blockage, excessive insertion, or an incorrect standpipe arrangement, and check for an obstructed sink. If the path is clear but water remains, stop before opening panels and arrange service.
Should I bypass the Maytag washer lid or door switch to make it spin?
No. The lid or door interlock is a safety boundary. Clear only an obvious obstruction and close it normally; if the washer does not recognize closure, request qualified service rather than taping, holding, or bypassing the switch.
Read the exact guide
Official sources
- Washer Not Draining or Spinning? Troubleshooting GuideMaytag Product Help · General Maytag washer troubleshooting; use the model-specific manual for service access.
- Washing Machine Not Spinning: Possible Causes And FixesMaytag · General Maytag washing-machine guidance; exact controls and access depend on model.
- Not Spinning - WasherMaytag Product Help · Top-load Maytag washer guidance; use the exact model manual for model-specific access and controls.
- Not Spinning - Front Load WasherMaytag Product Help · Front-load Maytag washer guidance; the exact model manual controls any access or service procedure.
Community feedback
Share a repair observation
Share a plain-text repair observation. Accepted observations are published automatically; this page may take a moment to update.