
On this page
Start here
Quick answer
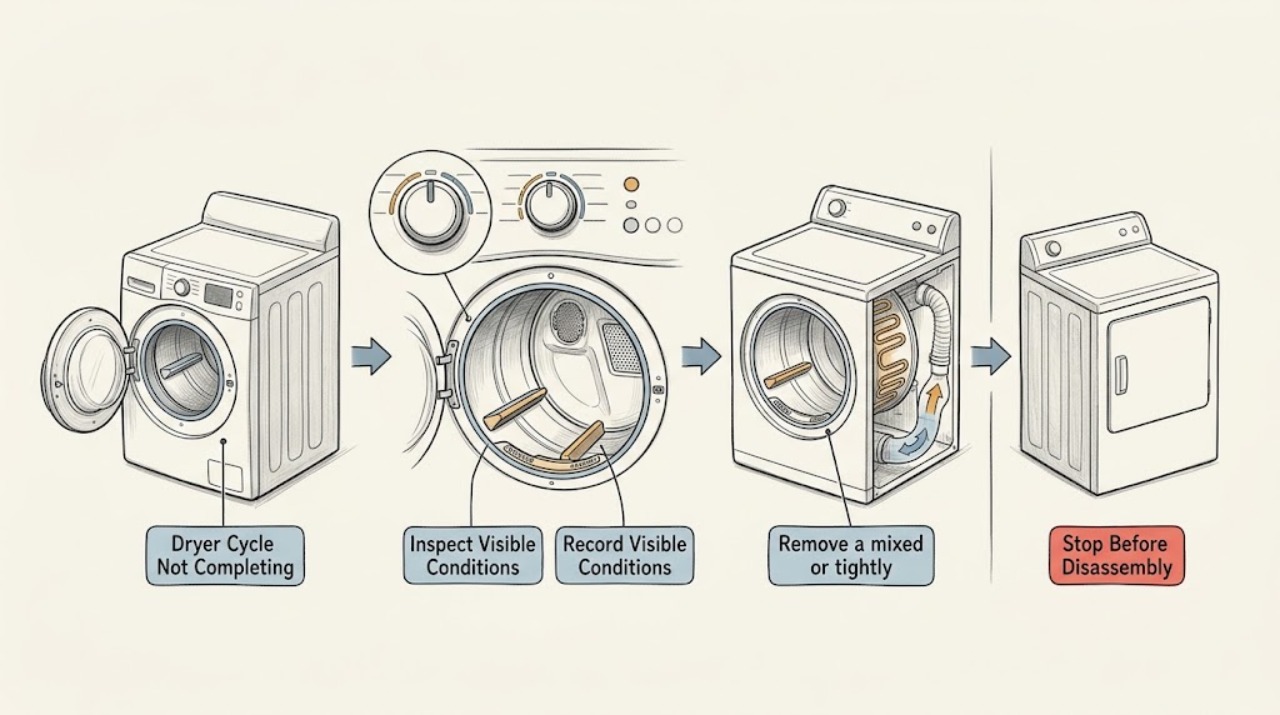
A Roper dryer that does not complete a cycle needs to be classified first: does it stop while the drum is tumbling, stop after heating, finish early with damp clothing, or lose power? The common paths are an unsuitable cycle or load, a blocked lint screen or exhaust, moisture-sensor contact, a door or control state, or an electrical or heat fault. Before any check, stop for smoke, a burning odor, scorching, extreme cabinet heat, sparks, a gas odor, water near the appliance, or a breaker that trips again. If safe, record heat and drum movement, clean and dry the lint screen, use the Roper model guide for the cycle, inspect accessible venting, and perform no more than one safe reset. A recurring stop, no heat, error code, or abnormal symptom needs qualified service.
Work through in order
Diagnostic checks
Use only checks that match the exact appliance or system and its official guide.
-
Check 1
Stop the dryer and look for smoke, a burning odor, scorching, sparks, an unusually hot cabinet, a gas odor, water near electrical parts, or a breaker that opens again.
Expected result: Any fire, smoke, strong odor, visible electrical arcing, abnormal heat, water at the appliance, or repeat breaker trip is present.
Next step: Do not restart the dryer or repeatedly reset protection. Leave the area for smoke, fire, or gas odor and follow local emergency or gas-supplier instructions from a safe location; obtain qualified appliance, electrical, or gas service as applicable.
Why this matters
Why: This is a fire, gas, water, or electrical safety condition, not a cycle-setting problem.
-
Check 2
Write down when the cycle stops and whether the drum is still turning, whether the load is warm or cool, whether the display is still on, and whether the door opened or an error indication appeared. If the surface is safe, use the exact Roper guide to identify the selected program and any option that changes the cycle end behavior.
Expected result: The dryer stops before tumbling ends, continues tumbling without heat, ends early with damp items, loses all display power, or shows an error or door indication.
Next step: Keep the dryer off until the symptom is classified. Record the phase and display text for the model-specific branch below rather than repeating a failed cycle.
Why this matters
Why: No tumbling suggests drive, door, control, or power involvement; tumbling without heat suggests cycle, supply, or heat-path involvement; an early automatic finish makes sensing, load contact, or dryness selection more relevant; a code must be interpreted for the exact model.
-
Check 3
Remove a mixed or tightly packed load, separate heavy items from light items, and choose the Roper manual's suitable automatic or timed program for a small, similar-fabric test load. Do not use Air Only when heat is required.
Expected result: A smaller, similar load completes, an automatic program ends early, a timed program runs its selected duration, or the selected program is Air Only or otherwise low heat.
Next step: Use the program and load size specified by the Roper manual. If the dryer still stops with a small test load, continue to the lint, airflow, door, and power checks instead of selecting higher heat repeatedly.
Why this matters
Why: Overloading limits tumbling and air movement; an automatic program ends when its sensed dryness target is reached; Air Only intentionally adds no heat; a timed program helps separate cycle logic from moisture-sensing behavior.
-
Check 4
With the dryer off and cool, remove lint from the screen. If the screen has invisible softener residue, wash it with warm water and a soft brush as the care guidance allows, then dry it fully before refitting it. Inspect only the visible drum area for lint around the sensor strips or housing.
Expected result: The screen is coated or blocked, lint surrounds the sensor area, or the screen is clean and the same load still ends early or remains damp.
Next step: Refit the fully dry screen and run one suitable test load. Do not scrape sensors, pour liquid into the cabinet, or remove covers; persistent early ending or dampness needs the next branch or service.
Why this matters
Why: A restricted or coated screen can reduce airflow, while poor contact between the load and moisture sensors can make an automatic cycle misjudge dryness. A clean screen with the same symptom makes the vent or sensor circuit more relevant.
-
Check 5
Inspect the user-accessible vent path only when the dryer is off and unplugged if the model guide permits. Look for a crushed or kinked hose, lint at the wall connection, a blocked exterior hood, or weak outside airflow during a brief safe run; keep the space around the dryer clear.
Expected result: Warm damp clothing, humidity or steam in the room, a hot cabinet, water behind the dryer, very little lint on the screen, weak outside airflow, an AF or Check Vent indication, or a visibly restricted hose is present.
Next step: Stop using the dryer until a visible restriction is cleared safely. Have the full home vent run cleaned or tested by a qualified vent professional when the restriction is beyond the accessible section. Do not operate with a crushed or damaged exhaust path.
Why this matters
Why: These are signs that moist air is not leaving efficiently. Restricted exhaust can lengthen cycles, leave clothes damp, raise cabinet heat, and create a fire risk; a clear vent shifts attention toward heat, sensing, control, or drive faults.
-
Check 6
Check that the door closes and latches fully, the controls are dry and not locked, and the Start control is used exactly as the Roper guide describes. If the drum light or display is dark, check the external supply state once when safe; do not remove the power cord or terminal cover.
Expected result: The door appears closed but is not latched, the control lock is active, moisture prevents input, the display is dark, or the dryer has power but stops when the door signal changes.
Next step: Correct only a normal latch, dry-control, or documented control-lock state. If power is absent, protection opens, or the latch and control remain abnormal, leave the dryer off and arrange qualified service.
Why this matters
Why: A door or control state can interrupt operation, while a dark display or partial power can indicate supply or wiring trouble. An electric dryer may use separate supply paths for drum movement and heat, so partial power can produce an unusual symptom.
-
Check 7
After the safe checks are complete, perform at most one model-appropriate power reset, then run one small test load on the documented program. Record whether the drum turns, heat is present, the cycle timer advances, and the same stop returns.
Expected result: The test completes once, the dryer stops at the same phase, heat is absent, an error returns, or the breaker opens again.
Next step: Stop after this single test. Give the technician the model, program, load type, stop phase, heat and drum results, vent observations, display text, and any odor, smoke, water, or power symptom.
Why this matters
Why: A reset can clear a temporary control state but cannot establish that the motor, belt, door switch, heater, gas ignition, moisture sensor, control, or vent system is sound.
Use your observations
Decision map
Find the observation that best matches what you see, then follow the next safe action.
-
PATH 01Next step
What you see
Smoke, burning odor, scorching, sparks, gas odor, water near electrical parts, extreme heat, or a repeat breaker trip occurs.
Do this next
Stop immediately. Do not restart or repeatedly reset protection; leave the area for fire or gas danger and obtain the appropriate qualified emergency, gas, electrical, or appliance help.
-
PATH 02Next step
What you see
The dryer ends an automatic cycle early but the load is damp, while a timed test runs.
Do this next
Use a compatible load and confirm the lint screen is clean, dry, and fitted. If the early ending repeats, the moisture-sensing path, load contact, leveling, or control needs qualified diagnosis.
-
PATH 03Next step
What you see
The dryer runs and heats but clothing remains warm and damp, or the Check Vent or AF indication appears.
Do this next
Stop and inspect the accessible lint and exhaust path. Clear only safe visible debris; arrange full vent cleaning or testing when airflow remains weak or the run is obstructed.
-
PATH 04Next step
What you see
The selected program is Air Only, low heat, unsuitable for the load, or the drum is tightly packed with mixed fabrics.
Do this next
Choose the Roper manual's appropriate automatic or timed program and a smaller, similar-fabric load. If the same stop returns, continue with service-level checks rather than selecting a hotter program repeatedly.
-
PATH 05Next step
What you see
The drum stops, the door indication returns, controls are unresponsive, or the display loses power.
Do this next
Confirm a normal latch, dry controls, and documented lock state once. If supply, door sensing, drive, or control behavior remains abnormal, leave the dryer off and request qualified service.
-
PATH 06Next step
What you see
No heat, an F-style or model-specific code, repeated stopping, or failure after one safe reset remains.
Do this next
Stop troubleshooting and provide the exact model, code, stop phase, heat and drum observations, program, load, and vent history to qualified appliance service. Do not open the cabinet or bypass a safety device.
Helpful context
Understand the symptom
“Cycle not completing” can mean two different things: the dryer may stop before the selected time, or an automatic cycle may end while items are still damp. The result matters. A drum that stops while heat is present points toward drive, control, door, or protection behavior; a running dryer that ends early points more toward sensing, load contact, or cycle selection; warm damp clothing points strongly toward airflow or heat performance.
Roper model families and electric or gas configurations can differ. Use the exact Roper manual for button names and access limits. Keep checks to the controls, drum, lint screen, outside vent, and other user-accessible areas. Do not open the cabinet, bypass a door switch or thermal device, probe live wiring, or alter a gas connection.
Only after diagnosis
Potential parts
- moisture sensor or sensor harness
Relevant only when a suitable load, clean dry screen, clear exhaust, and correct cycle still end early and qualified testing isolates the sensor path.
Confirm the exact Roper model and sensor layout before any replacement decision. - door latch or door switch
Relevant only when the door does not report a stable closed state or the dryer stops when the latch signal changes after normal alignment checks.
Use the complete model identity and qualified fit verification. - thermal cutoff, thermostat, or heater assembly
Relevant only when a qualified test confirms abnormal heat control or no heat after cycle, supply, lint, and exhaust checks.
Electric and gas configurations use different heat paths; verify the exact model and configuration. - drive motor, belt, or idler assembly
Relevant only when the drum stops, cannot restart normally, or produces a verified drive symptom rather than a vent or control interruption.
Confirm model-specific fit and have cabinet work performed by a qualified technician.
When checks do not resolve it
Need a professional?
Stop and seek qualified help for smoke, fire, burning odor, gas odor, sparks, scorching, extreme cabinet heat, water near electrical parts, a repeat breaker trip, a damaged or ineffective door latch, a returning error code, no heat, a drum that stops repeatedly, or a cycle that still fails after the safe visible checks and one reset. Do not bypass a door or thermal switch, open the cabinet, probe live wiring, alter a gas connection, or continue operating with a restricted exhaust.
Common questions
FAQ
Why does a Roper dryer finish early while clothes are still damp?
An automatic cycle can end when its sensor judges that the selected dryness target has been reached. Check for a small or mixed load, poor contact with the moisture sensors, a coated lint screen, and restricted airflow. If the same load ends early after those checks, qualified service should test the sensing and control path.
What should I check if the dryer runs but the cycle never seems to finish?
Note whether the clothes are warm or cool and whether the drum tumbles. Warm damp clothing, steam, excess room humidity, weak outside airflow, or an AF or Check Vent indication point toward a restricted exhaust. A cool drum points toward cycle selection, supply, heat, or a service fault.
Can Air Only make a Roper dryer appear not to complete a heated cycle?
Air Only or Air Fluff is intended not to add heat. Select the heated automatic or timed program specified by the Roper manual for the fabric and load, then test once with a small, similar load.
Why does a dryer stop when the door looks closed?
A door can look shut without its latch being fully engaged. Check the visible latch and the exact model guidance. If the door signal is intermittent or the dryer stops when the door moves, stop using it and have the latch and door circuit checked.
When should I stop using a Roper dryer that does not complete its cycle?
Stop for smoke, a burning odor, scorching, sparks, gas odor, extreme heat, water near electrical parts, a repeat breaker trip, a restricted exhaust, no heat, or a recurring stop after one safe reset. Do not bypass a safety switch or open the cabinet; arrange qualified help.
Read the exact guide
Official sources
- Controls are Not Working - DryerWhirlpool Product Help · Whirlpool dryer control lock, Start control, dry panel, and service guidance
- Dryer is not Drying or Experiencing Long Dry TimesWhirlpool Product Help · Roper and Whirlpool dryer cycle selection, load, heat, lint, airflow, and service guidance
- AF or Check Vent - DryerWhirlpool Product Help · Whirlpool dryer AF or Check Vent indication, lint, exhaust, airflow, and vent-service guidance
- Dryer Vent may be Blocked or RestrictedWhirlpool Product Help · Whirlpool dryer exhaust restriction symptoms, airflow checks, moisture, heat, and safety
- Not Collecting Lint - DryerWhirlpool Product Help · Whirlpool dryer lint screen, vent, load, and cycle checks
- Error Codes in DryersWhirlpool Product Help · Whirlpool dryer airflow, power-failure, low-voltage, and model-specific error-code guidance
- Not Tumbling or Spinning - DryerWhirlpool Product Help · Whirlpool dryer drum movement, power supply, Start control, and qualified electrical guidance
- Dryer Too HotWhirlpool Product Help · Whirlpool dryer heat selection, automatic sensing, exhaust airflow, and hot-dryer guidance
- ERR - Error Code - DryerWhirlpool Product Help · Whirlpool dryer door-latch state, power cycle, timed test, and service guidance
- Properly Loading a DryerWhirlpool Product Help · Whirlpool dryer load distribution, free movement, fabric grouping, and airflow
- Using Auto Dry, Timed Dry and EcoBoostWhirlpool Product Help · Whirlpool automatic and timed dryer cycles, load size, sensed dryness, and option effects
Community feedback
Share a repair observation
Share a plain-text repair observation. Accepted observations are published automatically; this page may take a moment to update.