
On this page
Start here
Quick answer
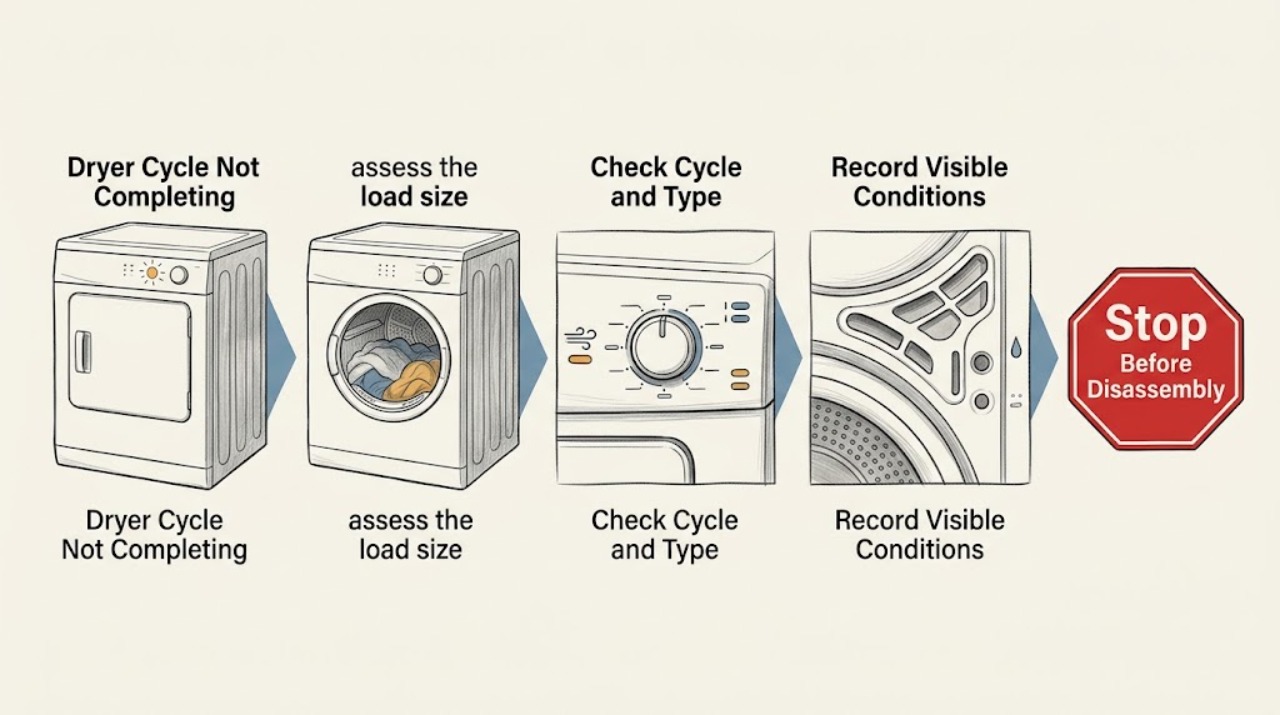
If a Speed Queen dryer does not complete its cycle, first record whether it stops during sensing, heating, cooling, or timed drying. Check the exact model's cycle choice, load size, closed door, lint filter, and visible exhaust path while the dryer is cool and safely disconnected. Auto-sensing cycles can change duration with load moisture, while a timed cycle that stops early, a repeated code, overheating, burned fabric, smoke, gas odor, or a breaker trip is not a normal setting issue: leave the dryer out of service and arrange qualified appliance or electrical service.
Work through in order
Diagnostic checks
Use only checks that match the exact appliance or system and its official guide.
-
Check 1
Record the complete Speed Queen model number and note the cycle type, temperature, dryness setting, status light or display, load composition, and the exact point at which the cycle stops.
Expected result: The dryer stops during sensing, while heating, during cooling, in timed drying, at a door event, or with a code or blank display.
Next step: Use the exact Speed Queen user guide and preserve the observation for service. Do not restart merely to obtain a second failure point.
Stop if: If the stop includes smoke, burning smell, gas odor, arcing, scorched fabric, or a breaker trip, leave the dryer off and move to the safety branch.
Why this matters
Why: The stopping stage identifies which control decision or load is relevant. Speed Queen models differ in cycles and indicators, so a model guide is needed before interpreting a code or setting.
-
Check 2
Compare the selected program with the dryer type: use the model guide to distinguish Auto-Sensing from Time Dry, and check whether the control is showing a normal cooling or extended-tumble stage.
Expected result: The cycle is Auto-Sensing and ends when the load is judged dry, the display is in cooling or extended tumble, or a timed cycle stops before its selected time.
Next step: Allow a clearly identified normal cooling stage to finish once. If the timed cycle or status stage stops abnormally, record the program and leave the dryer off for the next checks.
Stop if: Do not change settings or run a hotter cycle as a test when heat, odor, or a protection trip is present.
Why this matters
Why: Auto-Sensing duration changes with load moisture and size; a cooling stage can be normal. A timed cycle that ends early or repeatedly stalls is a different symptom and should not be explained by sensing alone.
-
Check 3
When the drum is cool and stopped, assess the load size and fabric mix against the model guide; remove items only when safe and check whether the load is very small, tightly packed, unusually heavy, or already nearly dry.
Expected result: The load is small or mixed, heavy items are paired with light items, or the load is ordinary for the selected program.
Next step: For a normal, cool, hazard-free load, follow the model guide's load and dryness guidance on a later use. If the same cycle still stops early, preserve the load details and request service rather than stress-testing the dryer.
Stop if: Do not continue with heat if clothing is scorched, unusually hot, contaminated with flammable substances, or the drum or cabinet smells burnt.
Why this matters
Why: Small loads may not tumble or dry evenly, and auto-sensing time depends on load type, size, and moisture. Those effects can explain an early normal finish or damp items but not a burning smell or electrical trip.
-
Check 4
With power isolated safely and the dryer cool, clean the user-accessible lint filter as directed and inspect the visible exhaust duct and outside hood for a kink, blockage, or a flap that cannot move freely; do not dismantle the duct or cabinet.
Expected result: The lint filter or visible exhaust path is heavily restricted, the room or appliance is damp, or the accessible path is clear and dry.
Next step: Correct only an obvious user-level filter or routing issue named in the model guide, then keep the dryer off if the cycle already tripped protection. A concealed blockage or recurring stop needs service.
Stop if: Do not spray or hose the dryer, reach into moving or hot parts, remove panels, or operate it with moisture, smoke, or overheating present.
Why this matters
Why: Restricted airflow can lengthen drying and alter heat or moisture behavior. Moisture ingress, a wet filter, or a blocked path also raises a safety concern and does not justify a repeat run.
-
Check 5
Check the loading door and its visible closure area after the drum stops, then compare the result with the model guide's start and door instructions.
Expected result: The door is not fully closed, the dryer reports a door or control state, or it closes normally but the cycle still stops.
Next step: Close the door normally and use the model's control sequence once only when there is no heat, odor, moisture, or protection warning. If it stops again, leave it off and provide the status and model to service.
Stop if: Never tape, hold, defeat, or bypass the door switch, and do not open the cabinet to adjust it.
Why this matters
Why: A door state can stop operation for safety. A normal closure with a repeated early stop points beyond the visible door position and may require a switch, control, or wiring diagnosis.
-
Check 6
For an electric or gas model only where the guide says it applies, record the visible supply condition without changing it: electric dryer protection status and plug or cord condition, or the external equipment and main gas valve position when there is no gas odor.
Expected result: The dryer has lost power, the cord or outlet is damaged or hot, the gas supply is uncertain, or the supply appears normal but the cycle still fails.
Next step: Leave a suspect electric installation or gas condition for a qualified electrician, gas professional, or appliance technician. Do not reset a breaker or relight, adjust, or test a gas system to see whether the cycle completes.
Stop if: With gas odor, smoke, flame, arcing, or a hot outlet, avoid switches and ignition sources, leave the area as appropriate, and use emergency help; do not operate the dryer.
Why this matters
Why: Electric and gas models have different supply requirements, and a supply interruption can stop a cycle. A hot, damaged, wet, or gas-odor condition is a safety event, not a setting to correct by trial.
-
Check 7
If the exact guide provides a single user reset or code-clearing step, read and record the code first and use that step only after the dryer is cool, dry, and free of safety warnings; otherwise preserve the code without experimenting.
Expected result: The same code or early stop returns, the motor-overload or control indicator clears once but the cycle fails again, or no code is shown.
Next step: Do not repeat the reset or run an empty stress cycle. Arrange qualified service with the model, code, selected program, stopping stage, load, and all safety observations.
Stop if: Any overheating, scorched clothing, smoke, burning smell, gas odor, arcing, moisture near electrical parts, or breaker trip ends user troubleshooting immediately.
Why this matters
Why: A returning code or repeat stop means the underlying condition remains. Speed Queen guidance treats a recurring digital fault as a reason to remove the dryer from use and call service.
Use your observations
Decision map
Find the observation that best matches what you see, then follow the next safe action.
-
PATH 01Next step
What you see
Auto-Sensing ends with cool, acceptably dry clothing and no warning.
Do this next
Compare the load and dryness choice with the exact model guide; do not label a normal sensing finish as a mechanical failure.
Why this path and its safety boundary
Why it matters: The cycle may have completed normally based on moisture detection rather than a fixed duration.
-
PATH 02Next step
What you see
A status indicator shows cooling or extended tumble and there is no hazard.
Do this next
Allow the identified stage to finish once. If it freezes or repeats, record the indicator and request service.
Why this path and its safety boundary
Why it matters: The dryer may be in a normal end-of-cycle stage.
-
PATH 03Next step
What you see
A timed cycle stops before its selected duration or stops with damp clothing.
Do this next
Check only the cool, visible filter, exhaust path, door, and installation information, then leave the dryer off if the stop repeats.
Why this path and its safety boundary
Why it matters: The issue is not explained by normal Auto-Sensing alone; door, control, airflow, thermal, or supply conditions remain possible.
-
PATH 04Next step
What you see
The lint filter or visible exhaust path is blocked, kinked, wet, or unusually hot.
Do this next
Do not run the dryer. Clean only the user-accessible area named in the model guide after it is cool and isolated; use service for concealed restrictions or moisture.
Why this path and its safety boundary
Why it matters: Airflow or moisture may be changing the dry result and creating a fire or shock concern.
-
PATH 05Next step
What you see
The door does not close or the control does not recognize it.
Do this next
Close it normally once if no hazard exists; never bypass it. A persistent door state needs qualified service.
Why this path and its safety boundary
Why it matters: The safety interlock may intentionally prevent or stop the cycle.
-
PATH 06Next step
What you see
The dryer shows smoke, burning smell, scorched clothing, gas odor, arcing, a hot outlet, moisture near electrical parts, or a breaker trip.
Do this next
Stop using the appliance, avoid ignition sources and wet electrical equipment, leave the area for active smoke or gas danger, and contact appropriate emergency or qualified professional help.
Why this path and its safety boundary
Why it matters: There is an immediate fire, shock, or gas-safety risk.
-
PATH 07Next step
What you see
The code or early-stop symptom returns after one exact manual-approved clear step.
Do this next
Remove the dryer from use and provide the model, code, program, load, stopping stage, and prior observations to qualified service.
Why this path and its safety boundary
Why it matters: The underlying fault remains and is outside safe user troubleshooting.
Helpful context
Understand the symptom
A cycle can stop for different reasons
Start by naming the stage rather than assuming every early stop is the same fault. Auto-sensing uses the load's moisture behavior to determine when to finish, so a small, mixed, or already-dry load can end differently from a damp, heavy load. A timed cycle should follow its selected duration unless a door, control, power, thermal, or safety event interrupts it. Cooling and extended-tumble behavior may also look like a pause on models that provide those stages.
Keep checks outside the cabinet
Use the exact Speed Queen model guide because electric and gas dryers, older timer controls, and newer moisture-sensing controls do not share every option. With the drum stopped and the dryer cool, limit yourself to the controls, door, lint filter, visible vent path, plug, cord, and surrounding floor. Do not remove panels, defeat a door switch, probe wiring, or reset a breaker repeatedly to reproduce the stop.
Know when to stop
A cycle that ends with dry clothes after normal sensing is different from a dryer that stops with damp clothes, heat trapped inside, a code, or a protection trip. Smoke, a burning smell, scorched clothing, gas odor, arcing, a hot outlet, moisture near electrical parts, or a breaker trip makes further testing unsafe. Isolate the appliance only from a dry, safe position and arrange qualified help.
Only after diagnosis
Potential parts
- dryer moisture sensor or sensor harness
Consider this only when a qualified diagnosis links an abnormal Auto-Sensing finish to the sensor system after load, filter, and airflow checks.
Confirm the complete model number and the manufacturer's fit information; do not infer a failed sensor from cycle time alone. - dryer door switch or latch
Consider this only if the door closes normally but the model's control repeatedly reports an open door and service testing confirms the interlock fault.
Match the complete model number and have safety-interlock work performed by qualified service; never bypass the switch. - dryer thermal or heating control
Consider this only after qualified diagnosis connects a heat-stage stop or abnormal temperature to a specific component.
Electric and gas models differ; confirm the complete model number and professional diagnosis before ordering.
When checks do not resolve it
Need a professional?
Arrange qualified Speed Queen appliance service when the cycle repeatedly stops, a timed program ends early, a code returns, the dryer overheats or damages clothing, or the visible filter, exhaust, door, load, and settings checks do not resolve the problem. Include the complete model number, cycle and temperature, load type, stopping stage, status or code, and any power or gas observations. Use a qualified electrician for a suspect outlet, circuit, or breaker.
Common questions
FAQ
Can Auto-Sensing make a Speed Queen dryer seem to stop early?
Yes. Auto-Sensing uses load moisture, size, and type to determine cycle progress, so its duration is not the same as a fixed timed cycle. Damp clothes, a code, excessive heat, or a repeated early stop needs separate diagnosis.
Why does my timed cycle stop before the clothes are dry?
Record whether the stop occurs at the door, heating, cooling, or another stage, then check only the cool, visible filter and exhaust path. If it repeats, leave the dryer off and arrange qualified service rather than running another stress test.
Should I use a hotter cycle to finish damp clothes?
Not after an unexplained early stop, overheating, scorched clothing, odor, smoke, or a protection trip. Treat those symptoms as a safety boundary and arrange service.
What can I check without opening a Speed Queen dryer?
Check the model-specific cycle and door status, load, user-accessible lint filter, visible exhaust path, and dry external plug or cord condition. Do not remove panels, bypass the door switch, probe wiring, or change the breaker.
What should I do if a Speed Queen code returns?
Use one exact guide-approved clear step only when the dryer is cool and has no safety warning. If the code or early stop returns, remove the dryer from use and provide the model and code to qualified service.
Read the exact guide
Official sources
- Electrical Safety Advice for Tumble Dryers / Tumble Dryer SafetyElectrical Safety First · Independent electrical and fire-safety guidance for tumble dryers
- Speed Queen | DryerSpeed Queen · Speed Queen consumer dryer types, auto-sensing, status, and support resources
- Tricks your washer or dryer might be playing on you (and how to solve them!)Speed Queen · Speed Queen owner guidance on lint filters, exhaust ducts, and service escalation
- User's GuideSpeed Queen · Speed Queen dryer user guide for cycle, load, filter, door, supply, and troubleshooting behavior
Community feedback
Share a repair observation
Share a plain-text repair observation. Accepted observations are published automatically; this page may take a moment to update.