
On this page
Start here
Quick answer
First confirm that this exact Thermador freezer model actually includes an automatic ice maker and a water connection; not every freezer or configuration does. If it does, check that the ice maker is enabled for the model, the ice bin is fully seated and its level-sensing arm or switch is not blocked, the freezer is at its prescribed temperature, and the visible water supply and model-specific filter are correctly installed. A freezer that was just started or an ice maker that was just turned on may need about 24 hours before making ice and up to 72 hours to reach full production. Do not chip ice with a sharp tool, remove covers, test a gas or electrical part, or dismantle the ice maker. Stop and arrange service for a continuous water leak, water near electrical parts, a damaged assembly, repeated electrical tripping, an unsafe-to-reach connection, or food that is thawing and cannot be kept safely cold.
Before you begin
Safety first
- This article covers model-confirmation and ordinary-access observation only. Do not chip ice with sharp tools, apply heat, bypass bin sensors, open panels, disconnect pressurized water, probe live wiring, or keep using the appliance around a leak, smoke, burning smell, repeated electrical trip, or unsafe food temperature.
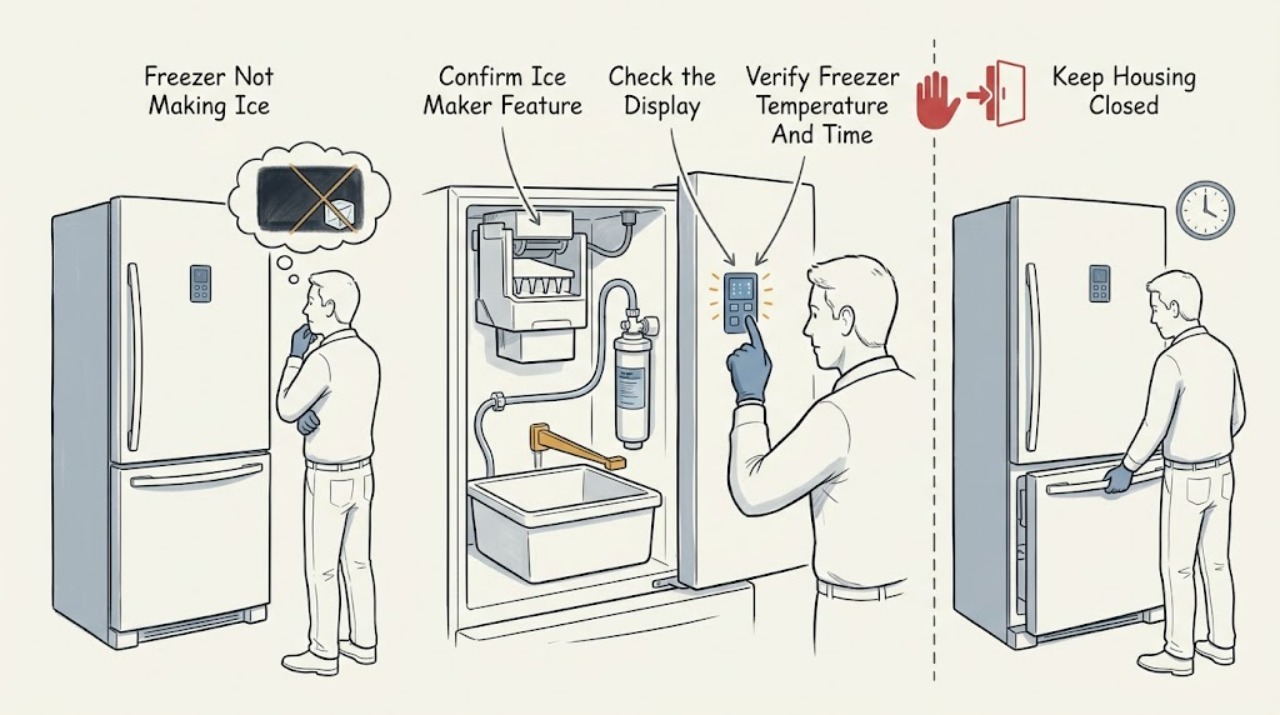
Work through in order
Diagnostic checks
Use only checks that match the exact appliance or system and its official guide.
-
Check 1
Read the freezer model label and the matching Thermador owner manual, then confirm whether this exact configuration has an automatic ice maker, a plumbed water connection, and a user-accessible ice-maker control.
Expected result: Record the model and configuration, and classify it as ice-maker equipped and water-connected, ice-maker equipped but not water-connected, or not documented as having automatic ice production.
Next step: Continue only with the model-specific control, bin, temperature, water, and filter checks when the feature is confirmed; otherwise request model-specific support or use the appliance in its documented configuration.
Stop if: Stop before ordering parts or opening panels when the model identity, ice-maker feature, water connection, or manual cannot be confirmed.
Why this matters
Why: A freezer without the feature cannot be diagnosed as an ice-maker failure. If the feature is present but the connection or control differs from the assumed setup, the manual-specific path takes precedence over generic ice-maker advice.
-
Check 2
With the appliance operating normally, verify the ice-maker control or mode for the exact model, then remove and reseat the ice bin as the owner manual directs; check that the bin is level, no shovel is left inside, and no loose cube is blocking the visible level-sensing arm or bin-detection area.
Expected result: Record whether the ice maker was off, the bin was mis-seated, the rear detection switch was not engaged, or a loose cube was visibly jamming the level-sensing arm; otherwise record that these visible checks were normal.
Next step: Correct only the documented visible condition, use a blunt plastic tool for a safely reachable loose cube if the manual permits it, then reseat the bin and allow the normal production period before reassessing.
Stop if: Do not reach into moving parts, bypass a detection switch, pry the bin, use a sharp tool, remove covers, or continue if the mechanism is damaged or water is leaking.
Why this matters
Why: An off control, mis-seated bin, or false-full sensor condition can stop production without proving that the water valve or ice-maker assembly has failed. A normal control and bin move the diagnosis toward temperature, water delivery, filter, or an internal fault.
-
Check 3
Check the displayed or measured freezer temperature against the exact owner manual and note how long the freezer or ice maker has been running since startup, a long power interruption, or a re-enable; keep the door closed as much as practical while it cools.
Expected result: Record whether the freezer is warmer than its prescribed condition, whether there is a temperature alarm or thawing food, and whether less than about 24 hours has elapsed since restart or re-enabling; allow up to about 72 hours for full production when the manual and Thermador guidance support that wait.
Next step: Follow the manual's temperature procedure and observe after the prescribed wait; move or discard food according to applicable food-safety guidance if it has thawed, and arrange refrigeration service if temperature does not recover.
Stop if: Stop using the freezer for food storage and seek service when it remains warm, food is unsafe, there is a burning smell or smoke, or electrical protection trips.
Why this matters
Why: A warm freezer or an incomplete cool-down can explain an empty bin without an ice-maker component failure. Thawing food changes the priority to food safety, and time alone should not be used to excuse an appliance that cannot hold its prescribed temperature.
-
Check 4
Inspect only the visible water supply path: confirm the accessible shutoff is open, tubing is not visibly kinked, and the model-specific water filter is the correct type and fully seated according to the manual; do not pull out a built-in unit or disconnect a pressurized line.
Expected result: Record an obvious closed valve, kink, leak, filter warning, filter that is overdue or not identified for the model, or a normal visible supply path. Do not infer water pressure from sound alone.
Next step: Follow the exact model's filter procedure or have a qualified person assess pressure and concealed connections; after an approved filter change, discard the first 24 hours of ice as Thermador directs.
Stop if: Stop immediately for a continuous leak, water near electrical parts, a filter that will not move without force, an inaccessible connection, or any need to open a panel or test live parts.
Why this matters
Why: Thermador lists low water pressure and a blocked filter as possible reasons for low ice production. An intact visible path does not rule out low pressure, an inlet-valve fault, or an internal leak, and a filter should not be forced or substituted by guesswork.
-
Check 5
From ordinary safe access, look for a visible ice bridge or blockage at the bin or fill area and check whether ice is clumped, the bin is overfilled, or the chute is obstructed; do not disassemble the ice maker or apply heat.
Expected result: Classify the area as clear, visibly blocked by a loose cube or clump that the manual allows you to remove safely, or blocked/inaccessible with suspected internal buildup or damage.
Next step: Remove only a safely reachable obstruction by the model-approved method, restore the bin, and observe after the normal production period; request service for internal buildup, repeated bridging, or damaged components.
Stop if: Do not chip ice with a knife or other sharp object, pour hot water into the assembly, bypass sensors, or work around exposed wiring, a leak, smoke, or a damaged liner.
Why this matters
Why: A removable visible obstruction can prevent harvesting or make the level sensor read full, but an inaccessible blockage does not identify which internal component has failed. Sharp tools and improvised heat can damage the liner, wiring, water path, or hands.
-
Check 6
After correcting only an identified control, bin, temperature, filter, or visible supply issue and allowing the documented production period, reassess the ice level and record the model, controls, temperature, water/filter observations, and any display state for service.
Expected result: Record whether ice production resumes normally, remains absent despite normal temperature and supply observations, or is accompanied by a leak, unusual noise, repeated electrical trip, smoke, burning smell, or damaged ice-maker parts.
Next step: Arrange qualified Thermador or appliance service and provide the recorded model, configuration, elapsed time, temperature result, bin/control state, filter history, water observations, and photos of any visible condition.
Stop if: Immediately stop use, and if safely accessible stop the water supply, for a continuous leak; keep away from water near electrical parts, smoke, burning smell, exposed wiring, repeated breaker trips, or any other electrical or food-safety hazard.
Why this matters
Why: Normal production after a safe correction supports a configuration, sensor, cool-down, or water-path issue. Persistent no-ice with those checks normal is no longer an ordinary-access diagnosis and may require model-specific service for the ice maker, valve, sensor, or control.
Use your observations
Decision map
Find the observation that best matches what you see, then follow the next safe action.
-
PATH 01Safety boundary
What you see
The exact freezer model is not documented as having an automatic ice maker or a water connection.
Do this next
Confirm the model and intended configuration from the matching owner manual or Thermador support before ordering parts or changing plumbing.
Why this path and its safety boundary
Why it matters: The empty bin may be a configuration expectation rather than a repair fault.
Safety stop: Do not install a generic ice maker, filter, or water line based only on the Thermador brand name.
-
PATH 02Safety boundary
What you see
The ice maker is enabled but the bin is mis-seated, a rear detection switch is not engaged, a shovel is left in the bin, or a loose cube blocks the level-sensing arm.
Do this next
Restore the bin and remove only a safely reachable loose cube using the documented blunt-plastic method, then allow the normal production period.
Why this path and its safety boundary
Why it matters: The appliance may be reading the bin as full or unavailable even though the ice maker itself has not been proven defective.
Safety stop: Do not bypass the sensor, use sharp tools, or continue if the bin, arm, switch, or ice-maker assembly is damaged.
-
PATH 03Safety boundary
What you see
The freezer is warm, or the ice maker was just enabled, restarted, or asked to refill after a large dispense.
Do this next
Follow the exact temperature setting in the owner manual, minimize door opening, wait the documented period, and address thawing food separately.
Why this path and its safety boundary
Why it matters: The freezer may not yet be in its normal ice-making condition; Thermador says production can take about 24 hours to begin and up to 72 hours to reach full production.
Safety stop: Stop relying on the wait period if the freezer cannot hold temperature, food is unsafe, or there is smoke, burning smell, or an electrical trip.
-
PATH 04Safety boundary
What you see
The model has a plumbed ice maker and there is a visible filter issue, supply restriction, or suspected low water pressure.
Do this next
Use the exact model's filter instructions and have a qualified person assess pressure or concealed connections; discard the first 24 hours of ice after an approved filter change.
Why this path and its safety boundary
Why it matters: Thermador identifies low pressure and a blocked filter as possible causes, but an intact visible tube does not prove that pressure and internal valves are normal.
Safety stop: Stop for a continuous leak, water near electrical parts, a pressurized connection that needs disassembly, or a filter that requires force.
-
PATH 05Safety boundary
What you see
Controls, bin, temperature, visible water path, filter, and the production wait period are normal, but no ice is made, or a leak, electrical symptom, or damaged assembly is present.
Do this next
Stop testing and arrange qualified Thermador or appliance service with the recorded model, observations, and photos.
Why this path and its safety boundary
Why it matters: An internal ice-maker, valve, sensor, control, water-path, or refrigeration fault remains possible and cannot be safely identified from ordinary access.
Safety stop: Do not open panels, probe live wiring, bypass switches, chip ice, repeatedly reset a tripping circuit, or continue food storage in a freezer that is not maintaining safe temperature.
Helpful context
Understand the symptom
Confirm that the freezer is an ice-making model
Thermador has built-in, bottom-freezer, freestanding, and undercounter refrigeration configurations, and filter use and filter location vary. Read the model label and the matching owner manual before assuming that a freezer has automatic ice production. If the model has no ice maker or no plumbed water connection, there is no ice-maker fault to troubleshoot; use the manual to confirm the intended configuration. Do not order a generic filter or ice-maker assembly based only on the brand name.
Start with the visible ice-bin and control checks
Once the feature is confirmed, check the model-specific ice-maker control or mode and make sure it has not been turned off. Remove and replace the ice bin only as the manual describes, checking that it is level and fully seated. Thermador notes that built-in models may use a bin-detection switch at the rear wall; an ice shovel left in the bin or a cube jammed at the level-sensing arm can make the appliance think the bin is full. Use only a blunt plastic tool for a safely reachable loose cube. Never pry, drill, knife, or reach into moving or covered mechanisms.
Check temperature, water delivery, and the wait period
Verify the freezer temperature against the matching owner manual rather than guessing an exact setting. A warm freezer may not make ice reliably, and food that is soft, thawing, or above the safe storage limit needs a separate food-safety decision. Inspect the visible water shutoff, tubing, and filter for an obvious closed valve, kink, leak, or incorrect installation without pulling a built-in appliance or opening panels. Thermador identifies low water pressure and a blocked filter as possible causes; pressure problems and concealed water connections are for a qualified person. After the appliance is turned on or the ice maker is enabled, allow roughly 24 hours for production to begin and up to 72 hours for full production before judging it by a single empty bin.
Treat filter changes and ice obstructions as model-specific
If the manual identifies a water filter, use only the model-compatible procedure and filter. Thermador says that filter location and type vary, and its replacement guidance describes aligning the filter correctly rather than forcing it; after a filter change, the first 24 hours of ice should be discarded. If a visible fill opening is blocked by ice, do not chip it with a sharp object, apply heat, or dismantle the ice maker. A persistent blockage, no water after a correct filter installation, or a leak from the fill area requires model-specific service.
Know when the diagnosis has reached service territory
If the ice maker remains inactive after the feature, bin, temperature, water, filter, and waiting-period checks, record the exact model, configuration, control or display state, filter history, visible leaks, and when ice production stopped. Do not bypass a bin switch, probe a valve, remove covers, or test live wiring. A continuous leak, water near an electrical connection, burning smell, repeated breaker trip, damaged or jammed mechanism, unsafe access, or a freezer that cannot keep food safely cold is a stop condition, not a reason to keep resetting or testing the appliance.
When checks do not resolve it
Need a professional?
Safety scope: This article covers model-confirmation and ordinary-access observation only. Do not chip ice with sharp tools, apply heat, bypass bin sensors, open panels, disconnect pressurized water, probe live wiring, or keep using the appliance around a leak, smoke, burning smell, repeated electrical trip, or unsafe food temperature.
Common questions
FAQ
Does every Thermador freezer make ice automatically?
No. Confirm the exact model and configuration in the matching Thermador owner manual first. Some refrigeration configurations differ in ice-maker and water-filter equipment, so do not assume that an empty bin means a failed part or order a generic assembly.
How long should a Thermador ice maker take to start making ice?
Thermador's refrigeration troubleshooting guidance says that after turning on the appliance or ice maker, production may take about 24 hours to begin and up to 72 hours to reach full production. That wait does not replace service when the freezer remains warm, food is thawing, or there is a leak or electrical hazard.
Why does the ice bin look empty even though the ice maker is on?
Check the model-specific control, bin seating, and level-sensing area. A loose cube can jam the sensing arm, a shovel left in the bin can interfere with detection, and some built-in models require the bin to engage a rear detection switch. Correct only a safely visible condition and do not bypass the sensor.
Can a water filter stop a Thermador freezer from making ice?
It can contribute when the filter is blocked, overdue, incorrectly installed, or not the type specified for the model. Follow the exact replacement procedure; do not force a filter or disconnect a pressurized line. Thermador says to discard the first 24 hours of ice after a filter change.
When should I stop troubleshooting and call for service?
Arrange service when the feature and ordinary visible checks are normal but ice production remains absent, or when pressure, an internal water path, a sensor, valve, control, or ice-maker assembly needs testing. Stop immediately for a continuous leak, water near electrical parts, smoke, burning smell, repeated breaker trips, damaged mechanisms, unsafe access, or a freezer that cannot keep food safely cold.
Read the exact guide
Official sources
- How to Replace Your Water FilterThermador · Thermador filter guidance; the exact filter type and access method vary by appliance model.
- Refrigeration Parts and AccessoriesThermador · Thermador's support and parts guidance; it does not establish compatibility without the exact model.
- Refrigeration TroubleshootingThermador · Thermador's general refrigeration troubleshooting page; the exact owner manual controls model-specific controls, filter fit, and configuration.
- Owner Support Resources | Quick LinksThermador · Thermador support navigation; use the exact appliance model to select the applicable manual and service resource.
Community feedback
Share a repair observation
Share a plain-text repair observation. Accepted observations are published automatically; this page may take a moment to update.