
On this page
Start here
Quick answer
When a Thermador ice maker leaks, stop the water supply if water is pooling, then identify whether water is coming from the drain cap or pan, fill path, supply connection, or an overflowed bin. Check only visible connections and the level of the unit, and use the exact owner's manual for access and cleaning. A loose drain cap, misdirected fill water, a blocked drain, an unlevel unit, or a damaged hose can each produce a different leak pattern. Do not open sealed refrigeration or electrical parts; recurring leaks require qualified service.
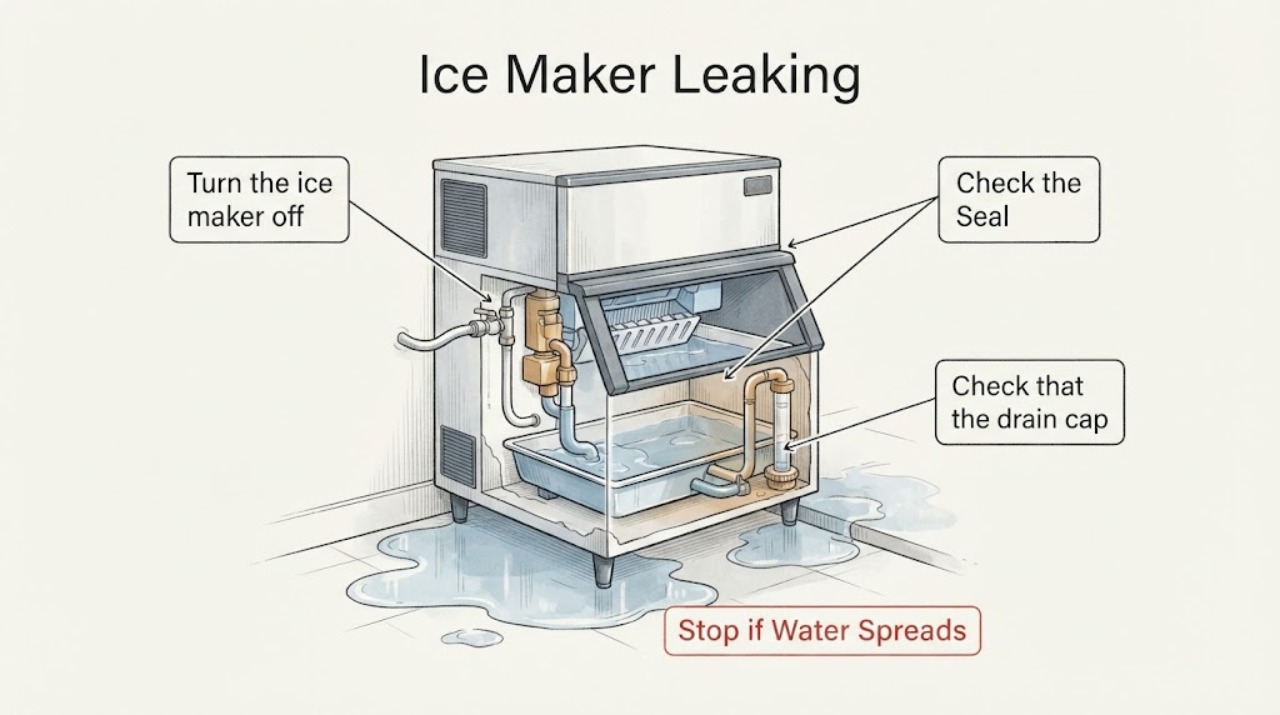
Work through in order
Diagnostic checks
Use only checks that match the exact appliance or system and its official guide.
-
Check 1
Turn the ice maker off and close its accessible water supply if water is actively pooling; isolate power before any cleaning or access step described by the manual.
Expected result: Water stops, continues from stored water, or appears only after a fill cycle.
Next step: Dry the area and observe one controlled fill only if there is no electrical hazard or uncontrolled flow.
Why this matters
Why: A continuing leak can be residual water, a supply-side leak, or a fill-control problem; the timing narrows the path.
-
Check 2
Trace the highest wet point around the bin, water pan, drain cap, drain outlet, and visible tubing without removing sealed panels.
Expected result: The pan or cap is wet, the bin is wet, or a fitting or hose is wet.
Next step: Follow the exact manual for tightening, reseating, or cleaning that accessible connection; do not force plastic fittings.
Why this matters
Why: The first wet point is more useful than the puddle location for distinguishing a drain, fill, or supply leak.
-
Check 3
Check that the drain cap and any removable water-pan component are seated as the owner's manual shows, then inspect the drain opening for accessible ice or scale.
Expected result: The cap is loose or the opening is blocked, or both are clear.
Next step: Clean only with the approved method and reinstall the cap; run a short observation cycle after all water is removed.
Why this matters
Why: A loose cap or restricted drain can let water escape during harvest or cleaning; a clear, correctly seated drain shifts suspicion to the fill side.
-
Check 4
Inspect the visible fill tube, spout, tray or cup alignment, and water-line connections for spray, ice deflection, kink, or looseness.
Expected result: Water misses the tray, freezes at the inlet, or a connection is damp; alternatively the fill path is dry and aligned.
Next step: Correct only an obvious manual-described alignment or hose condition, then retest once; stop if water is uncontrolled.
Why this matters
Why: A misdirected fill stream or loose supply connection can leak before water freezes; a dry path makes an internal valve or control fault more likely.
-
Check 5
Verify the ice maker and its bin or cabinet are level using the installation guidance, and check that the bin is not overfilled or obstructing the mechanism.
Expected result: The unit rocks, the bin is tilted or packed, or the assembly is level and unobstructed.
Next step: Level only at the user-accessible adjustment described by the manual, then discard contaminated ice and monitor a fresh batch.
Why this matters
Why: An unlevel assembly can change where fill water lands and where meltwater drains; an obstructed bin can redirect water into the cabinet.
-
Check 6
Apply the stop boundary after one documented test: check for a recurring leak, cracked tubing, water near wiring, abnormal freezing, or a leak that returns with the supply open.
Expected result: The leak recurs or a safety warning is present, or the ice maker remains dry.
Next step: Keep the water supply off and arrange qualified Thermador service with photos, model number, and leak timing.
Why this matters
Why: A recurring or internal leak requires pressure, valve, drain, and sealed-system diagnosis beyond routine cleaning.
Use your observations
Decision map
Find the observation that best matches what you see, then follow the next safe action.
-
PATH 01Next step
What you see
Water appears at the drain cap or pan immediately after cleaning or harvest.
Do this next
Isolate power, reseat or clean only as the manual directs, and service it if the cap, pan, or drain still leaks.
Why this path and its safety boundary
Why it matters: The drain assembly or its seating is the leading visible suspect.
-
PATH 02Next step
What you see
Water sprays or pools at the fill tube, tray, or cup during a fill.
Do this next
Stop the water supply, inspect accessible alignment and hose condition, and arrange service for a repeated spray or valve fault.
Why this path and its safety boundary
Why it matters: Fill alignment, inlet freezing, or the water valve path is more likely than a floor drain issue.
-
PATH 03Next step
What you see
The bin is wet or overflowing while the pan and supply fittings remain dry.
Do this next
Remove excess ice, verify level and clear visible obstruction, then monitor one batch; service recurrence.
Why this path and its safety boundary
Why it matters: An obstructed or unlevel bin, harvest path, or internal control can be redirecting water.
-
PATH 04Next step
What you see
Water returns from tubing, a sealed compartment, or an area near wiring after visible checks.
Do this next
Leave the water supply off and obtain qualified Thermador service.
Why this path and its safety boundary
Why it matters: The leak is beyond a user-accessible adjustment and may damage the appliance or create an electrical hazard.
Helpful context
Understand the symptom
Move food and protect the floor, then photograph the water before drying it. A leak from the pan or drain area is different from water entering the bin or escaping at a supply fitting; the origin determines the next safe check.
Thermador provides model-specific manuals and parts documentation. Use the model number before removing covers, changing a drain component, or interpreting an indicator; ice makers differ in drain and fill arrangements.
Only after diagnosis
Potential parts
- drain cap or drain assembly
Only if the model manual and leak origin confirm a damaged or missing drain component.
Match the exact model and revision; appearance alone is not compatibility.
When checks do not resolve it
Need a professional?
A technician may test the fill valve, tubing and fittings, drain path, level, harvest controls, and water-pan components. Provide the model, leak origin, whether it follows a fill or harvest, supply status, and photos.
Common questions
FAQ
Why is my Thermador ice maker leaking into the bin?
Observe whether water misses the tray, the bin is tilted or obstructed, or the fill path is frozen or misaligned. Check only visible conditions in the exact manual; persistent bin leakage needs service.
Can a loose drain cap cause an ice-maker leak?
Yes, if the model uses a drain cap or pan, an incorrectly seated component can let water escape. Isolate power and reseat it only as the manual shows; replace it only after model-specific confirmation.
Should I keep using a leaking ice maker?
Turn it off and close the accessible water supply when water is pooling, near wiring, or uncontrolled. Resume only after one safe, documented check shows the leak is gone.
Do I need the model number for a Thermador ice-maker part?
Yes. Thermador's owner resources use the model number for manuals, parts, and service information, and ice-maker drain and fill parts are not universal.
Read the exact guide
Official sources
- Owner Support ResourcesThermador · Use to locate the exact ice-maker manual and compatible components after symptom checks.
- Thermador Ice Maker TroubleshootingThermador · Use for Thermador ice makers at symptom level; access and reset steps remain model-specific.
Community feedback
Share a repair observation
Share a plain-text repair observation. Accepted observations are published automatically; this page may take a moment to update.