
On this page
Start here
Quick answer
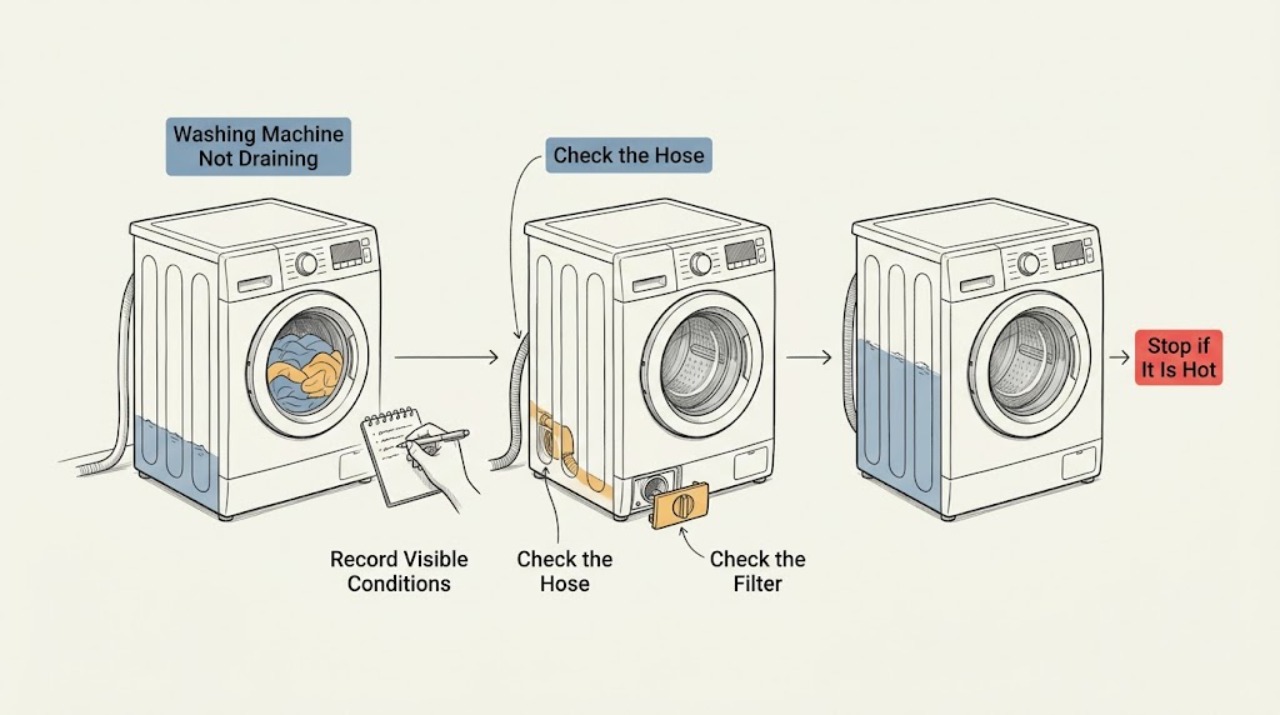
A Toshiba washer that will not drain is usually being held by a restricted drain hose, blocked outlet, pump filter or pump path, an unsuitable cycle state, excess suds, or a water-level or control condition. First record the exact model, cycle stage, display message, and water level. From a dry, stable position, check the visible hose and drain outlet, then use a pump-filter procedure only when the exact manual identifies that filter as user accessible and the machine is cool and safely isolated. Do not open a filter with hot or contaminated water, reach into standing water near electricity, or open the cabinet. If the visible path is clear but water remains or the condition returns, stop using the washer and arrange model-specific service.
Work through in order
Diagnostic checks
Use only checks that match the exact appliance or system and its official guide.
-
Check 1
Record the exact model, front-load or top-load layout, selected cycle, stage where draining stopped, displayed message, and whether the tub or drum still contains water. Look from outside for a door or lid lock indicator and listen only from a safe distance; do not reach into the appliance.
Expected result: Water may remain after wash or rinse, the machine may stop before final spin, a drain or water-level message may appear, or the machine may complete the cycle with a small amount of water still present.
Next step: Use the matching branch below and keep the model and message for service. Do not apply a code explanation from a different Toshiba platform.
Stop if: Stop immediately for active leakage, water near electrical parts, hot water or steam, smoke, burning odor, sparks, or repeated electrical trips.
Why this matters
Why: The stage separates a drain-path problem from a door or lid interlock, a cycle pause, or a water-level and control condition. A full tub is more urgent than a slow final spin with an empty tub.
-
Check 2
With the washer stopped, inspect the visible drain hose along its reachable length and at the outlet for a sharp bend, crushing, kinking, a loose connection, or an outlet that is visibly blocked or overflowing. Do not pull the appliance forward if doing so could strain hoses or the cord.
Expected result: The hose may be pinched behind the washer, the outlet may back up when the washer tries to drain, or the hose may look open while water still does not leave the tub.
Next step: Correct only a plainly visible hose position issue without moving the appliance unsafely, then use one model-documented drain or spin test. If the outlet backs up or the symptom remains, stop and arrange service rather than forcing more cycles.
Stop if: Stop if the outlet overflows, contaminated water is exposed, a hose connection is split, water reaches electrical parts, or safe access would require tilting or disconnecting the machine.
Why this matters
Why: A restricted or incorrectly positioned outlet can create an abnormal or overtime-draining condition without proving that the pump has failed. A clear external path with retained water shifts attention to the filter, pump, water-level sensing, or control system.
-
Check 3
Only when the exact manual names a user-accessible drain-pump filter, the machine is stopped, the water has cooled, and power can be isolated without touching water, follow that manual's filter procedure. Place a suitable container and cloth as the manual directs; open the access gradually and remove only visible lint or small foreign matter, then refit the cap and cover exactly as instructed.
Expected result: Water may flow out through an emergency drain path, the filter may contain lint or a small object, or little water may appear even though the tub is full. A filter cap that will not open normally, a damaged seal, or persistent water after cleaning is a different result.
Next step: If the model-approved filter check restores free drainage, run one suitable empty or small-load drain test. If the filter is clear, water remains, the cap leaks, or the procedure is absent from the exact guide, stop and request service.
Stop if: Do not continue if water is hot, contaminated, under pressure, near electricity, or flowing uncontrollably. Do not use tools to force the cap or remove panels.
Why this matters
Why: A blocked filter can restrict the pump and prevent the washer from clearing its drain interlock. The filter procedure is not interchangeable across models, and a full tub can release hot or contaminated water.
-
Check 4
Check whether the washer is waiting on a door or lid lock, a pause, a delayed or special cycle, or a control message. Close the door or lid normally only after checking that no garment is visibly caught at the opening; do not force the lock, bypass it, or reach into the tub.
Expected result: The lock indicator may change and allow draining, the machine may remain paused, or the same lock or water-level message may return even though the closure appears normal.
Next step: Remove only a plainly visible item while the washer is stopped, then use the exact manual's normal resume control once. If the message returns or the closure is damaged, leave the washer unused and arrange service.
Stop if: Stop for cracked glass or lid parts, a loose hinge or latch, active leakage, heat, or any need to access internal wiring.
Why this matters
Why: The washer may inhibit draining or later spin when it cannot confirm a safe closed condition or a correct water level. A repeated lock or sensing condition is evidence for a lock, wiring, sensor, or control diagnosis rather than a reason to defeat the safety device.
-
Check 5
Review the load and detergent history after the water path is safe: note a tightly packed load, a single heavy item, visible excess suds, or a recent change in detergent. Do not add chemicals to the tub or mix cleaning products. Use only the detergent class and quantity stated by the exact manual, and choose a documented rinse or drain option once the machine is safe to run.
Expected result: The washer may drain normally with a smaller balanced load, may pause while suds are reduced, or may repeat the drain condition regardless of load and detergent.
Next step: If one corrected load completes the documented drain step, keep the load and detergent as the likely trigger. If the tub still will not empty, continue to service rather than repeatedly restarting or adding chemicals.
Stop if: Stop for foam escaping the cabinet, leakage, unusual heat, smoke, burning odor, sparks, severe movement, or repeated electrical trips.
Why this matters
Why: A heavy or imbalanced load can delay the programme and make the user interpret a later spin or drain pause as a failed drain. Excess suds can extend rinsing and interfere with normal level decisions; recurrence with a sensible load points away from a simple load issue.
-
Check 6
If the appliance was recently installed or moved, check from the outside that it stands on a firm, level surface and that no visible hose is trapped. Use the exact installation guide for transport hardware and drain-hose routing; do not tilt a loaded washer or remove unidentified hardware as a diagnostic experiment.
Expected result: The machine may be unstable, the drain hose may be trapped, or transport hardware may still be present on a recently installed front-load model. Alternatively, installation may look correct while the drain fault persists.
Next step: Correct only a clearly identified external installation issue covered by the exact manual, then perform one documented test. If draining remains abnormal, stop and provide the installation history to service.
Stop if: Stop if correction requires lifting, tilting, cabinet removal, contact with a damaged cord, or work inside the appliance.
Why this matters
Why: Poor support or incorrect routing can cause movement, hose restriction, and repeated programme interruptions. Transport hardware and access points are model-specific; they do not explain every no-drain symptom.
Use your observations
Decision map
Find the observation that best matches what you see, then follow the next safe action.
-
PATH 01Next step
What you see
The tub is full and the hose is kinked, crushed, disconnected, or backing up at the outlet.
Do this next
Stop the cycle, keep water away from electricity, correct only the plainly visible external routing issue if safe, and perform one model-documented drain test. A backed-up outlet or persistent retained water needs service or qualified drain help.
-
PATH 02Next step
What you see
The hose and outlet appear open but the washer does not empty.
Do this next
Use the exact model manual to determine whether a user-accessible pump filter exists. If that procedure is absent, unsafe, or does not restore drainage, stop; a pump, internal blockage, pressure system, or control fault needs qualified service.
-
PATH 03Next step
What you see
A lock or sensing message appears, the door or lid does not confirm closure, or the machine stops before drain with no visible hose issue.
Do this next
Close the door or lid normally once and follow the exact manual's resume instruction. Never force or bypass the lock; a repeat condition needs service.
-
PATH 04Next step
What you see
The washer pauses while reducing foam, the load is heavy or single-item, or the selected programme has not reached its drain stage.
Do this next
Use the manual's detergent guidance and one suitable rinse or drain test with a sensible load. Persistent retained water is not a normal suds or load result and should be escalated.
-
PATH 05Next step
What you see
The tub stays full after the safe external checks, a clear filter, and a model-approved single test, or there is a pump hum, grinding, repeated message, leak, or electrical symptom.
Do this next
Stop using the washer and arrange qualified appliance service. The likely investigation may include the pump, internal drain path, water-level system, door or lid lock, wiring, or control, but no part should be selected from the symptom alone.
Helpful context
Understand the symptom
Identify the exact platform first
Toshiba sells front-load, top-load, and washer-dryer platforms, and the drain-filter location, control names, and messages vary by model and region. Record the model from the rating label and note whether water stopped during wash, rinse, or final spin. A front-load machine may retain water behind a locked door; a top-load machine may use a lid lock and different drain access. Treat the manuals below as model-specific examples, not a universal control sequence.
Safety before any water check
Stop the cycle before touching a hose, filter cover, door, or lid. Keep hands away from a moving drum or agitator. Toshiba's front-load guide says to allow water to cool and disconnect power before drain-pump-filter maintenance; do not turn a filter cap while a cycle is running. If water is near a plug, outlet, power strip, or damaged cord, do not handle the plug from the wet area. Stop and obtain qualified help.
Safety boundary
Stop conditions
- Stop immediately for smoke, burning or melting odor, visible sparks, a hot cord or outlet, or a protective device that trips again.
- Do not operate or unplug from a wet position. Keep water away from outlets and electrical parts; arrange qualified help if the machine or cord is wet.
- Stop for hot water or steam, uncontrolled leakage, contaminated water exposure, a damaged hose, cracked door or lid parts, or severe movement.
- Never force or bypass a door or lid lock, reach into a moving tub, remove the cabinet, or work on internal wiring.
Only after diagnosis
Potential parts
- drain pump assembly
Consider only after the exact model's visible drain path and permitted filter check are clear and service diagnosis identifies a pump fault.
Confirm the complete model and manufacturer fit information before ordering or fitting any part. - drain hose or hose seal
Consider only when inspection identifies a split, collapsed, leaking, or model-specific damaged hose or seal.
Hose routing and fit vary by platform; verify the exact model before replacement. - door or lid lock assembly
Consider only when a repeatable lock condition remains with an undamaged closure and correct external operation.
Front-load and top-load systems differ; a qualified technician should confirm the exact model fit. - water-level sensor or control module
Consider only after service diagnosis links the persistent no-drain condition to sensing or control behavior rather than the hose, filter, pump, load, or programme.
Electronic parts require exact model verification and professional installation.
When checks do not resolve it
Need a professional?
Arrange qualified appliance service when the visible drain path is clear but water remains, a model-approved filter check does not restore drainage, a lock or water-level message returns, or the pump, wiring, control, or internal drain path is suspected. Provide the exact model, cycle and stage, display message, water level, hose and filter observations, load and detergent details, and any leak, sound, heat, odor, or electrical event.
Have this ready
- Exact model and serial information, front-load or top-load layout, full display message, selected programme and stage, water level, visible hose and outlet condition, filter result if the manual permits that check, load and detergent details, and any leak, sound, heat, odor, or electrical event.
Common questions
FAQ
Why is my Toshiba washing machine not draining?
Start by noting when the cycle stopped and whether water remains. A kinked or backed-up drain hose, blocked pump filter where the exact model has one, a door or lid or water-level interlock, excess suds, and a pump or control fault are different paths. The model number matters because Toshiba front-load and top-load procedures are not interchangeable.
Can I clean the Toshiba washer drain filter?
Only if the exact model manual identifies a user-accessible pump filter and gives the procedure. The opened front-load guide says to let water cool and disconnect power before filter maintenance. Do not open a filter with hot or contaminated water, near electricity, or when the procedure is not in the exact guide.
Could the door or lid lock prevent draining?
Yes. A washer can hold a cycle when it cannot confirm a safe closed condition or correct water level. Close the door or lid normally once, never force or bypass the lock, and arrange service when the message returns or the closure is damaged.
When should I stop troubleshooting a Toshiba washer drain problem?
Stop when water reaches electrical parts, a hose or connection leaks, water is hot or contaminated, the machine smokes, smells burned, sparks, moves violently, or trips electrical protection. Also stop when a safe external hose and permitted filter check do not restore drainage; internal pump, sensor, wiring, and control work belongs with qualified service.
Read the exact guide
Official sources
- OWNER'S MANUAL AW-M801AS and AW-M901BSToshiba Lifestyle · Use for the listed AW-M801AS and AW-M901BS Singapore models only as a model-specific reference; confirm the reader's model and region.
- 洗濯機・衣類乾燥機 お客様サポートToshiba Lifestyle Japan · Use as an official Toshiba support entry point for locating the exact model manual and repair route; regional content and controls vary.
- TOSHIBA Washing Machine User Manual, TW-BL85A2, 95A4, 105A4, 115A2 SeriesToshiba Lifestyle · Use for the listed TW-BL85A2, TW-BL95A4, TW-BL105A4, and TW-BL115A2 series only as a model-specific reference; confirm the reader's model.
Community feedback
Share a repair observation
Share a plain-text repair observation. Accepted observations are published automatically; this page may take a moment to update.