
On this page
Start here
Quick answer
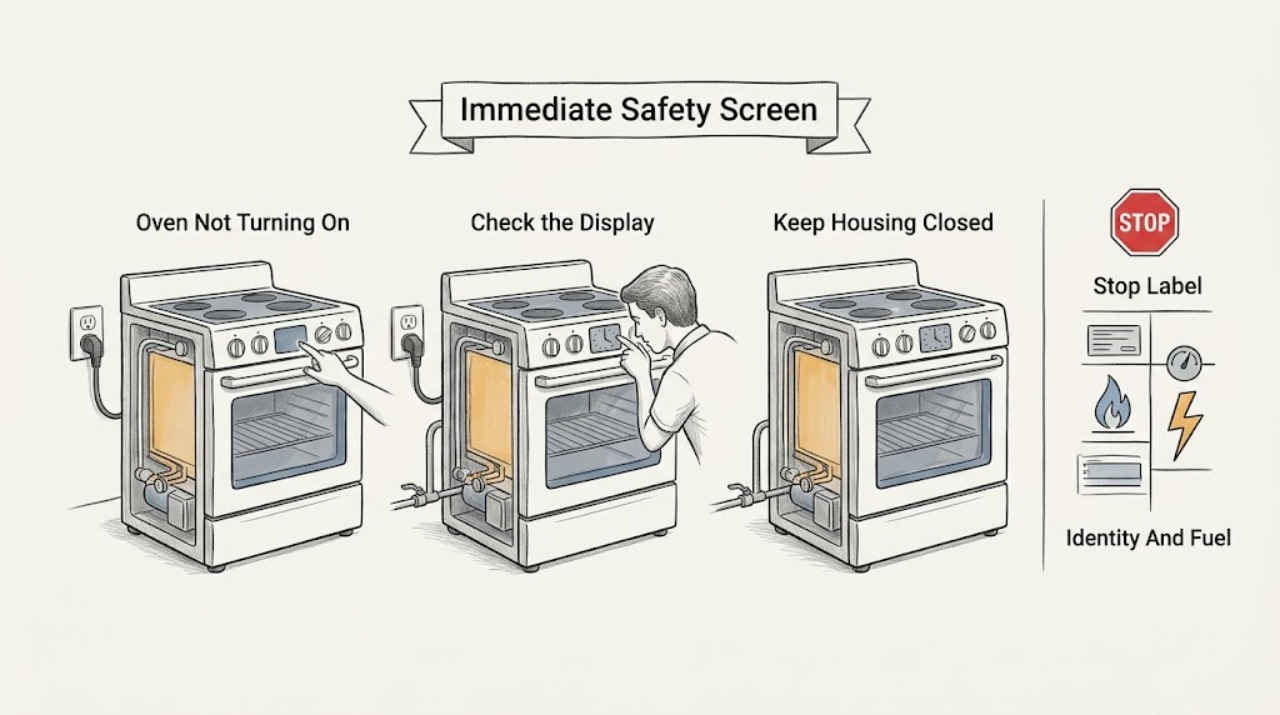
First separate a Viking oven with no display or interior light from one that has power but will not start a cooking mode. From a dry, safe position, check the household supply and visible controls, confirm the exact model and fuel type, and review the model's clock, lock, showroom or demonstration, and start requirements. A gas oven may also need an authorized ignition and gas-supply diagnosis. Do not open panels, bypass a lock, test live wiring, or retry after gas odor, delayed ignition, abnormal flame, carbon-monoxide concern, smoke, arcing, overheating, or a protection trip.
Work through in order
Diagnostic checks
Use only checks that match the exact appliance or system and its official guide.
-
Check 1
Stop using the oven and look from a dry, safe position at the cavity, controls, nearby cabinet, visible cord or isolator, and room; do not touch a hot, wet, or damaged surface.
Expected result: Record gas odor, smoke, flame outside the intended burner area, delayed ignition or a bang, carbon-monoxide concern, arcing, burning odor, melted or discolored controls, a hot receptacle, damaged glass or wiring, or a repeated breaker trip.
Next step: For any hazard, stop operating the oven, avoid switches or flames if gas is suspected, leave the area as appropriate, and arrange qualified emergency, gas, appliance, or electrical help. If no hazard is present, continue with external checks only.
Stop if: Do not reset power, ignite a burner, open a panel, or run another test after a safety symptom.
Why this matters
Why: These signs indicate a gas, fire, shock, or uncontrolled-heating hazard rather than a simple no-start setting.
-
Check 2
Read the complete Viking model number from the rating label when it can be done without opening a hot or locked oven, and identify electric, gas, or dual-fuel configuration from the label or matching documentation.
Expected result: A confirmed model and fuel type selects the applicable manual and separates electrical heating checks from gas ignition checks. An unknown or conflicting identity means the next procedure is not yet safe to assume.
Next step: Retrieve the matching Viking manual and document whether the symptom is a dark display, unresponsive controls, a mode that will not start, no heat, or no gas ignition before doing anything else.
Stop if: Do not borrow a control sequence, wiring claim, ignition procedure, or part fit from another Viking model.
Why this matters
Why: Viking documentation is organized by specific oven and range families; controls, lock behavior, ignition, and service codes vary by model.
-
Check 3
With the oven controls off and the area dry, observe whether the clock or display, indicator lights, and interior light respond; check the household breaker or fuse label from a safe position without removing covers.
Expected result: A completely dark display and light suggests missing supply, an open protection device, a disconnected installation, or a control fault. A live display shifts the diagnosis toward settings, lock, door, mode, or a downstream heating or ignition path.
Next step: If the protection device is tripped and there is no hazard, follow only the household reset guidance once; if it trips again or the supply remains absent, leave the oven off and arrange electrical or appliance service. Otherwise continue with the visible control checks.
Stop if: Do not repeatedly reset a breaker, remove a fuse, touch wiring, or continue when there is smoke, heat, odor, arcing, or a wet electrical area.
Why this matters
Why: A breaker or fuse can interrupt an oven while other kitchen equipment still works, and a working display does not prove the high-power heating circuit is healthy.
-
Check 4
On a powered, cool oven, compare the visible control state with the exact manual: check whether the control lock, Sabbath or special mode, showroom or demonstration state, or an off setting is active, then select a normal cooking mode without forcing controls.
Expected result: A lock indicator, demonstration behavior, disabled controls, or a mode that cancels before Start supports a control-state explanation. Normal control response with no heating or ignition moves the issue downstream.
Next step: Use only the matching manual's documented unlock or mode-exit sequence. If the control remains unresponsive or returns a fault indication, record it and arrange service.
Stop if: Do not bypass a lock, repeatedly press a stuck control, change service settings, or dismantle the control panel.
Why this matters
Why: A Viking control sequence is model-specific; an apparently inactive oven may be waiting for an explicit mode, temperature, timer, or Start command rather than having no power.
-
Check 5
Set the clock, cancel any delayed-start or timer state, choose a standard bake or other documented mode, enter a temperature when the model requires it, and use the exact Start or On control once.
Expected result: If the oven begins its normal sequence after a valid clock, mode, temperature, and Start command, the earlier symptom was a control-state or selection issue. If the display accepts settings but the oven remains silent, unheated, or unlit, note that transition for service.
Next step: Allow the documented normal sequence to begin without opening panels. If it does not, capture the display, indicators, selected mode, and response, then stop and arrange service rather than repeating cycles.
Stop if: Stop for any gas odor, delayed ignition, unusual sound, smoke, burning odor, arcing, overheating, or protection trip.
Why this matters
Why: Some electronic Viking ovens require a complete mode and temperature sequence; a selected mode alone may not energize heating or ignition.
-
Check 6
With the oven cool and power state safe, inspect the closed door alignment and visible seal area; confirm the door closes normally and, for a self-clean or lock-related state, follow only the manual's documented status indication.
Expected result: A door that is not fully closed, a lock indicator, a self-clean state, or a door that remains locked while hot can explain a mode that will not begin. A normally closing door with no lock state shifts the diagnosis to supply, controls, or the heating or ignition path.
Next step: Wait for a hot oven to cool and use only the exact cancel or unlock procedure in the model manual. Arrange service for a latch, switch, seal, hinge, or lock indication that does not clear safely.
Stop if: Do not pry, force, bypass, tape, or remove the door or latch, and do not reach into a hot cavity.
Why this matters
Why: Viking ovens may inhibit operation during a lock or high-temperature state; forcing the latch can damage the safety mechanism and expose hot-cavity hazards.
-
Check 7
Only if the confirmed Viking model is gas or dual fuel and there is no gas odor, observe the documented ignition sequence from outside the cavity; verify only an accessible supply-valve position if the manual explicitly identifies it, without testing for leaks or touching the igniter.
Expected result: No ignition response with normal control power can indicate an interrupted supply, ignition, valve, sensor, or control path. Clicking or sparking without a safe flame, delayed ignition, a large or abnormal flame, or a repeat failure is not a user repair diagnosis.
Next step: Stop the appliance and arrange qualified gas or appliance service for no ignition, delayed ignition, abnormal flame, or a recurring fault. Do not attempt to clean, align, energize, or replace an igniter or burner.
Stop if: For gas odor, delayed ignition, bang, yellow or lifting flame, smoke, carbon-monoxide concern, or any electrical symptom, stop immediately, avoid ignition and switches, leave as appropriate, and obtain qualified help.
Why this matters
Why: Gas-oven ignition and burner behavior are model- and fuel-dependent. A spark or glow does not prove that gas flow or combustion is safe.
-
Check 8
Only if the confirmed model is electric or dual fuel and the controls start normally, observe from outside whether the expected indicator, fan, or heating response begins; do not touch or measure an element, terminal, sensor, relay, or wiring.
Expected result: A powered control with no heat can involve a mode or sensor condition, open element, relay, wiring, or supply fault; one mode working while another does not narrows the report but does not identify a replaceable part.
Next step: Record which modes respond, whether the display changes, and whether a code appears, then arrange qualified appliance or electrical service for internal diagnosis.
Stop if: Do not remove panels, expose terminals, perform live measurements, bypass a sensor or door switch, or continue after smoke, odor, arcing, overheating, or a trip.
Why this matters
Why: High-power oven circuits and components require model-specific testing and can remain energized even when a control is off.
-
Check 9
Write down any exact display code, symbol, flashing sequence, mode, and time it appeared, then use only a single reset or power-cycle procedure explicitly authorized by the matching Viking manual.
Expected result: A code that clears and does not return may have been a transient control state; a recurring code, a blank display after reset, or a code linked to heat, ignition, sensor, or safety protection requires service.
Next step: Leave the oven off for a recurring code or any safety symptom and provide the exact code and model to a qualified technician. Do not erase the evidence with repeated resets.
Stop if: Do not enter service diagnostics, repeatedly cycle power, or operate after a protection trip, smoke, odor, arcing, abnormal flame, or uncontrolled heat.
Why this matters
Why: The code meaning and reset limits are model-specific. A successful reset does not prove that a gas, wiring, control, or overheating fault is safe to operate.
-
Check 10
Prepare the service report with the complete model and serial information, fuel type, display state, selected mode and temperature, door or lock state, supply observation, gas or heating response, exact code, and all safety symptoms.
Expected result: A complete sequence distinguishes no supply, control-state, door-lock, gas-ignition, heating, and internal-fault paths. A missing model or fuel type leaves the diagnosis and part selection conditional.
Next step: Keep the oven out of use until the appropriate qualified professional assesses it, especially after any gas, smoke, arcing, overheating, or protection symptom.
Stop if: Do not attempt internal repair, live testing, forced unlocking, gas-leak testing, or a replacement part based only on the no-start symptom.
Why this matters
Why: The remaining fault may involve the control, relay, sensor, switch, element, igniter, valve, wiring, or installation supply and may require guarded appliance, gas, or electrical work.
Use your observations
Decision map
Find the observation that best matches what you see, then follow the next safe action.
-
PATH 01Safety boundary
What you see
Gas odor, delayed ignition, abnormal flame, carbon-monoxide concern, smoke, burning odor, arcing, damaged wiring, overheating, or a repeated electrical protection trip occurs.
Do this next
Stop operating it, avoid switches or flames if gas is suspected, leave the area as appropriate, and arrange qualified emergency, gas, appliance, or electrical assistance.
Why this path and its safety boundary
Why it matters: The oven presents a gas, fire, shock, or uncontrolled-heating hazard.
Safety stop: Do not reset, ignite, open panels, or re-test the oven.
-
PATH 02Safety boundary
What you see
The clock, display, and visible indicators are all dark and the interior light also does not respond.
Do this next
Check the household protection state once from a safe position; if it is open, absent, or trips again, leave the oven off and arrange electrical or appliance service.
Why this path and its safety boundary
Why it matters: Missing supply, an open protection device, installation fault, or primary control fault is more likely than a single heating element issue.
Safety stop: Do not repeatedly reset protection or access the wiring.
-
PATH 03Safety boundary
What you see
The display is active but the selected cooking mode does not begin or the controls appear locked, delayed, in a special mode, or in demonstration behavior.
Do this next
Use the exact manual's visible control sequence once and record whether the state clears; arrange service for unresponsive controls or a returning fault.
Why this path and its safety boundary
Why it matters: The oven may be waiting for a model-specific clock, unlock, mode, temperature, timer, or Start sequence.
Safety stop: Do not bypass a lock, enter service settings, or repeatedly operate a stuck control.
-
PATH 04Safety boundary
What you see
The door is not fully closed, a lock or self-clean indication is present, or a hot oven remains locked.
Do this next
Allow the oven to cool and follow only the matching manual's cancel or unlock guidance; arrange service if the state persists.
Why this path and its safety boundary
Why it matters: A door, latch, lock, or temperature interlock can be preventing normal operation.
Safety stop: Do not pry, force, bypass, or remove the door or latch.
-
PATH 05Safety boundary
What you see
A confirmed gas or dual-fuel Viking oven has control power but no safe ignition, clicking or sparking without flame, delayed ignition, or abnormal flame.
Do this next
Stop the oven and arrange qualified gas or appliance service; report the exact model and observed sequence.
Why this path and its safety boundary
Why it matters: The gas supply, ignition, valve, burner, sensor, or control path may be involved, and the symptom is not safe to diagnose by repeated ignition.
Safety stop: For any gas odor, bang, abnormal flame, smoke, or carbon-monoxide concern, stop immediately and do not operate switches or attempt another ignition.
-
PATH 06Safety boundary
What you see
A confirmed electric or dual-fuel oven accepts a normal mode and Start command but does not heat, or only one mode fails.
Do this next
Leave internal diagnosis to a qualified appliance or electrical professional and provide the mode, indicators, code, and supply behavior.
Why this path and its safety boundary
Why it matters: An element, relay, sensor, wiring, control, or high-power supply path may be involved; a mode symptom does not identify the part.
Safety stop: Do not expose terminals, measure live circuits, bypass a sensor, or continue after smoke, odor, arcing, overheating, or a trip.
-
PATH 07Safety boundary
What you see
An exact code or flashing state returns after one manual-authorized reset, or the oven remains dark or unresponsive.
Do this next
Keep the oven off and arrange qualified service with the exact code, model, configuration, and event sequence.
Why this path and its safety boundary
Why it matters: The control has detected a persistent or model-specific fault that should not be erased with repeated resets.
Safety stop: Do not enter service diagnostics or operate through a recurring safety-related code.
-
PATH 08Safety boundary
What you see
The model, fuel type, control generation, or applicable manual is unknown.
Do this next
Record the rating-label information and retrieve the exact Viking documentation before proceeding; use qualified service if the oven is unsafe or inaccessible.
Why this path and its safety boundary
Why it matters: A procedure from another Viking family could cause an incorrect ignition, lock, power, or service decision.
Safety stop: Do not guess a button sequence, code meaning, fuel component, or part fit.
-
PATH 09Safety boundary
What you see
The display, mode, and Start sequence work normally after the exact documented clock, lock, or mode correction, with no hazard.
Do this next
Use the oven normally while observing it; stop and arrange service if the no-start condition returns or any unsafe symptom appears.
Why this path and its safety boundary
Why it matters: The symptom was consistent with a control state rather than a confirmed internal failure.
Safety stop: Do not continue operation after gas odor, abnormal flame, smoke, arcing, overheating, or a protection trip.
Helpful context
Understand the symptom
No display is a different failure from no heat
Record what is actually absent: display, clock, interior light, control response, heat, gas ignition, or only one cooking mode. A completely dark oven points first to the appliance supply or control path. A lit display with a mode that will not begin can instead involve a lock, clock, timer, required Start action, showroom or demonstration state, door condition, or a model-specific fault. Do not assume that a dark display proves the heating element or igniter failed.
Viking model and fuel type control the next step
Viking publishes separate manuals and installation documents across electric, gas, and dual-fuel oven and range families. Record the complete model number from the rating label and identify whether the oven is electric, gas, or dual fuel before following any button sequence. A gas ignition instruction does not apply to an electric oven, and an electric element diagnosis does not establish a gas fault.
Use controls only from a cool, safe appliance
Low-risk checks are limited to visible controls and the matching manual. Do not remove a panel, reach behind the oven, test a terminal, defeat a door latch, or repeatedly reset a breaker. An oven can retain heat or gas risk even when the display is dark. If a safety symptom occurred, leave the appliance isolated and give the service professional the model, fuel type, selected mode, and exact sequence of events.
When a service handoff is the correct answer
If the supply and documented control checks are normal but the oven still does not turn on, the remaining possibilities can include a control, relay, sensor, door switch or latch, element, igniter, gas valve, wiring, or installation-supply fault. The correct part depends on the model and observed branch. Stop the home diagnosis rather than turning the oven on and off until an intermittent hazard appears.
Safety boundary
Stop conditions
- Stop immediately for gas odor, delayed ignition, a bang, abnormal flame, carbon-monoxide concern, smoke, burning odor, arcing, damaged wiring, overheating, or a repeated breaker or protection trip.
- Do not operate switches or create a flame when gas is suspected; leave the area as appropriate and obtain qualified emergency or gas assistance.
- Do not open panels, touch terminals, perform live electrical tests, bypass a door or control lock, or remove an igniter, element, valve, sensor, or wiring.
- Do not force a hot or locked door, repeatedly reset the breaker, repeatedly ignite a gas oven, or continue cycles to see whether the symptom returns.
- Do not choose a replacement part or control procedure without the exact Viking model, fuel type, and matching documentation.
Only after diagnosis
Potential parts
- control or timer assembly
Consider this only when the exact model has a persistent display, control, clock, or mode fault after safe documented settings and supply checks.
Control assemblies are model- and revision-specific; confirm the complete Viking model and qualified diagnosis before selecting a component. - door switch or latch assembly
This is relevant only when the exact model's door or lock state prevents a documented start sequence and the door hardware is confirmed faulty.
Latch and switch designs vary by Viking oven family; do not force the door or bypass the interlock while identifying a part. - heating element
Consider this only for a confirmed electric or dual-fuel model with normal controls and supply but a qualified diagnosis of an open or failed element.
Element shape, rating, and connection vary by model; internal access and electrical testing require qualified service. - ignition or gas-control component
This is relevant only for a confirmed gas or dual-fuel model after a qualified diagnosis of an ignition or gas-control fault with no active gas-safety emergency.
Igniter, burner, valve, and sensor fitment is model-specific; do not test for leaks, repeat ignition, or replace a gas part from the symptom alone.
When checks do not resolve it
Need a professional?
Arrange qualified service when the oven remains dark or unresponsive after one safe supply check, a protection device trips again, a door or control lock will not clear, an exact code returns, a gas oven will not ignite safely, an electric oven will not heat, the mode or Start sequence is abnormal, or any gas, smoke, arcing, overheating, carbon-monoxide, or electrical symptom occurs.
Common questions
FAQ
Why is my Viking oven completely dark?
A dark clock, display, and interior light point first to household supply, an open protection device, installation, or a primary control path rather than a single heating element. Check the visible household protection state once from a safe position; a missing supply or repeat trip needs qualified service.
Why does my Viking oven have power but not start?
Check the exact model's clock, delayed-start, control-lock, special-mode, temperature, and Start requirements. If the display accepts a normal selection but the oven does not begin, record the mode and response and arrange service rather than repeating cycles.
Can a locked Viking oven prevent it from turning on?
A lock, self-clean, hot-cavity, door, or latch state can inhibit operation on some Viking models. Let a hot oven cool and use only the matching manual's cancel or unlock procedure. Never pry or bypass the latch.
What if my Viking gas oven clicks but does not light?
Stop repeated ignition attempts. A gas or dual-fuel model may have a supply, igniter, valve, burner, sensor, or control issue, and clicking without a safe flame or delayed ignition needs qualified gas or appliance service. Any gas odor, bang, abnormal flame, or carbon-monoxide concern is an immediate stop-use condition.
When should I stop troubleshooting a Viking oven?
Stop for gas odor, delayed ignition, abnormal flame, smoke, burning odor, arcing, overheating, damaged wiring, carbon-monoxide concern, or a repeated breaker or protection trip. Do not open panels or perform live tests; arrange appropriate qualified help.
Read the exact guide
Official sources
- Viking Range, LLC | Support and Docs | DocumentationViking Range, LLC · Viking ovens and ranges; select the exact model and fuel configuration
- Viking Range, LLC | Owners | Support FAQs for OwnersViking Range, LLC · Viking ovens and ranges; model manual controls operating details
- Viking Range, LLC | Support and Docs | Support CenterViking Range, LLC · Viking appliances; use the exact product documentation and qualified service path
Community feedback
Share a repair observation
Share a plain-text repair observation. Accepted observations are published automatically; this page may take a moment to update.