
On this page
Start here
Quick answer
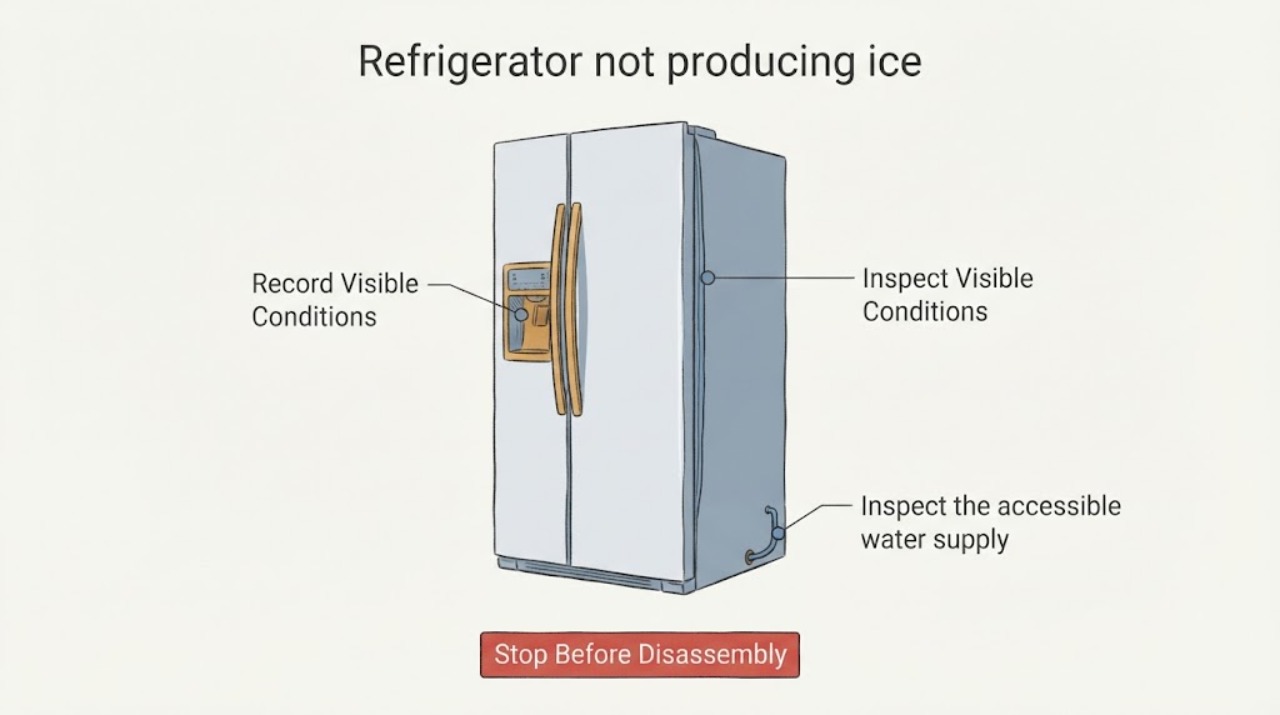
For the Viking RVRF3361SS6, first distinguish a new or slow ice maker from one producing no ice. The opened Viking RVRF3361 family manual says ice production can begin within 24 hours after proper installation and identifies the ice-maker arm, water supply and shutoff, kinked line, filter seating or blockage, and freezer setting as checks. With hands away from moving parts, confirm the arm is down in the ON position, the water valve is open, the line is not kinked or leaking, and the filter is seated. If the bin contains a stuck bridge of ice, turn the ice maker off and use warm water rather than a sharp tool. Do not remove covers or test internal wiring. If there is still no ice after the external checks and the model's stabilization time, arrange Viking service and verify any parts listing against the full model rather than relying on a look-alike or a forum cross-reference.
Work through in order
Diagnostic checks
Use only checks that match the exact appliance or system and its official guide.
-
Check 1
Record whether the bin has produced no ice at all, only a small amount, or ice that is frozen together. If the refrigerator or ice maker was newly installed or reconnected, note how long it has been operating.
Expected result: No ice has been produced, some ice is being harvested slowly, or the unit has had less than 24 hours to start after installation.
Next step: If the installation wait has not elapsed, keep the refrigerator operating as directed and continue only with visible setup checks. If there is still no ice after that period, check the arm and water path.
Why this matters
Why: The Viking guide separates no production from low production and says a properly installed ice maker can take up to 24 hours to begin and about three days to fill the bin. A short wait after installation is not evidence of a failed part.
-
Check 2
Pull out the freezer drawer only as needed to look at the ice-maker wire signal arm. Confirm that it is lowered for ON, that no package or ice is holding it in the wrong position, and keep hands away from moving ice-maker parts.
Expected result: The arm is raised, obstructed, or the arm is down with no visible obstruction.
Next step: Remove only a loose package or visible loose ice that can be handled safely, lower the arm, and allow the documented production time. Do not disassemble the ice maker or reach into the ejector mechanism.
Why this matters
Why: Viking states that raising the arm turns the ice maker OFF and lowering it turns it ON. A package or frozen cubes can also hold the arm and change the operating state; the arm position does not diagnose a motor or control failure.
-
Check 3
Inspect the accessible water supply connection, shutoff valve, and visible tubing behind or beside the refrigerator. Confirm the household valve is open, the line is not kinked where the refrigerator was pushed back, and there is no visible leak.
Expected result: The valve is closed, the line is kinked, a connection leaks, or the supply path appears open and intact.
Next step: If safe, open the household shutoff or reposition only an accessible slack loop without stressing the fitting. For a leak, shut off the water supply and arrange service; do not pull the refrigerator farther out or loosen plumbing fittings as a diagnostic experiment.
Why this matters
Why: Viking lists no water connection, a closed valve, and a kinked line as causes of no ice. A leak or damaged connection is a water-safety problem and does not prove the ice-maker assembly itself is defective.
-
Check 4
Check the water filter is fully seated in its housing and inspect the dispenser's accessible water flow if the refrigerator has that function. Do not force the filter or use a filter listing that is not confirmed for the full model.
Expected result: The filter was loose or not locked, water flow is slow or absent, or the filter is seated and flow is normal.
Next step: Re-seat the filter according to the model guide and use only a confirmed filter specification. If flow remains poor, stop before internal water-valve work and request service or water-system assessment.
Why this matters
Why: The Viking troubleshooting table identifies an incorrectly seated or clogged filter as a possible cause and says slow or absent dispensing can indicate a filter issue. This observation does not identify a failed inlet valve or ice-maker assembly.
-
Check 5
Check the freezer control against the Viking guide's documented setting and allow time for the compartment to stabilize. If ice is stuck together in the bin, turn the ice maker off, remove the bin if it can be removed normally, and loosen stuck ice with warm water; never use an ice pick or sharp tool.
Expected result: The freezer is warmer than its documented setting, the bin contains a frozen bridge, or the freezer setting and bin are normal.
Next step: Correct only the documented control setting, dry and replace a cleaned bin, and allow the guide's stabilization period. If there is still no harvest, stop user diagnosis and arrange model-specific service.
Why this matters
Why: Viking identifies freezer temperature and frozen-together cubes as conditions that can affect ice availability. A normal setting and clear bin do not prove the ice-maker motor, valve, or control is good or bad.
Use your observations
Decision map
Find the observation that best matches what you see, then follow the next safe action.
-
PATH 01Next step
What you see
The signal arm is raised or blocked, and the water supply is otherwise connected without a visible leak.
Do this next
Clear only loose visible obstruction, lower the arm, and allow the documented start and fill time before reassessing.
Why this path and its safety boundary
Why it matters: The ice maker may be off or unable to sense its normal operating position; this is an operating-state issue, not proof of a failed ice-maker part.
-
PATH 02Next step
What you see
The water valve is closed, the visible line is kinked, or a connection is leaking.
Do this next
Close the household water supply if needed, correct only an obvious accessible valve or line position, and arrange qualified service for a leak or damaged fitting.
Why this path and its safety boundary
Why it matters: The ice maker may not be receiving usable water, and the leak requires water-safety attention before production testing.
-
PATH 03Next step
What you see
The filter was not seated or water flow is slow, but there is no visible leak.
Do this next
Re-seat or replace the filter only when the full model documentation confirms the filter, then allow the system to stabilize. Escalate persistent low flow instead of opening the rear panel.
Why this path and its safety boundary
Why it matters: The filter path may be restricting water; the result does not identify a valve, tubing, or ice-maker assembly failure.
-
PATH 04Next step
What you see
The arm is ON, water path and filter checks are normal, the freezer has stabilized, and no ice is produced after the documented wait.
Do this next
Keep hands and tools out of the ice maker, do not install a forum-suggested cross-brand part, and request Viking or qualified refrigerator service with the complete RVRF3361SS6 model information.
Why this path and its safety boundary
Why it matters: The external causes covered by the Viking guide have not resolved the symptom, but the result still does not prove which internal component failed.
Helpful context
Understand the symptom
How the official model scope fits the assigned model
Viking's official documentation index lists the discontinued RVRF3361 French-door bottom-freezer family and links its English Use and Care Manual. That manual is the opened technical source used here. The assigned suffix is RVRF3361SS6, so use the full model and serial information when ordering a part or requesting service; the family manual does not by itself prove that a particular aftermarket or cross-brand ice-maker assembly fits every suffix.
No ice and slow ice are different observations
The Viking guide says a properly installed ice maker can begin producing within 24 hours and can take about three days to fill the bin. It also gives a typical production amount that depends on usage conditions. If there is no harvest at all, use the arm, water, filter, and line checks below; if the maker produces some ice but slowly, check freezer setting and water flow before calling the symptom a failed ice-maker assembly.
User checks stop at the signal arm, accessible ice bin, visible water line and shutoff, filter seating, visible leaks, and the documented freezer controls. Do not reach into moving ejector parts, remove covers, bridge electrical contacts, force a frozen mechanism, or substitute a look-alike ice-maker part. If water leaks, the refrigerator has electrical damage, or no ice returns after the documented checks and waiting time, keep the appliance safe and arrange qualified Viking service.
When checks do not resolve it
Need a professional?
Stop and arrange service for a water leak, damaged tubing or cord, repeated electrical tripping, exposed wiring, a mechanism that cannot be cleared without force, or no ice after the documented external checks and stabilization time. Do not remove covers, bridge contacts, reach into moving parts, or use a sharp tool to break ice.
Have this ready
- Provide the full model RVRF3361SS6, serial information, whether the symptom is no ice or low production, the arm position, filter age and seating, water-flow observation, freezer setting, and any visible leak or frozen bin condition.
Common questions
FAQ
How long should the Viking RVRF3361SS6 take to start making ice?
The opened RVRF3361 family guide says a properly installed ice maker can produce ice within 24 hours and can take about three days to fill the bin. A newly installed unit that has not reached that period should not be diagnosed as a failed part from the delay alone.
Which visible checks can cause no ice?
Viking lists an ice maker that is off, a missing or closed water supply, a kinked supply line, an incorrectly seated or clogged filter, and a restricted supply valve. Check those accessible conditions without opening the refrigerator's panels.
Can I use the part number mentioned in the exact Reddit parts post?
Treat it as a lead only. The opened post identifies RVRF3361SS6 but is community information and also discusses a look-alike from another brand. Confirm any replacement against Viking documentation, the full model and serial number, and qualified service before ordering or fitting it.
How do I clear ice stuck together in the bin?
Turn the ice maker off, remove the bin only if it comes out normally, and use warm water to loosen stuck ice. Viking warns against using an ice pick or similar sharp instrument, and the bin should be completely dry before it is replaced.
Read the exact guide
Official sources
- RVRF3361 Use / Install GuideViking Range, LLC · Official Viking manual linked from the Viking RVRF3361 documentation index. Used for family-level ice-maker checks; the assigned SS6 suffix and any part fitment must still be confirmed with the full model and serial information.
- Parts lookupReddit / r/appliancerepair · Exact opened community post used only to corroborate the assigned RVRF3361SS6 identity and document an unverified parts discussion. It is not treated as authoritative evidence of Viking compatibility or repair outcome.
- Viking Range, LLC | Support and Docs | DocumentationViking Range, LLC · Opened official Viking documentation index used to confirm the RVRF3361 French-door bottom-freezer family and its English Use and Care Manual link; it does not establish a replacement part for the RVRF3361SS6 suffix.
Community feedback
Share a repair observation
Share a plain-text repair observation. Accepted observations are published automatically; this page may take a moment to update.