
On this page
Start here
Quick answer
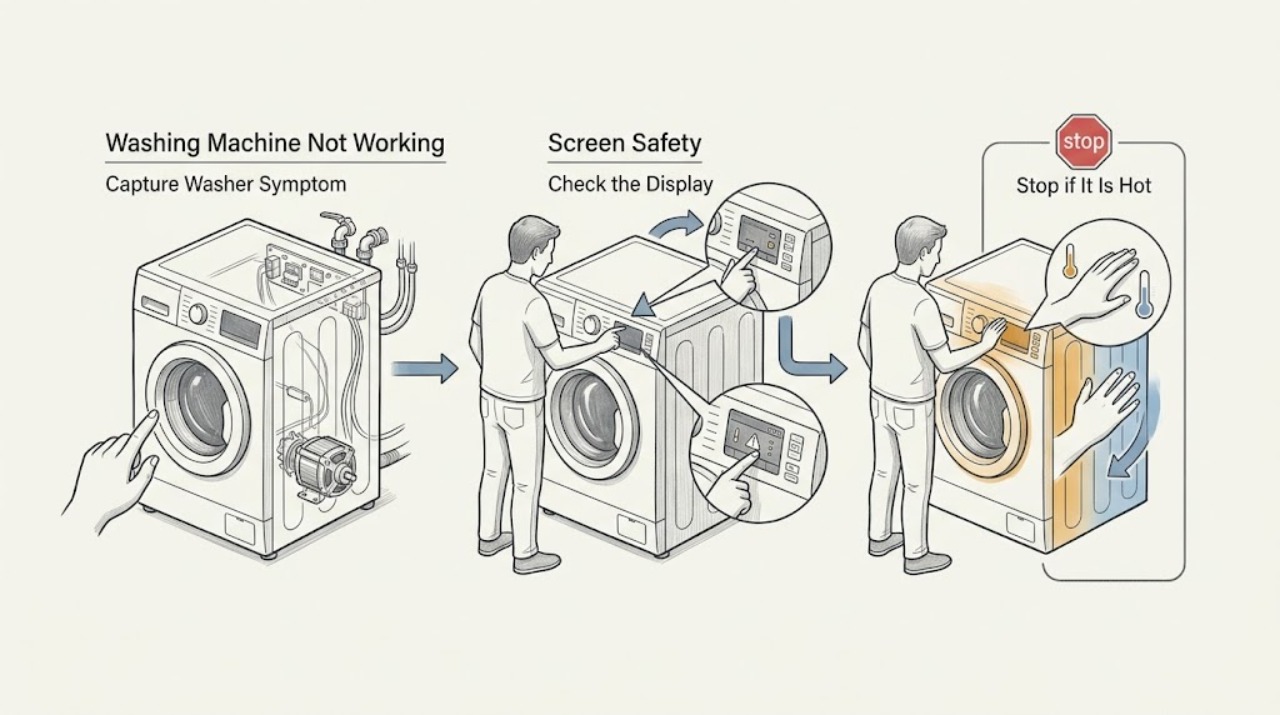
“Not working” is not one washer fault. First record whether the machine is completely without power, has a display but will not start, fills but stops, retains water, will not spin, leaks, or shows an error. With no hazard signs, check the exact manual for the door or lid lock, selected cycle, delay or control lock, accessible power, water faucets and hoses, drain path, and one documented reset. Do not tilt the washer, force a door or lid, open the cabinet, or work around wet electrical parts. Stop immediately for a leak near electrical equipment, uncontrolled filling, violent movement, smoke, burning odor, sparking, a hot connection, or a repeated circuit trip, then arrange qualified appliance, electrical, or plumbing service.
Work through in order
Diagnostic checks
Use only checks that match the exact appliance or system and its official guide.
-
Check 1
Record the exact model if available, front-load or top-load layout, display state, selected cycle, and the point at which operation fails: no power, no start, no fill, no wash movement, no drain, no spin, leak, or error display.
Expected result: The display is blank, the display works but Start is ignored, the cycle stops at a particular stage, the lid or door remains locked, or a complete error is shown.
Next step: Use the matching model manual and follow the corresponding branch. Preserve the exact code and timing rather than guessing a part.
Stop if: Stop before another cycle if smoke, burning odor, sparking, leaking near electrical equipment, violent movement, or repeated tripping occurred.
Why this matters
Why: The symptom stage determines whether the next path concerns power, controls, lock interlock, water entry, drainage, drive, balance, or a model-specific code.
-
Check 2
From a dry safe position, inspect for standing water, a damaged cord or plug, a hot outlet or connection, smoke, burning odor, sparks, a drum that moves violently, or water entering without a command.
Expected result: A safety warning is present, or the washer is dry and quiet with no unusual heat, odor, movement, or uncontrolled water.
Next step: For a warning, stop use and keep clear. Isolate water or power only from a safe dry position when possible, then arrange qualified appliance, electrical, plumbing, or emergency service as appropriate. If no warning exists, continue to the control and lock check.
Stop if: Do not reset a repeatedly tripping circuit, reach into a moving drum, touch wet electrical equipment, or continue a cycle with uncontrolled filling.
Why this matters
Why: Electrical, flood, fire, and mechanical hazards override normal troubleshooting. A normal display does not make wet equipment safe.
-
Check 3
With no hazard sign, confirm the intended cycle, Start or Pause action, delay setting, Control Lock, and door or lid closure. Inspect only the visible seal or latch area for clothing or debris, and do not force the lock.
Expected result: The cycle was not selected, a delay or control lock is active, the door or lid is not latched, an item obstructs the seal, or controls and lock appear normal.
Next step: Apply only the exact manual's documented cycle, lock, or door action and make one start attempt. If the lock will not engage or remains locked with water inside, move to the drain branch and arrange service if it persists.
Stop if: Do not pry the door, bypass the lid or door interlock, or insert tools into the latch.
Why this matters
Why: A control or interlock state can prevent a start without proving a motor or control-board fault. Whirlpool notes that a closed and latched door is required and that a drain fault can keep a front-load door locked.
-
Check 4
Without opening the washer, inspect the accessible cord and plug for visible damage and check whether the labeled breaker or fuse is in its normal position from a dry safe location. Note whether the display is blank or merely reset after an outage.
Expected result: The display is blank, a power interruption is recorded, the breaker or fuse is abnormal, the cord or outlet is damaged or hot, or accessible power appears normal.
Next step: If no hazard exists, follow the model manual for one safe breaker or fuse check. Use qualified electrical service for damage, uncertain supply, or a repeat trip.
Stop if: Do not use an adapter or extension cord, open the console, probe terminals, or perform energized electrical checks.
Why this matters
Why: A supply interruption can make the washer appear dead or leave a cycle incomplete, while a normal display does not prove the motor, valve, pump, or control circuit is healthy.
-
Check 5
If the washer does not fill or stops early, compare the exact manual with the accessible water supply: required faucets open, inlet hoses not kinked, hoses connected to the intended ports, and inlet screens checked or cleaned only when the manual permits and the water is isolated.
Expected result: A faucet is closed, a hose is kinked or reversed, supply pressure is weak, an inlet screen is visibly restricted, the lid or door is open, or filling appears normal.
Next step: Correct only an accessible, dry faucet or hose condition supported by the manual, then make one comparison start. Call appliance or plumbing service for persistent low flow, a damaged hose, or a leak.
Stop if: Do not disconnect a pressurized hose, handle hot water, open an internal valve, or continue if a connection leaks.
Why this matters
Why: Restricted or missing water can prevent the cycle from starting or completing. Whirlpool notes that hose and supply requirements vary by washer and that both incoming sources may be required on some models; do not generalize that requirement to every machine.
-
Check 6
If the washer stops with water, will not spin, or leaves clothes soaked, observe whether the drain hose is visibly kinked or backed up and whether the load is severely unbalanced. Check only a pump filter that the exact manual identifies as user-accessible, with the washer cool and isolated from power.
Expected result: Water remains, the drain backs up, a drain code appears, the load is bunched or overloaded, the machine is walking, or water drains and the load is balanced.
Next step: Correct a visible hose or load condition only as the manual allows and make one comparison cycle. Arrange appliance or plumbing service for persistent poor drainage, repeated balance failure, or a pump filter that is not user-accessible.
Stop if: Do not open a hot or pressurized filter, reach into standing water near electrical parts, tilt the washer, or keep running it during violent movement or metal contact.
Why this matters
Why: A drain problem can prevent a spin and can keep a front-load door locked; an unbalanced or oversized load can trigger a correction pause or stop. A pump, suspension, motor, or control fault requires service diagnosis.
-
Check 7
If a complete error code or flashing pattern is shown, record every character, the model, and the cycle stage. Apply a reset only when the matching manual or official model page documents it and no leak, heat, odor, smoke, spark, or electrical warning exists.
Expected result: The code matches the exact manual, only a broad code family is available, the display clears after one supported reset, or the code returns.
Next step: If the code returns or the model-specific instruction is unavailable, keep the washer off and give the complete code and observations to qualified service. Do not repeat resets.
Stop if: Do not guess a code meaning, use another model's diagnostic sequence, or operate through a returning fault.
Why this matters
Why: A code is a routing clue, not proof of a part. Whirlpool warns that its code lists may not include every model; a reset cannot repair a failed lock, valve, pump, motor, sensor, or control.
-
Check 8
For a continuing failure, prepare the model and serial information, load type, cycle stage, display or code, door or lid state, power and water observations, drain behavior, balance or movement, leak location, and the exact safe steps already tried.
Expected result: The washer is still dead, repeatedly fails at one stage, affects only one cycle, has a recurring code, leaks, or cannot be safely reproduced.
Next step: Arrange qualified appliance service; use electrical or plumbing service when the evidence points outside the washer. Keep the machine out of service until the cause is corrected and safe operation is confirmed.
Stop if: Do not replace a valve, pump, lock, motor, board, fuse, or suspension part from the symptom alone.
Why this matters
Why: A detailed handoff helps service separate power, lock, inlet, drain, drive, suspension, sensor, or control faults without asking the user to open or tilt the washer.
Use your observations
Decision map
Find the observation that best matches what you see, then follow the next safe action.
-
PATH 01Next step
What you see
There is smoke, a burning odor, sparking, a hot cord or connection, water near electrical equipment, uncontrolled filling, violent movement, or a repeated circuit trip.
Do this next
Stop use and keep clear. Isolate water or power only from a safe dry position when possible, then use qualified appliance, electrical, plumbing, or emergency service as appropriate. Do not reset and retest.
-
PATH 02Next step
What you see
The display and controls are completely blank, or a power interruption is recorded.
Do this next
Check only the accessible cord, outlet, breaker, or fuse condition allowed by the exact manual from a dry safe position. Use qualified electrical service for damage, uncertain supply, or a repeat trip.
-
PATH 03Next step
What you see
The display works but Start is ignored, a delay or control lock is active, or the door or lid will not latch.
Do this next
Use the matching manual's documented cycle, lock, and door or lid action once. Do not force or bypass the interlock; arrange service if it persists.
-
PATH 04Next step
What you see
The washer does not fill, fills slowly, stops at the fill stage, or shows a fill-related code.
Do this next
Check accessible faucets, hoses, kinks, connections, and manual-permitted inlet screens. Use appliance or plumbing service for persistent low flow, damaged hoses, or leaks.
-
PATH 05Next step
What you see
Water remains, the washer will not spin, a drain code appears, or a front-load door stays locked with water inside.
Do this next
Check only the visible drain-hose path, load balance, and user-accessible filter named by the manual. Stop for standing water near electrical parts and arrange appliance or plumbing service if drainage does not recover.
-
PATH 06Next step
What you see
The washer walks, bangs, pauses during balance correction, will not spin after a balanced load, or makes metal contact.
Do this next
Stop for violent movement or metal contact. Otherwise apply only the manual's load and leveling guidance once; arrange service for repeat movement or internal drive, suspension, or bearing symptoms.
-
PATH 07Next step
What you see
A complete code or flashing pattern appears, returns after one model-supported reset, or has no matching model documentation.
Do this next
Keep the exact code and model with the washer off and arrange qualified service. Do not apply another model's code definition or diagnostic routine.
-
PATH 08Next step
What you see
The washer remains nonfunctional after the exact manual's low-risk checks, or the symptom cannot be identified safely.
Do this next
Provide the service technician with the stage, model, code, water and drain behavior, lock state, movement, and safe history. Keep the machine out of service until qualified diagnosis confirms safe operation.
Helpful context
Understand the symptom
Classify the failure before touching anything
A blank display, a lit display that ignores Start, a washer that fills but will not agitate or tumble, a tub full of water, a locked door, and a leak are different observations. Write down the exact stage and any code before changing settings. A similar-looking washer from another brand can use different locks, reset behavior, hose requirements, and error meanings.
Low-water designs can look unusual
Some high-efficiency washers sense the load and use less visible water, or pause during load detection and balance correction. A low water level or short pause alone does not prove that the washer has failed. The manual for the exact model controls whether a behavior is normal and what a safe recovery step is.
Keep internal electrical and mechanical work professional
Power, valves, pumps, door or lid locks, motors, suspension, sensors, and controls can create similar symptoms. Do not bypass a lock, reach into a moving drum, remove the cabinet, disconnect a pressurized hose, or perform energized electrical checks. A qualified technician can test the correct circuit and part safely.
Only after diagnosis
Potential parts
- washer door or lid lock assembly
Consider only after qualified diagnosis confirms an interlock fault when the exact model will not latch or release after safe door, lid, drain, and control checks.
Front-load and top-load mechanisms differ; confirm the exact model, latch style, and safety interlock before any replacement. - water inlet valve
Consider only after qualified diagnosis confirms persistent fill failure after the accessible supply, hose, and manual-permitted screen checks.
Port count, temperature arrangement, connector, and flow design vary by model; do not infer fit from a slow fill alone. - drain pump or pump filter assembly
Consider only after qualified diagnosis confirms poor drainage beyond a visible hose, load, or manual-approved filter check.
Pump access and filter design vary. Match the exact model and keep standing-water and electrical hazards out of user-level work. - washer drive or suspension component
Consider only when qualified diagnosis links a persistent no-spin, violent movement, or mechanical sound to a specific drive or suspension component.
Do not tilt or open the washer to identify a part; exact model and mechanical diagnosis are required.
When checks do not resolve it
Need a professional?
Arrange qualified appliance service when the washer stays dead, will not start after safe control and power checks, cannot fill or drain, will not spin, has a persistent lock or error, leaks, or moves violently. Use plumbing service for household supply or drain-back problems and qualified electrical or emergency service for smoke, sparking, burning odor, damaged power equipment, or repeated trips.
Have this ready
- Provide the exact model and serial information, front-load or top-load layout, cycle and stage, complete display or code, door or lid state, power and water observations, hoses, drain behavior, load balance, leak location, sounds, movement, and safe steps already attempted.
Common questions
FAQ
Why is my washing machine completely dead?
Start with the display, cord, outlet, breaker or fuse, and any recorded power interruption, using only dry accessible checks allowed by the exact manual. If power is uncertain, equipment is damaged, or the circuit trips again, stop and use qualified electrical service.
Why does the washer have power but not start?
Check the selected cycle, Start action, delay or control lock, and whether the door or lid is fully latched. Do not bypass the interlock. A persistent no-start can involve the lock, control, water, or drain system and needs qualified diagnosis.
Why does the washer fill but then stop?
Record whether it stops during wash movement, drain, or spin. Check only manual-supported water, drain-hose, load-balance, and error-code branches. A pump, motor, suspension, sensor, or control issue may need service.
Can I open a locked washer door?
Do not pry or bypass it. A front-load lock can remain engaged when water has not drained. Follow the exact manual's safe drain or cancel instruction only, and arrange service if water remains or the lock will not release.
Should I reset the washer repeatedly?
No. Record the complete code and model, then use one reset only when the exact manual documents it and no hazard exists. If the code or failure returns, keep the washer off and arrange qualified service.
Read the exact guide
Official sources
- Not Starting or Not Operating - Product HelpWhirlpool Corporation · Official Whirlpool front-load guidance used for general decision categories only; exact washer model and manufacturer manual control.
- Error Codes in Top Load HE Washers - Product HelpWhirlpool Corporation · Official Whirlpool top-load examples only; the page explicitly says codes may not cover every model and the exact owner manual is required.
- Checking the Fill Hoses if the Washer is not Filling - Product HelpWhirlpool Corporation · Official Whirlpool guidance used to illustrate safe accessible fill checks; hose requirements and screen access vary by washer.
- Home MaintenanceU.S. Environmental Protection Agency WaterSense · General household guidance; it does not diagnose a washer or authorize appliance repair.
- Latching a Front Load Washer Door - Product HelpWhirlpool Corporation · Official Whirlpool front-load guidance used for general lock and drain decision logic; exact washer model controls.
Community feedback
Share a repair observation
Share a plain-text repair observation. Accepted observations are published automatically; this page may take a moment to update.