
On this page
Start here
Quick answer
First separate a Westinghouse oven with no display or light from one that has power but will not start. For a dark oven, check the appliance isolator or breaker and the model's power connection only from a dry, safe position; do not repeatedly reset a circuit that trips again. For a lit oven, return the function and temperature controls to a valid setting, check that the clock or timer is in the required manual mode, and clear Child Lock or Demo Mode only as the exact manual describes. Gas models add a supply and ignition boundary: do not keep trying to light an oven that smells of gas, clicks without ignition, has delayed ignition, an abnormal flame, smoke, or carbon-monoxide concern. Do not open the oven or control panel. A recurring no-start, code, power loss, or safety symptom needs qualified service.
Before you begin
Safety first
- Keep the oven off for any combustion or electrical stop condition. Do not bypass safety controls, repeatedly reset a circuit, operate a gas control after an odor, or perform internal electrical or gas work.
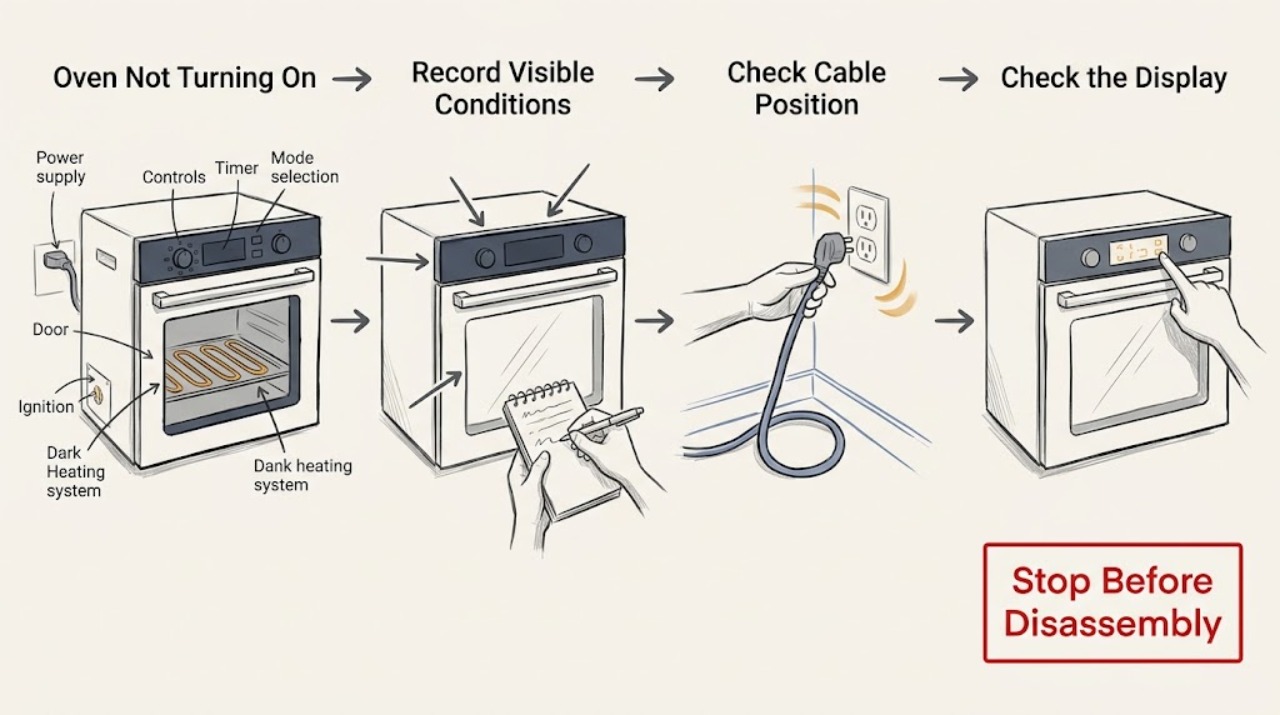
Work through in order
Diagnostic checks
Use only checks that match the exact appliance or system and its official guide.
-
Check 1
With the oven cool and off, record whether the display, clock, oven light, and control indicators are completely dark or partly active. Check the model data plate and note any flashing clock, lock indicator, Demo indication, error message, or recent power interruption.
Expected result: A completely dark appliance points to the supply path. A lit or flashing control points to settings, timer state, lock, mode, or an oven control condition rather than total loss of power.
Next step: Continue to the safe external power check for a dark oven, or to the timer, mode, lock, and Start checks for a lit oven. Stop for any gas, smoke, heat, or electrical hazard.
Why this matters
Why: Westinghouse troubleshooting lists power, fuse or breaker, control settings, clock, Demo Mode, and Child Lock as distinct causes of an oven or grill not working.
-
Check 2
From a dry position, check that the oven's isolator or plug connection is in its normal operating state and inspect only the accessible breaker or fuse indicator. Do not remove covers, pull a hardwired oven from the cabinet, or touch a wet or damaged connection.
Expected result: If the supply is off, a single safe restoration may return the display. If the breaker or fuse operates again, the outlet or appliance is hot, damaged, wet, or discolored, or the display remains dark, the power fault is unresolved.
Next step: Do not repeatedly reset a tripping circuit or use an extension lead as a workaround. Leave the oven isolated and arrange qualified electrical or appliance service for a recurring or unexplained power fault.
Why this matters
Why: The Westinghouse manual identifies power not being turned on, a household fuse, and a circuit breaker as possible causes, while recurring protective-device operation requires authorized service.
-
Check 3
For a powered oven that does not start, set the function selector and temperature control to a valid cooking mode shown in the exact manual. Check whether the clock or timer is waiting for a time-of-day or manual mode, and clear a delay, Demo Mode, or Child Lock only through the model-specific controls.
Expected result: If the oven starts after a valid function, temperature, and manual timer state are selected, the previous issue was a control setup. If the display remains in Demo, locked, or timed mode, or settings cannot be changed, the control state or panel needs attention.
Next step: Use the model manual for the exact button sequence and do not guess a lock combination. If the controls remain unresponsive or the oven still will not start, stop and arrange service.
Why this matters
Why: Westinghouse documentation lists incorrectly set controls, an unset clock, timer not in manual mode, Demo Mode, and Child Lock on certain models as no-start causes.
-
Check 4
With the appliance off and cool, close the oven door fully and inspect the visible door edge, seal, and latch area for an obstruction or damage. Do not force the door, remove the seal, or defeat a lock; note whether the oven light or display changes when the door closes.
Expected result: A visibly obstructed or unlatched door can prevent a model from starting or completing its safety sequence. A damaged hinge, latch, glass panel, or door seal, or a lock indicator that never changes, is a service condition.
Next step: Remove only an obvious external obstruction when the oven is cool. If the door does not align or latch normally, keep the oven off and request service rather than bypassing the interlock.
Why this matters
Why: Door position and safety interlocks vary by Westinghouse model, and a closed door is part of the normal operating sequence for many ovens.
-
Check 5
For a gas or dual-fuel model, identify the ignition symptom without repeated trials: note whether there is no ignition sound, a click without flame, a delayed pop, an abnormal flame, or an odor of unburned gas. Do not remove burner parts, hold a control open, or relight after a failed attempt outside the exact manual procedure.
Expected result: No click can indicate an electrical or control issue; clicking without ignition can involve gas supply, wet or dirty ignition areas, or model-specific ignition hardware. A gas odor, delayed ignition, abnormal flame, smoke, or pop is an immediate stop condition.
Next step: If there is any gas odor or abnormal combustion, leave the area and seek gas or emergency help from a safe location. Otherwise record the exact symptom and arrange qualified appliance service; do not keep attempting ignition.
Why this matters
Why: The Westinghouse troubleshooting manual lists gas supply, ignition-area condition, wet or dirty spark components, and flame behavior as model-dependent fault paths, while authorized personnel are required for servicing.
-
Check 6
If the area is dry, there is no gas or fire symptom, and the manual permits it, perform one normal control reset by switching the accessible appliance supply off briefly and restoring it. Recheck the display and one normal start command only after recording any code.
Expected result: A restored clock or control after one reset suggests a temporary control state or power interruption. A returning code, dark display, immediate breaker operation, or failed start means the fault remains.
Next step: Do not repeat resets or operate the oven with a safety symptom. Keep it off and provide the model, fuel type, display state, code, and observed sequence to qualified service.
Why this matters
Why: Westinghouse guidance directs users to restore controls or time settings after an interruption, but a reset does not repair a failed supply, lock, ignition system, heating element, or control.
Use your observations
Decision map
Find the observation that best matches what you see, then follow the next safe action.
-
PATH 01Next step
What you see
The oven, clock, and indicators are all dark, with no visible damage or hazard.
Do this next
Check the accessible power state once from a dry position. If it remains dark or the protective device operates again, leave it off and arrange qualified service.
Why this path and its safety boundary
Why it matters: A supply, isolator, breaker, fuse, or appliance power fault is more likely than a timer setting.
-
PATH 02Next step
What you see
The display is lit or flashing, but the oven does not begin heating.
Do this next
Follow the exact model manual to set time, clear an applicable lock or Demo state, select a valid mode, close the door, and use the required Start control. Escalate if the panel stays unresponsive.
Why this path and its safety boundary
Why it matters: Timer, manual mode, function or temperature selection, Demo Mode, Child Lock, or door state may be blocking the start.
-
PATH 03Next step
What you see
A breaker or fuse operates again, the cord or connection is hot or damaged, or there is smoke, arcing, or a burning odor.
Do this next
Stop using the oven and do not reset the protective device again. Isolate power only from a dry safe position and arrange qualified electrical or appliance service.
Why this path and its safety boundary
Why it matters: This is an electrical stop condition, not a setting problem.
-
PATH 04Next step
What you see
The oven is gas or dual-fuel and there is gas odor, delayed ignition, an abnormal flame, a pop, smoke, or a carbon-monoxide concern.
Do this next
Stop using it, leave the area, avoid switches and ignition sources, and contact local gas or emergency services from a safe location. Do not relight or inspect the burner yourself.
Why this path and its safety boundary
Why it matters: The appliance must be treated as a gas or combustion emergency.
-
PATH 05Next step
What you see
The door will not close or latch, the lock state remains, a code repeats, or one safe reset does not restore operation.
Do this next
Keep the oven off, record the model and exact display or symptom, and arrange authorized or qualified service. Do not bypass a lock or open the appliance.
Why this path and its safety boundary
Why it matters: A door interlock, control, sensor, ignition, element, or other model-specific fault needs diagnosis.
Helpful context
Understand the symptom
Identify whether the oven is electric, gas, or dual-fuel
Westinghouse uses more than one oven control design. A completely dark display can be a supply or circuit issue, while a lit display with no heat can be a timer, mode, lock, door, or ignition condition. Before any check, record the model and serial details from the data plate and note whether the cooktop burners work, whether the clock flashes, and whether any code is shown. A cooktop working does not prove every oven circuit or control is healthy.
Immediate safety boundary
If you smell gas, hear a leak, see smoke or flame outside the intended burner area, notice delayed ignition, or suspect carbon monoxide, stop using the oven, leave the area, and contact local gas or emergency services from a safe location. Do not operate electrical switches, ignite another burner, or re-enter to test. For an electric oven, stop for sparks, arcing, a hot or damaged connection, smoke, burning odor, repeated breaker operation, or water near the appliance.
Safety boundary
Stop conditions
- If you smell gas, hear gas escaping, see delayed ignition or an abnormal flame, or suspect carbon monoxide, stop, leave the area, avoid switches and ignition sources, and contact local gas or emergency services from a safe location.
- Stop for smoke, sparks, arcing, burning odor, a hot or damaged connection, repeated breaker or fuse operation, or water near the oven's electrical parts.
- Do not open the control panel, remove the oven from its cabinet, probe wiring, bypass a door or lock interlock, or service gas components.
- Do not repeatedly reset a breaker or keep attempting ignition after a failed gas start, pop, odor, or abnormal flame.
- Stop if the door, hinge, glass, seal, latch, control, or appliance body is damaged, loose, or too hot to approach safely.
Only after diagnosis
Potential parts
- oven timer or electronic control
Consider this category only when power is normal, the exact manual settings are correct, and a qualified diagnosis confirms a failed timer or control.
Confirm the full model and fuel configuration before selecting any part; do not infer fit from a dark display or no-start symptom. - oven door latch or interlock
Consider this category only when the door is correctly aligned but the model does not recognize a closed and latched door and service confirms the interlock fault.
Door hardware and safety behavior vary by model; never bypass the interlock. - oven ignition or heating component
Consider this category only after the fuel type, power, controls, and door state are confirmed and a qualified diagnosis identifies the ignition or heating component.
Gas and electric components are not interchangeable; use the exact model documentation and qualified service diagnosis.
When checks do not resolve it
Need a professional?
Arrange qualified Westinghouse appliance service when the oven remains dark after a safe external supply check, the controls remain lit but will not accept a valid mode or Start command, the timer or lock state cannot be cleared from the model manual, the door will not latch, a code repeats, or the oven will not ignite or heat. For gas odor, delayed ignition, abnormal flame, smoke, or suspected carbon monoxide, leave immediately and use local gas or emergency services from a safe location.
Safety scope: Keep the oven off for any combustion or electrical stop condition. Do not bypass safety controls, repeatedly reset a circuit, operate a gas control after an odor, or perform internal electrical or gas work.
Common questions
FAQ
Why is my Westinghouse oven completely dark?
Start with the accessible power connection, isolator, breaker, or fuse from a dry position. If the circuit trips again, the connection is damaged, or the oven stays dark, leave it off and arrange qualified service.
Why does my Westinghouse oven have power but not start?
Check the exact model's timer or manual mode, valid function and temperature settings, Demo Mode, Child Lock where applicable, and fully closed door. Do not bypass a lock; persistent failure needs service.
What should I do if my Westinghouse gas oven smells of gas?
Stop using it, leave the area, avoid switches and ignition sources, and contact local gas or emergency services from a safe location. Do not keep attempting ignition or open the appliance.
Read the exact guide
Official sources
- Carbon Monoxide Poisoning BasicsCenters for Disease Control and Prevention · General combustion-safety guidance; it does not replace gas-appliance service or local emergency instructions.
- TROUBLESHOOTINGWestinghouse · Use only for the model and fuel configuration covered by the opened Westinghouse manual; controls and gas features vary.
- FAQWestinghouse · General Westinghouse support guidance; the exact oven manual remains authoritative for operation and model controls.
Community feedback
Share a repair observation
Share a plain-text repair observation. Accepted observations are published automatically; this page may take a moment to update.