
On this page
Start here
Quick answer
If a Whirlpool freestanding ice maker will not complete or resume cleaning, read the Clean indicator, confirm the water pan and drain cap, start or resume the model-specific Clean cycle, and clean the accessible condenser with power disconnected. A blinking light may mean the cycle was interrupted, while scale, drainage, or airflow problems can reduce production. Leaks, electrical heat, or a cycle that repeatedly fails need service.
Work through in order
Diagnostic checks
Use only checks that match the exact appliance or system and its official guide.
-
Check 1
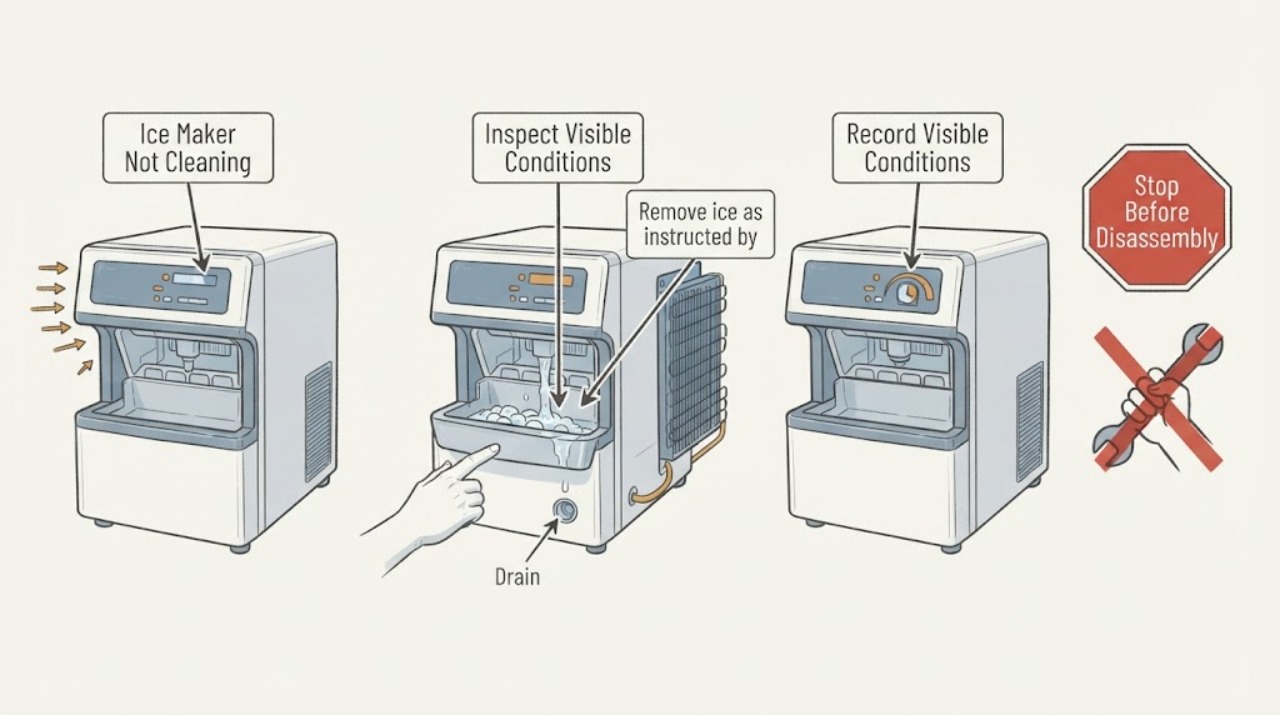
Identify the appliance as a freestanding Whirlpool ice maker and record the exact model. Note the Clean/Cleaning Needed light color or whether the Clean button is blinking; do not apply a refrigerator ice-maker procedure to a freestanding unit.
Expected result: The light is red/illuminated, production has decreased, the Clean light blinks, or no cleaning indicator appears.
Next step: Use the exact model manual and continue with the cleaning checks only if the unit is a freestanding ice maker.
Why this matters
Why: Whirlpool recommends cleaning when the indicator requests it, after about nine months, or when production drops; a blinking light may indicate an interrupted cycle.
-
Check 2
Remove ice as instructed by the model guide and check that the water pan, drain cap, and accessible ice-making area are in their normal positions. Do not chip scale with sharp tools or pour unapproved chemicals into the machine.
Expected result: The pan is empty, drain cap is loose/missing, scale is visible, or the interior cannot be identified.
Next step: Correct only the accessible cap/position and use the model-approved cleaner and quantity. Stop for a leak or missing part.
Why this matters
Why: Whirlpool explains that a loose drain cap can let water escape and lead to thin or no ice; scale requires the approved cleaning process.
-
Check 3
Start or resume the Clean cycle using the model control. If the Clean light was blinking after an interruption, press Clean as Whirlpool directs and observe the status light.
Expected result: The light blinks during cleaning, Cleaning Complete appears after the expected period, or the cycle stops/never completes.
Next step: Allow the documented cycle to complete once. If it stops again or never completes, keep the unit out of normal production and arrange service.
Why this matters
Why: A blinking Clean light can be normal during the cycle or can persist after interruption; completion indication shows the cycle reached its end.
-
Check 4
After the cycle completes, verify the cleaning solution drains fully, rinse exactly as the model guide requires, and replace the drain cap securely. Do not bypass the rinse or leave solution in the water path.
Expected result: Solution drains, residue remains, drain cap leaks, or the water path is blocked.
Next step: Repeat only the documented cleaning with fresh solution if permitted. Use service for a blocked drain, leak, or unresolved scale.
Why this matters
Why: Residual solution or an unsecured cap can affect ice quality and production; severe scale may need repeated approved cleanings.
-
Check 5
With power disconnected, inspect the accessible air-cooled condenser area for lint/dust and clean only according to Whirlpool instructions. Do not open refrigeration tubing or run the unit with panels removed.
Expected result: Condenser airflow is restricted, clean, or inaccessible without disassembly.
Next step: Restore safe airflow and then resume production with the On control. Arrange service if cleaning does not restore normal operation.
Why this matters
Why: A dirty condenser reduces capacity and raises operating temperature; inaccessible or damaged components need a technician.
-
Check 6
Record the model, indicator state, cycle duration, water quality/scale, drain behavior, and whether any ice is produced after the clean cycle.
Expected result: Ice production returns, the Clean light remains active, or the unit leaks, overheats, or shows an alert.
Next step: Stop use for leaks, electrical odor, abnormal heat, or an unresolved alert and arrange qualified Whirlpool service.
Why this matters
Why: A completed cleaning cycle does not prove a pump, valve, sensor, or refrigeration system is healthy. Persistent indicator or safety symptom needs diagnosis.
Use your observations
Decision map
Find the observation that best matches what you see, then follow the next safe action.
-
PATH 01Next step
What you see
The Clean light is blinking after a power interruption and the unit otherwise has no leak or electrical symptom.
Do this next
Press Clean once as Whirlpool directs and allow the documented cycle to complete; do not repeatedly interrupt it.
Why this path and its safety boundary
Why it matters: The cleaning cycle may be paused or still in process rather than proving a failed cleaner or pump.
-
PATH 02Next step
What you see
The indicator requests cleaning or production has fallen, and scale or restricted condenser airflow is visible.
Do this next
Run the approved cleaning cycle and clean the condenser as instructed, then resume On mode.
Why this path and its safety boundary
Why it matters: Scale or heat rejection is a plausible production limiter.
-
PATH 03Next step
What you see
Cleaning completes but the light returns, drainage is poor, or no ice is made.
Do this next
Keep the model details and cycle observations and arrange service; do not substitute random cleaners or parts.
Why this path and its safety boundary
Why it matters: A drain, water-flow, control, or ice-making fault remains possible; cleaning alone has not established the cause.
-
PATH 04Next step
What you see
There is a leak, burning smell, hot cord, smoke, sparking, or an exposed/damaged component.
Do this next
Disconnect power only if safe and obtain qualified appliance or electrical help.
Why this path and its safety boundary
Why it matters: This is a stop boundary.
Helpful context
Understand the symptom
Whirlpool’s cleaning guidance focuses on scale, the clean-cycle indicator, drainage, and the air-cooled condenser.
The unit must complete the exact model cycle and rinse/drain steps before normal ice production is judged.
When checks do not resolve it
Need a professional?
Arrange qualified service when the owner checks do not restore normal operation or the symptom recurs. Provide the exact model, observed pattern, and any displayed code; do not infer a replacement part from the symptom alone.
Common questions
FAQ
How often should a Whirlpool freestanding ice maker be cleaned?
Whirlpool says to clean when the indicator requests it, when production significantly decreases, or after about nine months; hard water may require more frequent cleaning.
What does a blinking Clean light mean?
It can indicate that the cleaning cycle is in progress or was interrupted. Whirlpool says to press Clean to resume an interrupted cycle and notes that completion appears after roughly 70-90 minutes.
Why does cleaning not restore ice production?
Cleaning addresses scale and condenser airflow, but persistent no-ice operation can involve water, drain, control, or refrigeration faults. Record the completed-cycle result and use model-specific service.
Read the exact guide
Official sources
- Cleaning the Freestanding Ice Maker Condenser - Product HelpWhirlpool Corporation · Whirlpool freestanding ice-maker condenser cleaning and airflow.
- Cleaning the Ice Maker - Product Help | WhirlpoolWhirlpool Corporation · Whirlpool freestanding ice-maker cleaning indicators, cleaning cycle, scale, and condenser maintenance.
- What to Do if the Cleaning Cycle was InterruptedWhirlpool Corporation · Whirlpool freestanding ice-maker interrupted cleaning cycle behavior and completion indication.
Community feedback
Share a repair observation
Share a plain-text repair observation. Accepted observations are published automatically; this page may take a moment to update.