
On this page
Start here
Quick answer
If a Whirlpool ice maker is not dispensing, first determine whether the bin contains ice and whether water still dispenses. Then check the door and dispenser lock, fully engage the paddle, inspect clumped ice and the chute, and confirm an in-door bin is seated. An empty bin sends you to ice-production troubleshooting; ice available with no delivery points to the dispenser path. Do not use sharp objects or order a motor from the symptom alone.
Work through in order
Diagnostic checks
Use only checks that match the exact appliance or system and its official guide.
-
Check 1
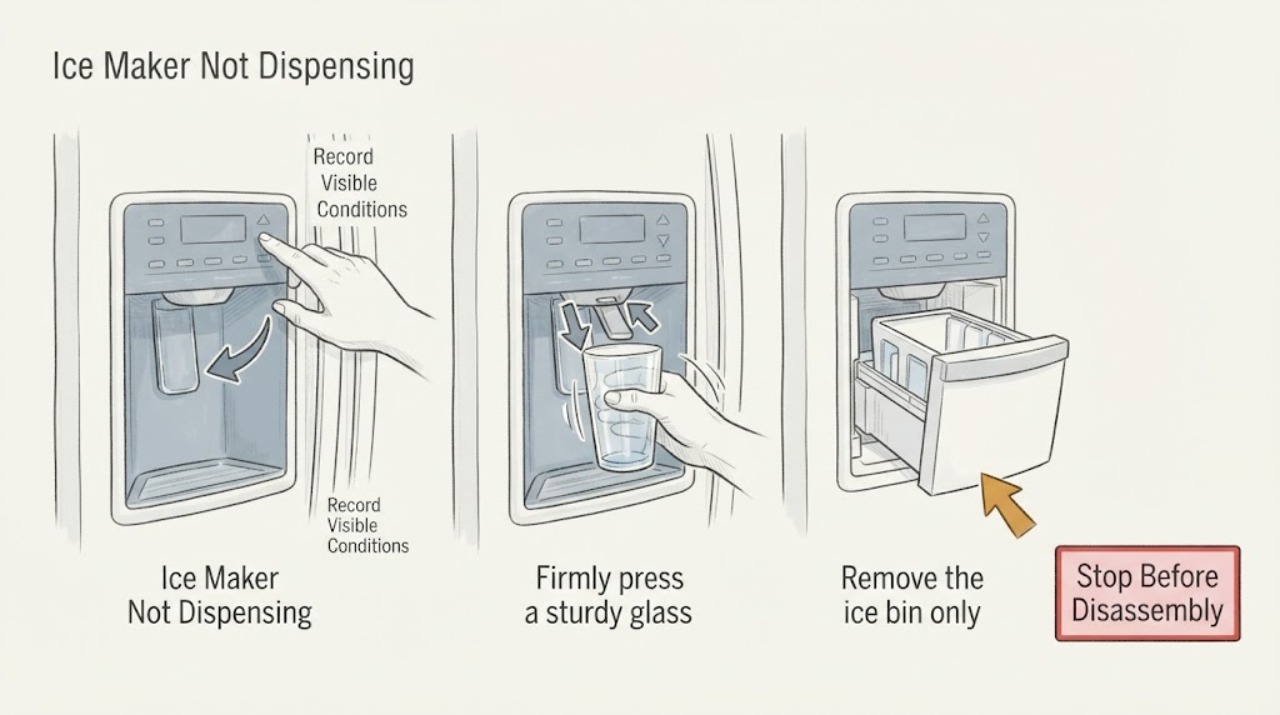
Select ice and water separately and record whether the bin is empty, the bin contains loose ice, and the water dispenser works. Confirm refrigerator doors are closed and note any Control Lock or Dispenser Lock indication.
Expected result: Only ice fails, both outlets fail, the bin is empty, or ice and water work after the door or lock is corrected.
Next step: Follow the matching ice-production or delivery path and use the exact owner manual for controls.
Why this matters
Why: An empty bin is a production or harvest issue, while ice in the bin with no output is a delivery issue. Door and lock states can disable dispensing.
-
Check 2
Firmly press a sturdy glass against the dispenser paddle or pad while the ice selection is active. Do not strike, pry, or hold the paddle with a sharp object.
Expected result: The paddle engages and ice dispenses, or it feels loose, does not engage, or remains silent.
Next step: Stop if the paddle is damaged; arrange service rather than forcing it.
Why this matters
Why: A pad that is not fully engaged can mimic a failed motor. A loose or silent control after the bin and lock checks needs service diagnosis.
-
Check 3
Remove the ice bin only as the owner manual directs and inspect for ice frozen into a mass, a blocked chute, or a bin that is not fully seated. Use a plastic utensil for loose clumps and dry the chute after cleaning.
Expected result: Ice is clumped, the chute is blocked, the bin is mis-seated, or the path is clear.
Next step: Correct the documented bin or chute condition and test once; never use a knife or other sharp tool.
Why this matters
Why: Humidity-driven clumping and an unseated in-door bin can block delivery without proving a failed ice maker.
-
Check 4
If the bin is empty, check whether the ice maker is producing ice using Whirlpool's separate no-ice guidance rather than repeatedly activating the dispenser.
Expected result: The maker is producing ice, is not producing ice, or the result cannot be determined.
Next step: Switch to the model-specific no-ice checks and return to dispenser diagnosis after ice is available.
Why this matters
Why: No stored ice means the dispenser cannot deliver; a production fault must be diagnosed before the delivery path.
Use your observations
Decision map
Find the observation that best matches what you see, then follow the next safe action.
-
PATH 01Next step
What you see
The bin is empty while water dispenses normally.
Do this next
Use the exact model's no-ice guidance and do not order dispenser parts from an empty-bin symptom.
Why this path and its safety boundary
Why it matters: The immediate problem is ice production or harvest, not a jammed delivery chute.
-
PATH 02Next step
What you see
Ice is in the bin but clumped, the chute is blocked, or the bin is not seated.
Do this next
Use the manual's bin procedure, a plastic utensil for clumps, and dry the chute; do not use sharp tools.
Why this path and its safety boundary
Why it matters: The storage and delivery path can explain the no-dispense symptom.
-
PATH 03Next step
What you see
Both ice and water fail with a door open or lock active.
Do this next
Close the doors and clear the lock using the exact model instructions, then test once.
Why this path and its safety boundary
Why it matters: The shared door or lock condition is more likely than two independent component failures.
-
PATH 04Next step
What you see
The bin is seated, ice is loose, the chute is clear, and the paddle still produces no ice.
Do this next
Stop repeated operation and schedule qualified Whirlpool service.
Why this path and its safety boundary
Why it matters: The dispenser drive or control remains possible, but the symptom does not identify a compatible motor or control.
Helpful context
Understand the symptom
“No ice” can mean no ice was made, no ice reached the bin, or the dispenser cannot move ice from a full bin. Identify which of those states exists before any reset.
Whirlpool warns against sharp objects in the ice bin and directs owners to the owner manual for model-specific dispensing and bin procedures.
When checks do not resolve it
Need a professional?
Use qualified Whirlpool service when the bin and chute are clear, the paddle and lock are correct, and no ice dispenses, or when the bin, control, or drive is damaged.
Common questions
FAQ
Why does my Whirlpool ice dispenser not work when the bin is full?
Check the closed doors, dispenser lock, paddle engagement, clumped ice, chute, and bin seating. If those are clear, the dispenser needs service rather than a guessed motor part.
Is an empty ice bin a dispenser failure?
Not necessarily. Whirlpool directs owners to check whether the ice maker is making or dumping ice before diagnosing the dispenser. No stored ice cannot be dispensed.
Can I break up a Whirlpool ice jam with a knife?
No. Use the model-approved removal procedure and a plastic utensil for loose clumps; sharp objects can damage the bin and dispenser mechanism.
Read the exact guide
Official sources
- Not Dispensing Ice - Side by Side Refrigerator - Product HelpWhirlpool · Whirlpool side-by-side refrigerator ice dispenser checks: ice production, closed doors, lock, paddle, clumping, chute, and bin seating
Community feedback
Share a repair observation
Share a plain-text repair observation. Accepted observations are published automatically; this page may take a moment to update.