
On this page
Start here
Quick answer
First separate a Wolf oven with a blank display from one whose display responds but will not start. From a safe, dry position, note the display, breaker status, door, lock or Sabbath indication, and whether the controls accept input. Wolf guidance says a blank electric-oven display can be checked by verifying power, cycling the oven supply off for 30 seconds, and testing the controls; model-specific ovens may also require selecting a cooking mode, temperature, and START. If the panel is locked, unresponsive after the documented reset, or the oven still will not start, arrange qualified service. Stop for smoke, a burning smell, arcing, a hot or damaged outlet, repeated breaker trips, gas odor, or any unsafe electrical condition; do not open panels or bypass an interlock.
Before you begin
Safety first
- A qualified technician can distinguish household supply, control state, lock, relay, ignition, and internal wiring faults without the user opening the oven or bypassing a safety device.
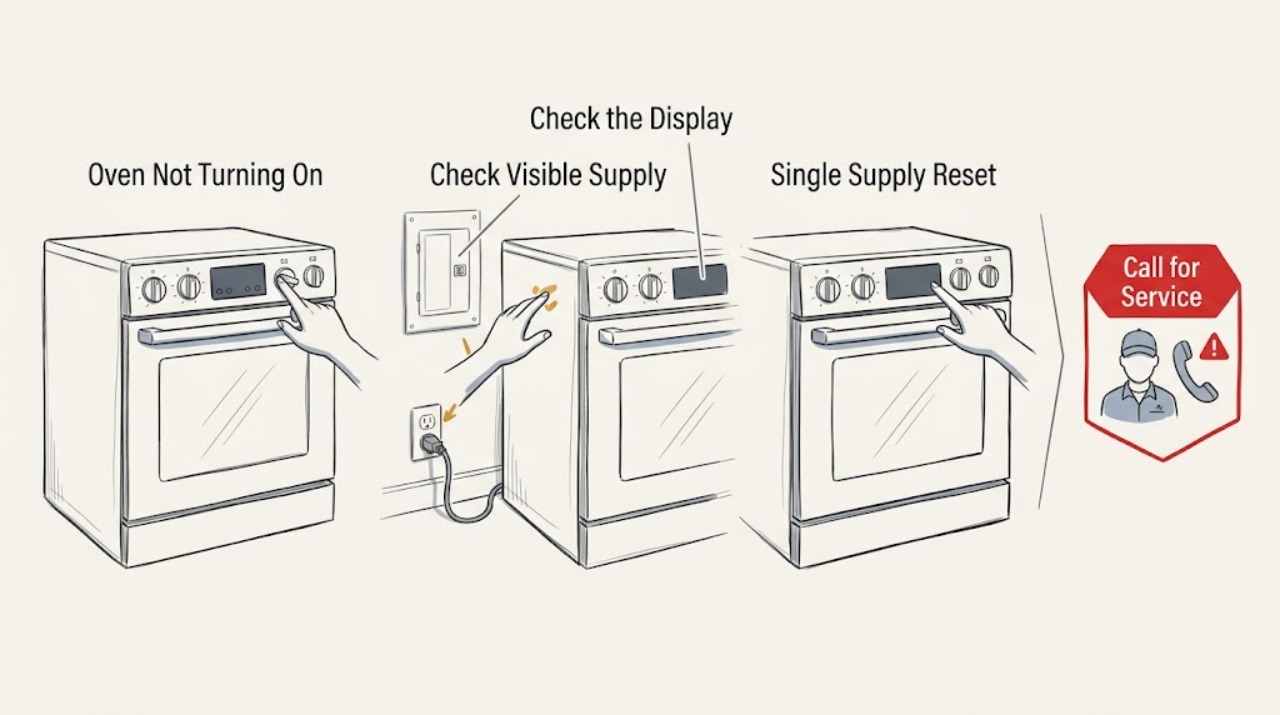
Work through in order
Diagnostic checks
Use only checks that match the exact appliance or system and its official guide.
-
Check 1
From a dry, safe position, look at the Wolf oven display and press one normal control once without opening the cabinet or moving the appliance. Note whether the display is fully dark, partially lit, responsive, beeping, flashing, or showing a lock, Sabbath, or error indication.
Expected result: The panel may be blank, lit but unresponsive, or responsive with a mode, lock, or message visible.
Next step: If there is smoke, heat, odor, arcing, or visible damage, stop and use the electrical or fire-safety branch. Otherwise follow the power branch for a dark panel or the control branch for a lit panel.
Why this matters
Why: A blank panel directs the diagnosis toward the household supply or the oven power path. A lit panel directs it toward control state, lock, mode selection, door state, or a stored fault.
-
Check 2
If the display is dark and the area is dry, observe the accessible circuit-breaker or electrical-supply indication and the visible plug or cord area without pulling a built-in oven, opening electrical equipment, or repeatedly resetting anything.
Expected result: The circuit may appear off or tripped, the visible connection may look normal, or the supply may be inaccessible while the display remains dark.
Next step: Restore a supply indication only once when it is safe and there is no damage, moisture, odor, or heat. If it trips again, remains dark, or cannot be reached safely, leave the oven off and arrange qualified electrical or appliance service.
Why this matters
Why: A supply interruption can explain a blank display. A normal-looking indication with a dark panel does not prove the oven itself is safe or sound; the internal power path still requires diagnosis.
-
Check 3
Only when there is no odor, heat, moisture, visible damage, or active trip, turn the oven's supply off at the documented breaker or electrical disconnect for 30 seconds, restore it, and observe the panel. Do not repeat the reset if the circuit trips or the hazard returns.
Expected result: The panel may recover normally, remain blank, blink, or return with a control message or the original symptom.
Next step: Press one control only after the panel is stable. If the symptom returns or the breaker trips, leave the supply off and provide the exact model and display behavior to a qualified technician.
Why this matters
Why: A recovery can indicate a temporary control state. A blank or recurring fault after one reset leaves a supply, control, relay, or related internal problem for service.
-
Check 4
With the panel lit, read the exact indication for Panel Lock, Key Locked, Sabbath Mode, Showroom Mode, or another status and use only the matching instruction in the exact Wolf Use and Care Guide. Keep hands clean and dry; do not force the door or defeat a lock.
Expected result: The lock or mode may clear and normal controls may return, or the indication may remain while the controls stay inactive.
Next step: If controls respond, continue with the model-specific start sequence. If they remain inactive or show an unfamiliar message, stop testing and arrange service with the recorded wording.
Why this matters
Why: A lock or special mode can intentionally prevent ordinary starting. A persistent state after the documented control sequence points to a model-specific control issue rather than a mechanical bypass.
-
Check 5
Using the exact model guide, select a normal cooking mode and temperature, then complete the required START or ENTER command. For M Series Professional controls, observe the mode and temperature knobs and the START command; for Contemporary or Transitional controls, observe Quick Start or Gourmet and the START command. Do not start a gas mode if gas odor or ignition trouble is present.
Expected result: The oven may show a selected mode and temperature and begin preheating, accept the controls but remain cold, or ignore the final command.
Next step: If the sequence starts, monitor normally and stop for abnormal heat, odor, smoke, or flame. If it does not start, record the model, mode, temperature, display, and any code, then use the service branch.
Why this matters
Why: A missing final confirmation can look like a dead oven on models with a two-step sequence. If the panel accepts the sequence but no operation begins, the issue is no longer just a button-selection question.
-
Check 6
Look at the closed oven door, visible seal, and control display without forcing the door or removing trim. If this is a double oven, note whether the upper or lower cavity was selected and whether the other cavity responds; do not treat a different cavity as proof that the whole appliance is safe.
Expected result: The door may be visibly obstructed or not aligned, the display may be asking for upper or lower selection, or only one cavity may respond.
Next step: Remove only a visible obstruction when the oven is cool. If the door, lock, cavity selection, or one side remains abnormal, stop and give the technician the affected cavity and display state.
Why this matters
Why: A selected cavity or door state can prevent a command from reaching the intended oven. A door that will not align or a single cavity that repeatedly fails needs model-specific service rather than force.
-
Check 7
After the safe visible checks and one authorized reset, record the full model, serial information, display text, control response, selected mode, breaker behavior, and any odor or heat. Do not open the oven or repeat a start test to obtain more evidence.
Expected result: The oven may work temporarily, stay unresponsive, show a recurring message, or trip the supply again.
Next step: Leave the oven out of service when the symptom returns and arrange qualified appliance service; use urgent electrical or fire support for an active hazard.
Why this matters
Why: A recurring no-start or trip is evidence of an unresolved supply, control, relay, lock, or other internal fault. A temporary recovery does not confirm that the underlying fault is gone.
Use your observations
Decision map
Find the observation that best matches what you see, then follow the next safe action.
-
PATH 01Next step
What you see
The display is fully dark and no hazardous smell, heat, moisture, or visible damage is present.
Do this next
Check the accessible supply indication and perform one documented 30-second supply reset only if safe.
-
PATH 02Next step
What you see
There is smoke, burning odor, visible arcing, a hot or damaged plug or outlet, exposed damage, moisture at electrical parts, or a repeated breaker trip.
Do this next
Stop using the oven and keep people away. Isolate power only from a dry, safe location without touching damaged equipment.
-
PATH 03Next step
What you see
The display is lit but ignores controls, shows a lock state, or appears to be in Sabbath or another special mode.
Do this next
Use clean, dry fingers and the exact model guide to clear the documented mode or lock, then allow one safe control reboot.
-
PATH 04Next step
What you see
The panel responds but the oven does not begin after a mode and temperature are selected.
Do this next
Follow the exact model's final START or ENTER step; M Series controls differ between Professional and touch-control models.
-
PATH 05Next step
What you see
The Wolf product is a gas or dual-fuel model and there is gas odor, delayed ignition, abnormal flame, repeated clicking without ignition, or a bang.
Do this next
Stop the ignition attempt, leave the area, and avoid flames or operating electrical switches near the suspected gas. Do not search for a leak or repeat ignition tests.
-
PATH 06Next step
What you see
A door will not align, a lock indication remains, or a double oven responds only in one selected cavity.
Do this next
Stop forcing the door or changing internal hardware. Check only for a cool, visible obstruction and confirm the selected cavity in the guide.
-
PATH 07Next step
What you see
The supply, display, mode or lock state, and model start sequence appear normal, but the oven still will not turn on after one authorized reset.
Do this next
Leave the oven out of service and do not open the cabinet or repeat breaker and ignition tests.
Helpful context
Understand the symptom
Start by describing what is actually blank
A dark display and an active display are different faults. Record whether the clock or status lights are visible, whether a button produces a beep, whether a lock or Sabbath indication appears, and whether the oven is a single or double model. Also record the exact model and serial information from the product label for any service request. Do not assume that a knob model and a touch model use the same start sequence.
Wolf controls vary by series
The M Series page describes a knob-based Professional sequence and touch-based Contemporary and Transitional sequences. Other Wolf ovens can have different controls, locks, or display behavior. Use the guide for the exact model when a key name, lock gesture, or mode is not visible; a generic button sequence can leave the oven in the same state or change another setting.
Keep electrical work outside the user checks
Only observe the plug or breaker indication if they are safely accessible and the area is dry. Do not remove a wall-oven panel, pull out a range to reach wiring, probe a live circuit, replace a fuse with a different rating, or bypass a door or control lock. A single documented supply reset is a diagnostic step, not permission to repeat a trip or work inside the oven.
When a no-start symptom becomes a service fault
If the display remains blank after a safe supply check and one documented reset, or if the panel responds but the selected mode never starts, the remaining possibilities include the supply path, control, relay, lock, or another internal fault. Preserve the display state and sequence of observations for a qualified Wolf or appliance technician rather than trying to prove the component yourself.
Safety boundary
Stop conditions
- Stop immediately for smoke, a burning or melting smell, visible arcing, a hot or damaged plug or outlet, exposed wiring, or a repeated breaker trip. Keep the oven off and use urgent electrical or fire support as appropriate.
- If gas odor, delayed ignition, abnormal flame, repeated clicking without ignition, or a bang occurs on a gas or dual-fuel model, stop ignition, leave the area, avoid flames and electrical switches, and use the local emergency gas or fire-safety process from a safe location.
- Stop if water or cleaning liquid reaches the controls, outlet, cord, or other electrical equipment. Keep clear and isolate power only from a dry, safe location; do not touch wet electrical parts.
- Do not remove panels, probe live wiring, pull out a built-in oven, change fuse ratings, bridge a safety device, or bypass a door or control lock.
- Do not force a door, repeatedly reset a breaker, or repeat an ignition or start test after the fault returns. One documented reset does not prove that an internal fault is repaired.
Only after diagnosis
Potential parts
- control panel or control board
Consider only when the panel remains unresponsive after supply, lock, mode, and exact-model reset checks and a technician confirms a control fault.
Confirm the exact Wolf model and approved fitment through qualified service; do not substitute a generic control. - oven door lock or latch assembly
Consider only when a model-specific diagnosis confirms that a persistent lock or latch fault is preventing safe operation.
Confirm the exact model and safety requirements; never bypass or bridge the lock. - oven power or relay component
Consider only after a qualified technician isolates an internal power or relay fault; a blank display alone does not identify this part.
Internal electrical components require model-specific diagnosis and professional installation.
When checks do not resolve it
Need a professional?
Request qualified service after the safe visible checks and one exact-model reset do not restore starting, or immediately for an electrical, gas, smoke, fire, or repeated-trip hazard.
Safety scope: A qualified technician can distinguish household supply, control state, lock, relay, ignition, and internal wiring faults without the user opening the oven or bypassing a safety device.
Have this ready
- Provide the full model and serial information, single or double oven status, display state, exact message or code, selected cavity, mode and temperature, control response, breaker behavior, and any odor, smoke, heat, flame, or door symptom.
Common questions
FAQ
Why is my Wolf oven display blank?
A blank display points first to the electrical supply or the oven power path. Check only the safe visible supply indication, perform one documented 30-second reset if there is no hazard, and arrange service if the display stays dark or the circuit trips again.
Why does my Wolf oven have power but not start?
Check for Panel Lock, Key Locked, Sabbath Mode, a selected cavity on a double oven, and the exact mode-temperature-START sequence for the model. If the display accepts the command but operation does not begin, preserve the details for service.
Could a Wolf oven be locked and look like it is not turning on?
Yes. Applicable Wolf models can show a lock indication and silence or block ordinary keys. Use only the release instruction in the exact guide; never force the door or bypass the lock.
Should I keep resetting the Wolf oven breaker?
No. A single documented reset can clear a temporary control state. A returning trip or no-start symptom needs qualified diagnosis, especially if there is heat, odor, smoke, arcing, or visible damage.
When is a Wolf oven no-start problem urgent?
Treat smoke, burning odor, visible arcing, hot electrical parts, repeated breaker trips, gas odor, delayed ignition, or an abnormal flame as stop conditions. Leave the area or appliance safe and use the appropriate electrical, fire, or gas emergency process.
Read the exact guide
Official sources
- Wolf L Series and Legacy E Series Oven Panel Lock or Key Locked FeatureSub-Zero, Wolf, and Cove · Wolf L Series and Legacy E Series panel lock, key lock, and control behavior
- Wolf Electric Oven Does Not Turn OnSub-Zero, Wolf, and Cove · Wolf electric oven blank-display, power, 30-second reset, control response, and service guidance
- Wolf Touch Pad or Controls Not WorkingSub-Zero, Wolf, and Cove · Wolf oven control input, clean hands, Sabbath Mode, lock mode, reboot, and service guidance
- How to Turn M Series Oven OnSub-Zero, Wolf, and Cove · Wolf M Series Professional, Contemporary, and Transitional oven start sequences
Community feedback
Share a repair observation
Share a plain-text repair observation. Accepted observations are published automatically; this page may take a moment to update.