
On this page
Start here
Quick answer
If an Amana refrigerator is leaking water, first identify whether the water is inside the cabinet, at the filter, under a door, or at the back. Check the filter seating, the water-supply line and connections, door and gasket contact, and any visible drain or defrost symptoms using the exact model manual. Turn off the refrigerator's water supply for an active leak when it is safe to do so, and stop using it if water reaches electrical parts. A damaged line, torn gasket, leak that continues after accessible checks, or water returning from a hidden drain or internal component needs qualified appliance service.
Before you begin
Safety first
- Do not remove panels, probe energized wiring, open hidden water valves, improvise drain clearing with tools or heat, or continue operating through water near electrical components or an uncontrolled leak.
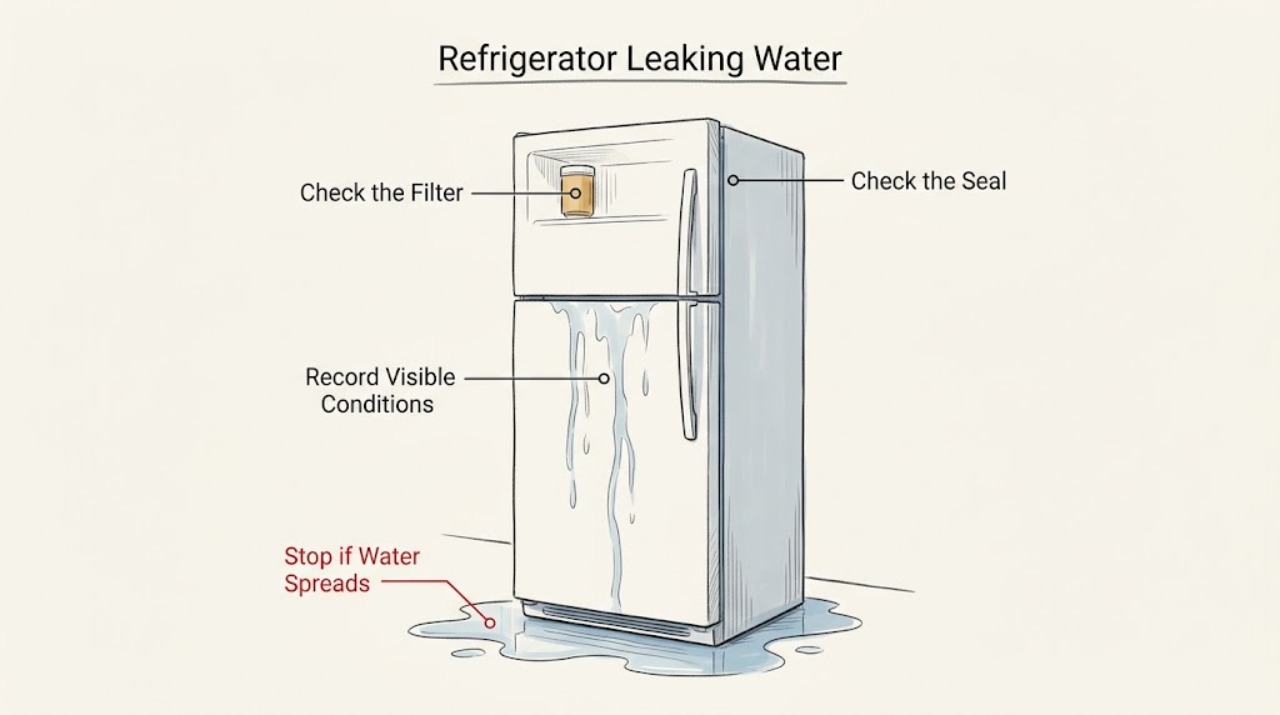
Work through in order
Diagnostic checks
Use only checks that match the exact appliance or system and its official guide.
-
Check 1
Make the area safe and map the leak before troubleshooting. Blot standing water, keep water away from outlets and appliance wiring, and if water is actively entering from the refrigerator's water system, close the accessible refrigerator water shutoff only if you can do so safely. Record the first wet location, the direction of any trail, and whether the leak happens after dispensing, ice making, or a defrost cycle.
Expected result: Water is only inside the cabinet, appears at the filter, runs from under a door, collects under the front, or comes from the rear; it may be continuous or tied to dispensing or ice making.
Next step: Keep the water supply closed for an active water-system leak and continue only with an accessible visual check. If water has reached electrical components, the floor is unsafe, or the source cannot be controlled, stop and arrange qualified appliance service.
Why this matters
Why: A repeatable location and timing makes a filter, supply line, dispenser, drain, or door-seal path more likely than an unexplained cabinet failure. Water near electrical parts or a continuously growing puddle is an immediate safety concern.
-
Check 2
Inspect the water filter area without forcing the housing. If the leak began after a filter change, check that the filter is the correct model-specific type, fully seated and locked as the Amana manual shows, with no visible crack or damaged sealing ring. Dry the area and watch briefly for renewed moisture; do not leave a leaking filter installed while waiting for parts.
Expected result: Moisture returns at the filter head, the filter is not fully seated, a seal or filter body is damaged, or the filter area stays dry.
Next step: Reinstall or bypass the filter only in the manner permitted by the exact Amana manual; replace it only after confirming the exact model. If the housing itself leaks, the filter will not lock, or moisture returns after correct installation, stop and request service.
Why this matters
Why: A leak that returns at the filter points first to filter seating, sealing, or filter damage. A dry filter area shifts attention to the supply line, door, dispenser, or drain path; it does not prove the filter is compatible merely because it fits.
-
Check 3
With the refrigerator stable and accessible, inspect the visible water-supply tubing, shutoff connection, and fittings behind or beneath it for a kink, crack, damp joint, or line pulled tight. Follow the Amana guidance for access; unplug the refrigerator before reaching behind it only when the manual and the situation make that safe, and do not pull out a built-in unit alone.
Expected result: A line is kinked or cracked, a connection is wet, the line is being pinched by the cabinet, or all visible supply components are dry.
Next step: Keep the water supply off and do not operate through a cracked line or leaking connection. Have the line or fitting repaired by a qualified technician if tightening or model-approved access is not clearly described; if the visible line is dry, continue to the door and inside-cabinet checks.
Why this matters
Why: A wet fitting or damaged line can explain water on the floor or behind the cabinet, while a dry visible supply path makes an internal drain, filter, dispenser, or condensation path more likely. A line that is being crushed can leak when the refrigerator is pushed back.
-
Check 4
Check both doors, drawers, and the door gaskets for a container, shelf, bin, or drawer that prevents closure. Wipe a dirty gasket with warm water and inspect the full contact path for tears, gaps, looseness, or a door that sits out of alignment. Do not force the door or adjust hinges without the exact Amana instructions.
Expected result: An obstruction is present, the gasket is dirty but intact, the gasket has a tear or gap, or the door closes squarely with continuous gasket contact.
Next step: Remove the obstruction and clean the gasket, then check whether the door closes fully. Arrange service for a torn gasket, persistent gap, or door that will not align instead of relying on repeated cleaning or force.
Why this matters
Why: An obstruction or poor gasket contact can let humid room air in and create condensation or water inside the refrigerator. A damaged seal or misaligned door is a repair issue; a fully sealed door makes a supply, filter, dispenser, or drain path more relevant.
-
Check 5
Inspect the accessible interior around the fresh-food back wall, beneath drawers, and the freezer floor for pooled water, an ice or frost pattern, uncovered containers, or a drain opening blocked by food or ice. Clear only loose, visible obstruction that the exact manual permits; do not probe a hidden drain, remove a panel, chip ice, or apply directed heat.
Expected result: Water or ice is concentrated beneath a drawer or near a drain opening, containers are dripping, frost is heavy, or the interior is dry while water appears elsewhere.
Next step: Correct a permitted visible obstruction or uncovered-container issue and monitor. If water returns from beneath a panel, heavy frost recurs, temperatures are abnormal, or the drain is inaccessible, stop and arrange qualified service.
Why this matters
Why: A container or condensation issue may be limited to the cabinet, while water beneath drawers or recurring ice can indicate a restricted defrost-drain path. A hidden drain or internal defrost fault cannot be identified safely from surface water alone.
-
Check 6
If the leak follows dispenser use or ice production, dry the dispenser area and observe whether water drips after the glass is removed, appears at the underside of the door, or returns around the ice-maker and fill area. Confirm the filter has been flushed and seated according to the model manual, and do not remove a door panel or valve cover.
Expected result: A short drip follows dispensing, water appears at the door or hinge area, moisture returns around the ice-maker fill path, or the leak occurs when the refrigerator is idle.
Next step: Hold the glass under the dispenser as directed and monitor only for the normal brief drip described by the manual. For repeated dripping, water at the door hinge or fill path, or any leak that continues while idle, close the water supply and arrange service.
Why this matters
Why: Amana notes that a dispenser can drip briefly after use and that a recently installed filter can affect water behavior. A leak at the door or ice-maker fill path points to a water-delivery component; an idle leak points back to a continuous supply, filter, drain, or condensation source.
-
Check 7
After an accessible correction, dry the cabinet and floor, reopen the water supply only when the line and filter are secure, and perform a controlled observation using the exact Amana operating instructions. Record whether water returns, where it starts, and how long it takes; do not repeatedly cycle a leaking dispenser or ice maker to reproduce the problem.
Expected result: The area stays dry, the leak returns at the same location, or water appears at a new or hidden location after the refrigerator resumes operation.
Next step: Close the water supply again for any water-system leak, protect food and flooring, and give the technician the leak location, timing, filter history, line findings, gasket condition, and model number. Do not remove panels or substitute a part from another model.
Why this matters
Why: A dry retest supports a corrected filter, obstruction, or condensation source but does not validate an unobserved hidden leak. Recurrence, a new location, or water near electrical parts means the fault remains unresolved.
Use your observations
Decision map
Find the observation that best matches what you see, then follow the next safe action.
-
PATH 01Next step
What you see
Water began after a filter replacement and moisture returns at the filter head or housing.
Do this next
Follow the exact Amana manual to reseat or bypass the filter, using the correct model-specific filter. Keep the water supply closed and arrange service if the housing leaks or the filter will not lock securely.
Why this path and its safety boundary
Why it matters: Filter seating, a sealing ring, filter damage, or housing leakage is more likely than a drain issue.
-
PATH 02Next step
What you see
The floor is wet behind or beneath the refrigerator, and a visible supply line or connection is cracked, kinked, or damp.
Do this next
Close the refrigerator water shutoff if safely accessible, do not push the unit back against a damaged line, and arrange qualified repair for the line or connection.
Why this path and its safety boundary
Why it matters: A supply-line or fitting leak is more likely, and continued water pressure can worsen floor or cabinet damage.
-
PATH 03Next step
What you see
Water collects beneath drawers or in the freezer while the filter and visible supply line stay dry, especially with recurring ice or frost.
Do this next
Clear only a permitted, visible obstruction and follow the exact manual. Do not probe or heat a hidden drain; arrange appliance service if the water or frost returns.
Why this path and its safety boundary
Why it matters: A defrost-drain or internal condensation path is more plausible, but the visible water does not identify which hidden component is blocked or faulty.
-
PATH 04Next step
What you see
A brief drip follows dispenser use, but no water appears when the refrigerator is idle and the dispenser area dries.
Do this next
Use the glass-holding and filter-flushing directions in the exact Amana manual and monitor. Repeated dripping, water at the door, or a puddle while idle requires service.
Why this path and its safety boundary
Why it matters: A normal residual dispenser drip or recently serviced filter may be involved rather than a continuous supply leak.
-
PATH 05Next step
What you see
Water is inside the cabinet and a door is obstructed, the gasket is dirty, or the gasket does not make continuous contact.
Do this next
Remove the obstruction and clean the gasket, then verify closure. A torn gasket, persistent gap, or misaligned door needs qualified service.
Why this path and its safety boundary
Why it matters: Humid-air entry and condensation from a poor seal are more likely than a rear supply-line leak.
-
PATH 06Next step
What you see
The leak continues after filter, visible line, door, and accessible interior checks, or water reaches electrical parts, food temperatures become abnormal, or the source is hidden.
Do this next
Stop the affected water or cooling functions as safely as the manual permits, protect food and flooring, and arrange qualified appliance diagnosis. Do not remove panels, probe wiring, or keep operating through an active leak.
Why this path and its safety boundary
Why it matters: An internal valve, drain, defrost, sealed water path, or cabinet problem is possible and cannot be safely isolated from surface symptoms.
Helpful context
Understand the symptom
Start with where and when the water appears
Blot up the water and record its location before moving the refrigerator or removing any parts. Note whether it is inside the fresh-food compartment, beneath a drawer, at a filter head, under a door, on the floor in front, or behind the cabinet. Also note whether it appears after dispensing water, making ice, a defrost event, or simply while the refrigerator is idle. This pattern separates a filter or supply-line leak from a door-seal, drain, or condensation problem.
Use the exact Amana manual for model-specific work
Amana refrigerator layouts, filters, drain paths, controls, and access panels vary by model. Use the model number and matching owner's manual before changing a control, attempting a defrost, adjusting a door, or handling a filter. Do not remove interior or rear panels to reach a hidden drain, fan, valve, or electrical part as a first troubleshooting step.
Safety boundary
Stop conditions
- Do not remove interior or rear panels, probe a hidden drain, chip ice, apply a flame or directed heat, test electrical parts, or continue cycling a leaking dispenser or ice maker to reproduce the leak.
- Close the refrigerator water supply and stop troubleshooting for an active line, filter-housing, valve, or dispenser leak when it is safe to do so. Keep water away from outlets and wiring; disconnect power only when the exact manual and conditions make that safe.
- Arrange qualified appliance service for water near electrical parts, a cracked or inaccessible line, a torn gasket, recurring water beneath drawers or panels, abnormal temperatures, repeated frost, a hidden source, or a leak that returns after accessible checks.
Only after diagnosis
Potential parts
- Amana refrigerator water filter
Consider only when the filter is damaged, incorrectly sealed, or will not seat correctly after the exact model's installation procedure is followed.
Filter shape and approval vary by Amana model. Confirm the exact model and filter guidance before selecting a replacement. - Amana refrigerator water-supply line or fitting
Consider only when a qualified diagnosis finds a cracked, kinked, or leaking visible line or connection and rules out a loose installation or cabinet pinch.
Tubing, fittings, and access vary by model and installation. Confirm the exact model and repair diagnosis before ordering. - Amana refrigerator door gasket
Consider only when the gasket is torn, deformed, loose, or unable to make continuous contact after accessible obstructions and cleaning are addressed.
Gasket profile and door configuration vary by Amana model. Confirm the exact model and service diagnosis before selecting a replacement. - Amana refrigerator defrost-drain or water-path component
Consider only after qualified service identifies a restricted drain or failed internal water-path component associated with recurring water beneath drawers or panels.
Drain and water-path components are model-specific and may require panel access. Do not select a hidden component from leak location alone.
When checks do not resolve it
Need a professional?
Arrange qualified appliance repair when the leak is active or recurring, the source is behind a panel or at an inaccessible connection, water reaches electrical parts, the filter housing or supply line is damaged, a door or gasket will not seal, interior water returns with frost, or the refrigerator cannot maintain safe temperatures. Provide the exact Amana model, first wet location, timing relative to dispensing or ice making, filter-change history, visible line and gasket findings, and photos of the water trail.
Safety scope: Do not remove panels, probe energized wiring, open hidden water valves, improvise drain clearing with tools or heat, or continue operating through water near electrical components or an uncontrolled leak.
Common questions
FAQ
Why is my Amana refrigerator leaking water on the floor?
Start by locating the first wet spot. A filter or supply-line leak is more likely when water appears at the filter or behind the refrigerator; water beneath drawers or recurring frost can point to a drain path; water inside with a poor door seal can be condensation. Close the refrigerator water supply for an active water-system leak and arrange service if the source is hidden or returns.
Can an Amana refrigerator water filter cause a leak?
Yes. Amana says a recently installed filter can leak when it is not seated correctly or when the filter or sealing ring is damaged. Use the exact model manual to reinstall or bypass it, and confirm the model-specific filter before replacement. A leaking housing or moisture that returns after correct installation needs service.
What should I check if the Amana refrigerator leaks only after dispensing water?
A brief residual dispenser drip can occur, but repeated dripping or water at the door or hinge is not a normal continuous leak. Hold the glass under the dispenser as the manual directs, confirm filter seating and flushing, and watch whether water appears while the refrigerator is idle. Close the water supply and arrange service for recurring or uncontrolled leakage.
Can a refrigerator door gasket cause water inside an Amana refrigerator?
It can. A dirty, damaged, or poorly contacting gasket lets humid air enter and can create condensation or moisture. Remove obstructions and clean the gasket with warm water, then verify continuous contact around the closed door. A torn gasket, persistent gap, or misaligned door needs qualified appliance repair.
Read the exact guide
Official sources
- How to Check the Water Supply LineAmana · Official Amana Product Help installation guidance for refrigerator water-supply lines; installation and model access can vary.
- Water Inside of RefrigeratorAmana · Official Amana Product Help guide for side-by-side refrigerator configurations; model-specific manuals control for other configurations.
- Leaking at the Bottom - Bottom Freezer RefrigeratorAmana · Official Amana Product Help guide for bottom-freezer refrigerator configurations; use the exact model manual for configuration-specific instructions.
- REFRIGERATOR TROUBLESHOOTING: DOOR, LIGHT AND LEAKAGE ISSUESAmana · Official Amana refrigerator troubleshooting article covering door alignment, gaskets, condensation, and filter checks.
- What to Do if There is Water on the FloorAmana · Official Amana Product Help guidance; exact refrigerator model instructions control for layout and access differences.
- Doors Not Sealing - RefrigeratorAmana · Official Amana Product Help guide for refrigerator door sealing; exact model instructions control for door and leveling adjustments.
Community feedback
Share a repair observation
Share a plain-text repair observation. Accepted observations are published automatically; this page may take a moment to update.