
On this page
Start here
Quick answer
Start by locating where the water begins: inside the refrigerator, at the dispenser or door hinge, around the filter, or at the rear supply line. KitchenAid identifies damaged or loose water tubing, a leaking shutoff connection, an incorrectly installed or damaged filter and O-rings, dispenser tubing, and condensation as different possibilities. Dry the area and perform only a safe visible check with the dispenser and ice maker stopped. Use the exact KitchenAid manual for any filter or drain procedure. If water reaches electrical parts, the leak is behind the cabinet, the filter or tubing cannot be sealed, or the leak returns after the model-approved check, stop using the water system and arrange qualified appliance service.
Before you begin
Safety first
- This article supports containment, location mapping, dry visible inspection, and only model-approved filter or drain handling. Water-line disassembly, panel removal, electrical work, sealed-system work, and contaminated-water cleanup require qualified service.
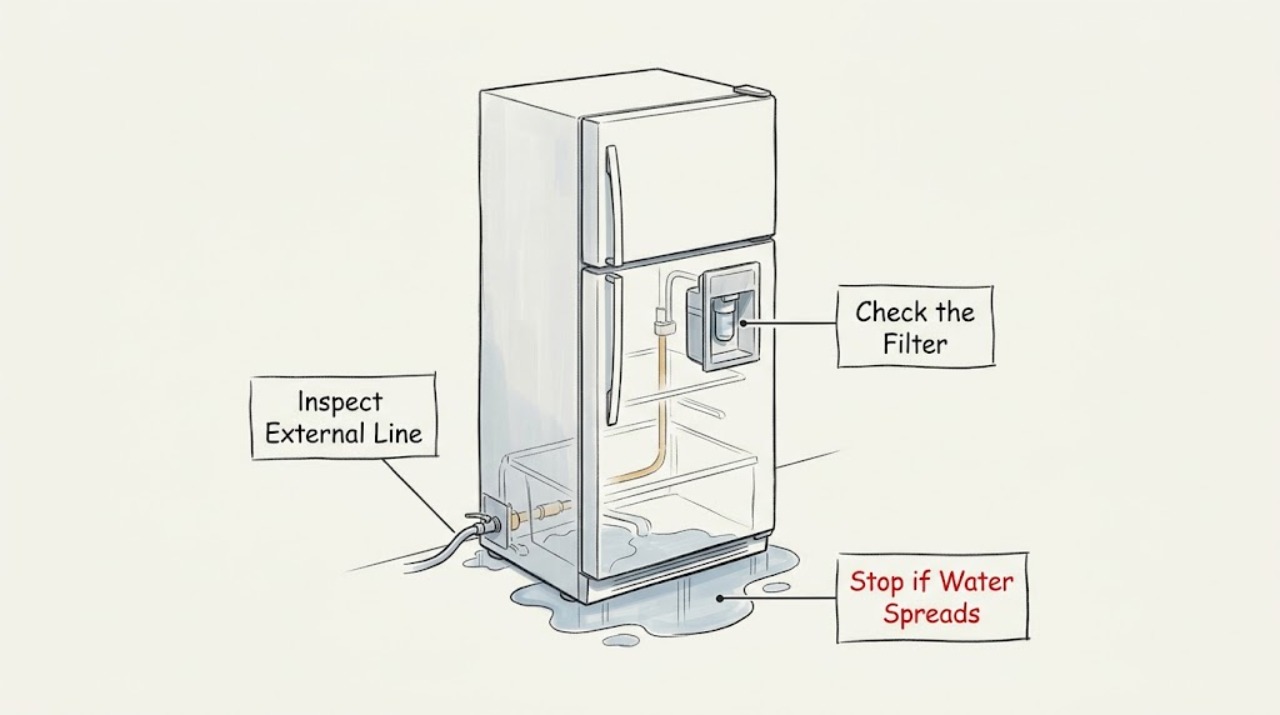
Work through in order
Diagnostic checks
Use only checks that match the exact appliance or system and its official guide.
-
Check 1
Stop the water dispenser and ice maker, dry the accessible floor, and place a towel under the next suspected drip without moving the refrigerator or removing covers.
Expected result: Record whether water reappears while the refrigerator is idle, after dispensing, after ice production, after a filter change, or when a door moves; note whether the first wet location is inside, at the door or hinge, at the front base, or behind the cabinet.
Next step: Use the starting location to choose the corresponding branch and keep the water system off until the source is identified.
Stop if: Do not touch wet electrical areas, tilt or pull a water-connected refrigerator alone, or continue operating a leak that can damage flooring or food.
Why this matters
Why: An idle interior leak favors condensation, a drain path, pan, or filter area; a use-linked leak favors dispenser, ice-maker, door tubing, or filter connections. A rear or base leak favors the supply line or an inaccessible water component.
-
Check 2
From a dry, well-lit position, inspect the visible household water line, shutoff connection, rear refrigerator connection, and any exposed tubing for cracks, kinks, wet joints, or tubing that is not fully seated; do not loosen a fitting or remove a panel.
Expected result: Record whether the line is damaged, a connection becomes wet, the shutoff or saddle valve is leaking, or all visible external connections remain dry.
Next step: If a valve moves normally and is safely accessible, shut off the refrigerator water supply before service; otherwise leave it alone and provide the location and photos to a qualified technician.
Stop if: Do not force a shutoff valve, disconnect pressurized tubing, overtighten a fitting, or operate the water system while a joint is visibly leaking.
Why this matters
Why: KitchenAid identifies damaged supply lines, loose or incompletely inserted tubing, and leaking shutoff connections as causes of water at the rear or base. Dry external connections shift suspicion toward the filter, door tube, dispenser, drain, or concealed component.
-
Check 3
If the refrigerator has a water filter and the leak began after filter service, follow the exact KitchenAid model instructions to inspect the filter for cracks, confirm the O-rings are present, and reinstall it so it is fully seated; do not force the filter or housing.
Expected result: Observe whether the filter is damaged, an O-ring is missing or displaced, the housing remains wet after correct seating, or the leak stops with the filter installed as directed.
Next step: Use only the model-approved replacement or bypass arrangement, then make a cautious leak check; stop using the water system if the housing still leaks or the filter cannot be seated without force.
Stop if: Do not substitute an unverified filter, discard O-rings, force the housing, or continue dispensing from a leaking filter area.
Why this matters
Why: A damaged filter, missing seal, or incomplete seating can cause a filter-area leak. A dry filter area with continuing water makes the drain, dispenser tube, valve, or another connection more likely.
-
Check 4
With no visible supply connection leaking and the floor dry, perform only a brief normal dispenser operation into a container, then observe the dispenser tip, tray, door or hinge area, and base without removing door panels or tubing.
Expected result: Record whether only a few drops appear immediately after dispensing, water continues to drip, the tray overflows, the door area becomes wet, or water reaches the base while the dispenser itself looks dry.
Next step: Follow the exact manual for filter-system flushing or dispenser-tray care; stop the water system and arrange service for persistent dripping, wet door tubing, or water that travels into the cabinet or floor.
Stop if: Do not pull tubing, remove a hinge cover or door panel, force the dispenser, or keep testing in a wet electrical area.
Why this matters
Why: KitchenAid manuals distinguish a few normal residual drops from continuing dripping. Persistent dripping can follow air after installation or filter replacement, a loose connection, ice residue, or a damaged filter or tube; a base leak with no dispenser symptom points elsewhere.
-
Check 5
If water is pooling inside the refrigerator or freezer while the filter and visible water lines are dry, identify the model and inspect only the user-accessible drain or condensation area described in its Use & Care Guide; do not remove evaporator covers or sealed panels.
Expected result: Record whether the water resembles condensation, collects below a drain opening, follows a warm container or door-seal gap, or continues with no accessible cause.
Next step: Clean only the accessible area using the model-approved method and monitor; arrange qualified service when water returns, the drain is inaccessible, food temperature is affected, or panels would need removal.
Stop if: Do not chip ice, probe a drain with a sharp object, pour chemicals into a drain, or work near live wiring or refrigeration tubing.
Why this matters
Why: KitchenAid notes that a small amount of condensation can be normal, while persistent pooling or water with a clear filter and supply path may involve a blocked drain, pan, door seal, or concealed component.
Use your observations
Decision map
Find the observation that best matches what you see, then follow the next safe action.
-
PATH 01Safety boundary
What you see
Water starts at the back, household connection, rear refrigerator connection, or a visibly kinked or cracked supply line.
Do this next
Stop the water supply from a safe accessible valve if it moves normally, keep the refrigerator water system off, and arrange qualified repair for the line or connection.
Why this path and its safety boundary
Why it matters: A supply-line, fitting, shutoff, or tubing problem is more likely than an interior condensation or drain issue.
Safety stop: Do not disconnect pressurized tubing, force the valve, or move the refrigerator alone.
-
PATH 02Safety boundary
What you see
Water appears around the filter or filter housing, especially after a filter change, and the filter is not fully seated, is cracked, or has a displaced O-ring.
Do this next
Follow the exact KitchenAid model instructions to reinstall or conditionally replace the filter and seal, then stop using the water system if the housing still leaks.
Why this path and its safety boundary
Why it matters: The filter seal or filter installation is the best-supported local explanation.
Safety stop: Do not force the filter, use an unverified substitute, or operate with a continuing filter-area leak.
-
PATH 03Safety boundary
What you see
Only a few drops appear immediately after dispensing and stop, with no wet filter, door tube, base, or floor; or dripping continues beyond the normal residual pattern.
Do this next
Use the exact manual for flushing or tray care only when the water system is dry and intact; arrange service for a continuing drip or any water reaching the cabinet or floor.
Why this path and its safety boundary
Why it matters: A brief residual may be normal, but continuing dripping makes air after filter service, a loose connection, ice residue, filter damage, or dispenser tubing more likely.
Safety stop: Stop dispenser testing if the drip persists, the door area is wet, or an electrical area becomes wet.
-
PATH 04Safety boundary
What you see
Water pools inside while the supply line, filter, and dispenser path are dry, and the issue follows humidity, a warm container, a door-seal gap, or a visible drain area.
Do this next
Dry the interior, correct only a clearly visible container or door-seal issue, and use the model-approved accessible drain procedure; call service if water returns or access requires panels.
Why this path and its safety boundary
Why it matters: Condensation or an interior drainage path is more likely than a rear supply leak, but recurring pooling can still indicate a blocked or concealed drain component.
Safety stop: Do not chip ice, probe deeply, remove evaporator covers, or use chemicals in an interior drain.
-
PATH 05Safety boundary
What you see
The leak continues while idle, reappears after visible checks, reaches electrical parts or flooring, affects food temperature, or cannot be located without moving or disassembling the refrigerator.
Do this next
Stop the dispenser and ice maker, protect the floor and food, record the KitchenAid model and timing, and arrange qualified appliance service.
Why this path and its safety boundary
Why it matters: A concealed water, drain, pan, valve, tubing, seal, or structural problem remains possible and is outside safe ordinary-access troubleshooting.
Safety stop: Do not move the refrigerator alone, remove panels, cut tubing, open sealed refrigeration components, or work near live wiring.
Helpful context
Understand the symptom
Trace the water before replacing a part
A puddle at the front may have traveled from an interior filter, door tube, drain path, or rear connection. Dry the floor and visible cabinet surfaces, then observe the next drip without pulling the refrigerator or removing panels. The location and timing—idle, after dispensing, after ice production, after a filter change, or after door work—usually narrow the safe next check more than the size of the puddle does.
KitchenAid models use different water layouts
KitchenAid's official product-help pages cover built-in, French-door, bottom-freezer, and side-by-side layouts separately. A dispenser tube may run under a hinge cover on one design, while another has a base-grille filter or a different filter housing. Use the model number and matching Use & Care Guide before removing a filter, door trim, tubing, or a drain cover.
Protect the floor, food, and electrical areas
Move food away from standing water and discard food that has been contaminated or held outside safe storage conditions. Keep hands, plugs, and tools dry. If water is near an outlet, cord, controls, compressor, or other electrical connection, do not reach into the wet area; isolate power only from a dry, safe position or arrange qualified service.
Safety boundary
Stop conditions
- Stop the dispenser and ice maker when water is actively leaking or reaching the floor, door, controls, or electrical area.
- Do not touch wet electrical parts, move a water-connected refrigerator alone, or work on live wiring.
- Do not force a filter, fitting, shutoff, hose, door tube, drain cover, or panel.
- Do not chip ice, probe a drain with sharp objects, pour chemicals into a drain, cut tubing, or open sealed refrigeration components.
- Stop and arrange qualified service for a hidden, recurring, or damaging leak, food-temperature concern, or water reaching flooring or electrical areas.
Only after diagnosis
Potential parts
- KitchenAid refrigerator water filter
Consider this category only when the exact model uses a filter and inspection confirms a cracked, damaged, incorrectly seated, or leaking filter after the model-approved installation check.
Confirm the complete KitchenAid model and manufacturer's filter information, including seal arrangement, before ordering; do not assume a filter fits by appearance. - refrigerator water supply hose or connector
Consider this category only when a qualified or safely accessible inspection confirms a cracked, kinked, or leaking external water line or connector.
Confirm the exact model, connection type, tubing specification, and installation procedure with KitchenAid or a qualified technician before ordering.
When checks do not resolve it
Need a professional?
Arrange qualified KitchenAid or appliance service when the leak persists after the exact model's accessible check, water appears behind the cabinet, a hose, filter housing, valve, dispenser tube, ice-maker line, pan, drain, or seal needs disassembly, the leak recurs, water reaches electrical parts or flooring, or food safety is uncertain.
Safety scope: This article supports containment, location mapping, dry visible inspection, and only model-approved filter or drain handling. Water-line disassembly, panel removal, electrical work, sealed-system work, and contaminated-water cleanup require qualified service.
Common questions
FAQ
Why is my KitchenAid refrigerator leaking water inside?
Check the model-specific filter area for correct seating, damage, and O-rings, then consider whether the water is condensation or pooling near an interior drain. KitchenAid notes that a small amount of condensation can be normal, but recurring pooling or a clear filter area needs service-level diagnosis.
What should I check when water is leaking from the back of a KitchenAid refrigerator?
From a dry visible position, inspect the household supply line, rear connection, shutoff, and exposed tubing for cracks, kinks, or wet joints. KitchenAid treats these as separate checks. Stop the water system and arrange service if the line or connection continues to leak.
Are a few drops from the KitchenAid dispenser normal?
KitchenAid manuals note that a few drops immediately after dispensing can be normal. Dripping that continues, began after a filter change, or appears at the door, filter, base, or floor is a different symptom and should be checked with the exact manual or by service.
Should I pull the KitchenAid refrigerator out to find the leak?
Not as an ordinary first step. Moving a water-connected refrigerator can strain tubing and expose electrical or floor hazards. Record the visible source and model, keep the water system stopped, and arrange qualified service when the leak is behind the cabinet or cannot be reached safely.
Read the exact guide
Official sources
- Water Inside RefrigeratorKitchenAid Product Help · KitchenAid French-door bottom-freezer guidance; model-specific instructions control the exact filter and interior access procedure.
- Leaking from Bottom - Built-In RefrigeratorKitchenAid Product Help · KitchenAid built-in refrigerator guidance; use the exact model manual and layout for another refrigerator.
- Product HelpKitchenAid · KitchenAid's official support portal; use the model number to locate the matching help article and service path.
- Leaking at the Top - Bottom Freezer RefrigeratorKitchenAid Product Help · KitchenAid French-door bottom-freezer guidance; the location of tubing and access vary by model.
- Owner's ManualKitchenAid · KitchenAid owner manual for the identified model family; use the exact manual for another refrigerator.
Community feedback
Share a repair observation
Share a plain-text repair observation. Accepted observations are published automatically; this page may take a moment to update.