
On this page
Start here
Quick answer
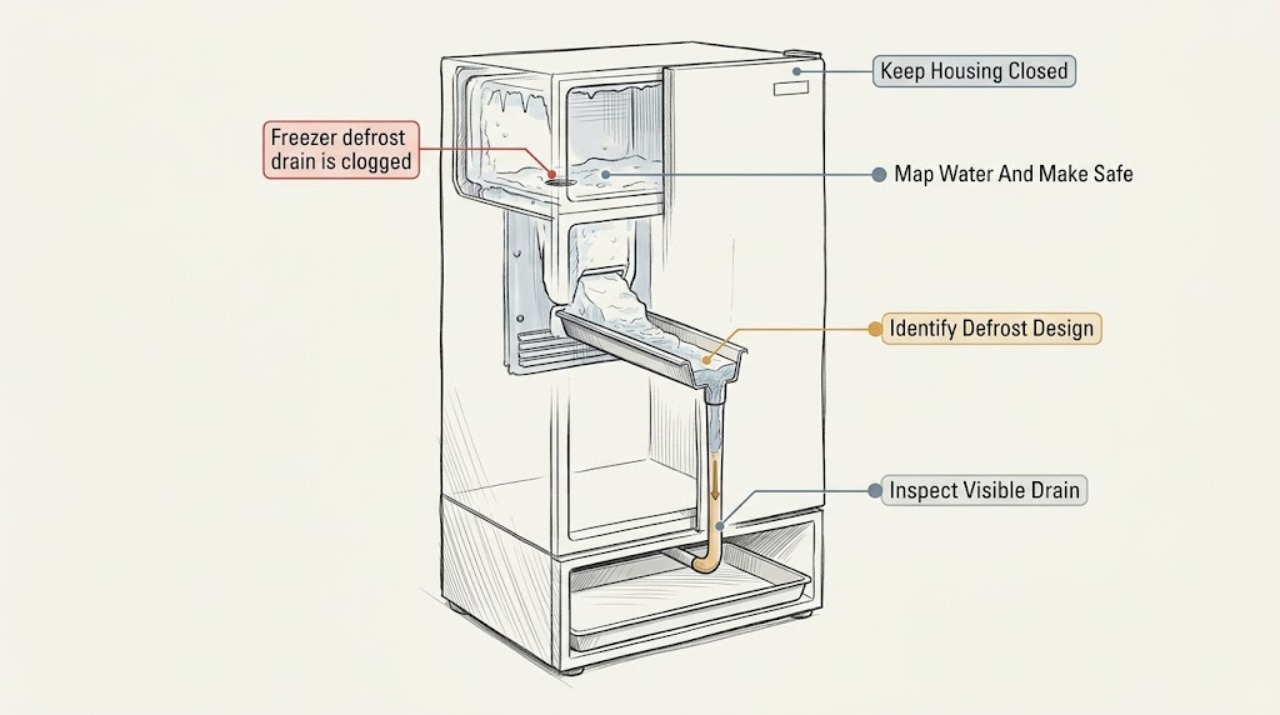
A Kenmore freezer drain that stays blocked usually has ice or debris in the drain opening, trough, or tube, but access differs between manual-defrost freezers, frost-free uprights, and refrigerator-freezer combinations. First identify the exact model and its manual, unplug only when the procedure calls for it, protect the floor and food, and locate the visible drain or drain cap without removing an evaporator cover. If the model's instructions permit defrosting, let ice melt, use only the documented drain path, and confirm that a small amount of warm water reaches the drain pan. Never chip ice with a knife, drill the drain, force water through a hidden tube, remove a frost-free panel, or use a heat gun or flame. If water backs up again, frost returns quickly, the drain pan or tube is damaged, or the freezer is warming, stop and arrange qualified appliance service.
Before you begin
Safety first
- This article permits model lookup, floor and water-source observation, visible drain inspection, and only the exact manual's documented defrost and flow steps. A technician must handle hidden drain access, panel removal, electrical or defrost components, water-line disconnection, and any sealed cooling work.
Work through in order
Diagnostic checks
Use only checks that match the exact appliance or system and its official guide.
-
Check 1
Keep the freezer door closed while you gather the model number, towels, a shallow pan, and a safe place for frozen food. From a dry position, note where water or ice appears: inside the freezer floor, under the cabinet, near the front seal, or at a water-line or ice-maker connection.
Expected result: Water or ice appears only during or after defrost at the freezer bottom, or water is steady, comes from a supply connection, reaches the floor without a defrost event, or the freezer is warming.
Next step: Photograph the location and continue only with the matching manual procedure. For a supply leak, warming food, or water near electrical parts, stop use and arrange service.
Stop if: Stop for active leakage near wiring, a damaged cord, smoke, burning smell, a tripped breaker, unsafe food temperature, or a cabinet that cannot be kept dry.
Why this matters
Why: A defrost-timed puddle supports a drain-path check. A steady supply leak, damaged pan, or warming compartment is not established as a clogged drain and needs a different response.
-
Check 2
Use the exact Kenmore model number to open the owner's manual and determine whether the freezer is manual-defrost, frost-free, a chest unit with a drain plug, or part of a refrigerator-freezer with a hidden drain. Locate only the drain cap, hose, or trough that the manual identifies as accessible.
Expected result: The manual gives a user defrost and drain procedure, identifies no user-accessible drain, or directs panel removal or service access.
Next step: Follow only the documented user steps for an accessible drain. If access requires a rear interior panel, wiring, a fan cover, or a sealed cooling area, stop and request appliance service.
Stop if: Do not use a generic diagram, remove a frost-free evaporator cover, or open any panel not identified as user-removable for the exact model.
Why this matters
Why: Drain layout and safe access are model-dependent. A frost-free unit with a hidden drain can have ice behind an evaporator cover, but that does not authorize a user to remove the cover or probe the tube.
-
Check 3
With the freezer still powered as the manual directs, inspect the visible drain opening, trough, cap, hose end, and pan area for an ice plug, food debris, sludge, a missing cap, or a displaced hose. Remove only loose debris that the manual permits you to remove without reaching behind a panel.
Expected result: The opening or trough has visible ice or debris, the drain cap or hose is not in its documented position, the opening looks clear, or the drain is hidden or inaccessible.
Next step: If the manual permits it, continue with a complete defrost and documented drain procedure. If the path is hidden, damaged, or clear but water still backs up, arrange service rather than probing farther.
Stop if: Do not push a wire, screwdriver, drill bit, compressed air, or rigid object into the drain; do not pry ice from a cooling surface.
Why this matters
Why: Visible ice or debris can block the first part of the drain path. A clear opening with recurring water suggests a blockage farther down, a drain-pan problem, a defrost-system issue, or a different leak source.
-
Check 4
Only if the Kenmore manual permits user defrosting, remove or protect the frozen food, disconnect power, open the door or lid, place the specified shallow pan or hose at the drain, and let the ice melt naturally or by the documented warm-water method. Keep electrical devices outside the wet freezer.
Expected result: The ice melts and water exits through the intended drain, water remains trapped, the pan begins to overflow, or the manual does not describe this procedure for the model.
Next step: Keep collecting water, dry the interior, replace every cap or plug, and restore power only as the manual directs. If water does not drain or the model procedure is unclear, stop and arrange service.
Stop if: Never use a knife, ice pick, metal tool, heat gun, open flame, or electrical fan inside the freezer; do not leave a drain pan unattended while melting ice.
Why this matters
Why: Free flow during a documented defrost supports an ice blockage at the opening or trough. Trapped water, overflow, or an absent procedure means the tube, pan, routing, or access needs model-specific service.
-
Check 5
After the visible ice has fully melted and only when the exact manual allows a flow check, pour a small amount of warm water into the drain trough or use the specified hose path. Watch the drain pan from a safe position and then restore the cap, hose, plug, and power exactly as documented.
Expected result: Water reaches the pan without backing up, water returns into the freezer, the pan is cracked or displaced, or the drain end is not visible.
Next step: Dry the freezer and monitor one defrost event. If flow is not clear or water returns, keep the appliance out of service as needed and request model-specific diagnosis.
Stop if: Do not use boiling water, pressure, chemicals, a rigid probe, or suction; stop if water could reach wiring or the drain route cannot be confirmed.
Why this matters
Why: A clear flow supports a previously frozen or debris-blocked path. Backflow, a damaged pan, a missing drain end, or no visible outlet indicates a deeper blockage, routing issue, or damaged part.
-
Check 6
After the documented drain procedure, inspect the visible door or lid gasket contact, closure, interior vents, frost pattern, and accessible cabinet area. Record whether the clog returns, frost builds quickly, the freezer warms, or water appears without a defrost event.
Expected result: The drain remains clear and the freezer holds temperature, or water or ice returns, frost rapidly covers the rear wall, the gasket has a gap, vents are blocked, or cooling is poor.
Next step: Correct only loose visible obstructions and closure issues allowed by the manual. For recurrence, hidden access, rapid frost, or poor cooling, provide the record and arrange qualified appliance service.
Stop if: Do not remove an evaporator panel, test a heater or timer, bypass a control, or keep the freezer running when food is thawing or water reaches electrical components.
Why this matters
Why: A stable result supports a one-time ice or debris blockage. Rapid recurrence points toward warm-air entry, a defrost heater or control issue, hidden tube restriction, blocked airflow, or another fault that a user flush cannot fix.
Use your observations
Decision map
Find the observation that best matches what you see, then follow the next safe action.
-
PATH 01Safety boundary
What you see
The water appears on the freezer floor during or after defrost, visible ice blocks an identified drain opening, and the exact Kenmore manual permits user defrosting.
Do this next
Disconnect power as directed, collect water, let the ice melt, use the documented drain cap or hose path, and verify flow without pressure or sharp tools.
Why this path and its safety boundary
Why it matters: An ice plug in the drain opening or trough is plausible. The safe repair is complete model-directed melting and drainage, not probing the tube.
Safety stop: Stop if water does not move after the documented melt, the route is hidden, or any tool would touch a coil or electrical part.
-
PATH 02Safety boundary
What you see
The visible opening is clear but water backs up, the drain end is hidden, or a frost-free interior requires panel removal to reach the trough.
Do this next
Stop DIY clearing and arrange service with the model number, water location, frost pattern, and the result of the visible inspection.
Why this path and its safety boundary
Why it matters: The restriction may be farther in the tube, at a drain-pan route, or in a defrost area that is not user-accessible. Repeated flushing can damage the appliance or move water toward wiring.
Safety stop: Do not remove hidden panels, force water, use wire or compressed air, or pierce ice near the evaporator.
-
PATH 03Safety boundary
What you see
A model-directed defrost clears the ice, water reaches the pan, the freezer dries and holds temperature, and the door or lid seals normally.
Do this next
Keep vents and the drain area clear, limit long door openings, and monitor for renewed floor ice or water. Use the manual if another defrost is needed.
Why this path and its safety boundary
Why it matters: A one-time frozen or debris-blocked drain is more likely than a failed cooling or defrost component, but the drain path should be watched through the next normal defrost.
Safety stop: Stop if water returns, frost builds rapidly, the freezer warms, or the gasket cannot close fully.
-
PATH 04Safety boundary
What you see
The drain clears briefly but ice or water returns, frost rapidly covers the interior, the gasket has a gap, vents are blocked, or cooling is weak.
Do this next
Correct only an obvious loose closure or vent obstruction allowed by the manual, then arrange qualified service for recurrence or poor cooling.
Why this path and its safety boundary
Why it matters: Recurring warm-air entry, a defrost-system problem, airflow restriction, drain-tube restriction, or drain-pan issue is more likely than a single clog.
Safety stop: Do not bypass a defrost control, remove a frost-free panel, keep adding water, or continue operation while food is thawing.
-
PATH 05Safety boundary
What you see
Water is steady rather than defrost-timed, comes from a supply connection or ice-maker area, overflows a cracked or displaced pan, or appears with no freezer-floor frost.
Do this next
Stop the water supply if the exact appliance setup provides a safe accessible shutoff, protect the floor, and arrange service if the source is not obvious or water is near electrical parts.
Why this path and its safety boundary
Why it matters: The symptom is not established as a clogged defrost drain. A supply, pan, leveling, or ice-maker issue needs a different inspection.
Safety stop: Do not pull a loaded freezer, disconnect a hidden water line, or operate with active leakage.
Helpful context
Understand the symptom
Confirm that the water pattern is a defrost-drain problem
A sheet of ice or water on the freezer floor that appears during or after defrost points toward the defrost trough or drain path. A steady drip from a water line, an ice-maker fill tube, or a cracked pan is a different branch. Kenmore sells both manual and frost-free freezer designs, so do not assume that a visible rear panel or drain opening is user-removable. Use the model number to retrieve the matching manual before taking anything apart.
Melt a blockage only through the documented drain path
If the manual permits user defrosting, the safe sequence is to protect or relocate the food, disconnect power, let the ice melt, collect water at the specified drain, and restore every cap or plug. An official freezer manual describes a drain cap and hose adapter on some models, while other models require water to be collected from the freezer bottom. Warm water may be used only where the exact instructions allow it; never force a hidden drain or use a sharp tool that could puncture a cooling line.
A recurring clog needs a cause check
If the drain clears but freezes or backs up again, check the full pattern rather than repeating the same flush. A door or lid that does not seal can bring humid air into the freezer and create excess frost; a blocked vent, failed defrost system, restricted tube, misrouted hose, or damaged drain pan can also recur. Frost-free units often need panel access and electrical or defrost-component testing, which belongs to a qualified appliance technician.
Safety boundary
Stop conditions
- Stop for active leakage near wiring, smoke, burning smell, a damaged cord, a tripped breaker, water damage, unsafe food temperature, or water that cannot be contained.
- Do not remove a frost-free evaporator cover, reach behind an electrical panel, bypass a defrost control, test a heater or timer, or work on a sealed cooling system.
- Never chip frost or a drain plug with a knife, ice pick, screwdriver, drill, wire, or other sharp or rigid tool; do not pierce cooling lines.
- Do not use a heat gun, open flame, boiling water, chemicals, compressed air, or pressure to force a hidden drain clear; keep electrical devices out of a wet freezer.
- Do not force a cap, hose, drain plug, door, or lid, and do not move a loaded freezer alone to reach a drain or pan.
- Stop after one documented defrost and flow check when the drain remains blocked, water returns, frost rapidly returns, or the freezer is warming; arrange qualified appliance service.
Only after diagnosis
Potential parts
- defrost drain tube or drain hose
Consider this category only if service confirms that the model's drain tube or hose is blocked, damaged, misrouted, or unable to carry defrost water after the accessible ice is removed.
Confirm the exact Kenmore model, tube routing, material, connections, and manufacturer's fit information before ordering. - defrost drain pan or drain cap
Consider this category only if inspection confirms a cracked, missing, displaced, or leaking pan, cap, or plug rather than a blockage in the drain path.
Confirm the exact model and drain design, dimensions, mounting, and fit information; do not substitute a cap or pan by appearance alone. - defrost system component
Consider this category only after a qualified technician confirms recurring frost is caused by a failed defrost heater, sensor, timer, or control rather than a door-seal or drainage issue.
Confirm the exact model, electrical rating, connector, defrost design, and manufacturer's fit information; do not bypass or live-test the component.
When checks do not resolve it
Need a professional?
Arrange qualified appliance service when the exact Kenmore manual does not provide user access, the drain remains blocked after a documented defrost, water backs up or returns, the drain pan or hose is damaged or displaced, the unit rapidly frosts, the freezer warms, or the clog recurs. Also request service for a steady water-line leak, water near wiring, or any repair requiring panel removal, defrost-component testing, electrical work, or sealed-system access.
Safety scope: This article permits model lookup, floor and water-source observation, visible drain inspection, and only the exact manual's documented defrost and flow steps. A technician must handle hidden drain access, panel removal, electrical or defrost components, water-line disconnection, and any sealed cooling work.
Common questions
FAQ
Where is the defrost drain on a Kenmore freezer?
It depends on the exact Kenmore design. A manual-defrost chest or upright may have a visible drain plug or trough, while a frost-free freezer may route water behind an interior cover. Use the model number on Kenmore's manuals page and follow that manual; do not remove a hidden panel by guesswork.
Can I pour hot water into a clogged Kenmore freezer drain?
Use only the temperature and method allowed by the exact manual. Official freezer guidance uses warm water in some defrost procedures, but boiling water, pressure, chemicals, heat guns, and flame can damage plastic, seals, wiring, or cooling parts. Keep electrical devices out of the wet freezer.
Why does my Kenmore freezer drain clog again after defrosting?
A recurring clog can involve a door or lid gasket that admits humid air, blocked airflow, a hidden drain-tube restriction, a displaced or cracked pan, or a failed defrost component. If ice or water returns after one model-directed defrost and flow check, arrange service instead of repeatedly probing the drain.
Can I use a wire or coat hanger to clear a Kenmore freezer drain?
No. A rigid or sharp object can puncture a cooling line or damage the drain. Let visible ice melt through the documented procedure and stop when the blockage is hidden or water still backs up.
Is water under a Kenmore freezer always a clogged defrost drain?
No. Water may come from a supply line, ice-maker fill path, cracked or displaced pan, door-seal condensation, or a defrost drain. Water that is steady rather than defrost-timed, or water near electrical parts, needs a separate service response.
Read the exact guide
Official sources
- 7 Freezer Problems & How to Help Fix ThemWhirlpool · Official manufacturer troubleshooting reference used for symptom branches; the exact Kenmore manual and model design control.
- Find Your Manual | Kenmore Appliance Manuals & GuidesKenmore · Direct Kenmore source establishing the model-number lookup required before selecting a drain or defrost procedure.
- Customer Care & Support | Kenmore AppliancesKenmore · Direct Kenmore support source used for model-specific service escalation, not for a universal drain-clearing procedure.
- Owner's ManualWhirlpool · Official freezer manual used for general model-dependent drain and defrost safety; the exact Kenmore manual controls the assigned appliance.
- Cleaning the Interior - Convertible Chest Freezer - Product HelpWhirlpool · Official freezer product-help guidance used for safe defrost concepts; it is not a claim that every Kenmore freezer has the same drain layout.
Community feedback
Share a repair observation
Share a plain-text repair observation. Accepted observations are published automatically; this page may take a moment to update.