
On this page
Start here
Quick answer
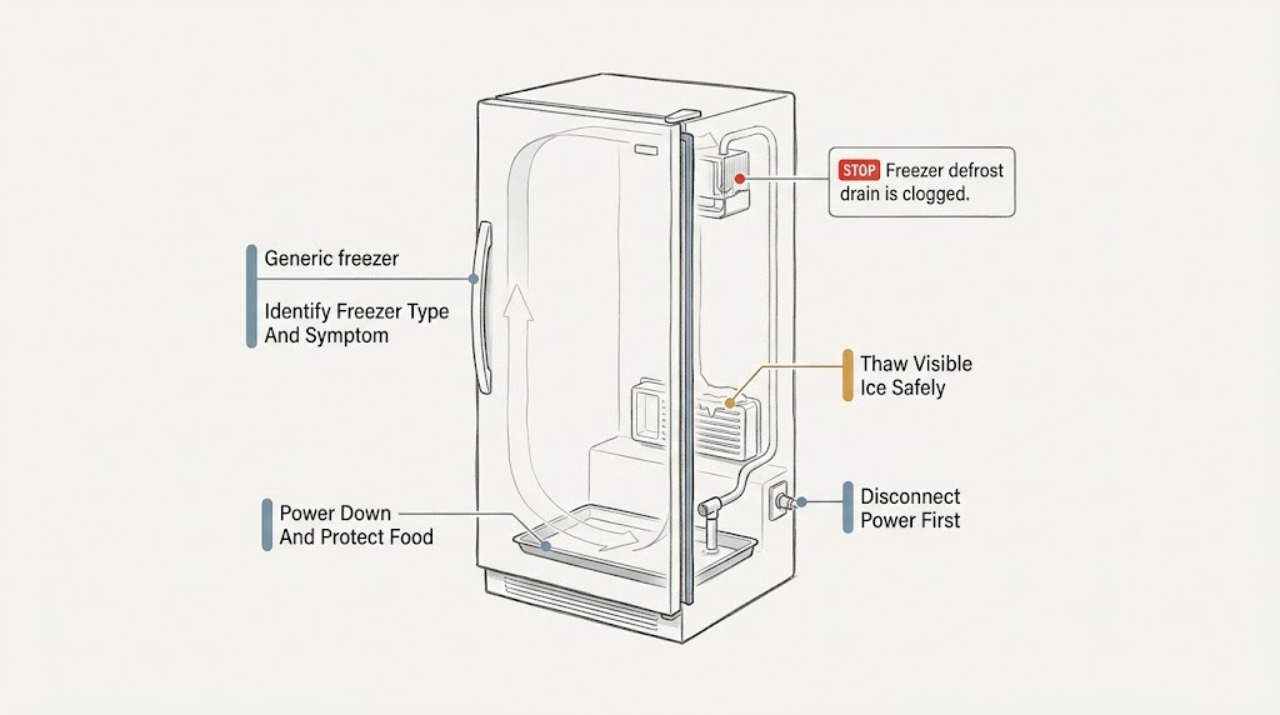
A GE freezer drain problem commonly shows up as ice or water on the freezer floor, beneath a bottom basket or drawer, or water on the floor after a defrost cycle. First identify whether the freezer is a self-defrost upright or a manual-defrost chest or older unit, because GE says only self-defrost models have a defrost drain tube and the exact model determines whether the drain can be accessed. Unplug the freezer, protect the food, thaw visible ice using the model manual's method, and only flush a clearly accessible drain with hot tap water and baking soda if GE's instructions for that model allow it. Do not chip ice with a sharp tool, use an electrical heating device or open flame, puncture the liner, or remove inaccessible panels. If the drain opening is not visible, the ice or leak returns, the rear wall is heavily iced, water reaches electrical parts, or the freezer is warming, arrange qualified appliance service.
Before you begin
Safety first
- This article covers model-guided observation, unplugging, food protection, visible thawing, and an approved flush only where GE explicitly permits access. Do not open electrical or sealed-system covers, puncture the liner, probe live parts, force panels, or continue through a water, electrical, cooling, or food-safety hazard.
Work through in order
Diagnostic checks
Use only checks that match the exact appliance or system and its official guide.
-
Check 1
Identify the GE freezer format and defrost type from the model label and Owner's Manual, then photograph or note where the water or ice appears: freezer floor, under a basket or drawer, rear wall, outside floor, or nowhere visible.
Expected result: Record whether this is a self-defrost upright or side-by-side, a manual-defrost chest or older unit, and whether the symptom follows a defrost cycle or is an isolated spill.
Next step: Use the exact model manual to locate an approved drain opening or drain plug. If the unit is manual-defrost, follow its manual-defrost procedure rather than searching for a tube.
Stop if: Stop and protect food if the cabinet is warming or water is reaching electrical parts; do not remove panels or guess at the defrost system.
Why this matters
Why: GE says only self-defrost freezers have a defrost drain tube; current GE uprights have one, while GE chest freezers are manual-defrost and do not. Ice under a bottom basket plus floor water is a typical clogged-drain pattern on applicable side-by-side models.
-
Check 2
Turn the temperature control off and unplug the freezer before cleaning or thawing, then move food to an insulated container and place towels or a pan where thaw water can collect.
Expected result: Confirm the plug is disconnected, food is protected, and water cannot run toward an outlet, cord, light, control, or other electrical part.
Next step: Proceed only with the model-approved thawing and drain-access steps. Keep the freezer out of service until water is controlled and the drain cap or tube is correctly restored.
Stop if: Stop immediately for smoke, sparks, a damaged or hot cord, water at electrical parts, or food that is thawing unsafely; arrange qualified service.
Why this matters
Why: GE's freezer defrost instructions begin with turning the control off and unplugging, removing food, and sponging water so it does not overflow. This establishes a safe observation boundary before any drain access.
-
Check 3
Allow visible ice around the freezer floor or approved drain area to thaw using the method in the GE manual for this model; remove only loose ice and wipe pooled water without opening sealed or inaccessible panels.
Expected result: Note whether the ice loosens, a drain opening becomes clearly visible, water begins to move into the drain path, or the ice is on the rear wall or behind a panel that the manual does not authorize you to remove.
Next step: If a clearly visible drain opening is identified and the model manual permits cleaning, continue to the approved flush. Otherwise stop and arrange service.
Stop if: Never chip with an ice pick, knife, screwdriver, or other sharp object; do not use an electrical heating device, open flame, heat gun, or force an internal panel.
Why this matters
Why: GE documents thawing before inspecting the lower rear interior on some accessible models, but says models requiring disassembly or without a visible drain opening need service. Rear-wall ice or ice that does not resolve can indicate more than a simple accessible clog.
-
Check 4
Only if the drain opening is visible and the model's GE instructions authorize it, use a bulb baster to flush the specified baking-soda and hot tap-water solution into the opening; never use boiling water or pressure that could damage the tube.
Expected result: Look for water flowing into the drain pan below or otherwise leaving the cabinet without backing up. Record whether the opening clears, remains blocked, or leaks back into the freezer.
Next step: When flow is restored, wipe the cabinet dry, replace any cap or tube as directed, reconnect power, and monitor for recurrence. If flow does not restore or water continues to leak, arrange service.
Stop if: Stop if the drain is not visible, the solution backs up, water approaches electrical parts, a panel must be forced, or the symptom persists after the approved flush.
Why this matters
Why: GE's side-by-side guidance describes a baking-soda and hot-tap-water flush for models with an accessible drain and says hearing water run into the pan indicates the path is clear. GE also says inaccessible or non-resolving models need service.
-
Check 5
After restoring the drain parts and power, monitor the freezer floor, rear wall, bottom basket or drawer, outside floor, temperature trend, and frost pattern through the next normal defrost interval.
Expected result: Classify the result as dry with stable freezing, a single resolved puddle, recurring ice or water, heavy rear-wall frost, a warm cabinet, or water returning near electrical components.
Next step: Arrange qualified GE appliance service for recurrence, inaccessible drainage, rear-wall ice, poor cooling, or any unresolved leak; provide the model, symptom location, photos, and steps already taken.
Stop if: Do not repeatedly thaw the freezer, bypass a defrost control, puncture the liner, or continue operation through an electrical, active-leak, or food-safety hazard.
Why this matters
Why: A dry cabinet after an approved clear supports a resolved obstruction. Recurring water, rear-wall ice, persistent leakage, or a warm cabinet makes a continuing drain, door-seal, airflow, defrost, control, or other fault more likely.
Use your observations
Decision map
Find the observation that best matches what you see, then follow the next safe action.
-
PATH 01Safety boundary
What you see
A self-defrost GE freezer has ice on the floor or beneath the bottom basket or drawer, sometimes followed by water on the floor after defrost.
Do this next
Unplug, protect food, thaw visible ice, and look for an accessible drain only under the exact model instructions; use the approved flush only if the opening is visible.
Why this path and its safety boundary
Why it matters: GE identifies this combination as consistent with a clogged defrost drain on applicable side-by-side models.
Safety stop: Stop for an inaccessible opening, rear-wall ice, water at electrical parts, or a symptom that returns after the approved clear.
-
PATH 02Safety boundary
What you see
The GE unit is a manual-defrost chest freezer or older manual-defrost model and has a drain plug or manual defrost path rather than a tube.
Do this next
Follow the model manual's unplugging, food-protection, drain-plug, thawing, and water-collection instructions. Do not apply a side-by-side drain-flush procedure by assumption.
Why this path and its safety boundary
Why it matters: GE says manual-defrost chest freezers do not have a defrost drain tube or drip pan; some have a removable drain plug instead.
Safety stop: Stop if the plug is stuck, the manual is unavailable for the model, water reaches electrical parts, or the freezer will not maintain safe freezing.
-
PATH 03Safety boundary
What you see
The exact GE instructions show a visible drain opening, loose ice thaws, and an approved hot-tap-water/baking-soda flush flows into the drain pan.
Do this next
Dry the cabinet, restore the drain parts exactly, reconnect power, and monitor for another defrost cycle and any new ice or puddle.
Why this path and its safety boundary
Why it matters: Restored flow supports a localized obstruction rather than proving that every defrost component is healthy.
Safety stop: Stop and request service if water backs up, leaks on the floor, the opening freezes again, or cooling becomes abnormal.
-
PATH 04Safety boundary
What you see
No drain opening is visible, the opening is behind a panel requiring unlisted disassembly, the flush does not restore flow, or water continues to leak.
Do this next
Leave the freezer unplugged if water is uncontrolled, protect food, and arrange qualified appliance service with the model and symptom location.
Why this path and its safety boundary
Why it matters: GE says models requiring disassembly or a drain problem that does not resolve with the model-approved steps need service.
Safety stop: Do not force panels, probe the tube, use pressurized or boiling water, or repeatedly power-cycle the freezer.
-
PATH 05Safety boundary
What you see
Ice is concentrated on the rear wall, the cabinet is warming, airflow is blocked by frost, or water and ice return despite a confirmed drain flow.
Do this next
Protect food and arrange qualified service for model-specific diagnosis; document the frost pattern, temperature trend, and recurrence timing.
Why this path and its safety boundary
Why it matters: This pattern is less consistent with a single accessible drain obstruction and may involve the defrost system, airflow, door seal, or another fault.
Safety stop: Do not remove sealed panels, bypass the defrost system, or continue operation if food is thawing or water reaches electrical parts.
-
PATH 06Safety boundary
What you see
Water reaches an outlet, cord, light, control, or other electrical part, or there is active uncontrolled leaking, smoke, sparks, or a damaged or hot cord.
Do this next
If it can be done without touching wet or damaged parts, disconnect power at the plug or breaker, keep people away from the water, protect food, and arrange qualified service; use local emergency procedures for smoke or fire.
Why this path and its safety boundary
Why it matters: This is an electrical and property-safety boundary, not a routine drain-cleaning task.
Safety stop: Do not touch live or wet electrical parts, restart the freezer, remove covers, or attempt to contain a leak by forcing the appliance to run.
Helpful context
Understand the symptom
Confirm that the freezer has a defrost drain
GE distinguishes self-defrost from manual-defrost freezers. Current GE upright freezers are self-defrost models with a drain tube and pan, while GE chest freezers are manual-defrost and do not have a defrost drain tube or pan. Older upright models can be either type, so use the model's Owner's Manual before looking for a drain. A drain symptom on a manual-defrost unit may instead be a drain plug or normal manual-defrost water path.
Use the symptom location to test the clog hypothesis
Ice under the bottom basket or on the freezer floor, together with water on the floor during or after defrost, is a GE-described pattern for a clogged drain on applicable side-by-side models. That pattern is different from an isolated spill or a door that was left open. Water on a rear wall, heavy rear-wall ice, a warm cabinet, or a leak that continues after the drain is cleared suggests that a defrost, airflow, door-seal, or other diagnosis may also be needed.
Clear only a visible, model-approved drain
After unplugging and allowing ice to thaw, inspect the lower rear interior only as far as the model instructions permit. GE describes some accessible side-by-side drain holes and a bulb-baster flush with hot tap water and baking soda; it also says models without a visible drain hole or models requiring disassembly need service. Do not force a panel, probe the liner, or improvise a tool or heat source. If the freezer is a manual-defrost model, follow its drain-plug and defrost procedure instead.
Check the result and recurrence
After the approved thaw or flush, confirm that water leaves through the drain path rather than pooling in the cabinet, replace any drain cap or tube exactly as the manual specifies, and monitor for a new ice layer or floor puddle. A return of the symptom can mean that the tube is still obstructed or that a defrost, seal, airflow, or drain-component problem remains. Repeatedly thawing an inaccessible or recurring blockage is not a substitute for diagnosis.
Safety boundary
Stop conditions
- Unplug before maintenance or cleaning, keep thaw water away from outlets and electrical parts, and protect or relocate food if the freezer is warming.
- Do not use an ice pick, knife, screwdriver, sharp scraper, electrical heating device, heat gun, or open flame to remove ice; do not puncture the liner or sealed system.
- Do not force an internal panel, probe an inaccessible tube, use boiling or high-pressure water, or apply a procedure that is not in the exact GE model manual.
- Stop for water at electrical parts, smoke, sparks, a damaged or hot cord, active uncontrolled leaking, or a freezer that cannot maintain safe freezing; arrange qualified service.
- Do not repeatedly thaw, flush, or reset the freezer when the drain is inaccessible, the symptom returns, rear-wall ice is heavy, or cooling remains abnormal.
Only after diagnosis
Potential parts
- defrost drain tube, grommet, drain pan, or drain plug
Consider this category only when the exact model and qualified diagnosis confirm a damaged, displaced, missing, or persistently obstructed drain component after the approved cleaning path is verified.
Match the complete GE model and the freezer's defrost type; a manual-defrost drain plug is not interchangeable with a self-defrost drain tube. - defrost heater, sensor, thermostat, or control
Consider this category only if recurring ice, rear-wall frost, or poor cooling leads a qualified technician to diagnose a defrost-system or control fault rather than a simple drain obstruction.
Confirm the exact model, measured fault, wiring, and service procedure before ordering; do not bypass a sensor or control. - freezer door gasket or hinge-related sealing assembly
Consider this category only when a damaged or leaking gasket or door alignment is confirmed as a contributor to recurring frost and drain loading.
Match the complete GE model and gasket profile; do not force, heat, or reshape the seal without model-specific instructions.
When checks do not resolve it
Need a professional?
Arrange qualified GE appliance service when the drain opening is inaccessible, the freezer requires disassembly, an approved thaw or flush does not restore flow, water or ice returns, rear-wall frost is heavy, the cabinet is warming, or the door seal, defrost system, airflow, or drain parts need diagnosis. Disconnect power if safe when water reaches electrical parts or there is a damaged cord; follow local emergency procedures for smoke or fire.
Safety scope: This article covers model-guided observation, unplugging, food protection, visible thawing, and an approved flush only where GE explicitly permits access. Do not open electrical or sealed-system covers, puncture the liner, probe live parts, force panels, or continue through a water, electrical, cooling, or food-safety hazard.
Common questions
FAQ
Does every GE freezer have a defrost drain tube?
No. GE says current upright freezers are self-defrost and have a drain tube, while GE chest freezers are manual-defrost and do not. Older models can differ, so check the model's Owner's Manual before attempting drain work.
What does a clogged GE freezer defrost drain look like?
On applicable side-by-side models, GE describes ice under the bottom basket or on the freezer floor, sometimes with a puddle on the floor when defrost water escapes through the door. An isolated spill or heavy rear-wall frost needs a different assessment.
Can I flush a GE freezer defrost drain myself?
Only when the exact model instructions permit access to a visible drain opening. GE describes using a bulb baster with baking soda and hot tap water on some side-by-side models. If the opening is not visible or access requires disassembly, service is recommended.
Can I use a knife, ice pick, or heat gun to clear the ice?
No. Do not chip ice with sharp tools, puncture the liner, or use an electrical heating device, heat gun, or open flame. Unplug the freezer and use only the thawing method in the exact GE manual.
Why does the drain clog again after I clear it?
A recurring blockage can mean the tube is still obstructed or that a defrost, door-seal, airflow, drain-component, or control problem is producing more ice or water than the drain can handle. Repeated recurrence or poor cooling warrants qualified service.
Read the exact guide
Official sources
- Side-by-Side Refrigerator - Drain TubeGE Appliances · GE side-by-side refrigerator/freezer guidance; access and quantities are model-specific and must be checked against the Owner's Manual.
- Upright Freezer - Manual Defrosting InstructionsGE Appliances · GE manual-defrost upright instructions; use the installed model's Owner's Manual for exact drain hardware and procedures.
- Side-by-Side Refrigerator - Water on Floor, Repairing a Clogged Defrost DrainGE Appliances · GE side-by-side support article; built-in and most freestanding models may require service, and the exact manual controls access.
- Side-by-Side Refrigerator - Ice on Freezer FloorGE Appliances · GE side-by-side guidance; model-specific manuals determine whether the drain is accessible.
- Refrigerator & Freezer - Drain TubesGE Appliances · GE support guidance covering current and older GE freezer types; the installed model manual controls the exact procedure.
Community feedback
Share a repair observation
Share a plain-text repair observation. Accepted observations are published automatically; this page may take a moment to update.