
On this page
Start here
Quick answer
When a Maytag refrigerator ice maker is not making ice, first confirm that ice production is enabled through the model's normal control, the ice bin and freezer door are correctly seated and closed, the freezer is at the model's ice-making setting, and the refrigerator has an open water supply. A kinked line, restricted or incorrectly seated filter, low water flow, a blocked ejector or sensor area, recent installation, or a separate ice-maker fault can also stop production. Use only model-specific reset and filter instructions. Do not pull the refrigerator, disconnect a water line, bypass a sensor, reach into a powered mechanism, or use a knife or heat; arrange qualified appliance service for leaks, damaged tubing, abnormal electrical symptoms, or no improvement after the safe checks and documented wait.
Before you begin
Safety first
- This article covers normal controls, visible inspection, model-safe bin and filter handling, and cautious observation only. Qualified service must handle concealed water connections, internal ice-maker parts, sensors, wiring, valves, cooling faults, and repairs near electrical or water hazards.
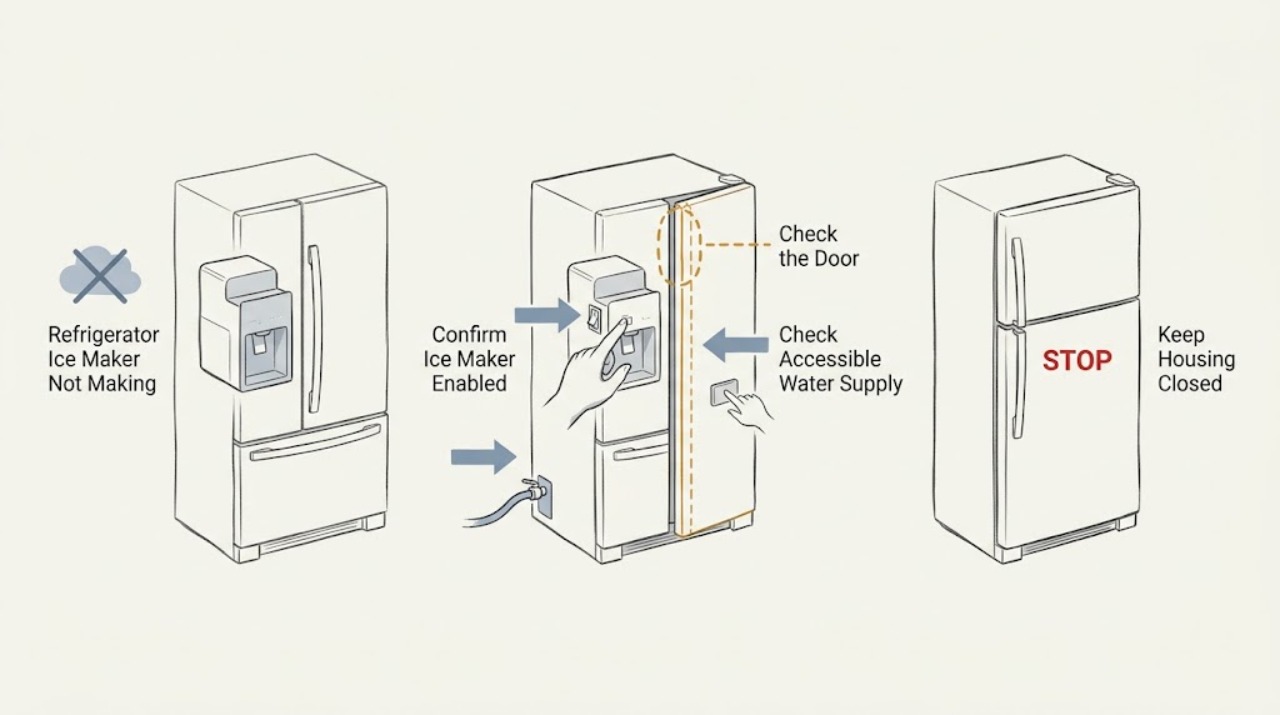
Work through in order
Diagnostic checks
Use only checks that match the exact appliance or system and its official guide.
-
Check 1
Use the normal refrigerator control, accessible switch, or wire arm to confirm that ice production is enabled; consult the exact Maytag manual if the control is not obvious and keep hands out of the mechanism.
Expected result: The ice maker is off or paused, the wire arm is raised, the display shows an ice-off state, or production is enabled with no other visible issue.
Next step: Enable production only through the documented control and allow the model's stated production period. If the control will not enable or the ice maker returns to an off state, arrange service.
Stop if: Do not bypass the control, hold a sensor closed, remove a cover, or reach into a moving or powered ice-maker mechanism.
Why this matters
Why: An accidentally disabled control can explain a completely empty ice bin. If it is enabled, the likely paths shift to bin and door position, water flow, filter, freezer temperature, a temporary obstruction, or an internal fault.
-
Check 2
With the ice maker inactive, remove and reseat the accessible ice container only as the model manual permits; close the freezer door and check that food, shelving, the bin, or a visible sensor area is not blocking closure or the fill-level path.
Expected result: The bin was not fully seated, the door was obstructed or left ajar, the visible sensor area was blocked, or the bin and door are correct but no ice appears.
Next step: Restore the documented bin and door position, then observe through the model's normal wait. Request service if a bin, door seal, sensor, or hinge is damaged or production remains stopped.
Stop if: Do not force the bin, bend an arm, chip ice from the mechanism, or operate with a door that cannot close and seal.
Why this matters
Why: A mis-seated bin, open door, or blocked sensing area can suppress production without proving that the ice-maker assembly has failed. Correct seating with continued silence keeps water, temperature, and internal fault causes in consideration.
-
Check 3
Check that the refrigerator is connected to its water supply and that an accessible shutoff is open; inspect only visible tubing for a kink or crushing, without pulling the refrigerator or loosening a connection.
Expected result: The supply or shutoff is off or unknown, visible tubing is kinked, the water dispenser is weak or absent, or dispenser flow is normal while the ice maker stays dry.
Next step: Restore only an accessible shutoff or visible line position that operates normally and is described by the manual. Use plumbing or appliance service for a hidden restriction, leak, damaged tubing, or any connection that must be opened.
Stop if: Stop for a leak, damaged hose, stuck shutoff, water near electrical parts, or any need to move the refrigerator or disconnect tubing.
Why this matters
Why: An unavailable or restricted water path can keep the ice mold from filling. Normal dispenser flow narrows attention toward the ice-maker fill path, sensor, control, or a model-specific fault, but it does not prove a valve or assembly failure.
-
Check 4
If the refrigerator uses a water filter, identify its status and visible seating from the owner's manual; check whether it was recently installed or is indicated as due, without forcing the housing or leaving the water path open.
Expected result: The filter is indicated as due, recently replaced, visibly mis-seated, associated with a weaker dispenser stream, or the model has no filter in the ice-maker path.
Next step: Follow only the exact model's filter, flushing, and reset procedure, then allow its documented production period. If flow stays weak, the housing leaks, or the filter cannot be identified, request service.
Stop if: Do not bypass filtration, use an unverified substitute, force the filter, or operate with a leaking filter connection.
Why this matters
Why: Maytag says a clogged or incorrectly installed filter can reduce flow to both the dispenser and ice maker. A normal filter does not rule out the supply, temperature, sensor, valve, or ice-maker assembly.
-
Check 5
Read the freezer temperature display or use the model's normal temperature check, and inspect that the freezer door closes against its gasket without an obstruction; do not adjust hidden components or move the refrigerator.
Expected result: The freezer is warmer than the model's ice-making requirement, the door or gasket cannot seal, food blocks an air path, or temperature and closure appear normal.
Next step: Correct only an ordinary food or door obstruction allowed by the manual and allow the model's recovery period. Arrange service for persistent cooling, gasket, hinge, or installation problems.
Stop if: Do not move or tilt the refrigerator, adjust leveling hardware under load, or continue use with a damaged seal or unstable appliance.
Why this matters
Why: A warm freezer or poor door seal can prevent water from freezing and can interrupt the ice-maker cycle. If cooling and closure are normal, water flow, filter, sensing, and internal ice-maker causes remain possible.
-
Check 6
Look only at the accessible bin and ice-maker opening for a loose cube or obvious blockage; clear it only by the safe method explicitly allowed in the model manual, then allow the documented recovery time after startup, reset, or a large ice removal.
Expected result: A loose cube blocks the visible ejector path, the ice maker was recently enabled or emptied, no obstruction is visible, or the mechanism remains stuck after the safe wait.
Next step: Use the model's reset and wait guidance once. If production does not return, keep the ice maker off if it behaves abnormally and arrange qualified Maytag appliance service.
Stop if: Do not chip, pry, twist, melt, heat, manually cycle, or probe the ice maker; do not remove covers.
Why this matters
Why: A temporary blockage or normal recovery period can explain a short interruption. Continued silence or a mechanism that remains stuck after the other checks makes a sensor, fill valve, wiring, control, or ice-maker assembly fault more likely.
Use your observations
Decision map
Find the observation that best matches what you see, then follow the next safe action.
-
PATH 01Safety boundary
What you see
The ice maker was off, paused, or incorrectly positioned, and production resumes after the documented control or bin correction.
Do this next
Leave production enabled and the bin and door correctly positioned, then observe through the model's normal production period. Request service if the same condition returns without a new obstruction.
Why this path and its safety boundary
Why it matters: A setting, bin, door, or sensing-position problem is more likely than a failed internal assembly.
Safety stop: Do not bypass a sensor or force the bin, arm, door, or switch.
-
PATH 02Safety boundary
What you see
The shutoff is closed or unknown, visible tubing is kinked, dispenser flow is weak or absent, or production improves after the model-approved filter check.
Do this next
Restore only the documented accessible supply or filter condition. Use plumbing service for the household connection and appliance service for an internal line, valve, leak, or unresolved restriction.
Why this path and its safety boundary
Why it matters: A supply, filter, pressure, or flow restriction is more likely than a purely mechanical ejector problem.
Safety stop: Do not disconnect tubing, bypass filtration, or operate with a leaking connection.
-
PATH 03Safety boundary
What you see
The freezer is too warm for ice making, the door or gasket cannot seal, or a blocked air path is found.
Do this next
Correct only ordinary control or door obstructions covered by the manual and allow recovery. Arrange service when cooling, hinges, gasket, leveling, or adjustment beyond normal access is involved.
Why this path and its safety boundary
Why it matters: Cooling, door, or airflow conditions can prevent freezing even when the ice-maker control is enabled.
Safety stop: Do not move or tilt the refrigerator or continue use with an unstable appliance or damaged seal.
-
PATH 04Safety boundary
What you see
A visible obstruction is cleared safely, or the ice maker was recently enabled, reset, installed, or heavily emptied while the other checks appear normal.
Do this next
Follow the model's documented wait period and observe one normal cycle. If ice does not return, request service rather than repeatedly resetting or cycling the mechanism.
Why this path and its safety boundary
Why it matters: A temporary obstruction or normal production delay is more likely than an immediately failed component.
Safety stop: Do not use sharp tools, heat, forced defrosting, or manual cycling.
-
PATH 05Safety boundary
What you see
The ice maker is enabled, the bin and door are correct, water and filter checks are normal, the freezer is cold enough, and no safe wait or visible-obstruction check restores production.
Do this next
Keep the ice maker off if it clicks, buzzes abnormally, leaks, or repeatedly faults, and arrange qualified Maytag appliance service with the model and observations.
Why this path and its safety boundary
Why it matters: An internal ice-maker, fill-valve, sensor, wiring, or control fault is more likely, but these observations cannot identify the failed part.
Safety stop: Do not remove covers, probe wiring, force a harvest cycle, or replace a component without model-specific diagnosis.
Helpful context
Understand the symptom
Start with the ice-making control and the bin
Maytag refrigerators use different ice-maker layouts: an accessible wire arm, a switch, or a control on the refrigerator display. Confirm the ice maker is enabled using the exact model instructions, then check that the accessible ice bin is fully seated and that the freezer door closes. A dispenser may still provide water while the ice maker has a separate setting or fill problem, so treat those as separate observations.
Water supply and filtration can stop a fill
Maytag identifies an unavailable or kinked supply line, low flow, and a clogged or incorrectly installed filter as causes of slow or absent ice production. Inspect only accessible tubing and the filter seating described in the manual. A weak water dispenser stream is a useful clue, but it does not identify which hidden valve, line, or ice-maker part has failed.
Temperature and recovery time matter
The freezer must reach the temperature required by the particular Maytag model for water to freeze and the ice-maker cycle to proceed. New installation, a recent filter change, a power interruption, or an emptied bin can delay the next batch. Use the owner's manual for the wait period and reset method rather than repeatedly cycling the appliance.
Keep internal repair outside the user check
A loose cube or visible ice buildup may be a temporary obstruction, but the ejector, fill tube, valve, sensor, wiring, and control are model-specific. Clear only an accessible obstruction by the method explicitly allowed by the manual. Do not pry, chip, heat, probe, remove covers, or force a harvest cycle; those symptoms belong with a qualified appliance technician.
Safety boundary
Stop conditions
- Stop using the ice maker for a water leak, damaged tubing, repeated overfilling, abnormal electrical smell, sparking, or ice reaching wiring or controls.
- Do not pull the refrigerator, disconnect a water line, open a pressurized connection, or test concealed water flow as a user check.
- Do not bypass the filter, door switch, bin sensor, or ice-maker shutoff, and do not force the container, ejector, tray, or fill mechanism.
- Do not use a knife, heat gun, hair dryer, boiling water, or electrical probe to clear ice or diagnose the refrigerator.
- Stop after the model-safe checks and documented waiting period when production does not return; arrange qualified service instead of repeatedly resetting or disassembling the appliance.
Only after diagnosis
Potential parts
- Maytag-compatible refrigerator water filter
Consider this category only when the model manual and inspection indicate a clogged, exhausted, or incorrectly seated filter that restricts ice-maker flow.
Confirm the exact Maytag model, filter system, installation direction, and reset or flushing requirements; do not bypass the filter with an unverified substitute. - refrigerator ice maker assembly
Consider this category only after qualified diagnosis confirms an internal ice-maker mechanism, sensor, or control fault with water, temperature, door, and bin conditions normal.
Confirm the exact Maytag model, ice-maker location, revision, connectors, and manufacturer fit information before ordering or replacing. - refrigerator water inlet valve
Consider this category only when qualified diagnosis finds that the ice-maker fill path or valve is not supplying water despite a correct setting, adequate supply, and model-approved filter condition.
Confirm the exact model, valve ports, tubing connections, and service procedure; do not disconnect or electrically test the valve as a user check.
When checks do not resolve it
Need a professional?
Arrange qualified Maytag appliance service when ice production remains stopped after the model-safe setting, bin, door, water, filter, freezer, obstruction, reset, and waiting checks; or immediately for a leak, damaged hose, abnormal electrical symptom, repeated fault, or any need to open covers, move the refrigerator, disconnect water, or test electrical parts. Use plumbing service when the unresolved cause is the household water connection or shutoff.
Safety scope: This article covers normal controls, visible inspection, model-safe bin and filter handling, and cautious observation only. Qualified service must handle concealed water connections, internal ice-maker parts, sensors, wiring, valves, cooling faults, and repairs near electrical or water hazards.
Common questions
FAQ
Why is my Maytag refrigerator not making ice but still dispensing water?
The ice maker has a separate control, bin or sensing condition, freezer-temperature requirement, fill path, and production wait. Confirm ice production is enabled, the bin and door are correctly positioned, and the model's water and filter checks pass before arranging service.
What should I check if the Maytag ice maker stopped after a filter change?
Use the exact model instructions to check that the filter is fully seated and sealed, then follow any documented flushing or reset sequence. If water flow is weak, the housing leaks, or production does not return after the manual's wait, stop and request service.
Can low water pressure keep a Maytag refrigerator from making ice?
Yes. Maytag identifies low flow or pressure, a closed shutoff, a kinked line, and a restricted filter as possible causes. A weak dispenser stream is a clue, but diagnosing an internal valve or line requires qualified service.
Should I reset a Maytag ice maker that is not making ice?
Only use the reset method in the owner's manual for the exact refrigerator. If there is no model-specific button, follow Maytag's documented power-cycle guidance once and allow the normal production period; do not repeatedly reset or manually cycle the mechanism.
Can I remove a stuck ice cube with a knife or hair dryer?
No. Use only the model manual's safe method for an accessible obstruction, and never force the ejector or apply heat. Request service for an inaccessible, frozen, leaking, or repeatedly stuck mechanism.
When should I call for Maytag refrigerator ice-maker service?
Call when the safe setting, bin, door, water, filter, freezer, obstruction, reset, and waiting checks do not restore ice, or immediately for a leak, damaged tubing, abnormal electrical symptom, repeated fault, or any need to open covers or disconnect water.
Read the exact guide
Official sources
- Not Dispensing Ice or Water - Refrigerator - Product HelpMaytag · Official Maytag Product Help guidance for refrigerator ice and water concerns; control locations and exact procedures vary by model.
- Refrigerator Troubleshooting: Possible Solutions for Fixing 7 ProblemsMaytag · Official Maytag refrigerator troubleshooting overview; specific temperature settings and repair procedures remain model-dependent.
- How to Turn the Ice Maker On and Off - Product HelpMaytag · Official Maytag Product Help instructions for identifying common ice-maker controls; the correct method depends on the refrigerator model.
- How To Possibly Fix an Ice Maker That’s Not WorkingMaytag · Official Maytag troubleshooting article for common refrigerator ice-maker symptoms; use the owner's manual for model-specific controls and procedures.
Community feedback
Share a repair observation
Share a plain-text repair observation. Accepted observations are published automatically; this page may take a moment to update.