
On this page
Start here
Quick answer
A Midea freezer door that will not seal is most often blocked by a package, dirty or distorted gasket, frost at the frame, a freezer that is not level, or a door that has shifted at its hinges. First clear the closing path, clean and inspect the gasket, and perform a gentle paper or bill check around the perimeter. Use the exact Midea manual before adjusting leveling feet, hinges, or a chest lid. Do not force the door, heat the gasket by guesswork, pry ice, or remove hinge hardware as a test. If a gap remains after cleaning and removing obstructions, frost returns, the door alarm stays active, or the freezer is warming, stop and arrange qualified appliance service.
Before you begin
Safety first
- This article covers ordinary-access inspection, cleaning, closure-obstruction removal, perimeter seal observation, and only model-documented user adjustments. A technician must handle hinge or slider alignment, hidden frost, defrost parts, electrical testing, panel removal, cabinet repair, and cooling-system work.
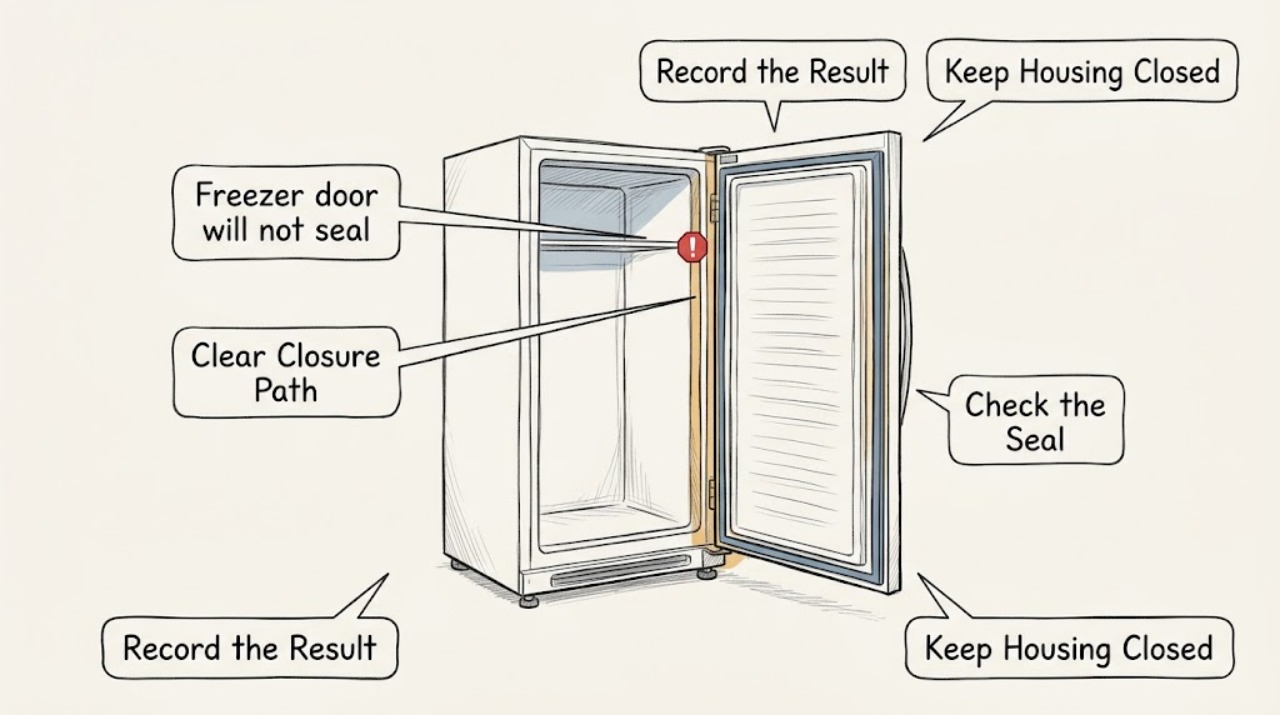
Work through in order
Diagnostic checks
Use only checks that match the exact appliance or system and its official guide.
-
Check 1
Keep the freezer closed while you collect the model number. Open it once and inspect the front edge, baskets, shelves, packages, ice, and packing material for anything that prevents the door or lid from reaching the frame; remove only a loose obstruction.
Expected result: The door closes fully after an item, basket, shelf, frost ridge, or packing piece is moved, or a visible gap remains with a clear path.
Next step: Close the door gently and check the gasket around the full perimeter. Continue with the gasket check if it springs open or leaves a gap.
Stop if: Do not force the door, push a package against the seal, pull a stuck basket, or move a loaded freezer alone.
Why this matters
Why: A closure obstruction can mimic a failed gasket. A remaining gap points toward the gasket, level, hinges, door shape, or cabinet.
-
Check 2
Wipe the gasket and the matching cabinet surface with a soft cloth and the cleaning method in the Midea manual, then dry them. Inspect the full seal for dirt, a twist, tear, flattened section, hard spot, pulled corner, or frost on the contact surface.
Expected result: The gasket is dirty but flexible and contacts the frame, or it has visible damage, permanent distortion, a corner gap, or frost that prevents contact.
Next step: Close the clean door and repeat a perimeter test. If the seal remains damaged or the gap persists, record the model and arrange service before ordering a gasket.
Stop if: Do not cut, glue, stretch, heat, pry, or solvent-clean the gasket, and do not use an abrasive pad.
Why this matters
Why: Midea identifies dirty gaskets as a closure cause. Cleaning can restore contact only when the seal and door are intact; a damaged or distorted section needs model-specific assessment.
-
Check 3
Place a sheet of paper or a bill between the gasket and cabinet at several points, close the door normally, and pull gently. Test the hinge side, latch side, top, bottom, and any corner where frost or moisture is visible.
Expected result: The paper has similar resistance around the perimeter, or it slides out easily at one corner or along a section.
Next step: Mark the weak location and photograph it. If cleaning and obstruction removal do not restore resistance, request an alignment and gasket assessment.
Stop if: Do not pull hard enough to deform the seal, clamp the door, or loosen hardware to improve the test.
Why this matters
Why: Midea describes an easy paper or bill release as evidence that the seal may be weak, with level or hinge concerns also possible. A localized loose area suggests gasket or alignment trouble; even resistance does not excuse a door that still will not stay shut.
-
Check 4
Inspect the door frame, liner, accessible vents, and nearby food placement for frost or an item blocking airflow or the closing path. Keep the door open only for this brief inspection and follow the exact manual for any defrost procedure.
Expected result: Frost blocks the frame or vents, food covers an air path, moisture is concentrated at a seal gap, or the frame is clear but the door still does not contact.
Next step: Remove only loose items or surface frost that the manual permits. For thick, hidden, or recurring frost, arrange service for the defrost and door systems.
Stop if: Do not chip ice, remove an evaporator cover, block vents, or use heat near plastic, wiring, the liner, or the gasket.
Why this matters
Why: Midea links poor closure with frost, moisture, and airflow problems. A clear frame with a persistent gap makes level, hinge, door, or cabinet alignment more likely.
-
Check 5
From a stable position, observe whether the cabinet rocks, the door is lower on one side, a hinge area rubs, or a chest lid fails to fit at one corner. Consult the exact Midea manual before touching leveling feet or alignment hardware.
Expected result: The cabinet is unstable or tilted, the door sags or rubs, the gap is localized near a hinge or corner, or the freezer appears level but the seal still fails.
Next step: If the exact manual gives a user-leveling step, make only that documented adjustment with the freezer safely unloaded as needed, then repeat the seal test. Otherwise arrange service.
Stop if: Do not lift the door, loosen hinge screws, tilt a loaded appliance, pry the cabinet, or make an adjustment that could destabilize it.
Why this matters
Why: Midea manuals link an unlevel freezer with incomplete closure and describe leveling feet on some upright designs. A level cabinet with a persistent gap makes a damaged gasket, door, or cabinet more likely.
-
Check 6
After one clean, unobstructed closure, monitor the freezer with minimal door openings. Record whether the door stays shut, frost or moisture returns at one edge, a door alarm persists, the compressor runs unusually long, or food temperature rises.
Expected result: The door stays shut and the freezer remains cold, or the gap returns, frost builds again, an alarm continues, the compressor runs excessively, or food warms.
Next step: Keep the door closed and arrange qualified appliance service for recurrence, warming, persistent alarm, or a gap that remains after the safe checks. Provide the model and photos.
Stop if: Stop using the freezer for a damaged door or liner, water near electrical parts, smoke, burning odor, damaged cord, or unsafe food temperature.
Why this matters
Why: A stable result supports a surface obstruction or dirty seal. Recurrence indicates unresolved gasket, alignment, frost, airflow, control, or cooling trouble.
Use your observations
Decision map
Find the observation that best matches what you see, then follow the next safe action.
-
PATH 01Safety boundary
What you see
The gap disappears after a package, shelf, basket, frost ridge, or dirt is removed and the clean gasket contacts around the perimeter.
Do this next
Keep the load below the closing path, keep the gasket and frame clean, and monitor the next cooling period for renewed frost or temperature change.
Why this path and its safety boundary
Why it matters: A closure obstruction or dirty sealing surface is more likely than a failed door assembly.
Safety stop: Stop if the gap returns, the gasket tears, or the freezer cannot hold cold despite a clear closing path.
-
PATH 02Safety boundary
What you see
The paper or bill test is loose at one or more points after cleaning, or the gasket is torn, flattened, twisted, pulled away, or permanently distorted.
Do this next
Arrange service or follow only the exact manual's seal procedure; provide the model, weak location, photos, and frost pattern before ordering a part.
Why this path and its safety boundary
Why it matters: The gasket is not making a reliable air seal. A model-matched replacement may be needed, but a hinge or level problem can also cause a new gasket to fail.
Safety stop: Do not stretch, glue, heat, cut, or install a generic gasket as a test.
-
PATH 03Safety boundary
What you see
Frost blocks the frame or vents, moisture returns at the seal, food blocks airflow, or cooling is weak while the door appears nearly closed.
Do this next
Use only model-documented defrost and load guidance, then arrange service for thick, hidden, or recurring frost, poor cooling, or a door that still cannot close.
Why this path and its safety boundary
Why it matters: Warm-air entry, poor closure, blocked airflow, or a defrost issue is more likely than a surface-cleaning problem. Frost can itself hold the door away from the frame.
Safety stop: Do not chip ice, heat the liner, remove an evaporator cover, or keep operating while food is warming.
-
PATH 04Safety boundary
What you see
The closing path is clear and the gasket is clean, but the cabinet rocks, the door sags or rubs, the gap is near a hinge, or a chest lid does not fit at one corner.
Do this next
Use only an exact manual's documented leveling step or arrange appliance service for alignment and cabinet inspection.
Why this path and its safety boundary
Why it matters: Leveling, hinge, slider, door shape, or cabinet alignment is more likely and may make a good gasket appear defective.
Safety stop: Do not lift the door, loosen hinges, pry the cabinet, tilt a loaded freezer, or operate an unstable appliance.
-
PATH 05Safety boundary
What you see
The door remains unsealed after safe checks, a door alarm persists, frost or moisture continues, the freezer runs excessively, or food is warming.
Do this next
Keep the door closed, protect food according to its condition, stop further disassembly, and arrange qualified appliance service with the model and observations.
Why this path and its safety boundary
Why it matters: The appliance has an unresolved seal, alignment, frost, airflow, control, or cooling issue. Pressing the door closed repeatedly does not restore a reliable seal.
Safety stop: Stop use for a loose or damaged door, water near wiring, damaged cord, burning odor, smoke, or any unstable cabinet.
Helpful context
Understand the symptom
Start with the closing path and the exact freezer design
A door can look closed while a basket, package, shelf, frost ridge, or packing piece holds one corner away from the cabinet. Midea manuals cover upright doors and chest designs differently, and the location of the model label and adjustment parts varies. Use the model number to retrieve the matching manual before attempting a hinge, leveling, or gasket procedure.
A seal gap explains frost and unstable cooling
When warm humid air enters through a weak seal, frost or moisture can form around the opening and make the gap worse. Midea advises checking the gasket, door closure, food distribution, and level when a freezer is not cold or a door does not close completely. A clean seal test with an even contact pattern is more useful than repeatedly pressing the door shut.
Do not turn a door check into a repair experiment
Cleaning and removing a loose obstruction are ordinary checks. Door removal, hinge alignment, leveling a loaded cabinet, heating a seal, hidden frost, and electrical or cooling work are model-specific. Midea's upright manual warns against trying to repair the freezer yourself; stop when a step involves panels, wiring, a damaged cabinet, or a seal that cannot be restored without force.
Safety boundary
Stop conditions
- Stop for a loose or damaged door, unstable cabinet, damaged cord, smoke, burning odor, water near wiring, persistent alarm, or food warming beyond safe storage.
- Do not force the door or lid, lift a door, tilt a loaded freezer, pry the cabinet, or loosen hinge or slider hardware as a test.
- Do not cut, glue, stretch, heat, or scrape the gasket, and do not install a generic seal before the exact model and cause are confirmed.
- Do not chip frost, remove an evaporator cover, use a heat gun or flame, or place an electrical device near a wet freezer.
- Do not bypass a door switch or control, test live wiring, or work on a defrost or sealed cooling component.
- Stop after the safe obstruction, cleaning, seal, frost, and alignment checks when the door still will not seal or the freezer is warming; arrange qualified appliance service.
Only after diagnosis
Potential parts
- freezer door gasket
Consider this category only when the exact model's gasket is torn, permanently distorted, or fails the perimeter contact test after cleaning and closure obstructions are removed.
Confirm the exact Midea model, freezer type, seal profile, mounting method, and manufacturer's fit information before ordering. - door hinge or slider hardware
Consider this category only when service confirms sag, binding, damaged hinge or slider hardware, or alignment movement as the cause of the seal gap.
Confirm the exact model, door or drawer design, hardware position, and manufacturer's fit information; do not replace hardware based on appearance alone. - leveling foot or door alignment component
Consider this category only if model-specific inspection confirms a damaged leveling foot, adjustment component, or cabinet support that prevents the door from seating.
Confirm the exact model, load support, adjustment range, and manufacturer's fit information; do not destabilize the appliance to test a part.
When checks do not resolve it
Need a professional?
Arrange qualified appliance service when a clean and unobstructed Midea freezer door still leaves a paper-test gap, the gasket is torn or permanently distorted, the door sags, the cabinet is unstable, frost returns quickly, a door alarm persists, or the freezer is warming or running excessively. Use the exact model manual for any documented user adjustment; hidden frost, hinge work, wiring, panel removal, and cooling-system work require a technician.
Safety scope: This article covers ordinary-access inspection, cleaning, closure-obstruction removal, perimeter seal observation, and only model-documented user adjustments. A technician must handle hinge or slider alignment, hidden frost, defrost parts, electrical testing, panel removal, cabinet repair, and cooling-system work.
Common questions
FAQ
How can I tell whether my Midea freezer door gasket is sealing?
Place paper or a bill at several points between the clean gasket and cabinet, close the door normally, and pull gently. Midea says an easy release can indicate a weak seal, with level or hinge trouble also possible. A good test does not excuse a visible gap or a door that will not stay shut.
Why does frost form around my Midea freezer door?
A dirty or warped gasket, a door that is slightly open, frost at the frame, blocked airflow, or a package preventing closure can admit warm humid air. Midea links frequent openings and weak seals with frost. Thick or recurring frost needs model-specific service rather than sharp-tool removal.
Should I heat a Midea freezer gasket to reshape it?
Do not heat, stretch, glue, cut, or pry the gasket by guesswork. Midea manuals differ by model; use the exact manual and stop if the seal remains distorted. A technician can confirm whether the gasket, door, hinge, or cabinet is the actual cause.
Can an overloaded Midea freezer keep the door from sealing?
Yes. A package, basket, shelf, ice ridge, or packing piece can hold the door away from the frame. Remove only a loose obstruction, then repeat the perimeter test. Do not force the door or move a loaded appliance to reach a hinge.
When should I replace a Midea freezer door gasket?
Replace it only after the exact model and cause are confirmed. A torn or permanently distorted gasket that fails the perimeter test can justify replacement, but a sagging door, unlevel cabinet, frost, or damaged hinge can make a new gasket fail too.
Read the exact guide
Official sources
- EN USER MANUAL FREEZER UprightMidea · Official Midea manual used for general model-dependent seal and level checks; exact model instructions control.
- Midea Upright Freezer MRU14F2AWW v3.indbMidea · Official Midea freezer manual used for model-dependent closure and temperature logic; the exact installed model manual controls.
- SupportMidea · Direct Midea support source used for model-specific documentation and service escalation.
- All RefrigeratorsMidea · Official Midea FAQ used for seal-test interpretation and freezer frost logic where the same door and gasket arrangement is present.
Community feedback
Share a repair observation
Share a plain-text repair observation. Accepted observations are published automatically; this page may take a moment to update.